Parsley is traditionally prepared for the winter by drying. This seasoning can most often be found on market shelves: it is used to prepare parsley soup in winter. But homemade preparations with this aromatic healthy herb are much more varied. Here you can find ice cubes, which are used to prepare green salads in winter, and pickled leaves, which preserve all vitamins, and caviar twisted with garlic and other spices and vegetables - and much, much more, no less appetizing than fresh parsley. Such preparations help us get rid of the symptoms of vitamin deficiency in winter and simply make dishes tastier. If you eat parsley correctly, it will supply our body with microelements and vitamins, which are so lacking in winter.
When to Harvest Parsley to Prepare for Winter Storage
First, let's figure out when is the best time to start harvesting parsley for the winter at home. This herbaceous crop belongs to the order of biennial umbrella spices. In the first year after sowing the seeds, such plants actively increase their leaf mass throughout the entire summer season. This means that you can cut young succulent leaves and send them for storage throughout the summer.
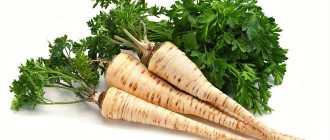
Fresh bunches of parsley are very fragrant
Parsley is famous for its increased frost resistance . Short-term cold snaps with a transition through zero are not capable of destroying the vegetative part of the plant. Even after frost, vitamins and microelements are completely preserved in the shoots. Such greens are also suitable for harvesting for future use.
Overwintered parsley rosettes begin to grow immediately after the snow cover melts and the soil layer warms up. You can cut branches of fragrant greenery from them in early spring. The main thing is not to delay harvesting. Already in the first ten days of summer, the formation of a peduncle occurs in two-year-old bushes, and all the plant’s forces are spent on the development of generative organs (the leaves become smaller, lose their juiciness and presentation).
You can cut parsley for storage throughout the entire summer season.
On a note! Do you want to harvest juicy, nutritious greens even from two-year-old parsley? Remove flower stalks from plants in a timely manner. This will extend the growing season and growth of the leaf apparatus.
If parsley leaves can be collected throughout the spring-autumn season, then it is advisable to harvest the root part of the plant in the fall. After all, it is during this period of time that the maximum amount of aromatic components and vitamins is concentrated in the rhizomes. You can harvest roots from both annual and biennial rosettes.
Autumn is the ideal time to collect parsley roots.
Note! Not all parsley is suitable for harvesting roots. A powerful spindle-shaped root is formed only in root varieties: Alba , Saharnaya , Good Morning , Eagle , Bubka , Prestige , Lekar , Lyubasha .
Health benefits and harms
Like many garden plants, parsley is a storehouse of vitamins. This herb is especially rich in vitamins K and C. In addition, there are vitamins A and E, B2 and B9, as well as beta-carotene, lutein and zeaxanthin, which are necessary for vision.
There are also a lot of minerals in this spicy herb, the leaders in content are manganese and boron. It also contains a lot of iron, nickel and calcium. Of the acids in first place are ascorbic, linolenic and oxalic.
Here is a partial list of the main benefits of parsley:
- Full of active antioxidants that help the human body get rid of toxins, strengthen the immune system and help the body's cells renew and recover faster.
- This seasoning is especially useful for people with heart disease. It has vasodilating properties, therefore lowers blood pressure. It also thins the blood and reduces bad cholesterol levels.
- Lowers blood sugar levels, so it is also useful for diabetics. Among other things, it has properties to improve the condition of the pancreas.
- Has anti-inflammatory and bactericidal properties. Makes urine less concentrated, which is beneficial for the kidneys and urinary tract.
- Thanks to vitamin K and calcium, it is very beneficial for the health of the body's skeletal system.
- This plant is very useful for maintaining eye health and visual acuity.
Of course, parsley also has contraindications, and the main one is the excessive use of this spicy herb. Some vitamins and minerals are found in excess in this plant, exceeding the daily human requirement. Therefore, an overdose with such unpleasant symptoms as headache, nausea and lethargy is possible.
Contraindications:
- individual intolerance can lead to allergic reactions;
- people prone to urolithiasis, inflammation of the bladder and kidney disease should either refuse to take it or use it with caution;
- contraindicated during exacerbation of gastric ulcer;
- Pregnant and breastfeeding women should use this seasoning with great caution. The seasoning increases the tone of the uterus and has a stimulating effect on infants;
- It is contraindicated for patients with epilepsy and people with calcium metabolism disorders.
Preparation and processing of herbs and ingredients for storage
In order to prepare parsley for the winter and preserve its aroma, beneficial properties and vitamins, the choice of raw materials should be approached with special responsibility.
For long-term storage, select only fresh green branches without yellowness. The harvested grass should not have a musty odor or signs of decay. Such disadvantages are inherent in raw materials that have been in the heat for a long time in tight bags without air access. To minimize such negative consequences, try to harvest parsley immediately after harvesting from the garden. If for some reason this is not possible, then:
- divide the greens into bunches;
- wrap each with a damp cloth and cling film on top;
- place in the refrigerator.
In this form, it can be stored without loss of presentation and taste/aromatic qualities for 3–5 days.
Before storage, greens must be washed and sorted.
Before cooking greens you should:
- wash thoroughly;
- sort through, removing all damaged/yellowed fragments;
- dry in fresh air or blot with a soft cloth to remove excess liquid.
It is not necessary to store parsley separately from other herbs. Mixes consisting of several herbaceous crops turn out much tastier, more aromatic and healthier. It goes well with:
- leaf celery;
- cilantro;
- dill;
- spinach;
- green onions.
Additional ingredients are prepared in the same way as parsley (washed, sorted, dried).
Adjika with parsley and chili pepper
Ingredients:
- fresh parsley – 0.6 kg
- sweet pepper – 1.2 kg
- hot pepper – 5 pods
- tomato paste – 1.1 kg
- granulated sugar – 150 g
- salt – 1.5 tbsp.
- refined sunflower oil – 130-150 ml
- garlic – 3 heads
Cooking method:
- Wash the sweet pepper, cut out the stalk, remove all the seeds, and grind the pulp through a meat grinder. Wash the parsley thoroughly, dry it and also twist it.
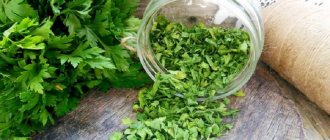
Dried
Until recently, the only way to preserve any greenery was drying. Depending on the humidity and ambient temperature, it took from 3 to 7 days for the herbs to completely dry. Today, a lot of kitchen gadgets have appeared in our homes that allow us to reduce this process to a few minutes, but despite this, many housewives still prefer to dry it in the fresh air.
Drying is the most common method of harvesting parsley.
On open air
Those who have ever prepared parsley in this way know very well that during the drying process, the green leaves change their color. The intensity of color loss directly depends on the conditions under which drying occurs. No tricks will help to completely preserve the color of the leaf plates, but it is quite possible to minimize the destruction of the coloring pigment. All you need to do is block direct UV rays.
You can dry herbs:
- crushed;
- whole branches.
In the first case, washed and sorted parsley is finely chopped with a knife and laid out on surfaces covered with clean paper or cotton cloth. In this form, the crushed grass is left for several days in a dry, well-ventilated room.
Parsley should be dried in a dark, well-ventilated area.
If there is a need to dry the whole parsley, then small bouquets are formed from it, which are then hung in attics or closets. In both cases, it is desirable that the green rays should not be exposed to sunlight.
In the oven or electric dryer
When you don’t have the time or desire to wait several days, you can use an electric dryer for vegetables and fruits or a regular household oven.
In the oven
Place the prepared, chopped herbs on a baking sheet lined with siliconized paper. Place the sheet in an oven preheated to 50°C for 2–3 hours. If the features of your oven do not allow you to properly regulate the temperature, do not close the door tightly, leave a small gap for the outflow of hot air. This will prevent the parsley leaves from burning.
In an electric dryer
The presence of a household electric dryer will no longer surprise anyone. You can even prepare herbs with this kitchen gadget.
You can put any greens in the electric dryer
It is not at all necessary to load all tiers of the electric dryer with leafy greens of the same type. At the same time as parsley, you can dry dill, cilantro, basil and even mint.
All manufacturers supply their devices with detailed instructions, which indicate the maximum number of products for one load and the time required to dry them. On average, leafy herbs reach readiness in 1.5–2 hours. However, after drying, it is recommended to leave the prepared products in the fresh air for 2–3 hours for the final evaporation of residual moisture.
Microwave
Using a regular microwave, you can reduce the drying time to 7-10 minutes.
- Spread the washed and finely chopped parsley on a flat plate in a thin layer (7–10 mm).
- Set the power to 700 W and the time to 4-5 minutes (if you are worried that the tender leaves will burn during this time, break it into 2 stages).
- Open the door and stir the greens thoroughly.
- Wait 30-50 seconds and then turn it on for another 3-4 minutes.
This time is quite enough for complete evaporation of moisture from the sheet plates. However, in some cases, the parsley may remain slightly damp even after 10 minutes. If this happens, stir it and microwave it for a couple more minutes.
Note! The time required for drying directly depends on the operating characteristics of the microwave oven and the amount of greens used, and therefore may differ slightly from that indicated in the recipe.
You can store parsley prepared in this way in glass/plastic jars or fabric bags for six months.
Step-by-step recipe with photos
Canarian parsley sauce (mojo de perejil) is one of the many Canarian mojos that they serve with, in fact, everything. Mojo is, one might say, a signature feature of Canarian cuisine. There are a lot of them, all simple to prepare, all tasty and multi-functional.
Mojo is more of a dip than a sauce, i.e. they are dipped in them. Well, this is so, a minor formality, important solely in the context of serving.
The most common (and known to tourists) is mojo verde, a “green sauce” with a slightly more complex composition. I want to show here the simplest mojo of a similar plan - parsley sauce. If you replace the olive oil with sunflower oil, I think anyone and everyone with a blender in the kitchen can make it. Well, yes, perhaps someone won’t have any more turmeric... To those I’ll simply say - give up on it! Maybe it’s important for Canarian cuisine, but I don’t feel its taste in the finished sauce at all, and it shouldn’t have an effect on the consistency. With or without turmeric, you will get an excellent hot and piquant parsley sauce that can be served with fish, meat, poultry, and vegetables.
Remove the rough stems from the parsley. Thin ones are not a problem.
Peel and lightly chop the garlic to make it easier for the blender to work.
Very carefully puree the parsley with garlic, salt, turmeric and 50 ml of vinegar. Homogeneity should be achieved at this stage, do not rely on the next one.
With the blender turned on at low speed, pour in the oil in a thin stream. The result is a characteristic bright green emulsion with the consistency of thick jelly. This is mojo. There is no need to try to beat it additionally - you can get exactly the opposite result - the airiness of the emulsion will be disrupted, the sauce will turn out to be too liquid.
I highly recommend making the Canarian parsley sauce for (background right), they are literally made for each other! By the way, this is a very good pair for non-strict days of fasting.
Pickling
Dried parsley, unlike fresh, has a less pronounced taste and aroma, and also contains much less vitamins. If you want to preserve the maximum amount of nutrients in it, use an alternative method - salting. Some housewives wonder whether it is possible to salt parsley for the winter. Yes, you can, and in different ways.
Twigs or chopped
If in cases of drying and freezing it is quite acceptable to use both whole and chopped raw materials, then it is advisable to pickle only finely chopped greens. Typically, parsley prepared with salt for the winter is used for stews, roasts, first and second courses, and whole sprigs in them do not look very appropriate. Cutting greens that have been pre-salted is absolutely inconvenient.
In the bank
Place the washed chopped greens in a large bowl, add salt in a proportion of 1 to 4 (for 1 kg of parsley - 250 g of salt), and mix gently but thoroughly.
Parsley sprinkled with salt can be stored for six months
After the salt has dissolved and the greens have released their juice, transfer the prepared mixture into jars and seal tightly.
Advice! Store parsley seasoning in the refrigerator or cellar.
With the addition of dill or celery
The principle for pickling parsley with dill or celery is no different from the previous one. As in the first case, for cooking you will need 4 parts of herbs (parsley + dill/celery) and 1 part of salt.
Raw adjika from parsley and hot pepper
Ingredients:
- parsley
- celery
- hot pepper
- garlic
- dill
- horseradish
- vinegar
- boiled salt
Cooking method:
- The first step is to get the freshest and youngest bunches of all the required greens. It is also equally important to collect dense, fleshy pods of hot green pepper, which will play an important role in shaping the taste of adjika.
- Rinse the greens under running cold water and place them on a flat surface to dry. Simply peel the garlic and place the cloves in a deep bowl. We free the hot pepper pods from seeds and stalks, we also wash them, and we always work with gloves.
- At this stage, we need to thoroughly grind all the ingredients until smooth. The easiest and most convenient way to do this is with a meat grinder, but a small blender will also do. In portions, chop some of the greens with pepper pods and garlic cloves: this way the ingredients will not only be crushed, but will also immediately mix with each other.
- Salt the resulting mass to taste and mix thoroughly again, then make a small depression in the center as shown in the photo. Pour vinegar into the bowl with the future adjika, stir it with the green juice, and then with all the ingredients.
- We leave the mixture to brew for the next couple of hours, after which we transfer it into prepared dry-sterilized glass jars and roll them with tin lids. Raw adjika from parsley is ready for the winter according to the simplest and most delicious recipe.
Freezing
Freezing is the best way to preserve parsley for the winter at home. In terms of taste and aromatic qualities, such greens are absolutely not inferior to fresh ones. In addition, all useful properties are completely preserved in it.
Bunches or chopped
Chopped greens and whole branches folded into neat, small bunches are equally suitable for freezing.
Finely chopped herbs are usually stored in containers or bags. To ensure that the parsley remains crumbly throughout its storage period, it is first frozen before putting it into containers. To do this, clean, sorted parsley is chopped, slightly dried in fresh air, and then scattered on any surface (flat dish, container lid, cutting board) covered with a cloth napkin. In this form, the semi-finished product is sent to the freezer for 30–40 minutes. During this time, the tender leaves freeze slightly, and all that remains is to pour them into prepared, dry containers.
When frozen, all the vitamins are preserved in greens.
The following can be used as containers for storing parsley:
- containers made of frost-resistant, food-grade plastic;
- juice, water or dairy bottles.
Sometimes it becomes necessary to freeze whole parsley (for making broths). In this case, small bouquets are formed from twigs, each of them is wrapped in foil, and on top with cling film. However, you can do without film, but then each bunch of greens should be wrapped in 2-3 layers of foil. This will prevent:
- freezing of moisture;
- loss of taste and commercial qualities,
- absorption of foreign odors.
In the package
Despite the huge range of containers designed for storing frozen food at home, many housewives prefer to use ordinary plastic bags for this purpose. When you have a small chest freezer and a standard compartment in a household refrigerator, this decision is completely justified. The bags easily take any shape, so placing them compactly in the freezer is no problem.
Use only thick bags to store frozen greens.
The only thing you should pay attention to is the thickness of the polyethylene. It is better to avoid bags that are too thin. They are not able to completely block the penetration of foreign odors. This means that there is a possibility that during storage the parsley will acquire an unusual smell.
The ideal option is zippers. A special fastener allows you to open and close the bags multiple times without compromising their integrity. In such bags, fresh greens can be stored either in bulk (chopped) or whole (whole branches) without worrying that they will spoil or absorb an unpleasant odor from the refrigerator.
In ice trays
This method of harvesting parsley is considered the most labor-intensive and time-consuming. However, despite all these “difficulties”, most chefs prefer it.
- Grind fresh parsley with a blender or pass through a meat grinder with a fine grid 2 times.
- Place the resulting puree mixture into molds and place in the freezer for 1–2 hours.
- Once frozen, remove the parsley cubes, transfer them to a container, and then store them.
Green adjika recipe
Ingredients:
- Hot red pepper 6 – 7 pods;
- Sweet bell pepper 800 – 1000 grams;
- Fresh parsley – 0.5 kg;
- Garlic – 0.5 kg;
- Salt 90 – 100 grams;
- Granulated sugar 200 – 250 grams;
- Dry adjika (Abkhazian) 1 – 2 tbsp. spoons (optional);
- Vinegar essence (70%) 3 – 4 tbsp. spoons;
- Vegetable oil (odorless) – 300 ml;
- Tomato paste (good quality) – 1 kg;
- Basil or cilantro to taste and desire.
Cooking method:
- Let's start the process of preparing adjika by washing all the ingredients. Parsley should be washed in plenty of water, remove any debris, and shake off the water.
- Wash and remove seeds and stalk.
- Peel the garlic cloves.
- Bell and red hot peppers need to be washed and the stem removed. I used hot peppers along with seeds, so the adjika turned out spicier. If you want to reduce the spiciness, remove the seeds from the pod.
- Now a meat grinder or blender comes into operation, pass all the ingredients through a meat grinder with a large grid or grind with a blender to a homogeneous paste.
- Add tomato paste, salt, granulated sugar, vinegar essence, vegetable oil to the vegetable mass and mix everything thoroughly. Taste and add salt or sugar to taste. According to my taste, I added a dry mixture to the adjika composition - Abkhazian adjika, for greater taste and aroma.
- To bring the green adjika recipe closer to the original Caucasian recipe, we recommend adding cilantro or basil to the ingredients to your taste.
- With such adjika, any meat dish will sparkle with new colors and reveal a new side.
- Place the adjika into clean and dry jars and close with clean lids. Store adjika made from parsley and bell pepper in the refrigerator.
- Thanks to such homemade preparations, the taste of hot and green summer will remain with you throughout the winter and on a cold winter evening, you can easily find something to serve this original adjika with.
Canning
Another way to preserve parsley without freezing is canning.
Parsley seasoning is a great addition to vegetable dishes.
You can preserve absolutely any greens. There are a lot of unusual recipes for this. The simplest and most effective of them is preserving herbs in vegetable oil.
Recipe No. 1
Parsley with vegetable oil - an ideal tandem
You will need:
- parsley – 500 g;
- garlic – 20 g;
- hot pepper – 20 g;
- horseradish root – 20 g;
- salt – 30 g;
- vegetable oil – 200 ml.
Preparation:
- The greens are finely chopped with a knife or blended with a blender.
- Add salt, a clove of garlic passed through a press, a small piece of finely chopped hot pepper and chopped horseradish root.
- The prepared green mass is poured with vegetable oil, mixed thoroughly and the snack is placed in clean, sterilized jars.
Store fresh, oiled greens in the refrigerator.
Recipe No. 2
You will need:
- salt – 1 tbsp. l.;
- sugar – 2 tbsp. l.;
- black pepper + allspice – 4 pcs.;
- lemon juice – 2 tbsp. l.;
- bay leaf – 2 pcs.;
- water – 0.5 l;
- parsley – 500 g.
Preparation:
- Place all ingredients (except parsley) in a saucepan, add water and bring to a boil.
- The greens are placed in jars, poured with the prepared marinade and closed.
Preserving parsley in marinade
And this preservation option is suitable exclusively for preserving parsley root.
By the way, the resulting dish is an excellent snack, no worse than ginger root. So, wash the parsley rhizomes, peel them, dry them and cut them. Place the prepared roots in a saucepan with boiling and slightly salted water and cook for 3 minutes. Then place the roots in a colander to drain and cool. If desired, you can pour ice water over the greens, then they will deform less during the pickling process. Place the cooled roots in sterilized jars, pour marinade over them and roll up.
As for the marinade, it can be prepared according to any recipe used for preserving vegetables, for example, this one:
- Mix a glass of 9% vinegar, half a glass of sugar and 2 teaspoons of salt in a liter of water, add 6-8 black peppercorns, 4 cloves of garlic cut lengthwise, 2 bay leaves to the solution and put on fire. When the mixture boils, add a glass of 9% vinegar. The marinade is ready. Happy preparing!
How to prepare parsley root for the winter
Parsley root, like greens, is prepared for the winter in several ways.
Parsley root can be stored fresh or dried.
Large root vegetables store well in the cellar or in the refrigerator for several months (from 3 to 6 depending on the size and variety). To increase shelf life, each root is wrapped in food foil (in the refrigerator) or immersed in a box of sand (in the cellar).
Don't despair if you don't have a large refrigerator or cellar to store your root vegetables. The roots, as well as the leaves, dry well. To do this they:
- wash;
- clean thoroughly;
- cut into rings (4–7 mm thick) or small cubes (5*5 mm);
- blanch (pour boiling water over for 2–3 minutes);
- the liquid is decanted and the chopped root vegetables are dried with a towel;
- placed in an electric dryer or oven and dried at 50°C for 2 hours;
- transfer to a dry, clean sheet or towel and leave for 2–3 hours;
- pour into prepared containers.
Vegetable adjika with parsley
So, today, in times of healthy food, thermal processing of food is fading into the background. More and more often you can find recipes in which products are consumed raw. Adjika with parsley, made without cooking, is one of them.
Ingredients:
- Tomatoes - 0.4 kg.
- Sweet apples - 0.3 kg.
- Hot pepper (chili) - 5 pieces.
- Bulgarian sweet pepper - 0.5 kg.
- Garlic - 5 cloves.
- Carrots and parsley root - 0.3 kg each.
- Spicy mustard - 100 gr.
- Vinegar 9% - 10 tablespoons.
- Tomato paste and salt - 2 tablespoons each.
Cooking method:
- In order for parsley adjika to be successful, you should stick to your taste preferences. And adjust the spiciness by adding or removing chili pepper.
- Keep in mind that adjika infuses over time. Its taste is fully revealed a day after preparation. So, all the necessary vegetables need to be thoroughly washed under running water, chopped finely (the pieces can be of any shape) and put through a meat grinder.
- You can use a blender. But then there is a possibility that the size of the ground particles will be too large. Then you need to add tomato paste to the resulting mass.
- It imbues the finished adjika with a beautiful red color that fresh tomatoes cannot provide. After this, add vinegar, mustard and salt to the mixture.
- Stir and leave for several hours. Then we put it in pre-sterilized jars, seal them and put them in a cool place.
Storage conditions and periods
Dried parsley is stored for six months in a dry, dark place, avoiding UV rays.
Parsley paste is a great winter snack
Frozen greens can be stored for 6-9 months.
Canned parsley for the winter is perfectly preserved in the refrigerator or in the cellar for 3–5 months.
Parsley adjika with tomato paste
A lot of sugar and tomato paste will provide it with a pronounced taste, and a considerable amount of garlic will not allow it to spoil.
Ingredients:
- parsley – 0.5 kg;
- garlic – 225 g;
- bell pepper – 0.5 kg;
- thick tomato paste – 1 kg;
- vegetable oil – 300 ml;
- sugar – 90 g;
- salt – 100 g;
- ground hot pepper – 3 teaspoons.
Cooking method:
- Wash the greens, peeled garlic and bell pepper. Grind vegetables in a meat grinder or using a blender. Add all other ingredients and mix well.
- Place this adjika in sterile jars and seal with plastic lids. The product should only be stored in the refrigerator.
- Do not cook a lot of adjika at once using this recipe. It is not stored for a long time.
- Tasty and healthy adjika made from parsley with various additives will enrich your menu. In winter, it will help cope with vitamin deficiency.
- And the unique aroma of greenery will remind you of warm summer days.
Important tips and advice from experts
Do not refreeze herbs. This not only degrades the quality (greens lose color and stick together), but also provokes the development of pathogenic bacteria.
If you want to enjoy juicy fresh leaves all winter, then don’t forget to prepare a few parsley roots for the winter. After the onset of cold weather, plant root crops in nutritious, loose soil. Place the containers on the windowsill, and within a few days new leaf blades will appear at their base. When cutting greens, try not to hit the growing point.
If you prefer to use parsley in dry vegetable and herb mixes, prepare each ingredient separately and combine them only after drying.
Adjika with plum
Adjika without cooking for the winter (the best recipes are given in the material) with the addition of plums turns out to be especially piquant and not too hot. In addition, it is stored in the cellar for quite a long time and does not spoil.
Composition of ingredients
To prepare this savory delicacy you will need the following ingredients:
- plums – 500 g;
- bell pepper – 1 kg;
- tomato paste – 250 g;
- chili pepper pods – 2-3 pcs.;
- garlic – 100 g;
- sugar – 160 g;
- salt – 15 g;
- vinegar – 15 ml.
For this recipe, it is advisable to choose the Tkemali variety of plums, and the fruits should be slightly unripe. If desired, instead of fresh fruit, you can put prunes in adjika. This snack will be thicker.
Step-by-step cooking process
To prepare a flavorful snack with plums, you need to follow these instructions:
- It is necessary to cut off the stems of plums. After removing the seeds from the fruit, wash and lightly dry the pulp.
- You need to remove the seeds from the sweet peppers and cut the vegetables themselves into large pieces. Garlic cloves need to be peeled and washed. Hot peppers must be cleaned of stems and seeds.
- Vegetables and fruits must be passed through a meat grinder. It is better to repeat this process 2-3 times, then the delicacy will have a more delicate consistency.
- The resulting mass must be mixed with sugar, salt and tomato paste, and left to stand for 30 minutes, covered with gauze.
- While the adjika is infusing, you should wash and wipe the jars, and then warm them in the oven. The lids need to be kept in boiling water for 2-3 minutes.
- The mass needs to be divided into prepared jars. Having rolled up the containers with lids, you need to store them in a dark, cool place.
What can I add?
To give the dish additional flavor, you can add dry herbs and spices to the list of ingredients, for example, marjoram, cardamom, suneli hops.
How to serve a dish
The finished adjika should be poured into a small bowl or gravy boat and served with baked poultry or meat. And also this dish will perfectly complement vegetable and fish dishes.