How to dry bell peppers for the winter at home - all the secrets of drying peppers
Dishes with bell pepper have an exquisite taste, pleasant aroma and acquire a beautiful appearance. How to prepare bell peppers for the winter so that they do not lose their vitamins, taste and color? A solution has been found - you need to know how to dry bell peppers at home. This will allow you to enjoy the aroma and taste of this vegetable all year round. Moreover, preparing it for the winter is not as difficult as it might seem at first glance. Dried sweet bell peppers will allow you to saturate your dishes with vitamins and beneficial minerals, which are contained in large quantities in this fruit, even in winter.
Bell pepper: pros and cons
But before you start preparing food and learn how to dry bell peppers yourself, everyone should become familiar with who dried paprika can harm. Therefore, it is not recommended to eat it:
- angina pectoris
- gastrointestinal ulcer,
- gastritis,
- hypotension,
- haemorrhoids,
- dysfunction of the urinary tract and liver.
If you do not fall into any of the listed categories, then let's get to work. Healthy fruits with fleshy walls of any color are suitable for drying.
There are several methods that can be used at home: in an electric dryer, in an oven, or in the sun.
How to prepare bell pepper fruits for drying?
Selected healthy bell peppers should be rinsed well under running water. Place them on a kitchen towel and dry each one with gentle blotting movements.
Now, use the edge of a knife to remove any possible signs of spoilage, cut off the tail and remove the core. Those seeds that remain in the middle can be removed immediately by tapping the wide edge of the pepper on the table surface. For this purpose, you can use a special device.
Cut the peeled fruits in half or into four parts, then cut into strips 4-5 mm thick.
How to dry bell peppers outdoors
An old and good method that our grandmothers and mothers enjoyed using is drying vegetables in the fresh air.
To do this, you will need a grid on which to lay the strips. Cover with gauze and take out to the balcony.
Bell peppers will dry at any temperature. The only thing is! In case of high humidity outside, it is better to bring the grills with bell peppers into the house.
If the weather is favorable for drying vegetables, then in 3-4 days you will receive finished products. Drying vegetables at lower temperatures, for example in autumn, can last 5-7 days.
How to dry bell peppers in an electric dryer
This method is faster and more reliable.
Place pepper strips in a single layer on dehydrating racks.
Set the temperature to 50*C and turn on the electric dryer.
The duration of the procedure will be no more than 12 hours, depending on the width of the slices and the thickness of their walls.
Ready dried bell peppers should be crispy dry. This is easy to check with your fingers.
Drying bell peppers in the oven
The drying procedure in an oven (oven) is almost the same as in an electric dryer. Set the temperature to 50*C, close the cabinet door and periodically check your workpieces. After 12-14 hours, the pepper should reach the desired consistency, that is, become dry and brittle.
Attention! If the pieces of pepper bend rather than break, and are more reminiscent of sun-dried tomatoes, then the drying procedure must be continued
Storing dry bell peppers
In order for the pepper to be well preserved throughout the winter, it must be stored in a linen bag - an old and time-tested method. This material allows air to pass through well, which provides the “dried fruit” with reliable ventilation.
You can store dry pepper in a jar, but it is advisable to make several holes in the lid.
If you don’t have a linen bag, you can store dried bell peppers in a plastic bag, but you don’t need to tie it tightly. It’s a good idea to make several holes in the walls of the bag.
Salted pepper for the winter
Hot peppers can be very simply and deliciously pickled for the winter and later used as a spicy spice or a salty snack. To make the preparation rich in flavor, you can add mint leaves, green dill or cilantro to jars of pickles. This recipe involves pickling vegetables with celery.
Salted pepper
Components:
- Pepper – 1 kg
- Celery – 0.2 kg
- Water – 2 l
- Salt – 0.25 kg
- Laurel leaves – 8 pcs.
- Head of garlic – 1 pc.
The process of salting peppers is as follows:
- Rinse the spicy vegetable well with running water and dry it, spreading it on cotton towels.
Attention! For preparation, it is better to take green hot peppers, as they are salted faster,
- Peel the garlic cloves and rinse with water. Wash the celery and chop coarsely.
- Prepare a container for pickling, for example, an enamel, ceramic pan, basin or wooden barrel. Wash the container with soda, rinse and scald with boiling water. Before preparing, be sure to dry the vessel thoroughly.
- Place the following layers in the prepared bowl: herbs, bay leaves, garlic cloves and pepper, filling the container 2/3 full with ingredients.
- Boil the brine. To do this, you need to boil water in a separate pan and pour salt into the bowl. Stir the salt crystals until completely dissolved. Remove the container from the heat and cool the liquid to room temperature.
- Pour the cooled brine into a container with pepper. Press down the workpiece with a plate slightly smaller than the diameter of the pan itself or with a lid turned upside down. Place a pressure on top of the structure; a five-liter bottle of water will do.
- The product should be salted for 15 days at room temperature, since heat will speed up the salting process.
- On day 15, taste the pepper. If the vegetable is sufficiently salted, pack the preparation into jars sterilized in any way. Boil the remaining brine in a saucepan. Fill the jars with boiling brine and seal with boiled iron lids.
Attention! If the pepper is not ready yet, leave the preparation in a warm place for a few more days and then seal it using the above method.
- Cool the seam, placing the lid down, under a warm blanket and put it away for storage.
When to harvest hot peppers. When to Harvest Peppers
Timely and correct harvesting, rules, regulations, errors, elimination of all types of losses.
Share your advice. When to harvest peppers so that they are stored well. I heard the opinion that peppers are left in a film greenhouse until the first frost. Cleaning up the last of the debris begins at minus five. I would like to know your opinion. Do you wait until the last minute or do you pick the fruits as soon as they turn red and send them off to ripen? What considerations guide you in this? Early ripening bell peppers are harvested 60-70 days after planting, focusing on color and size. Once a week, a full harvest is carried out, cutting off the fruits along with the stalk. Mid-ripening varieties will be “ready” in 110-130 days, and late-ripening varieties in 130 days. You can read more on the topic here.
Peppers can be stored for no more than three weeks. Then they wither and wrinkle. They will keep in the refrigerator for a month. If you do not harvest peppers for preservation, it is better to send them for dispensing. This way they will become sugary and tasty. The removable ripeness of pepper is counted a month plus a week, depending on the weather, after the formation of the ovary. They are collected for pickling and canning. There is another more interesting question. How to remove bitterness from peppers. This is really the topic)
Share your advice. When to harvest peppers so that they are stored well. I heard the opinion that peppers are left in a film greenhouse until the first frost. Cleaning up the last of the debris begins at minus five. I would like to know your opinion. Do you wait until the last minute or do you pick the fruits as soon as they turn red and send them off to ripen? What considerations guide you in this? Early ripening bell peppers are harvested 60-70 days after planting, focusing on color and size. Once a week, a full harvest is carried out, cutting off the fruits along with the stalk. Mid-ripening varieties will be “ready” in 110-130 days, and late-ripening varieties in 130 days. You can read more on the topic here.
Well, as if there are two ripenesses - technical and biological. Green, when the peppers have already reached their varietal size - this is technical ripeness. Many, for cooking, for preservation, prefer just such and do not specifically wait for biological ripeness. If the peppers are still green, and it’s cold propped up, then those that have reached their size can be ripened and the best option is to pull out the bush and tie it root up in a suitable place. You can also store ripe peppers - red, yellow... And when the peppers turn red, yellow, or orange - this is biological ripeness, that is the seeds are ripe.
Planting hot peppers in open ground
When to plant hot peppers in the ground
Planting hot peppers in open ground is carried out at the stage of formation of the first buds of the seedlings. A prerequisite is also to set the average daily temperature at 15-17 ºC.
Two weeks before planting, hot pepper seedlings undergo hardening, which involves daily “walking” the seedlings in the open air. You need to start with 15-20 minutes, but gradually increase the duration of the session until young plants can spend the whole day in the air. Once the plants have become accustomed to the environment in which they will grow, they can be planted in the garden bed.
Ground for chili peppers
Neither bitter nor sweet peppers can withstand heavy cold soils, so peat and humus must be added to the clay soil before digging to the depth of a spade bayonet. If your soil is light and permeable, fertilize it in the fall with rotted manure at the rate of 2 buckets of organic matter per m² of land. Although you can apply fertilizer directly to the hole when planting seedlings.
How to plant hot peppers in open ground
Make holes in the soil at a distance of 30-40 cm with row spacing of 60 cm. You can plant peppers in a nesting manner, according to a 50x50 cm pattern, placing two seedlings in one hole. The depth of the hole should be such that the seedling is immersed in it up to the root collar
Place a tablespoon of complete mineral fertilizer in each hole, mix it well with the soil, carefully remove the seedling with the earthen lump from the pot and transfer it to the hole. Fill the hole halfway or a little more with soil, pour a third of a bucket of water into it, and when it is absorbed, fill the hole to the top with soil
After planting, mulch the bed with peat and, if necessary, tie the bushes to supports. If the air temperature at night is below 13-14 ºC, cover the bed with peppers with non-woven material, throwing it over the dug arches. Seedlings should be planted on a cloudy day or in the late afternoon, after sunset.
Growing chili peppers in a greenhouse
Experts say that chili peppers grow much better in a greenhouse than in open ground. This can be explained by the fact that in closed ground conditions it is easier to control the temperature regime, and the level of air humidity in the greenhouse is more stable than in the garden. Pepper seedlings are planted in closed ground when the seedlings reach a height of 10-15 cm and night temperatures reach 10-12 ºC. Before planting, the seedlings are hardened off in the manner we have already described.
The optimal daytime temperature for the growth of chili peppers in a greenhouse is 16-18 ºC. In a heated greenhouse, plants are watered often, but not abundantly; in an unheated greenhouse, in cool weather, watering of plants is reduced. Moisten the soil with warm water. After watering, do not forget to loosen the soil around the bushes and remove weeds. From the moment the fruits form, the plants are fed once a week with liquid fertilizer for tomatoes. Bushes of tall varieties are tied to supports. If at the end of summer the ripening of fruits begins to slow down, hang the bushes pulled out of the soil on the eaves of the greenhouse “upside down” - this measure will speed up ripening.
Keep in mind that it is better to grow self-pollinating varieties indoors, but if you planted peppers that require pollinators, you will have to do this yourself. To do this, you'll need a soft pollen brush or a fan, but sometimes shaking the plants is all you need.
The last harvest of fruits is carried out before the onset of severe frosts, after which the bushes are transplanted into flowerpots and transferred to a heated room on the windowsills. With the onset of spring, they can again be planted in a greenhouse or open ground.
Drying peppers in the sun. How to dry bell peppers at home in the oven and electric dryer?
Dried bell peppers can decorate even a very simple dish. And the fact that this vegetable is rich in vitamins makes us even more enthusiastic about stocking up on it. But those who have medical contraindications to eating pepper should be careful. And how to dry it, in pieces or whole? Read the answer to the question in this article.
Drying sweet peppers:
Benefit or harm
Bell peppers are a great opportunity to diversify your winter diet. In addition, paprika is rich in vitamins, folic acid, iodine, iron, sodium and other beneficial substances.
However, this product should not be eaten if a person has the following diseases:
- Angina;
- Liver problems;
- Gastritis;
- Any ulcers of the gastrointestinal tract;
- Haemorrhoids;
- Hypotomia;
- Problems with the urinary system.
Benefits of pepper:
Dried paprika can have the following beneficial effects on the body:
- Reduces the possibility of developing diabetes;
- Strengthens nails and hair;
- Improves vision;
- Increases appetite;
- Reduces the risk of vascular blockage;
- Restrains hypertension.
Dried bell pepper has 10 times more energy value and calorie content than the fresh product.
Technology. Drying modes and methods
Bell peppers are dried in the following ways:
- In the fresh air and sun;
- In the oven;
- Using electrical appliances.
Cooking time for dried paprika will depend on the temperature and method chosen. So, in the fresh air it will take 3-4 days if it’s +30 or higher outside, and 5-7 days if the readings on the thermometer are lower. But using household appliances, good results can be achieved in 12-24 hours.
Finished pieces of this vegetable will break easily, but not bend.
Before drying the pepper, it must be carefully prepared, following all the rules.
Preparation
The bell pepper harvest must be carefully sorted. Only healthy plants without visible damage are suitable for preparing dried paprika.
Now you should follow the following instructions:
- Each vegetable must be washed separately and gently dried with a paper towel;
- Then, with the tip of a knife, you need to cut off the tails and remove the core;
- Gently tap to remove the seeds from the inside;
- Now the fruits need to be cut in half and chopped into strips.
The thickness of the latter should be no more than 5 mm.
In the oven
Drying bell peppers in the oven will proceed as follows:
- Set the temperature to 50 degrees;
- Arrange the sliced peppers in a single layer on a parchment-lined baking sheet;
- The cabinet door is closed.;
- Cooking time will be 12-14 hours.
Periodically you need to look into the oven to check the readiness of the product.
In an electric dryer
The procedure for drying bell peppers will be similar to the previous one. So, chopped paprika is laid out in one layer on a dryer mesh, the temperature is set to +50 degrees and left for 12 hours.
Drying:
Storage
It is best to store dried peppers in a linen bag, but if you don’t have one, you can put the blanks in a glass jar with holes made in the lid.
A plastic bag with special holes in the walls will also be suitable for storing bell peppers.
Dried bell pepper: use in cooking
Dried sweet peppers will be an excellent addition to hot dishes, meats, and side dishes.
Finely chopped dried paprika is added when baking bread. This will diversify the taste of baked goods and make it even more interesting.
Dried peppers can also be used as a snack on their own. Unlike store-bought chips, this product will definitely not harm your health.
How to make paprika seasoning:
Bell peppers can be canned, frozen, or kept fresh. But this vegetable will last the longest when dried and will be an excellent addition to many dishes.
Bell pepper powder. Composition of bell pepper.
This plant is considered a record holder for vitamin C content. Pepper also contains a group of B vitamins, provitamin A (carotene) and vitamin P. Pepper is a storehouse of minerals (potassium, sodium, phosphorus, zinc, iodine, iron, calcium and magnesium). Pepper owes its characteristic taste to the high content of the alkaloid capsaicin. This substance also makes it beneficial for the gastrointestinal tract. Zucchini juice is also beneficial for the entire digestive system. Thanks to its composition, bell pepper is an invaluable vegetable.
Considering the rich composition of this vegetable, we can conclude that it is beneficial for human health. The mineral complex enriches the blood composition, serves as a preventive measure for anemia, and also increases the body’s protective barrier. The vitamins contained in pepper strengthen blood vessels, improve hair growth, and the condition of nails and skin, and even preserve vision, it is suitable as juice for chickens.
The substances contained in pepper help fight depression and loss of strength. Bell pepper is also very useful for people suffering from diabetes. Another property of this vegetable is its ability to increase appetite. Pepper thins the blood and, as a result, lowers blood pressure. Bell pepper also has a beneficial effect on the gastrointestinal tract and the functioning of the pancreas.
Pepper is used externally as masks and ointments to treat arthritis, radiculitis and neuralgia. They are made from sweet pepper powder. Bell peppers also have a high content of vitamin P (rutin), due to which pepper helps preserve the youth of capillaries and blood vessels and improve the elasticity of the entire circulatory system. Therefore, pepper can be used as a prevention of atherosclerosis and thrombosis.
Bell pepper also improves memory and concentration. It will help get rid of insomnia, stress and pre-depression, excessive muscle tension. Pepper is useful for both men and women. It is especially useful for women during pregnancy, since during this period the skeletal system and hair are subject to serious stress.
All the beneficial substances of bell pepper are concentrated in the stalk area, in the white pulp, as well as in the seeds. You can also prepare healthy dishes from pumpkin pulp itself. Unfortunately, during cooking we throw away all the “useful part” of the pepper. Therefore, you can make juice from whole unpeeled peppers to preserve all its beneficial properties. When cooked, bell pepper loses up to 70% of its nutrients, so it is better to eat it raw in salads and snacks.
Contraindications to the use of bell pepper.
Bell pepper itself is not harmful, but in some cases it is better to limit or completely eliminate its consumption.
- Ulcer and gastritis of the stomach
- Angina pectoris
- Epilepsy
- Hypertension
- Liver and kidney disease
- Colitis
- Haemorrhoids
- Heart rhythm disturbances
Restrictions on the consumption of bell peppers are associated with a high percentage of essential oils and fiber, which can cause an exacerbation of the above diseases. Therefore, if you suffer from one of these diseases, you should consult your doctor or nutritionist before consuming bell peppers.
Benefit
What are the benefits of dried peppers?
Dried sweet peppers retain almost all the vitamins and minerals involved in the development of the body, maintaining reliable immunity and protection against vitamin deficiency.
This is possible thanks to a complex of vitamins A, group B, C, E and PP, as well as phosphorus, potassium, calcium, magnesium, manganese, sodium and iron.
Regular consumption of dried pepper activates the digestive system, helps strengthen hair and nails, and improves vision.
Beneficial substances contained in sweet peppers normalize the functioning of the cardiovascular system, reduce the risk of blood clots by thinning the blood, and strengthen the walls of blood vessels.
Pepper also brings invaluable benefits to the condition of the skin and mucous membranes.
Energy value and calorie content of dried pepper: per 100 grams of dried sweet pepper there are approximately 118 calories.
Dried peppers for the winter in oil
To prepare dried peppers in oil, use a simple recipe (the photo shows the finished result).
Ingredients:
- bell or hot pepper – 1 kg;
- extra virgin olive oil – 50 ml;
- balsamic vinegar to taste.
Preparation:
- Wash the peppers, dry them, remove the stem and core. Rinse with cold water and place cut side down in a bowl. This will ensure free flow of water.
- Line a baking sheet with parchment or grease with oil. Arrange the slices.
- Preheat the oven to 120°C, place the baking sheets and cook for 3-4 hours. Gradually reduce heat to 110°C.
- Remove the vegetables after the cooking time has passed and leave to cool.
- Heat the vegetable oil in a water bath or in the microwave. Add garlic if desired.
- Place the peppers in a jar, pour in warm oil, add a little balsamic vinegar and close the lid.
Store in the refrigerator or cellar.
In seasonings and spices
Dried peppers in aromatic herbs and spices will delight you with a rich taste and pleasant aroma.
Ingredients:
- sweet or bitter pepper – 1 kg;
- rosemary, thyme, oregano;
- salt, black pepper - to taste;
- Extra Virgin olive oil – 80 ml;
- garlic – 3-4 cloves.
Preparation:
- Wash the vegetables, peel them, rinse with water. Cut into 2-4 pieces depending on size.
- Cook in the oven at 100°C or in an electric dryer at 75°C. Adjust the time as you wish and constantly monitor the slices so as not to dry out.
- Peel the garlic and cut into thin slices.
- Place chilled peppers in a glass container, add spices and garlic.
- Pour in olive oil and close the lid.
Store in the refrigerator on the top shelf.
How to cook dried peppers
To prepare dried peppers, household appliances are used: microwave, oven and electric dryer. Each of their methods has advantages and disadvantages. Let's talk about them in more detail.
In the oven
Modern ovens are equipped with many useful features. One of them is convection, which allows you to dry any fruits and vegetables without much effort.
The mode ensures free circulation of air inside. Thanks to this, excess moisture quickly evaporates. If you have an older oven model, simply keep the door ajar.
Preparation:
- Prepare the peppers by covering a baking tray with baking paper.
- Place the pieces skin side down. You can put garlic, spices and oil inside the boats.
- Set the temperature to 100-120°C and leave for 1.5 hours.
- Turn off the oven, leave to cool for a while, then set the same temperature and cook for 40-60 minutes.
- Leave in the oven until completely cool.
In the dryer
Drying peppers in an electric dryer is as easy as shelling pears:
- Place the prepared vegetables on the racks, leaving space between the slices.
- Set the temperature to 75°C. Check the vegetables every 30 minutes and turn if necessary. Remember that the peppers should not dry out completely.
- The preparation time for the product is 3-4 hours.
In the microwave
Microwave dried peppers are the most difficult to prepare. It is necessary to constantly be on the alert and monitor the vegetables. The main task is to prevent the vegetables from being cooked.
Preparation:
- Place the prepared vegetables on a plate and pour over the oil.
- Set the maximum power and cooking time to 5 minutes. Then remove the plate and drain the resulting liquid.
- Cool the slices and repeat the procedure 3-4 times. Don't forget to drain the juice every time.
Usage
The benefits of bell pepper for the body are not in doubt. It contains a lot of ascorbic acid and beta-carotene, which support the immune system, give strength and thickness to nails and hair, and improve vision. Doctors recommend its use for diabetics and heart patients. A substance called capsaicin stimulates appetite, which is important for anorexics. It stimulates blood circulation, balances blood pressure, and has a beneficial effect on the functioning of the gastrointestinal tract.
Crispy pepper slices will be a good replacement for unhealthy chips. Those who are losing weight can take them to work as a nutritious, low-calorie snack. Children also love its sweet taste. This seasoning is used in a wide range of dishes:
- Soups and broths.
- Side dishes, porridge.
- Vegetable stew.
- Salads.
- Pastries, bread.
- Sauces.
- Meat.
- Fish and seafood.
The seasoning can be added to dishes that require cooking, such as soups or stews, without prior preparation. In salads or sauces, dried peppers are first reduced. Place the drying material in a bowl, add hot water at the rate of 0.5 cups of water per 1 cup of dry matter.
Previous VegetablesSimple drying: how to dry zucchini in an electric dryer and more Next VegetablesHow to dry carrots: for frying and for salad
Chef's Notes
Dried peppers are a delicious snack with a wonderful taste and aroma. It is consumed on its own, added to salads, meat dishes, pizza, spread on croutons, and combined with other vegetables and cheese. For preparations, select undamaged vegetables without stains or rot.
Delicious recipe! Pancake salad with sausage and carrots
Drying vegetables has become very popular after sun-dried tomatoes, peppers and even some fruits appeared on store shelves. Preparing dried peppers for the winter at home is not difficult. They can be used as a component of salads, sauces, and served as a ready-made appetizer for meat, croutons, and fish. This dish will be a wonderful decoration for the holiday table.
How to dry bell peppers at home: a guide
There are several ways to dry bell peppers. All of them are simple and do not require much effort.
On open air
Drying time: 3-12 days.
There are two options for preparing peppers for air drying. In the first, they are left whole and strung on a harsh or nylon thread or fishing line. In the second, they are cut into thin strips and placed on trays, sieves or grates covered with paper. The pieces should not touch each other.
- Place drying trays in a dark place with good air circulation. Some recommend installing a drying box above the hob, then the process will go faster. You can dry it under a canopy, on the balcony or in the attic, opening the dormer windows and vents.
- Turn the strips over once or several times a day.
- In the evening or in the rain, bring the pepper indoors, otherwise it will become damp.
The duration of drying depends on the juiciness of the fruit and the humidity of the surrounding air. Readiness is checked experimentally: the pieces should be hard and crunchy when broken.
In the oven
Drying time: 12-16 hours.
This method will reduce drying time. Peppers after the oven turn out more tasty and aromatic.
- Line baking sheets or racks with baking parchment.
- Place the pepper slices in a single layer so that they do not touch.
- Set the temperature to 45-55°C.
- Dry for 3 hours with the door tightly closed.
- Raise the temperature to 60°C.
- Open the oven door slightly (gas by 15 centimeters, and electric by 5) and dry until done.
Every 2-3 hours, take out the baking sheets, turn the pieces over and let them cool completely.
In an electric dryer or dehydrator
Drying time: 10-12 hours.
How to dry bell peppers in an electric dryer? It's much easier than in the oven. The device will do all the work for you.
- Place the pepper strips on the grates in a single layer, 1 to 2 millimeters apart. In a dryer this is done with the inside facing up, and in a dehydrator it is done with the inside facing down.
- Set the temperature to 55-60° or the “Vegetables” mode.
- Change the grilles every 2-3 hours.
If after the allotted time the pepper does not become crispy and brittle, then the procedure can be extended until cooked.
In the microwave
Drying time: 10-25 minutes.
This method is much faster than drying bell peppers in an electric dryer. But small batches are obtained, so you have to tinker.
- Place pepper slices on a paper plate, silicone, ceramic or glass dish.
- Set the “Defrost” mode. Rotate the pepper for 2-4 minutes.
- Open the door and let the moisture escape.
- Set the power to the lowest mode (80-100 W). Dry until ready.
Open the oven every 4-6 minutes to get rid of excess moisture that has evaporated from the pepper.
To make a delicious seasoning from dried paprika, grind it in a coffee grinder, blender or mince it. If desired, you can add salt, pepper, various spices and herbs, dried garlic and onions, and vegetable oil to the finished powder. Sun-dried or sun-dried tomatoes and apple cider vinegar will help add sourness.
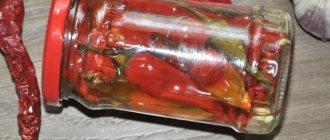
Armenian marinated peppers
Armenian cuisine is famous for its spicy marinades and sauces. The proposed national marinated snacks will decorate and brighten any table.
Option 1
An accessible Armenian recipe for preparing yellow-green hot pepper is called Tsitsak (after the name of the variety).
This pickling is fermented and stored in the refrigerator.
Ingredients:
- 0.5 kg of spicy tsitsak (yellow-green);
- bunch of dill 20 g;
- 3 cloves of garlic;
- tablespoon salt;
- 1 liter of water.
Preparation:
- Wash the fruits, dry them with a paper towel, and let them sit for a while until they wilt. Wash the greens and dry. Remove the covering from the garlic. Prepare the brine: dissolve salt in hot water.
- Finely chop the greens and garlic, mix and place in the bottom of a wide bowl. Then put a layer of tsitsak, then again greens with garlic, etc.
- Pour in brine. Place a saucer on top and place something heavy on it, for example, a liter jar of water.
- Place in a cool, dark place for 2 weeks. The peppers should turn yellow.
Store in a cellar or refrigerator. In Armenia, this snack is made in large portions at once. Thus, you can salt tsitsak in a makitra or enamel bucket.
Option 2
This recipe is great because it uses a lot of aromatic greens, as well as different pepper varieties.
Ingredients:
- Tsitsak (variety name) – 2 kg (you can add a chili pod for added spiciness);
- 2 medium bunches of celery;
- 2-3 heads of garlic;
- 1 teaspoon each ground black and allspice;
- 0.5 tsp each mustard (seeds), coriander;
- 5 bay leaves.
For the marinade: 2 tbsp. sugar 2 tbsp. rock salt, a glass of vinegar 9%, a glass of water, a glass of vegetable oil.
Cooking method:
- Wash and sterilize jars and lids. Wash and dry the tsitsak and herbs. Cut the celery, finely chop the chili, cut the tsitsak.
- Make the marinade in a deep frying pan or saucepan and bring it to a boil. Add the peppers and boil for 5 minutes. Place the tsitsak in a bowl without marinade.
- Place herbs and chopped garlic into the marinade for a few minutes, stirring. Pour the marinade with herbs into the bowl with the peppers on top.
This tsitsak can be stored in the refrigerator for a long time, and can also be pasteurized.
Warnings
When preparing and drying hot peppers, you must follow some safety rules:
It is necessary to work only with gloves (you can use latex surgical gloves, having previously washed the top layer of the gloves with ordinary soap); Avoid touching your face with your hands until work is completed; When slicing hot peppers, it is important to ensure that small pieces or splashes of pepper juice do not get into your eyes; After finishing working with hot peppers, be sure to wash your hands well with plenty of water.
Drying hot peppers at home is quite simple. Dried peppers will be an excellent addition to pickles, preserves, as well as fresh salads and various snacks. Having dried a sufficient amount of pepper, you will always have an original seasoning for dishes at hand, and garlands of red and green pods will serve as an unusual decoration in the kitchen.
Terms and conditions of storage
Storage conditions for Georgian pepper are no different from other pickled vegetables.
Important rules:
- Do not keep near heating devices or in places with temperature changes. The kitchen, for example, is completely unsuitable for this.
- It is advisable to store jars in the refrigerator. Especially if they are not rolled up.
- Do not place the seams on the balcony at sub-zero temperatures. This will cause them to leak.
- Periodically check the jars for cloudiness of the brine or the appearance of spots on the fruit. Such preparations cannot be eaten.
Shelf life varies depending on the preparation method. One way or another, all the preparations given in the article will definitely remain fresh until winter. The shelf life increases when adding a large amount of salt, vinegar or after sterilizing already filled jars.
It is also important to boil jars and lids before starting cooking.
What are the benefits of dried bell pepper?
As already mentioned, dried foods retain vitamins and microelements; their benefits can be considered on an equal basis with fresh ones. So, what can dried bell peppers boast of?
- The colorful vegetable contains high levels of minerals, the main components of which are iron, manganese, potassium, selenium and magnesium. Each of them has a positive effect on the functioning of the body, improving the functioning of all systems - from head to toe.
- Pepper is rich in vitamins. The first place of honor is occupied by vitamin C (especially if a green or red variety was used for drying) - a powerful antioxidant is necessary for our body to synthesize collagen, which in turn maintains the integrity of blood vessels, increases skin elasticity (ladies, remember), improves the body’s resistance to infections.
- Red pepper, compared to others, contains a large amount of vitamin A and B. So use it more than others. Vitamin B promotes the production of melatonin, which the body needs to regulate its internal clock, helps with insomnia and promotes healthy sleep.
- Carotenoids help fight free radicals that we acquire from environmental toxins that can lead to cancer. Yellow and orange peppers are especially rich in them.
- One handful of chopped fresh peppers contains up to 40 calories, and dried ones contain even less. And if you decide to watch your figure, then the vegetable is ideal for a snack.
- Bell pepper has anti-inflammatory properties. By reducing inflammation in the arteries, it helps prevent cardiovascular disease and diabetes.
- A snack made from dried sweet peppers is suitable for people with high cholesterol levels, because it contains the alkaloid capsaicin, which reduces the amount of this substance.
Benefits of harvesting dried sweet peppers
The method of preserving vegetables and fruits for the winter by drying is especially popular due to the fact that the product preserves vitamins, micro- and macroelements.
Sweet peppers, unfortunately, cannot be stored fresh for a long time, so this method of preparation is best suited.
The chopped and dried pieces are placed in plastic or glass jars and added to food as needed. During the cooking process, the flakes swell under the influence of moisture.
Dried paprika can be ground into powder. The result is an environmentally friendly product, no worse than store-bought seasonings.
Selection and preparation
In order to properly dry and thereby preserve bell peppers, it is necessary to make a high-quality selection and preparation of raw materials. Drying bell peppers yourself is not difficult. To do this, we take healthy, ripe, undamaged fruits, without dark spots or deformations. It is worth noting that fruits of different colors can be dried. It’s even more beautiful – like it’s part of the rainbow.
Real gourmets prefer to dry each variety separately and then store and use it separately.
The algorithm of actions is as follows.
- Rinse the fruits with running water.
- Dry with a towel.
- Remove the core with seeds and the tail.
- Chop each fruit. The thickness of the slice will determine the time required to dry it quickly and efficiently. Thus, experienced housewives recommend cutting bell peppers no more than 5 mm thick into strips.