Icing, the recipe for which we will talk about today, allows you to create a wide variety of dessert decorating styles.
Icing is essentially a sugar-protein mass, the term for which means nothing more than an “ice pattern.”
In fact, there is more than one recipe for making icing at home. In this MK we will look at the most common one, where we will learn how to make a cornet for drawing patterns with icing.
How to make royal icing: step-by-step recipe with photos
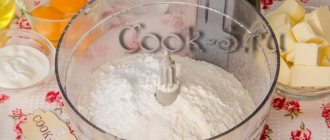
Step 1. Carefully separate the white from the yolk so that not a single drop falls into the container. The final result of the icing will depend on this. Sift the powdered sugar into another container.
Plus store-bought fine powdered sugar in the finest grind, which will not tear the icing and crumble it. You won’t be able to prepare such fine powder on your own, so either set yourself up for an “amateur” result, or purchase fine powder in a specialized store, which is sifted through a nylon cloth to ensure the quality of its grinding.
Step 2. Beat the egg whites with a fork until foamy.
When preparing icing, we do not need a mixer, unlike, for example, protein custard. We will use exclusively manual labor. The mixer saturates the icing with air bubbles, which will make the product very fragile.
Step 3. Add 1 tbsp into the beaten egg whites. powder, carefully rubbing the mass each time to avoid the formation of lumps.
Step 4. When half of the powdered sugar is gone, add citric acid to the icing mixture; it will give the products a white color and dilute the cloying taste of the decorations.
If you use juice instead of citric acid, it is better to pour it in at the end of kneading.
Step 5. The finished mass for icing should be dense, viscous and homogeneous.
Now is the time to divide it into parts and decorate it with food coloring (if you plan to make colored pictures) or get silicone moldings (molds for icing decorations).
Step 6. If you don't have silicone moldings, use regular children's coloring books or pictures printed from the Internet. Place them in a file and coat with a thin layer of olive oil to prevent the icing from sticking (it is better not to use vegetable oil, as it polymerizes (hardens) when exposed to air).
Step 7. Apply icing using brushes or regular syringes, then leave the patterns/figures to dry for 1-2 days. If everything was done correctly, after drying, the icing products are very strong and do not crumble.
Leftover icing can be stored in the refrigerator for a couple of days, but since the protein mass dries out very quickly, confectioners do not recommend doing this. It is advisable to prepare icing “here and now” as needed.
How to beat eggs
To obtain snow-white, fluffy, stable foam, you need to follow the rules for selecting and preparing dishes, eggs, and the sequence of actions. A container made of copper, metal or glass is ideal. The exception is aluminum (it reacts with the product, giving a gray tint). Plastic is also a bad alternative. Dishes must be clean, dry and grease-free. Fresh eggs require more beating time but give good long-lasting volume. The whites are separated from the yolks, warmed to room temperature and foamed to the consistency specified in the recipe, gradually increasing the speed.
Common mistakes
It seems like everything was done according to the recipe, but the icing didn’t work out? Here are the most common mistakes that can completely ruin the glaze:
- Lemon juice must be added exactly according to the recipe - one teaspoon per white from one egg and 150 grams of powder. If you add too much egg white, the frosting will be too brittle.
- Gently add powdered sugar depending on the desired consistency. A mixture that is too liquid will spread over the baked goods; a mixture that is too dense will be difficult to squeeze out of the pastry bag. Adjust the density of the icing using protein and powder.
- The glaze requires air to dry. Do not place the decorated product or the drying parts of future figures in the refrigerator - the icing will become limp and flow.
- For the same reason, do not apply the mixture to cream or wet biscuits. Ideal for application to dry cookies and cakes, pre-coated with a base - mastic, marzipan, ganache.
Making lace
The egg mass is distributed over the entire surface of the mat, removing excess. Then everything is placed in a preheated oven and baked for three or five minutes, depending on the type of oven. After time, the finished lace is carefully removed and patterns are made from it as desired. You can decorate the cake with it by attaching it to the sides. You can make all sorts of figures - it all depends on the imagination of the cook.
As you can see, this cake icing recipe is very fast. The lace is ready in fifteen minutes, so you can save time for preparing other holiday dishes.
Volumetric figures
The simplest type of 3D royal icing decoration is the 3D butterfly. To make it, you need to take a stencil with a file, as when creating drawings, but place the sheet on an open book. The angle at which the pages lie will give the butterfly volume. If you want to get semicircular shapes, place the file with the stencil on a cylinder (a small plastic bottle, glass, etc. will do).
Ornaments in the shape of a ball look impressive. An openwork hemisphere or many small balls will turn any baked goods into a work of art. To create such figures you will need a balloon, which is first inflated to the desired size. Gently moisten it with a cotton swab and olive oil and begin the process. The pattern is applied, after which the ball is left in a dry place until the sweet mixture dries completely.
Making 3D figures involves gluing together several flat parts. The difficulty is to find a stencil for all the necessary parts of the figure. Before installing the volumetric decoration, you need to wait until the parts have dried thoroughly. Glue the parts together with a paint mixture or whipped egg white. The glaze dries in about 12 hours. It is recommended to start making voluminous figures a day before serving the cake or pie on the table. All parts for voluminous jewelry should be made with a reserve, because they are fragile and can break during the assembly process.
Creating figures
If you create three-dimensional figures by squeezing the mass onto a stencil, first grease it with a little olive oil to make it easier to separate the dried parts. Regular sunflower oil will not work here.
To create three-dimensional flowers and other figures, apply glaze to the stencil, and then place it on any curved surface. For example, a flower can be placed in a cup with the leaves facing out; butterflies - on the fold of the book (when they dry, you get a fluttering effect).
Large volumetric icing decorations are incredibly beautiful: shoes, carriages, houses, towers and more. It seems that this is impossible to do, but in reality everything is not so scary. These figures are made up of many individual parts, which are first applied to a stencil and dried, and then joined together with cream.
Remember that the average drying time for glaze is 12 hours, so you need to apply it to the finished cake in advance. Cookie icing also requires time to dry, otherwise the cakes will simply stick together. It is better to start preparing three-dimensional or prefabricated figures that are pre-applied onto a stencil a day before, so that they have time to dry well and are easy to assemble. Make them with reserve, because the parts are very fragile and can break during the assembly process.
Flexible icing at home
- Time: 45 minutes.
- Number of servings: 8 persons.
- Calorie content of the dish: 325 kcal (per 100 g of glaze).
- Purpose: for dessert.
- Cuisine: English.
- Difficulty: medium.
To make icing flowers or other cake decorations, you need a mixture with a more complex composition and dense consistency. The flexible glaze is prepared using a silicone mat. Rare ingredients for cooking can be ordered in specialized online stores. The resulting mass is enough to decorate 1 cake or medium-sized pie.
Ingredients:
- corn starch – 20 g;
- water – 50 ml;
- food coloring (white) – ¼ tsp;
- fructose – 20 g;
- citrus pectin – 1 tsp;
- invert syrup – 1 tsp;
- food additive polysorbate-80 – 3 drops;
- food grade glycerin – 1 tsp.
Cooking method:
- Combine starch, dye, pectin, fructose, mix.
- Pour room temperature water into the container.
- Add dry mixture.
- Mix everything and leave for 30 minutes.
- Stir the mixture again and pour in the invert syrup.
- Combine food grade glycerin with polysorbate-80 additive and add to container.
- Spread the resulting mixture onto a silicone mat for working with flexible icing.
- Preheat the oven to 100 degrees, place the mat with glaze into it.
- After 10 minutes, take out the mat, let the mixture dry and cool.
- Separate the resulting flexible pattern from the mat and use it for decoration.
How to store chocolate glaze
Chocolate icing is one of the easiest ways to decorate desserts. Chocolate glaze is always prepared in a water bath, regardless of whether it uses chocolate or cocoa. It can be stored for quite a long time, just like chocolate. Optimal storage conditions for chocolate glaze: air temperature 18°C and humidity 75%. The shelf life of chocolate glaze begins to be calculated from the date of production of chocolate, which is indicated on the packaging by the manufacturer.
- dessert chocolate without additives is 6 months;
- loose chocolate without additives can be stored for up to 4 months;
- loose chocolate with additives can be stored even shorter – up to 60 days;
- chocolate for people with diabetes, as well as with fillings and additives, is suitable for consumption for 90 days.
Based on these indicators, the shelf life of chocolate glaze with additives is 3 months, and without additives – 6 months. It must be placed in a container and tightly closed with a lid, and before use, warm up to 37°C and mix thoroughly.
How to work with icing
1. To get started, you will need templates. These can be either your drawings on paper or ready-made printed outlines. At this stage, children's coloring books for little ones with simple drawings may come in handy.
2. Plastic cling film is placed on the template, or the sheet is placed in a transparent document file. Do not use tracing paper, parchment or wax paper, as the icing will stick to them “tightly”, without any possibility of carefully separating the product.
You can lubricate the film with a thin layer of olive oil (precisely olive oil, since it does not dry out). Sunflower oil is extremely undesirable, since it hardens in contact with air, like oil paint, and can, on the contrary, stick the product to the surface.
3. Freshly prepared icing is placed in a cornet (pastry envelope) with a suitable nozzle or in a plastic bag with a corner cut off. It is not advisable to prepare the mass “in reserve”, as it may lose its plasticity and will have to be diluted again.
The icing mixture should not be made too liquid so that it does not spread when drawing. A mass that is too thick will be difficult to squeeze out of the cornet and will tear when applied. But from the thick icing mixture, decorations can be sculpted by hand, like from plasticine. But don't make the elements too thick, otherwise they will take a long time to dry.
4. If you have artistic skills, you can do without templates. When painting, you can successively use icings tinted with food coloring to get multi-colored decorations.
5. The mass can be applied directly to the surface of the finished (baked and cooled) product. The dough should be fairly dry (gingerbread, shortbread). You can apply icing to chocolate glaze.
Icing should never be applied to pastry cream, sponge cake and other wet surfaces, as well as to those confectionery products that should only be stored in the refrigerator. Only ready-made icing decorations are installed on such products, immediately before serving.
6. The film with the pattern is dried at room temperature for 1 - 3 days, depending on the size, until the mass is completely dry. 1 - 2 days is enough for a small flower or pattern. Large parts can take up to 5-6 days to dry.
7. If you want to get a three-dimensional decoration rather than a flat one, a film with a pattern can be placed for drying on a curved surface (a pan, a jar, the spread of an open book).
Properly prepared mixture should not drain from inclined surfaces. If the icing is too liquid, you can wait until it dries to the desired thickness in a horizontal position, and then place it on a curved surface.
In order to obtain openwork spherical decorations, the protein mass is applied to small inflated balloons greased with vegetable oil. After the icing has dried, the ball is deflated and carefully removed from the product.
8. Dried icing decorations must be carefully removed from the film. It is better to do this on the edge of the table, starting from the corner of the film, pulling it down.
Method for disinfecting chicken eggs
A chicken egg is a useful biological product for human health, and an excellent ingredient for making confectionery products. However, raw eggs carry an acute intestinal infection in the form of salmonellosis. Of course, modern poultry farms constantly monitor the safety of derivative products, but no one can guarantee 100% safety of raw eggs consumed.
As you know, in order to disinfect the white of a chicken egg, it must be processed at a temperature of at least 70°. But we need the protein in its raw form, and not in custard (where it can be subjected to similar heat treatment).
To disinfect egg whites, prepare a strong solution of soda and water (1 tablespoon of soda/glass of water), where we place the egg for 15-20 minutes.
The process of defatting a chicken egg
Secrets of working with icing
To ensure that your cakes, pies and cookies delight your guests and loved ones with their original decor, it is important to learn how to work with royal icing correctly. Below are all the secrets of successfully decorating confectionery products using icing: . It is better to beat the mixture manually with a fork or whisk so as not to spoil the structure.
- Powdered sugar should be finely ground and sifted before use.
- The glaze should be smoothed with a cream spatula.
- Do not store glaze in the refrigerator.
- It is better to make figures and drawings in several copies, in case of breakage.
- It is better to beat the mixture manually with a fork or whisk so as not to spoil the structure.
- Powdered sugar should be finely ground and sifted before use.
- The glaze should be smoothed with a cream spatula.
- Do not store glaze in the refrigerator.
- It is better to make figures and drawings in several copies, in case of breakage.
Cookie
Frosting cookies and gingerbread is a great way to start practicing. Drawings can be very simple or complicated with a large number of small details. Icing for cookies, the recipe of which can be any (shortbread and ginger are good), can be of two types: soft peaks (for contours and designs) and the consistency of thick sour cream (for filling).
If you want to completely fill the surface of the cookie with icing, apply an outline along the edges, let it dry a little and fill the rest of the area with the soft mixture. The circuit will hold it back, preventing it from settling. Use fine line tips or icing pencils to create fine lines and patterns.
Icing at home: second recipe
Ingredients:
- white of one egg;
- 200-250 grams of powdered sugar;
- lemon juice: 0.5-1.0 teaspoon.
Preparation:
Cool the egg so it beats better. Break the egg and carefully separate the white. The slightest splash of yolk will ruin everything. Did not work out? Break another egg. In the protein you will see clots, peculiar strings. Remove them. The protein must be absolutely homogeneous. Add citric acid.
Select clean, dry, high-sided containers suitable for whipping. If there are traces of fat on the dishes, you won’t get a fluffy protein mass. Beat for no more than a minute.
Particular attention should be paid to the quality of powdered sugar. The best results are obtained from finely ground powder
As a rule, this is a factory product. If your powder is a bit rough, try using a coffee grinder or food processor to get it perfect.
Add the powder to the egg whites in small portions and beat until stiff peaks form. The properties of the drawing mass depend on how long you beat. If you beat to soft peaks, the frosting is ideal for drawing thin lines directly onto the confection. If you work longer, the mass will whip up to hard peaks. This consistency is optimal for making stenciled figures. Thicker lines are needed there so that the patterns do not fall apart when you try to pick them up.
Check the consistency of the icing. Squeeze a thin thread between two fingers. Happened? Is it holding up? If the mass rolls up or the thread turns out to be intermittent, it means the consistency is not thick enough. Add powdered sugar. If the thread is too thick and short, the icing is too thick. Dilute it with a drop of lemon juice. With the right consistency, the thin thread does not break, even if you move your fingers.
At this stage you can add dry food coloring. Exactly dry. Liquid - it will spoil the consistency.
So, we have achieved the correct density. Now we transfer the mixture into a pastry bag, which we will use for drawing. Be sure to cover everything that remains with film. If this is not done, a crust will form very quickly, and you will no longer be able to paint with the mixture.
Transfer the icing to a storage container and cover with cling film - a crust will form on the mixture very quickly.
Drawing sugar-protein mass
METHOD OF PREPARATION AND PROCEDURE FOR WORKING WITH ICING
To prepare you will need:
fresh egg white - 1 pc.
powdered sugar until desired thickness is achieved - about 250 g
lemon juice or dry citric acid on the tip of a knife - about 0.5 teaspoon
Cooking method:
Carefully separate the egg white from the yolk. Even traces of yolk are unacceptable.
Beat the whites with a fork until a light foam forms. The goal of this procedure is not to beat the protein, but only to sufficiently destroy its structure until it liquefies. There is no need for air bubbles in the finished icing mixture.
Then we begin to gradually add powdered sugar to the protein in portions, each time thoroughly rubbing until smooth.
In the middle of cooking, add dry citric acid or almost at the very end - lemon juice. Add lemon juice towards the end of cooking, otherwise the finished products will be too fragile.
Toward the end of cooking, you can add the desired food coloring.
Adding powdered sugar in portions, grind and knead until a homogeneous, stable, viscous plastic mass of the desired consistency is formed.
Our icing is ready for making jewelry by jigging from cornet.
Note: For jigging with a cornet, the mass is made more liquid, and for sculpting with your hands, it is made thicker, easily kneaded with your fingers.
When sculpting by hand, the icing can be dusted with powdered sugar.
Icing what is it
Confectionery products look much more appetizing, having extraordinary openwork decorations and magnificent paintings. Sometimes cakes, pastries and gingerbreads turn into masterpieces. Unforgettable works of culinary art, which, unfortunately, are not destined to exist for long, remain in the memory of eyewitnesses and are captured in photographs.
To create such unusual decorations, icing is made. This is a confectionery mixture based on proteins and sugar, used for drawing and creating flat and three-dimensional details for decorating culinary creations. This mass is plastic; has a light marshmallow-like structure.
A properly prepared protein mixture evenly covers the product, creating matte white patterns, and retains its shape even under the action of a knife during cutting, without breaking or changing. To make the patterns colorful, the necessary food colors are added to the mixture.
Any desserts can come to life with the use of icing. Baked goods and cakes convey their meaning, creating congratulations or just a good mood with the help of unique elements and figures. Icing is sometimes called royal icing.
What is it used for?
As you can see, icing for lace (the protein mass recipe was discussed above) does not require the use of many expensive and rare products. It is made from quite affordable and simple ingredients that are available to every housewife.
So why is such a mass needed at all? As a rule, it is used to prepare unusual patterns for decorating cakes and pastries. Although chefs often use sweet rice mixture to create their own dessert. In this case, various figures and patterns are made from icing. If you decide to please your loved ones with an original sweet, we suggest creating a Christmas tree, various animals, snowflakes, etc.
Classic icing
- Time: 30 minutes.
- Number of servings: 8 persons.
- Calorie content of the dish: 305 kcal (per 100 g of glaze).
- Purpose: for dessert.
- Cuisine: English.
- Difficulty: easy.
Icing for a cake is prepared without much difficulty. The products necessary for it can be found in every home. At the same time, with the help of icing you can turn chocolate cake, cookies or cupcakes into a festive dessert that will not leave your loved ones and guests indifferent. The icing prepared according to the recipe below is enough to decorate 1 kg of gingerbread or a medium-sized cake. The baked goods will immediately become original, appetizing and festive.
Ingredients:
- powdered sugar – 150 g;
- lemon juice – 1 tsp;
- chicken egg – 1 pc.
Cooking method:
- Take the egg. Separate the white from the yolk. Even a drop of yolk will spoil the protein cream, so you will have to take another egg if the procedure is not successful the first time.
- Beat the egg white with a mixer, blender or whisk until smooth.
- Sift the powdered sugar through a sieve.
- Add powder to the protein in small portions, without stopping whisking the mass.
- Pour in lemon juice to give the mixture a glossy shine.
- Use ready-made glaze to decorate baked goods.
Secrets of perfect ice paste
- Kitchen cleaned to a shine. The smallest specks of dust that fall into the bowl can ruin the appearance of the product and the finished cake.
- Adding lemon juice to the recipe. The acid strengthens the albumin in fresh egg whites. The main thing is not to overdo the dose, otherwise the glaze will turn out brittle and rough.
- Step by step introduction of powdered sugar into the mixture. By pouring and mixing the sweetness in small portions, you can precisely control the texture, which in the end should be airy and glossy.
- Proper storage. You can protect the mousse from drying out by overfilling and filling a tightly closed container to the top or wrapping it in damp film.
Icing at home recipe
Icing is a mixture for making decorations for confectionery products, as well as for drawing patterns on gingerbread and cookies. In the classic version, icing is made from protein and powdered sugar with the addition of lemon juice. This mixture is most often used for drawing or creating fragile patterns. To prepare flexible icing or sweet “lace”, more complex combinations are used.
We will consider both options for preparing icing in our recipes.
Cookie icing - homemade recipe
- white of one egg;
- lemon juice – 5-10 ml;
- powdered sugar – 150-160 g;
- food coloring (if desired).
To prepare the icing we will use raw egg white. Therefore, before breaking an egg, wash the shell thoroughly with soap. Separating the white from the yolk, place it in a bowl, add lemon juice and beat until smooth with a fork or whisk, but do not beat. We are not faced with the task of obtaining an airy protein mass, otherwise the icing will be saturated with air bubbles, which will negatively affect its quality.
Add powdered sugar to the mixture of protein and lemon juice and stir well. If there is a need to get multi-colored icing, then divide the white mass into the required number of parts, add food coloring to each and mix until an even color is obtained.
Now we put the mixture into pastry bags and start drawing.
The prepared mixture in its pure form is used to draw dots, stripes and patterns. If you want to fill the surface of the cookies with icing, then first draw an outline with it, and then dilute a small portion of it with a few drops of boiled water to get a mixture that spreads easily over the surface. We fill certain outlined parts of the cookies with it and let them dry completely.
You can also make various three-dimensional shapes or patterns from this icing and then use them to decorate cakes. To do this, we use printed stencils, placing them in a stationery file, on which we draw patterns, repeating their contours on the stencil, and then, after complete drying, carefully remove them.
You can also make incredibly impressive icing balls. To do this, apply the mixture to the oiled surface of an inflated balloon of the desired size, let it dry completely, and then gently gradually deflate the ball and remove it from the resulting icing sphere.
How to make flexible icing at home with your own hands?
To prepare flexible icing at home, you will need a special mat, some skills in handling it, and several less common components that can be ordered from specialized online stores.
- corn or potato starch – 20 g;
- fructose – 20 g;
- citrus pectin – 1 teaspoon;
- invert syrup – 1 teaspoon;
- food glycerin – 1 teaspoon;
- polysorbate-80 (E433) – 2-3 drops;
- white dye - titanium dioxide (E171) - 0.25 teaspoons;
- water – 50 ml.
Initially, combine starch, fructose, pectin, white dye and mix well. Pour fifty milliliters of water at room temperature into a bowl, pour the dry base into it, stir and let stand for thirty minutes. After the time has passed, mix the mass, add invert syrup to it and stir again. Combine food glycerin and polysorbate-80 in a tablespoon, pour into a common container and mix again.
Spread the resulting mixture onto a flexible icing mat and place it in an oven preheated to one hundred degrees for ten minutes. Then we remove the mat, let it cool for ten minutes and carefully remove the resulting flexible pattern, carefully separating it gradually from the mat.
The resulting flexible icing can be used to decorate cakes by layering it on top of fondant or icing, or shaping it into desired decorations.
Flexible icing or, as it is also called, Sugarvale, can be prepared from a ready-made mixture, which is available for sale in specialized stores, but the cost of such decoration is much higher than that prepared from a homemade mixture.
Now you know what icing is and how to prepare it at home. With a little patience, endurance and, of course, desire, your products decorated with prepared icing will be simply irresistible.
How to make icing at home, recipe
Ingredients:
- Powdered sugar – 200 grams;
- Chicken protein – 1 piece;
- Citric acid – 1 gram (or juice – a couple of drops);
- Dye - optional.
Preparation:
- Place the chicken protein in a clean and dry bowl and add citric acid to it. Beat all these ingredients at the slowest speed for just one minute.
- Afterwards, add finely ground powdered sugar to the chicken protein. It should be almost like dust: if you feel grains of sugar, then consider that such icing will no longer be useful to you. To grind granulated sugar more thoroughly, use a coffee grinder, blender or food processor. If you want the icing to be perfect, use store-bought powdered sugar.
- Beat all the ingredients for several minutes, at high speed, until a mass is formed, as shown in the photo. It is white, elastic and very pleasant to look at: it even looks like toothpaste.
- As soon as you have the icing, put it in a container in which you plan to store it in the future, and cover it with cling film. If you delay and do not do it all at once, you risk ruining our icing: a crust will immediately form on it. Please note that it sets and dries very quickly.
- Already from the mass covered with cling film, we take out the required amount of icing and mix it with the desired colors of dye.
- The icing must be checked for thread: squeeze out a small amount of icing from the cornet onto one finger, and try to pull the thread to the second finger. If the mass is too liquid, then you simply will not be able to do this, as is the case with ordinary drinking water. If a thread forms but breaks, then the powdered sugar is not finely ground enough, and you did not take this into account at the very beginning, when I warned you.
- Now, I’m demonstrating the simplest examples of working with icing. You can apply it to a regular stationery file, under which there is a stencil of the future design. Naturally, in the case of patterns, you will have to create them yourself and “on the spot”. You can also apply icing to a finished silicone stencil, spread the mixture over its surface using a spatula and let it dry.
- The products dry for about two days. If you are afraid that fragile blanks will break, then create a few more pieces. The products can be connected to each other using the same icing.
- These are the beautiful butterflies made from icing:
- Icing works well with different surfaces. For example, on butter or protein-custard cream, it holds just perfectly.
What is icing
The term is translated from English as royal icing. He came to Russia from England, where at the royal court it was customary to decorate cakes with edible flowers and lace. Icing is a mass for decorating confectionery products, which is made on the basis of protein with granulated sugar. According to composition, purpose (contour, modeling, etc.), consistency, it is divided into several types.
Classification of confectionery icing:
- Plastic. This type is used for sculpting figures and creating lace. The composition of icing is similar to confectionery mastic. Work with it using molds and a silicone mat. The finished composition is poured into a mold, dried, and a decorative element is obtained.
- Classic icing is a mass with a more liquid consistency. The glaze has a fragile structure. Apply the mass directly to the confectionery product or use stencils.
Consistency
Depending on what the glaze is intended for, the amount of powdered sugar changes during whipping. Based on density, icing is divided into the following types:
- Consistency of thick sour cream. The mass is prepared with a small amount of powdered sugar, reminiscent of traditional icing for Easter cakes. This type is used for cookies or gingerbreads, the surface of which is filled with a uniform layer. The finished products are distinguished by a perfectly even layer of glaze.
- Soft peaks. If you need to make an inscription, an outline, or draw a picture on a pie or cake, then this type of glaze is ideal. To check readiness, you need to remove the whisk from the whipped mass; the icing should hang in soft peaks that bend slightly when you turn the tool.
- Hard peaks. This glaze is thick. If you remove the whisk from the whipped mass, the icing will follow it and freeze into dense peaks. Icing is used to pipe designs from a piping bag onto a cake or cookie. For flat and three-dimensional figures made using a stencil, this mass is also suitable.
Accessories
You cannot do without auxiliary accessories if you prepare icing. What it is? First of all, a pastry bag. It is impossible to work with classic royal icing of any density by hand, so you cannot do without a pastry bag or syringe. Using various nozzles, you can create beautiful patterns, but more often the glaze is drawn in straight lines. Real helpers will be icing pencils, which act like a syringe, but with their help you create especially thin lines.
Stencils, silicone mats and molds help create complex patterned decorations that are difficult to make by hand. You can apply the pattern or its details on plain baking paper, after first placing the drawn outlines of the future product under it.
Classic icing recipe
Let's move on to the practical part of our master class and prepare icing for gingerbread cookies. The recipe is quite simple, the main thing is to make the glaze correctly. And so that the icing turns out perfectly, as they say, we will prepare the powdered sugar ourselves in advance. To do this, you need to grind granulated sugar in a coffee grinder.
Compound:
- 250 g powdered sugar;
- 1 egg white;
- confectionery dyes.
Preparation:
- The powder has been prepared, now we need to sift it to get rid of lumps.
- Separate the white from the yolk in a convenient way and combine it with powdered sugar.
- Without being lazy, thoroughly knead the resulting mass. We need thick icing. You can check its consistency in this way: run a spoon over the surface of the glaze, and if the line that appears disappears after about ten seconds, it means we did everything right.
- Transfer the resulting mass into a bag and tie it. You can use a pastry syringe.
- Carefully cut the corner of the bag.
- Now, perhaps, the most difficult stage - we need to outline the outline of the gingerbread cookies with icing. We perform this action slowly. Then leave the gingerbread for the icing to dry.
- To cover the gingerbread cookies completely with icing, we need to slightly dilute it with purified water. Let's check the correct consistency of the glaze in a way we already know, but only this time the line should disappear in about four seconds.
- Cover the gingerbread cookies with glaze using a thin brush.
- Let's decorate the gingerbread cookies with a simple design. To do this, prepare a dye of the selected color and, dipping a brush into it, mix it with the glaze. Now we apply dots in a chaotic order on the surface of the gingerbread cookies.
- We leave our gingerbread cookies until the glaze completely hardens. This is the beauty we got.
- Once you master the technique of working with icing, you will be able to create more intricate designs.
https://youtube.com/watch?v=5sOkOMxdFas
Tip 5: Choose the right container
Many people are interested in how to choose a bag in which to place icing for drawing. Of course, ideally it is better to use a pastry syringe, but since not every housewife has one, you have to make a bag for icing from scrap materials. It is best to use a thick bag or roll up a bag of thick paper - the main thing is that it is elastic enough and does not bend in your hands when squeezing out the mass. It is better to make the hole in the bag smaller.
Flexible icing decoration: photo ideas
flexible cake icing
lace icing
decorating a cake with flexible icing
Decorating the side surfaces of a cake or creating intricate shapes requires that the icing should be sufficiently plastic, viscous, and not crumble during assembly. To create such a drawing mass, a more complex recipe is used.
Ingredients:
- boiling water – 60 milliliters.
- tylose (cellulose ester used in mastics and other decorations) - 1 tablespoon;
- powdered sugar – 1 tablespoon;
- dry proteins – 0.5 teaspoon;
- corn starch - 2 teaspoons;
- corn syrup - 0.5 teaspoon.
Cooking process:
- Beat the tylose with water using a mixer.
- Add powder, then starch, proteins and finally syrup. Stir before adding each new component.
- Beat all the ingredients together for 4 minutes.
- Store away from air icing unless you use it immediately.
- The resulting plastic mass can be used to prepare flexible lace: a silicone mold with recesses for the lace is slightly greased with odorless oil, icing is laid out, and the excess is cleaned off with a scraper or just a wide knife. The molds are then left in the air to harden at least overnight.
- The lace turns out not to crumble, is plastic and can be laid out on the side surfaces of the cake with sticky icing or jam, and flowers can also be formed from such lace.
Decorating sweets
Decorating cakes and other baked goods is very diverse. Since ancient times, they have been decorated with various creams, fruits, chocolate chips, nuts and coconut flakes. A more complex option is to fill it with jelly, cover it with fudge sugar, and chocolate glaze (ganache). Foreign ideas also came to us: marzipan mass, mastic and icing. These are more complex options for covering baked goods, including a variety of figures and decorative elements. Icing decoration is considered the height of confectionery art. Some masters create masterpieces that simply take your breath away. However, knowing some secrets, every housewife, with a certain skill and a bit of patience, will be able to amaze her guests.
Advice. Don't be afraid to use color
A separate trick is making colored icing. We do not recommend adding food coloring at the stage of preparing the mixture, as this may cause the icing to whip up poorly. A much smarter option is to paint the finished jewelry by hand using a flat brush with natural fibers. To do this, dilute the food coloring in a small amount of water and, lightly dipping the brush until barely damp, begin to carefully paint the surface of the decorations.
To obtain a more saturated shade, first wait until the first layer has dried, and only then start painting again.
An interesting idea is to use a regular spray bottle to spray the diluted dye in the finest dispersion mode.
Finally...
Thus, it is not difficult to make flexible icing, the recipe for which we already know. Using sugar mass you can create not only lace and balls, but also candlesticks, butterflies, snowflakes and more. This requires only stencils, which can easily be found in children's coloring books. Working with stencils is quite simple, you just need to apply ready-made icing on them and then dry it. Large parts can be glued together using the same icing.
Royal icing is the most popular decoration for various confectionery products. With its help, real masterpieces are created. Patterns that seem to be woven from thin lace look delicious on cakes, gingerbread cookies, pastries and cookies. Decorating confectionery products with icing is an interesting activity. This requires only blanks with drawings, a plastic bag, olive oil, egg mass, as well as the desire and imagination of the cook. Undoubtedly, every cook will be able to create his own masterpiece that everyone will like.
Pattern Formation
Then a thick line is drawn along the contour, and then any pattern is made at your discretion. These can be intertwined lines, squares, ovals, etc. The finished icing is left to dry for one night. Then they begin to carefully remove it so as not to break or crush it. Having made two such hearts, they are glued together, the same icing is used for this, and the decorations are set back to dry.
