The classic way to make sponge cake
For 3 servings of biscuit you will need the following amount of ingredients:
- 5 eggs, of which only the whites will be needed.
- 4 tablespoons of powdered sugar.
- 3 tablespoons sugar.
- 4 tablespoons flour.
- A pinch of salt and a packet of vanillin.
- 3 grams of citric acid.
Preparing a biscuit from proteins consists of several stages:
- It is imperative to sift the flour and powdered sugar to enrich the bulk components with oxygen. Combine powder and flour in one container.
- Carefully separate the whites from the yolks. Place the whites in a glass container that contains no water or other ingredients. Add salt.
- You need to beat the whites with a mixer until a strong foam appears. This will take up to 7 minutes.
- When the beating is complete, you need to add sugar, citric acid and vanilla sugar to the foam.
- After adding the sweet ingredients, continue beating. The secondary procedure will take 10-15 minutes.
- Gradually add a mixture of flour and powder into the protein mixture. Mix the ingredients with a spoon, moving from the bottom of the container to the top.
Next is the baking process.
Maria Belaya's blog
Hi all. Today I will share with you a recipe for an absolutely amazing sponge cake. It is prepared using proteins, so it has an unusually delicate texture and white color. That's why they called him Angelic.
This biscuit came to us from America. I’ve had my eye on it for a long time, but there are a couple of nuances when preparing it that stopped me. Firstly, it is better to bake this sponge cake in a small form, or even better in a rectangular or muffin form with a hole in the middle. The dough is very tender, and the middle may fall off if it has nothing to cling to. Well, secondly, I always have the problem of what to do with the remaining yolks after meringue or this kind of biscuits.
And finally, I got to the Frezier cake. What is this cake?! This is a sponge cake with soaking, strawberries on the edge, and custard inside. Well, since custard is best prepared with yolks, I decided to combine these two recipes in order to get the most delicate dessert in the end.
As a lover of waste-free production, I always try to adapt my recipes as much as possible. If I make Pavlova, I immediately add lemon curd to it; if I dry meringue, I make homemade mayonnaise. Here is my version of Frezier - without loss.
So, how to make angel sponge cake with squirrels at home, step by step recipe with photos.
Ingredients:
- 6 first grade proteins (or 5 selected)
- 65 grams flour
- 130 grams of powdered sugar
- a pinch of salt
- vanilla sugar (optional)
- lemon juice
Preparation:
The most important thing in this recipe is to prepare the meringue correctly. In order to get your egg whites whipped, there are a couple of rules.
Firstly, the whites must be fresh, at room temperature, without a drop of yolks! Otherwise, they may not fluff up.
Secondly, squirrels are afraid of water and fat. Therefore, dishes and whisks must be dry and before use they must be degreased by wiping their surface with lemon juice or vinegar.
Thirdly, it is better to use powdered sugar in your work, because the sugar may not dissolve. As a last resort, use fine sugar.
You should bake only in metal forms; silicone ones are not suitable here. The biscuit clings to the walls during baking, and during the cooling process it hangs upside down, so in this case we put the silicone aside.
You need to cook in a mold no larger than 18-20 cm in volume, if you have a regular round mold, and not for cupcakes with a hole, as in the picture. In this one, you can safely prepare this biscuit in larger quantities.
Let's start preparing the sponge cake from the proteins.
Wipe the bowl and whisks with lemon juice or vinegar.
We place our whites there with a pinch of salt.
We start beating at low speed, gradually increasing the speed.
As soon as the whites have increased well in volume and a good foam has appeared, we begin to introduce our powder.
This should be done gradually, adding powder one spoon at a time, without ceasing to beat. We also add vanilla sugar (vanillin). If the powder has lumps, then it must first be sifted.
The most important thing here is not to overbeat the whites. We don't need hard peaks like we do when making meringue. As soon as clear traces of the whisk remain on the surface, stop.
Whipped whites should keep their shape, but not yet have a sharp beak, that is, if you scoop up some of the whites with a whisk and lift it up, the whites will fall to the side. If you beat the whites to elastic peaks, the sponge cake will turn out as hard as rubber.
While the whites are whipping, we need to sift the flour.
We introduce our sifted flour into the whipped whites, and carefully mix it with a silicone spatula using movements from bottom to top.
This must be done confidently, and as quickly as possible, so that our proteins do not settle and retain all their airiness.
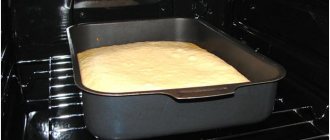
Pour our dough into the mold. We do not lubricate the form with anything! This is important, the dough needs to cling to the sides, otherwise it will not rise. I used a split ring for baking, with a diameter of just over 18 cm. I simply wrapped the bottom with foil. It’s better to knock the mold on the table a couple of times so that excess air comes out and there are no large bubbles left in the dough.
Place the biscuit to bake in a preheated oven at 180º for 30-35 minutes.
Do not open the oven for the first 20 minutes! Starting from 25 minutes, check with a skewer, as soon as it comes out dry, take it out. The finished biscuit should spring back. Attention, when baking, the biscuit will first rise and then settle to the level at which it was originally. So don't be scared!
Now the most important thing is to cool it properly. To do this, put 2-3 glasses or jars on the table. And on top of them we turn our form over. This is how our biscuit should cool completely.
As it cools, it will settle a little and move away from the walls of the mold. All you have to do is walk a little along the edges with a knife and release it. Since I have a ring, there are no problems with removing the biscuit; if the oven is in a one-piece mold, then knock the mold on the table a couple of times, the biscuit should come out of the mold on its own. This biscuit can be immediately used in preparing desserts; it does not need to be wrapped in film and placed in the refrigerator to ripen.
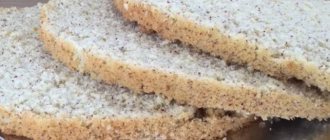
Just look at the structure of the biscuit on the whites. Very porous inside, with a thin crust on the outside (about mm), it looks like white sliced bread. I didn’t notice any egg smell, which made me very happy. The height turned out to be about 4 cm, which was just the ideal for me for 2 layers in a cake.
Yes, this biscuit is a little capricious. And it is not suitable for everyday cooking, until I change my favorite vanilla sponge cake in boiling water.
But it definitely has its advantages. He is incredibly gentle! If you soak it in syrup (or better yet, my favorite soak - 3 milk), make a layer of fruit and pour whipped cream on top - you will get something completely unreal. I would even advise you to go this route. You can make portioned desserts with this biscuit - trifles. Or simply serve in a mold, soaked in syrup, topped with berry sauce (raspberry or something sour is best) and garnished with whipped cream. The only thing I want to add. The biscuit itself is sweet, so adjust the amount of sugar in the cream.
This angelic biscuit ended up in my cake, this is what it looked like there.
Still, it’s not for nothing that this biscuit is called the food of angels. I'm sure you'll definitely like it.
This is a great option for recycling leftover proteins! If you also have questions about where to put the whites, then this recipe is perfect!
Frezier published the recipe for the cake itself, it is available here.
Bon appetit.
Secrets of baking protein biscuit
Biscuit is a very delicate and sensitive type of baked goods. A protein sponge cake requires careful handling of each ingredient. Then the dough will turn out tender and airy. But in addition to the correct preparation of the dough, you also need to perform the baking itself efficiently.
To ensure that the biscuit does not fall, does not burn and is baked well, you need to know just a few basic secrets regarding the baking process:
If you take into account all the nuances, the cake will turn out high and uniform in height.
Angel biscuit - a recipe for a delicious American dessert
Hello my dear readers! Here is Easter week in full bloom! I know that many of you baked excellent Easter cakes using pure yolks. What to do with so much protein left over after baking Easter cakes in the spring or making homemade ice cream in the summer? There are several options. Today I will talk about the second of these (the first method is to make Swiss meringue). Proteins can be “recycled” by preparing Angel’s biscuit or Angel’s food cake, as the Americans call it.
Source
This biscuit is very different from its “brothers”, both in taste and texture. It is porous, dense, does not grow during baking, but retains its original shape. Moreover, the shape is maintained equally well by both raw and prepared biscuits. Americans most often bake angel sponge cake in a special round mold with a tube in the middle. But this is optional. It can be baked in a regular springform pan or cake pan.
Having prepared this dessert for the first time, you will certainly eat it “just like that” - with compote, tea or coffee, without turning the cute cake into a cake or other dessert. Its taste is so “texture” that you will want to try and taste it again and again. Until you eat it all.
Only then will you want to try combining it with your favorite creams. I warn you right away that it is best to “marry” it with a light, low-fat filling with a bright taste and aroma - coffee custard, for example.
Making angel cake is quite simple. You just need to follow some rules and everything will work out for you!
A fluffy sponge cake based on separating the whites from the yolks
Everyone knows the recipe for “yolk from white” biscuits, but not many understand why such manipulations should be done. Therefore, housewives make the same mistake, not separating the yolks and whites. Additionally, the yolks are also introduced into the semi-finished dough.
Professional bakers claim that this principle of preparing sponge cakes is completely wrong, because:
Additionally, it is recommended to start direct baking approximately 15 minutes after preparing the dough, so that air bubbles in the foam of the proteins can form in large quantities.
Protein cream for protein biscuit
Those who know how to cook “angel food” claim that the resulting sponge cake without creams, impregnations or additives has an ideal taste. The ideal option for a biscuit made with proteins is protein cream. It is not necessary to have a recipe with a photo of a sponge cake with protein cream, since preparing such an addition is very simple. Needed:
Next, there will only be technical aspects that need to be completed with no less quality.
Classic sponge cake for cakes according to GOST for 4 eggs
In Soviet times, it was not for nothing that GOST standards were introduced, according to which all, even confectionery, products were made strictly according to proven recipes and in accordance with step-by-step technology.
And even now we can say with confidence that this dessert, prepared according to GOST, is the most tender, fluffy, at the same time quite elastic, not crumbling, with a porous, uniform crumb structure and a gorgeous light brown thin crust. That is, ideal for preparing various cakes.
It is quite easy and simple to prepare it at home. The only thing is that flour in production is specially mixed from different varieties and manufacturers to make the gluten more viscous. We are unlikely to resort to such a technique at home. Therefore, experienced cooks still recommend adding 20 grams of starch to 100 grams of flour.
We will need:
- Fresh chicken egg – 4 pcs.
- Granulated sugar, premium flour - 120 g each.
- Butter - for greasing the mold.
Preparation:
1. Melt a small piece of butter and use a pastry brush to grease the inside of the baking dish. Lightly powder the sides and bottom to make it easier to remove the finished cake - this way it will not stick to the surface of the container.
2. Set the oven regulator to 200 degrees and while it is warming up, begin kneading the most delicate dough. To do this, be sure to sift premium flour through a sieve a couple of times. This way it will be filled with the necessary oxygen, will not form lumps, and at the same time, excess debris will be removed (if any).
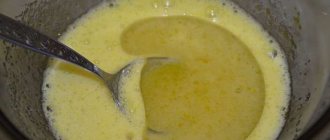
3. Using a special tool, or by pouring into shells, separate the whites from the yolks. Place them in different deep cups. Add 80 grams of granulated sugar to the yellow liquid rounds and beat with a mixer until the sweet grains are completely dissolved. At the same time, the yolk mass will become thicker and lighter - that’s how it should be!
4. Using a clean, dry mixer whisk, beat the whites until a thick consistency appears. Then add the remaining granulated sugar and work again with the attachments at medium speed so that the stable peaks acquire greater density and gloss.
5. Using a spatula, transfer the protein mass into the yolk mass and combine them with mixing movements from bottom to top until a homogeneous consistency. Continuing to vigorously stir from the edges into the center of the bowl, add the previously sifted flour.
In this case, it is advisable to constantly turn the bowl in which we make the dough clockwise. This way you can combine all three ingredients into a single, soft dough faster and more evenly.
6. Pour the finished airy dough into an already prepared baking pan. Immediately place it and its contents in a hot oven. Simmer in it for about 25 minutes until the dough doubles in volume and the baked goods appear beautifully light brown.
After this time, gradually opening the door slightly so that the baked goods do not fall due to a sudden wave of cold air, use a match to check the readiness of the dough.
7. Our handsome man is already ready. All that remains is to take it out onto the kitchen table and let it cool for 10 minutes right in the mold. The sides will have time to cool down and the hot biscuit itself will slightly “lag behind” them, so it will be quite easy to run a knife between the sides and the cake.
To avoid damaging the baked goods when removing them, it is advisable to carefully turn the top part onto the wire rack.
That's all, all that remains is for the product to cool completely and rest for at least half a day, so that you can then beautifully cut the fluffy soft crumb and then work with the airy cakes: soak them or decorate them with creams.
How to make the perfect protein cream
You can get a high-quality protein cream from the presented ingredients in 10 minutes. The mass should be exceptionally airy so that the protein sponge cake combines well with the cream.
Features of preparing the cream:
When the cream has already been applied to the cake, you need to put the finished confectionery product in a hot oven. Heat treatment preserves the texture of the cream.
What else can you cook with leftover whites?
It seems that if you have at least a few extra proteins, you don't have to worry about the menu. You can make many incredibly delicious dishes from proteins. For example, Tum garlic sauce, a protein omelet that fits perfectly into almost any diet or is suitable for baby food. There are also batter recipes for meat and fish or a cocktail for those who want to get in good shape. The classic is protein cream. Who among us has not prepared it to fill straws, eclairs or to decorate cakes? We have repeatedly baked the most beloved meringues by us and our children using French meringue. Protein-butter cream is another frequent guest in our kitchen. It holds its shape perfectly, is stable, light, almost airy, it is beautifully colored, delicate, even without flavoring additives, which is why it is widely used by confectioners to create simply fabulous decorations. We all know well how to prepare these two versions of the cream. And we are happy to diversify them by adding ingredients such as cocoa, cream, condensed milk, cottage cheese or even fruit. But I’ll share the mousse recipe. You know, I only appreciated my mother’s favorite candies when I made Bird’s Milk myself.
For candies we will take:
- Proteins – 2 pcs.;
- Powdered sugar - 4 tbsp;
- Gelatin – 2 tbsp;
- Water – 100 ml;
- Milk (cream) – 50 ml;
- Chocolate – 50 gr;
- Nuts (any) – 50 g;
- Salt - a pinch.
Let's prepare the most delicate and elegant sweets in their simplicity:
- Let the gelatin swell in cold water in advance.
- After 10 minutes, put the gelatin on low heat. Our goal is to warm it up so that the gelatin completely dissolves. After this, leave it alone so that the gelatin cools. And we make the cream ourselves.
- Beat the whites with salt.
- Gradually add powder. Take your time, thoroughly stir each portion until smooth.
- When the foam becomes fluffy enough, without stopping whisking, pour in the gelatin in a thin stream.
- We should have a stable mass. We fill out the form with it. You can pour it into separate molds. But I prefer the classic candy shape. So I pour the whole mass onto a baking sheet. I let it cool and then cut it into rectangular portions.
- Before cutting, I put it in the refrigerator for a short time (to be sure). And after I divided the mousse into parts, I returned my sweets to the cold again.
- While the base of the dessert is getting ready, let's prepare the chocolate glaze. Personally, this activity is a great distraction from tasting sweets))) Melt the chocolate in the bathhouse.
- Add cream to chocolate.
- Pour glaze over the finished sweets and sprinkle them with crushed or chopped nuts.
I kept talking about candy. But in fact, the mousse can become a layer in the cake, or serve as an independent dish. Choose options for yourself, try the mousse in different roles. Another dish that I would like to remind you of is pastila. In fact, it is berry, fruit or fruit and berry puree. It requires very little protein, but it can’t be done without protein. This delicacy will diversify our menu, it will especially come in handy if you are preparing for a children's party.
Features of preparing chocolate angel sponge cake
Children and many adults love chocolate. This also applies to confectionery versions of dessert. An ideal option for those with a sweet tooth would be a chocolate protein sponge cake.
For preparation, you can use a standard recipe and set of products. The only difference will be the step of introducing cocoa powder into the proteins. You need to take 2 tablespoons of flour and 2 tablespoons of cocoa. Mix these ingredients and add to the beaten egg whites.
To ensure that the sponge cake does not sag and turns out airy, you need to sift cocoa, flour, and powdered sugar before adding to the whites. You should not completely replace cocoa flour, as the dough will turn out bitter and may not rise at all. There is no need to increase the amount of sugar to improve the taste.
To make the taste of chocolate more vibrant, you can place plaques of confectionery glaze or chocolate chips into the dough before baking.
Biscuit "Angel"
The biscuit is beyond praise. The top crust resembles a fragile meringue, the crumb is so tender that you don’t notice when you’ve already bitten into it, and your mouth is filled with a delicious sponge cake. It can be prepared as a separate sponge cake and enjoyed with tea, covering a piece with your favorite jam, or as a sponge cake layer.
About the name: it comes from a classic sponge cake where no cocoa was added - the white cut of such a cake looked like angel wings. To make sure of this, simply replace the cocoa with an equal amount of wheat flour.
Ingredients:
For the sponge cake: 400 g proteins (about 12-13 pieces) 400 g sugar 1 packet of baking powder 150 g flour 60 g cocoa 1.5 tsp. vanilla extract pinch of salt 1 tsp. citric acid
For the layer: 1 jar of Nutella or any homemade jam
For glaze: 5-8 tbsp. cocoa 50 gr. butter 100 ml. cream 3-4 tbsp. Sahara
Preparation:
Preheat the oven to 190C. Grease the mold with butter and lightly sprinkle with flour. Sift flour and cocoa. Better several times. Mix with baking powder.
Beat the whites with the addition of cream of tartar or citric acid with a mixer at high speed until soft peaks form. Citric acid is needed to maintain the fluffiness of whipped egg whites.
Then add vanilla and salt. Continue beating, adding 2 tablespoons of sugar at a time. Beat until stiff peaks form.
Add the flour mixture to the beaten egg whites and mix gently until the flour is dispersed into the whites. Don’t be too zealous, otherwise the whites will settle. Mix, ideally, with a silicone spatula, from bottom to top.
In my photo you can see that there are small white gaps left, that's okay. The fluffiness of the proteins is more valuable, rather than total uniformity (this will also be slightly noticeable in the cut of the finished biscuit).
Place the dough carefully into the mold.
And bake in the oven for 30-35 minutes without opening the door!
It will come out of the mold very easily. And you will also be very surprised at how weightless it is, like a cloud.
Now cut it lengthwise into two halves. Notice how loose and tender the dough is when cut.
We grease one half with either jam or Nutella, as in my case.
Cover with the second half.
Boil the cream, add butter, cocoa, sugar. Cook until thickened.
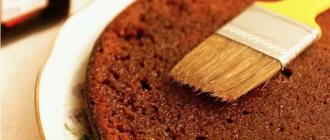
Pour the resulting glaze over the biscuit while it is still warm and decorate as desired.
Berry sponge cake with squirrels
Although this type of airy dough is popular, over time the dessert becomes boring. A sponge cake made from egg whites can be significantly diversified by adding a new flavor to the standard base. The ideal option would be berries that have an elastic texture without increased juice secretion.
It is worth preparing the following set of products:
- Half a glass of sugar.
- 6 proteins.
- A pinch of salt.
- A pinch of citric acid.
- A glass of berries.
- 60 grams of flour.
Suitable for dough: raspberries, red or black currants, blueberries, cherries.
Angel sponge cake - egg white sponge cake recipe
Ingredients
- 6 proteins.
- 160 g sugar.
- A third of a teaspoon of citric acid.
- A pinch of salt.
- 20 g vanilla sugar.
- 80 g flour.
How to cook
- Pour the whites into a bowl, previously wiped with vinegar or vodka (to degrease), and a pinch of salt.
Source
Beat until stable foam appears, add citric acid. Gradually beat, adding sugar with vanilla sugar, until a fluffy glossy mass is obtained. The peaks should be soft, not hard, as for any meringue. The best way to add sugar is to first add a quarter, beat, then another quarter, and so on until the sugar is gone. The mass should be tender, elastic, not runny, and not fall out of the bowl when turned over.
Source Add the flour in two additions, mixing gently, using bottom-up movements.
Source Pour the prepared biscuit dough into a mold, the bottom of which is greased with oil or lined with silicone baking paper (grease and cover only the bottom!). Tap it on the table a couple of times (this will release excess air and prevent huge bubbles from forming during baking).
Source
- Bake at 180°C for approximately 30 minutes.
- Remove the finished biscuit from the oven, turn the pan over onto a wire rack or bowl, as in the photo. We determine readiness first of all visually - the top should acquire a dark golden hue. Then we check with a splinter - it should come out dry from the baked biscuit. Cool “upside down” on a wire rack or in a large cup.
Source Separate the cake from the walls using a knife, again hit the pan several times on the table, remove from the pan - that’s what it is - an “angel food” sponge cake! Here - in a rectangular muffin tin.
Source - And here is a beautiful one, baked in a special form.
The principle of making angel sponge cake with berries
A sponge cake with whipped egg whites and berries is prepared according to the following algorithm:
You can start baking. The resulting cake can be used as a finished dessert, lightly sprinkled with powdered sugar.
"Angel" biscuit. The “angel” sponge cake turns out to be very tender, light and incredibly tasty.
It first appeared in the USA at the end of the 19th century and, thanks to its airy texture, the biscuit received a unique reputation and its name is equated to angel food.
The uniqueness of this pie lies in the fact that it is made only from egg whites. Thanks to its delicate texture, the biscuit is more reminiscent of dessert than zdoba. For decoration, choose any wild berries or fruits and top with whipped cream. For baking you will need a muffin tin with a tube in the middle.
Place the baking tray on the middle level. Preheat the oven to 185 degrees before baking. Egg whites must be chilled.
Ingredients:
140 gr. flour. 12 pcs. egg white. 2 cups sugar. 1 tbsp. l. vanilla essence. 2 tbsp. l. lemon juice. 1 gr. salt. Figs to taste. Blueberry to taste. Blackberry to taste. 2 tbsp. l. lemon syrup. 170 gr. cream
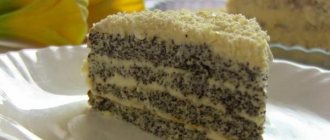
If you love sweets, if you want to show off your culinary talents and amaze your guests, prepare an “Angel” cake! https://shkola-krasoty.com/stati/angelskiy-tort-s-makom
1 dough. Sift the flour and set it aside for a while. In a separate bowl, whisk together egg whites, sugar and vanilla essence. Beat the resulting mixture at low mixer speed for a minute. Then turn the mixer to medium speed and beat for another 3 minutes. As a result, the whites should become dense and dark. Then, with the mixer running, add lemon juice and salt. Beat for another 3 minutes at medium mixer speed. You should get a not thick, but foamy protein mass.
Continue beating until you get a glossy white white with a fairly firm texture so that the whisk mark remains visible. This will take 2 to 4 minutes, depending on the speed of your mixer and the freshness of the eggs.
Then gradually add flour to the bowl and start kneading the dough with a spatula. Gently scrape down the sides and bottom of the bowl. Break up any lumps of flour.
2 baking. Pour the resulting dough into a mold with a diameter of 25 cm. Place the cake in the oven to bake for 45 minutes.
As a result, you should have a tall, golden-brown cake.
Turn the finished cake over and cool for about two hours.
3rd serve. Once the biscuit has cooled, carefully remove from the pan.
Place the pie on a serving platter and garnish with your favorite fruit.
The combination would be great with blueberries, blackberries and pieces of figs. Top with lemon syrup and top with whipped cream. Enjoy!