Honey cake
Cake
How to decorate “Honey cake” - 6 options for decorating a cake at home
Honey cake
Cake
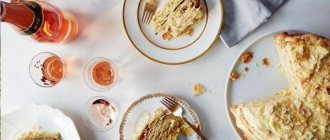
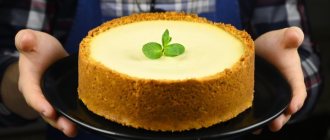
“Medovik” does not need advertising; it has long won the hearts of millions of sweet tooths and has taken its rightful place among the classic representatives of the confectionery world. A heady honey aroma, melt-in-your-mouth cakes, delicate cream, crispy nut crumbs harmoniously complement each other. The cake has, perhaps, only one drawback - its overly modest appearance, which cannot always emphasize the solemnity and significance of the event being celebrated. That is why we have collected the most successful ideas that inspire and suggest how to decorate the “Honey Cake” so that it becomes the “highlight” of the holiday table.
Important! First, you should level the surface of the cake using cream, mastic or glaze.
How to decorate “Honey cake” with fruits
Idea No. 1 is simple, but at the same time juicy, bright and fortified - to decorate baked goods with fruit.
We will need:
- seasonal or canned fruits ( give preference to peach, orange, mango, pear, apple, kiwi, banana, grapes, pineapple; avoid using persimmon, melon, lime, and other excessively “watery” fruits for decoration);
- cake jelly - for filling a fruit composition or lubricating its individual elements to give them a glossy shine - a “dew effect”.
Decorating a cake with gifts from gardens at home is quite simple.
The following are 5 interesting ideas that you can safely adopt:
- "Wreath." An assortment of slices of your favorite fruit is laid out along the edges of the baked goods; the central part remains covered with snow-white cream, beautifully contrasting with the bright fruits.
- "Rainbow". The surface of the cake is divided into equal sectors, each of which is covered with multi-colored fruit cubes. For example, red is from strawberries, orange is from orange, yellow is from pineapple, etc.
- Fruit roses. To make them, you will first need to boil slices of apples, pears or orange zest in sugar syrup until elastic, then roll them into “rosettes” and secure them in a random pattern on the dessert.
- Minimalism. Along the edges lay caramelized heavenly apples, cocktail cherries or small tangerines cut in half. The ensemble is complemented with several sprigs of mint.
- "Glade". The top part of the baked goods is completely covered with fruit (for example, grape halves, peach slices, assorted patterns), then filled with transparent jelly.
For housewives who love to surprise guests with their culinary talents, we recommend carving – artistic cutting of fruit – as a decoration for “Medovik”. With its help, a simply beautiful birthday cake will turn into a real work of confectionery art.
In fact, you can make anything from fruits: figurines of fairy-tale characters or animals, hearts, geometric shapes - it all depends on the event for which the dessert is baked, as well as the flight of your imagination.
Description of preparation:
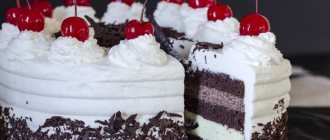
This cake is worth making for your holiday table: believe me, everyone will love it!
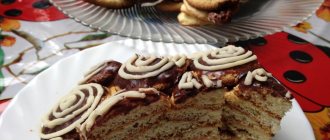
Slightly sour cherries combined with delicate honey cakes and sweet cream create a real masterpiece of baking. This cake tastes much better the second day after making it, so it's best to make it ahead of time. You can use fresh cherries, but they will first need to be rid of excess juice. Below you will learn how to make Honeycomb Cake. Purpose: For children / Afternoon snack / Afternoon snack / For dessert / For a festive table / Birthday Main ingredient: Cherries / Berries / Dairy products / Flour / Sour cream / Honey Dish: Pastries / Cakes / Filled dishes / Sweets
Decorating a cake with cream
Idea No. 2 – delicate, light, airy cream. This is a beautiful and fairly quick decoration for Medovik.
This decor:
- holds its shape perfectly: does not settle, does not spread;
- allows you to experiment: write congratulatory inscriptions, make borders, openwork patterns, reliefs, lush roses, daisies or lilies, waves, zigzags, and other amazing shapes;
- can be made in any color variation using food coloring.
Choose the cream according to your taste and budget: butter, protein, whipped cream, marshmallow, cream cheese (cream cheese). Any of them will look impressive.
You will also need:
- to make openwork reliefs, flowers and other artistic compositions - a pastry syringe with various attachments or a cornet (a sheet of parchment rolled into a ball with a cut off tip);
- for decoration using rough strokes (chaotic or made in one direction) - a spatula/silicone spatula.
Ingredients:
- Wheat flour - 430 grams
- Sugar - 480 grams (150 g - in cakes, 150 g - in cream, 180 g - in glaze)
- Honey – 100 grams
- Butter – 100 grams
- Soda – 2 Grams
- Baking powder - 4 grams
- Canned cherries - 800 grams (or fresh)
- Sour cream 30% fat – 700 grams
- Vanilla sugar – 10 grams
- Cocoa powder – 60 grams
- Cream 20% fat - 160 grams
- Water - 120 Milliliters (80 ml - for glaze, 40 ml - for soaking gelatin)
- Gelatin – 8 grams
- Chicken egg - 3 pieces
Number of servings: 7-9
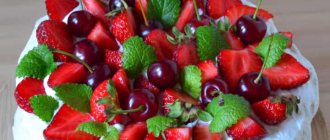
Using berries
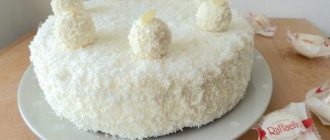
Idea No. 3, which modern confectioners consider the best decoration for a cake, is fresh berries. Original, juicy, incredibly aromatic, appetizing decor takes a minimum of time and effort, and the ingredients for it in modern megacities are available all year round.
To decorate the “Medovik”, both a scattering of assorted berries and individual berries are used.
The decor can be placed on the cake:
- in the form of a wreath, month;
- scattered over the entire surface - a popular combination of blueberries, red currants, raspberries;
- exclusively in the central part, for example, decorate it with strawberries with tails.
A handful of berries “pouring out” from a sugar cone will look impressive. An elegant solution is fruits neatly laid out and filled with jelly. You can also dip them in melted chocolate, sprinkle with cinnamon or powdered sugar, add coconut flakes, nuts, and sprigs of “greens” - mint, rosemary, eucalyptus.
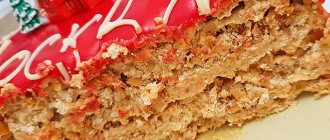
Distinctive features of the cake
All components combine perfectly with each other. Sour cherries, airy honey biscuits and the most delicate sour cream complement each other in an amazing way and make the taste of the cake incredibly delicious.
The uniqueness of this cake is that it is much tastier and more tender a day after it is prepared, which is why it is recommended to prepare it in advance. To prepare this honey cake you need cherries. You can use berries in any form: fresh, frozen, canned.
Ingredients
Products needed to make the cake:
- 430 gr. flour;
- 480 gr. Sahara;
- 100 gr. honey;
- 100 gr. sl. oils;
- 2 gr. soda;
- 4 gr. baking powder;
- 800 gr. cherries;
- 700 gr. thick, fresh, fatty sour cream;
- 10 gr. vanilla sugar;
- 60 gr. cocoa powder;
- 160 gr. thick, heavy cream;
- 120 ml water;
- 8 gr. gelatin;
- 3 large chicken eggs.
Cake making technology
Step by step process:
- Take a deep bowl, mix 150 grams of sugar and chicken eggs in it, beat everything thoroughly until a thick, homogeneous mass is obtained. To do this, you can use a blender, mixer, or a regular whisk.
- Add honey to the egg mixture. Mix the mass well.
- Sift the wheat flour through a fine sieve. Combine a small amount of flour with baking powder and gradually, in a thin stream, pour into the egg mass and mix thoroughly.
- Cook the resulting mixture over low heat, stirring occasionally, and cook for a quarter of an hour.
- Gradually add baking soda to the hot mixture and mix thoroughly.
- Next, you need to add softened butter to the dough. Mix all ingredients well again.
- Gradually add the remaining flour to the mixture and knead the dough. Wrap the finished dough in cling film and send it to the cold. The dough should cool for at least an hour.
- Divide the dough into three equal parts and send to cool again.
- We take out one portion of the dough, roll it into a thin rectangular layer and cut it with a sharp knife into five equal-sized strips.
- Take a strip of dough, place cherries in the middle and seal the edges. We repeat such manipulations with each strip of dough.
- We take a special baking sheet, line its bottom with parchment paper, grease it with butter and lay out the prepared strips of dough in a certain way in the form of a spiral. The best option in this case would be to use a split mold; it is more practical and convenient. It will be much more convenient to remove the finished cakes from it.
- Bake the dough strips for 25 minutes at 190 degrees. The oven should be preheated in advance.
- We take out the mold, carefully remove the side, remove the finished cake, lay it out on a flat surface, and cool. Thus, bake the rest of the dough.
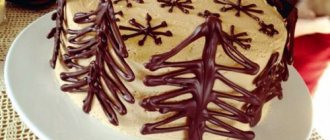
Chocolate pattern
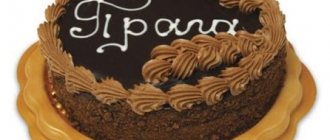
Idea No. 4 will tell you how to decorate the Honey cake with chocolate. This decor looks incredibly elegant and stylish at the same time, and does not require any special pastry skills.
We will need:
- two bars of dark or milk chocolate without any kind of fillings/additives;
- pastry bag with a narrow dispenser;
- sheets of parchment and plain paper with a pre-designed or printed pattern (this item is variable).
Note! The chocolate pattern is applied exclusively to the cream. If you do this with crumbs from the cakes, the decor will constantly slide or even fall off the sides of the baked goods.
Algorithm of actions:
- Melt the chocolate.
- Cool it a little and pour it while warm into a pastry bag.
- Apply patterns (honeycombs, flowers, artistic patterns, congratulatory inscriptions, etc.): on the surface of the cake, then put it in the refrigerator for three hours to harden; on parchment paper (put a printed “ornament” under the bottom), which then needs to be placed in the freezer for 1.5 hours, after which you carefully remove the pattern from it and beautifully place it on the confectionery product.
Decorating with mastic
Mastic is an excellent material for creating a smooth cake surface, three-dimensional shapes, bows, and flowers. An ordinary classic “Honey cake” can be decorated in an original way for a child’s birthday, or for any other holiday.
The process is simple if you have minimal skills in working with mastic:
- Bake a honey cake, give it the shape of a bee, and put it in the refrigerator.
- Meanwhile, prepare the “grout” - mix the buttercream with the cake crumbs. With this mixture, carefully level the entire surface of the bee, giving it a natural shape. Refrigerate for 1–2 hours, then remove and smooth the surface again with a heated wide knife.
- Mastic for coating can be made from marshmallows or powdered sugar and butter with added dyes.
- In addition, you can make a black and yellow mastic coating on a regular round cake or decorate it with mastic bee figurines.
- The cake is decorated with cream. To do this, add black and yellow dye (separately) to the butter or protein cream and use a syringe with a star-shaped nozzle to squeeze stripes and other details onto the surface of the cake in the shape of a bee or round.
We recommend: Video: watercolor technique on cakes
When designing “Medovik”, follow several recommendations:
- honey-based cakes are quite dense, so it is advisable to use soft cream for layering and decoration - with butter, condensed milk or sour cream;
- do not overdo it with honey - if there is too much of it in the cakes, they will turn out too dark and elastic and will not be soaked;
- if you use honey in decoration (for example, in glaze or mastic coating), put a little less of it in the cakes;
- do not forget that honey is very sweet: it replaces granulated sugar, and does not add honey to sugar;
- Before installing decorative elements on them, the cakes must be covered with a sticky mass - jam, cream (thick), glaze;
- honey dough tastes best with nuts, chocolate, raisins;
- Vanilla is mainly used as flavoring; alcohol and cocoa powder are practically not used in honey cakes.
Decorating a honey cake for a birthday, anniversary or other holiday is not a troublesome task and is quite quick if you have minimal skills in decorating confectionery products. Show your imagination, and your cake will become not only very tasty, but also decorated in an original way.
Drawing a bee using a stencil
The simplest idea at home No. 5 is an ideal option when you want to involve the kids in decorating a holiday treat.
We will need:
- stencil “bee” (all kinds of variations can be printed from Internet sources, and if you have drawing abilities, you can make it yourself);
- cake crumbs and/or chopped nuts for sprinkling;
- powdered sugar/coconut flakes.
Let's take a closer look at how to decorate the Honey cake using a themed stencil:
- Grease the top cake layer generously with cream, then sprinkle with crumbs, lightly pressing them to the surface.
- Place a stencil on top.
- Carefully, strictly along the contours, sprinkle it with powder or shavings (you can use nut “flour”). To obtain a more voluminous and contrasting bee pattern, the action can be repeated several times.
- Quickly remove the stencil so that any remaining powder does not fall on the surface of the baked goods.
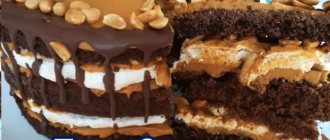
Honey cake "Honeycomb"
Themed cake decoration for a holiday or birthday. For this design you will need:
- ready-made honey cake, brushed with butter cream and condensed milk;
- a little white and dark chocolate (or ready-made bee figurines);
- wrapping film with “pimples”;
- some nuts, candied fruits or cookie crumbs.
The decorating process is completely simple even at home:
- Cover the top and sides of the cake coated with cream with butter cream, level the surface as much as possible with a knife and put the product in the refrigerator for several hours so that the cream becomes dense.
- Then take out the cake and cover it with a piece of film. Its size should be such that it completely covers the product from above and from the sides.
- Gently press it with your hands over the entire surface - you will get honeycomb-like indentations on the cream. Remove the film - we won't need it anymore.
- Sprinkle the sides of the cake with crushed nuts, cookie crumbs or cake scraps, candied fruits, and raisins.
Melt the chocolate in a water bath or in a microwave oven. On the parchment, pour out of it (from a syringe with a nozzle) first the “body” of the bees, then the wings, then the head. Make stripes of white chocolate on the dark body.
You can also use ready-made bee figurines made from mastic, sugar icing or chocolate ganache. The wings can be made from almond petals, and the body from peanuts.
Refrigerate the cake overnight, then serve.
We recommend: Custard for decorating a homemade cake
Glaze
Now you need to prepare the glaze. In a small container, mix gelatin with a small amount of water (pour about 40 milliliters), let it stand and swell.
Take a small metal container and mix the remaining sugar, water, cocoa powder and cream in it. Place the saucepan on the fire, constantly stirring the mixture, bring it to a boil. Reduce the heat to low and cook our glaze for another 10 minutes, constantly stirring it with a wooden spatula.
Remove the glaze from the heat, stirring constantly, pour gelatin into it. Mix the mixture thoroughly until the gelatin is completely dissolved, cool to room temperature.
We take our cake out of the refrigerator and cover it with the finished glaze. Let it cool again. When the icing has hardened, the cake is ready.
How to prepare shortbread dough correctly
The shortbread dough should be homogeneous, crumbly, but still hold its shape. It is very difficult to achieve an ideal result, but it is possible. We will tell you three main ways to prepare shortcrust pastry:
- Chopped. For it you will need: 400 grams of sifted flour, 250 grams of butter, a pinch of table salt, 100 milliliters of warm water. First you need to randomly chop the butter and then put it in the freezer for twenty minutes. Then add a pinch of table salt and pieces of cold butter to the sifted flour. Next, you need to quickly chop the dough using a large knife. You should end up with a crushed mass, into which you should gradually pour warm water and knead. Afterwards the dough must be refrigerated for 10-20 minutes.
- Cottage cheese. If chopped is more suitable for pies, then tender, curd can be used as a base for cakes. It requires: fresh cottage cheese - 150 grams, butter - 150 grams, sifted flour - 250 grams, a pinch of food and table salt. First you need to sift the cottage cheese through a special sieve. Next, grate the butter and then add it to the cottage cheese. Pour sifted flour into the creamy-curd mixture and add a pinch of salt and soda. Afterwards, knead the dough well and place it in a cool place for an hour, wrapping it in cling film.
- For the lazy. If you don't want to spend a lot of time preparing shortcrust pastry, then there is a simple method just for you. This mass is ideal for our “Bee” cake. For it you should stock up on the following ingredients: sifted flour - 300 grams, butter - 150 grams, one chicken egg, powdered sugar - 150 grams. First of all, you need to add powdered sugar to the bowl, then grate the butter there, preferably on a fine grater. Add flour to it. Mix the whole mass well with a spoon or food processor. Be sure to wrap the dough in cling film and put it in the freezer for an hour.
Shortbread dough is very finicky. All ingredients must be added strictly according to the recipe. If you overdo it with butter or flour, you may end up either very crumbly or too dense. However, you will have to master the recipe, because this particular type of dough is ideal for making “Bee” honey cake.
For the cream you will need:
- Boiled condensed milk – 1 can
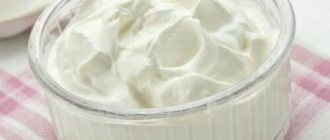
- Sour cream – 400 g
- Honey – 2 tablespoons
- Cream – 150 g
- Gelatin – 11 g
To prepare the cream, mix all ingredients using a blender. Gelatin will be needed for the top layer. Coat all the cakes with cream. Add gelatin melted in a water bath to the remaining cream (gelatin is mixed with 100 ml of milk or water). Mix gelatin and remaining cream with a blender. Pour the resulting liquid mixture onto the cake. Place in the refrigerator.
There are two more simple options for cream - sour cream and butter. In the first case, mix sour cream (250g) and sugar. In the second, a can of boiled condensed milk with a pack of butter. (250 g)