Basic Ingredients
Dessert Ingredients
This chocolate ball cake recipe requires few ingredients. It does not require an oven or microwave. All products are ready-made and purchased in the store. No need to worry about how to make chocolate balls for a cake. For dessert you will need:
- butter – 180 g;
- condensed milk – 250 g;
- 250 g Nesquik chocolate balls for the cake;
- breakfast cereals or corn flakes 1 package;
- 100 g roasted peanuts.
You can use chocolate breakfast crumbs in this recipe. She is recommended to decorate a culinary masterpiece. The cake contains Nesquik chocolate balls or others similar in structure and consistency, as well as crispy leaves from the breakfast cereal. You can use one type of sweet or mix them together. If you have raisins, prunes or dried apricots, the dessert turns out more rich and original.
Dessert decoration options
While baking, chefs are faced with the question of designing and decorating cakes made from chocolate balls, and confectionery tricks for the original presentation of their masterpiece. When a dessert only takes a few minutes, there’s bound to be time for aesthetic improvements.
For the chocolate bead cake, we recommend using chocolate chip cookie crumbs. You can sprinkle it on the top and sides.
The subtle taste of chocolate will give the dessert a special richness and piquancy. Cocoa topping is used for the same purposes. But you shouldn’t overuse it, as the powder gives off bitterness.
Grated chocolate can be used as a tasty and worthy decoration. It will complement the cereal balls and make the dessert richer. Chocolate in tandem with cookies gives you the opportunity to fantasize. The first is grated on a fine grater, the second is crushed in a mortar or using a grinder. It is recommended to apply the cookie topping right before serving the dessert so that it does not lose its appearance due to the wet cream.
Nuts are also suitable as decoration for a cake with chocolate balls. They are used as a topping or whole. Don't forget about the sides of the cake. They also need to be oiled and decorated. Then the dessert takes on a more aesthetic appearance, and the ingredients used speak about its exceptional taste. If you follow the line of least resistance, you won't have to use additional components.
You can decorate a very tasty dessert of chocolate balls with any berries during the season. Those who love sourness can use the frozen product at any time of the year. Berries and pieces of fruit will look great on a delicate blanket of whipped cream. All these components are in harmony with chocolate and complement its rich taste with their light notes.
With peanuts and dried fruits
According to the recipe presented above, you can prepare a cake with the addition of chopped peanuts and dried fruits, cut into pieces. To do this, you need to add to the main recipe:
- One hundred grams of roasted peanuts, crushed into small pieces.
- A generous pinch of various dried fruits that are available at home: raisins, dried apricots, dates. It is important to pre-soak them in boiling water for a few minutes so that they swell and also get rid of dust and small grains of sand that get on them during the drying and selling process.
- Additionally, to this no-bake ball cake, you can add small candied fruits, pieces of marmalade, or even better, take a little bit of everything and mix it into a single mass. The child will eat the new dessert with interest, without even suspecting how much healthier it has become due to such tasty additives.
Cocoa with milk
- 250 ml fat milk;
- 2 tbsp. l. "Nesquika".
Preparation:
- Fill a small saucepan with milk.
- Place on the fire and wait until it boils.
- Pour chocolate powder into a mug.
- Pour hot milk and stir.
If you can’t find a package of ready-made Nesquik, try making the drink yourself.
- 0.4 l cow's milk;
- 3 tsp. cocoa;
- 1 tbsp. l. granulated sugar.
Preparation:
- Put the milk on the fire. Meanwhile, combine the bulk ingredients in a mug. It is recommended to adjust the amount of ingredients based on taste preferences. For example, you can add less sugar.
- Pour 2 or 3 tbsp over mixed products. spoons of hot milk. Mash well to prevent lumps from appearing in the finished chocolate drink.
- Add the resulting mass to the rest of the milk that is on the fire. Bring to a boil. Fill the mug with the drink. Homemade Nesquik is a great addition to cookies or baked goods. If you are preparing a drink for a child, various decorations will not hurt. For example, add some whipped cream, grated chocolate or chopped nut kernels. On weekends, you can treat yourself to a chocolate drink with a little rum or cognac added.
Recipe:
In advance, before you start preparing the cake, remove the butter from the refrigerator and let it sit until it reaches room temperature, that is, wait until it becomes soft.
After this, place the soft butter in a deep cup. Beat it with a mixer/blender until fluffy (this will take no more than five minutes).
Now open the can of condensed milk and place it all in a cup with the whipped butter. Continue beating with the same mixer/blender until you get a thick and homogeneous mass (this will also take no more than five minutes).
Pour chocolate balls and roasted peanuts into the resulting cream. Mix the contents of the cup thoroughly using a tablespoon. Again, this process will take you no more than five minutes.
Now take a suitable size springform baking pan - we will form the cake in it. Line the bottom of the mold with baking paper.
Using the same spoon you used to mix the ingredients, pour the resulting mixture into the prepared pan, being sure to carefully smooth the top of the cake.
If you want, you can decorate the top of the cake by sprinkling it with cocoa powder, grated chocolate, or coconut. In general, to your taste.
All these actions will again take you about five minutes of time.
Now the cake pan needs to be placed in the refrigerator for a couple of hours. During this time, the cream will “set” and the cake will not fall apart.
Some useful tips
If during the process of mixing the ingredients it turns out that the mass is a bit dry, then you should add a little more condensed milk or, as a last resort, regular milk, so that the balls, absorbing the liquid, become softer.
Immediately before serving, carefully turn the cake pan over onto a plate, remove the film and decorate it as desired. This can be done using ground nuts, chocolate or coconut shavings, pieces of marmalade or swirls of whipped cream.
Such a cake can stand in the refrigerator for about two days without losing its taste, although many argue that in the first few hours after preparation it is most delicious due to the fact that not all the balls are well soaked and retain a pleasant crunch.
Nesquik cake with cocoa recipe with photo
1. First of all, making cakes starts with the base. Ours will be biscuit, with the addition of the main ingredient indicated in the name. There should be no difficulties, the main thing is to correctly adhere to the specified proportions.
Break all four eggs into a bowl, add about 150 grams of sugar and beat all ingredients at low speed. Gradually increase it until the products are mixed.
2. Now the butter - you need to first take it out of the refrigerator so that it stands warm for at least an hour and softens. Then we divide it into fragments and send it to the biscuit base being prepared. Separately mix flour and baking powder packet.
In our case, one teaspoon of the latter is enough. We also send all this to the rest of the ingredients, passing it through a sieve at the same time. Turn on the processor again and beat until smooth.
3. Next you need to add two tablespoons of Nesquik and continue stirring until everything is combined. Of course, this ingredient can be replaced with simple cocoa powder - everything will depend on your capabilities.
Let's start baking:
4. Preheat the oven to 170 degrees. Take a springform baking dish and grease it a little with butter. Place all the prepared dough there, level it for uniformity and place in the oven. Approximate baking time is no more than thirty minutes.
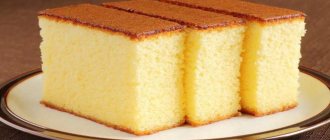
5. When the cake is ready, take it out and divide it into two parts lengthwise. You need to make sure that they are not the same size - the base will be a little thinner than the rest.
6. Set out the base for assembly, and cut the top part into medium-sized cubes. You can use any base - there are ordinary metal ones, or more advanced silicone ones. See for yourself and choose dishes that you know how to work with.
Cream:
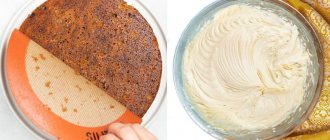
7. Now you need to prepare the cream. You will need the fattest sour cream that you have at your disposal and condensed milk. The latter will need to be bought boiled, or it is best to do it yourself - depending on your free time. We put the whole thing in one container and mix until smooth.
8. Pour two tablespoons of Nesquik into the cream and stir again until the powder dissolves. Separately grind the nuts of your choice using a blender. You should not turn them into puree; small fragments of nuts are preferable.
9. Add a little more than half of the nut mass to the cream, and set the rest aside. Also, separate about a third of the cream and remove it - it will be needed for decorating the cake. Stir the cream and add the chopped biscuit there. Mix both products to make a creamy mass.
10. Next, take the biscuit base and place the prepared cream mixed with dough cubes on it. During assembly, immediately form the desired appearance of the dish.
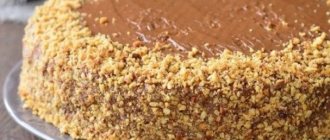
11. Decorate the whole thing with regular cream and chopped nuts. Place the dish in the refrigerator. It is best, of course, to leave it overnight so that the cake is well soaked. But if you don’t have such a reserve of time, one and a half to two hours will be enough. Afterwards, we take it out, cut it and serve it to the table. Enjoy your tea!
If desired and possible, try replacing nuts with chocolate. Only you won’t need to add it to the cream, but you can simply decorate the top of the cake with grated product. Or simply place the nuts on the surface of the cream.
As you can see, there are many options and plenty to choose from, so choose the most suitable decoration method, and we wish you good luck!
How to prepare such a dessert?
A cake made from chocolate balls is easy to prepare - any schoolchild can make it if the parents allow the child. First, you should choose a suitable shape and line it with cling film inside so that the edges protrude on the sides by at least five to eight centimeters. Very beautiful cakes of this kind are made from oval salad bowls; it is also convenient to use a springform baking dish.
When it is ready, set this dish aside and take a wide bowl to beat the butter with condensed milk and vanilla in it until light and airy. If desired, you can add pieces of fruit and nuts. Then add the dry Nesquik balls and carefully mix with a spoon (or your hands) until the mass is uniform, being careful not to crush the balls.
Transfer the resulting thick mass into the prepared pan and press lightly with gentle finger pressure. Level the top layer and cover it with the edges of cling film, leave at room temperature for two hours or in the refrigerator for four. The cake should be soaked in cream, but at the same time partially retain its crispy properties. Children really like this unusual taste of this dessert. Remove the finished product from the film and decorate the top part with the chocolate balls that were left at the beginning. They stick easily to the cake, but if that's not enough, you can use a small amount of condensed milk or a melted chocolate bar.
Nesquik, chocolate balls
Perhaps the main legend of the Russian market. Where the American giant Kellog's is not represented, Nestle reigns. And in general, Nesquik has all the components of a real breakfast cereal. They have a recognizable mascot in the form of Kwiki the Rabbit, a recognizable design and popular love. For children, these chocolate balls are a bright present, and for those who are older, a reason to feel nostalgic about their own childhood.
In fact, chocolate balls are a dishonest genre. Essentially, it's just cereal and cocoa powder, which few people won't like. The greatness of Nesquik is truly revealed when you compare it with Bomzhat chocolate balls. The milk becomes colored and becomes more or less like cocoa. It’s almost as pleasant as it was in childhood.
Price: 111 ₽ for 250 g. Verdict: Still chocolatey, still good.
“Lyubyatovo”, caramel pillows
Those who watch Syenduk know that in the US, pillow-shaped breakfasts are not only not common - they simply don’t exist. But somehow this form successfully gained a foothold in the post-Soviet era and became almost a classic of the genre. This probably happened partly because the pads can be eaten with appetite even in dry form. And many of us ate dry Doshirak as children.
“Lyubyatovo” also has chocolate and milk pillows, but out of personal preference, I set my sights on the caramel ones. And I didn’t regret it. It's really tasty. The cereal shell protects the filling from getting soggy, so the product remains crispy. The only problem is that it’s impossible to resist stealing a couple from the pack while the milk is heating up. And where there is a couple, there is a third of the pack.
Price: 90 ₽ for 240 g. Verdict: Cereal, caramel, wonderful.
