Publication in the group: Recipes in a bread machine
Recipes for baking bread today are available to every housewife, although previously it was cooked in an oven from flour and water. Now there are Redmond bread machines, which come with ready-made recipes. 15,000 years ago, people ground raw grain between stones to create fine dust for future dough.
In Egypt, according to hieroglyphs, there were more than 50 types of bread, loaves, which were decorated with seeds, smelling of camphor and honey. Initially, the food had a liquid consistency, similar to the stew in Africa and Asia.
Archaeologists later found an old bread recipe in Switzerland on Lake Biel. There were no bakeries then, so families baked it for personal use at home. In France in the mid-20th century, bread was baked only in monasteries - it was heavy, made from barley and coarse rye flour. The white version was served only to the royal family, while for the nobility day-old bread was given away.
The world's first bread museum appeared in Germany in 1956. The exhibition was open constantly and was replenished annually with a new recipe. By the end of the 20th century, the museum had more than 18,000 types of cooking. The 6,000-year-old history presented by the exhibits showed a variety of baking forms. Today, bread can be baked at home according to any available recipe using an oven, bread machine or slow cooker.
There is a difference between baking in the oven and baking in a bread machine:
- An electric or gas oven dries the outside of the bread, resulting in a crispy crust.
- In a bread machine, the dough is baked, but not dried. You can achieve a golden color, but not a dense, hard “crown.”
- In a bread machine, the dough will take longer to cook, since the container has virtually no voids where hot air could circulate.
- The crumb in the bread machine turns out moister and heavier despite the cooking time.
Recipe for rye bread for a bread machine
The bread machine is an amazing technique. She not only bakes the bread product, but also kneads the dough. This device will allow you to avoid getting your hands dirty, knead the dough perfectly, and end up with delicious bread faster than after baking in the oven. In addition, a bread machine significantly reduces financial and time costs, since after cooking you do not have to wash a large amount of dishes.
Do you like rye bread? Do you have a bread machine in your home arsenal? Then for baking you will need to take a supply of the following necessary products:
- Rye flour – 1.5 tbsp.
- Yeast – 1 tsp.
- Melted margarine – 1 tbsp.
- Serum – 1 tbsp.
- Cumin – 1 tsp.
- Salt and granulated sugar
Perform the following manipulations:
- Place food in bread maker
- Close it and set the desired mode. Often such bread is baked in the “Basic bread” or “Rye bread” mode
- Select Loaf Size and Color options
- Click the "Start" button
This completes your actions. The technology will do the rest for you. The bread will bake for about 3 hours
Important advice: when preparing any bread, try to first pour liquid ingredients into the bowl from the bread machine, and then add dry ones, unless otherwise provided in the instructions for your bread machine model.
Safety precautions
Before you start, you need to pay attention to some rules for using the Scarlett SC 400 bread maker.
The instructions for use indicate that the device should only be connected to a grounded outlet. The cord plug has a grounding pin.
- Before cleaning, be sure to unplug the device from the outlet. After use, do not leave it online either.
- You should not use a bread machine to dry clothes or, even worse, papers.
- Care must be taken to ensure that water does not enter the ventilation openings. This may cause a short circuit.
When the bread maker is running, it becomes very hot. Therefore, you should not handle Scarlett SC 400 with bare hands.
- The kneading spatula may cause injury during operation if you try to pick it up with your hands.
- The lid must not be opened to add food during operation without a beeper signal.
- You cannot remove the form during operation.
- After being in the cold, the bread maker must be kept warm for at least 2 hours before turning it on.
Bread recipe for Redmond bread machine
The Redmond bread maker is reliable and modern. Those housewives who purchased this miracle technology can well consider themselves the happy owners of an excellent assistant. After all, with such a device, delicious bread will be ready practically without your participation. Convenient and a great time saver.
If you want to get the rye bread that our ancestors baked in those distant times, then you should take the required amount of the following ingredients:
- Rye malt – 4 tbsp.
- Ground coriander – 1 tsp.
- Rye wallpaper flour – 70 g
- Hot water – 200 ml
- Water – 130 ml (for dough)
- Honey – 2 tbsp. (for test)
- Apple cider vinegar – 2 tbsp. (for test)
- Vegetable oil – 2 tbsp. (for test)
- Salts – 1.5 tsp. (for test)
- Rye wallpaper flour – 80 g (for dough)
- Dry yeast – 2 tsp. (for test)
- Coriander beans
Perform the following manipulations:
- Sourdough: Mix coriander seeds, flour and malt. Add boiling water. Place the mixture in a thermos for about a couple of hours.
- Add vinegar and honey to the water. Stir. Add tea leaves, vinegar-honey composition, and oil to a separate bowl. Add the rest of the ingredients except the coriander beans. Place them as directed in the recipe - sequentially.
- Turn on the “Preparing yeast dough” mode. When the dough is kneading, try to guide it towards the central part with the help of a spatula.
- Level the surface and sprinkle it with coriander. Set aside to let it rise.
- Bake the bread using the Bake setting with a medium crust.
What types of rye flour are there?
The benefits of bread depend on the ingredients included in its composition. Of course, bread made from rye flour in a bread machine according to recipes tested by experienced chefs will be healthier than a factory-made loaf. First of all, the nutritional value of bread depends on the type of flour. All the most valuable things in rye grain are in the germ and shell, therefore, the coarser the flour, the more benefits it contains.
Three types of rye flour are produced in Russia:
Seeded - finely ground flour; 1 kg of grain produces 630-650 g of flour. Produced from the center of the grain, the bran particles are removed. It is white in color with a cream or grayish tint.
Peeled – flour containing inclusions of shell particles. It has a darker color with a gray, cream, greenish or brownish tint, depending on the type of rye. Flour yield is 860-870 g per 1 kg of grain.
Wallpaper is a coarse flour made from whole grains, therefore it contains the most bran. The healthiest bread is baked from wallpaper flour, the content of nutrients in which is 3-4 times higher than their content in bread made from refined wheat flour.
Tips for beginner bakers
Rye bread is more capricious than wheat bread. Delicious bread in a bread machine according to recipes with photos may not work out the first time. Experienced housewives advise to act in the following sequence.
- So that a bad experience does not discourage you from learning how to bake healthy bread, it is better to bake your first loaf from a wheat-rye mixture. The content of rye and wheat flour should be 50% to 50% or 60% to 40%. Rye flour does not contain gluten, so it is more difficult for novice bakers to achieve the desired crumb porosity, moisture, and fluffiness. Wheat flour will help correct the deficiency. Gradually increase the amount of rye by 10%. So gradually you will learn how to bake 100% rye bread.
- The most delicious is considered to be rye bread made in a bread machine without yeast with sourdough. There is also no need to rush into this. Start with recipes based on dry yeast. Next, try baking a loaf using briquetted yeast. The next step is a piece of old dough. And only after that start preparing the sourdough.
- The secret of rye dough lies in the optimal combination of flour and water. Not a single recipe for making black bread in a bread machine contains ideal proportions, since any flour differs in moisture content. To ensure the ideal ratio, do not pour in all the liquid at once. Leave a small amount and add according to how the dough behaves. If a lump of dough does not leave a small dough puddle underneath, you should add water. If the puddles are large and the lump is very wet, you need to add flour.
Important! Eggs are liquid. If using eggs, first beat the eggs into a measuring cup and then add water to the amount of liquid called for in the recipe.
Bread recipe for Mulinex bread machine
The Mulinex bread maker is considered the smartest among similar equipment. It is quite modern in design and functionality, and at the same time makes it possible to bake hot bread according to the recipes of our grandmothers. Of course, the taste of bread made at home cannot be confused with that bought in a supermarket.
So, to make fragrant baked goods, take the right amount of ingredients:
- Wheat flour – 650 g
- Water – 350 ml
- Vegetable oil – 3 tbsp
- Granulated sugar - 1 tsp.
- Salt - 0.5 tsp.
- Dry yeast - 1 tsp.
Perform the following manipulations:
- Sift the flour through a sieve
- Open the bread maker lid. Pour water into a special bowl
- Add oil, salt
- Add granulated sugar and yeast
- Place the bowl in the bread maker, select program 8 and start the appliance
This way you will knead the dough. You can bake whatever you want with it. For example, buns or bread.
Description of the bread machine
The body of the bread machine is made of white plastic, and all internal parts are made of stainless steel. There is a viewing window on top that allows you to observe and control the processes inside. If the need arises, you can add more flour or water while preparing the bread. The legs are rubberized. This allows you to securely install the bread maker on a flat surface. The control panel is located immediately under the cover. This is convenient for users. They don't have to bend over to look at the menu.
The Scarlett SC 400 bread machine can bake bread using 16 programs. In addition, she prepares dough, muffins, jam, and porridge. With its help you can bake valuable gluten-free bread.
The weight of the bread machine is 4.6 kg. Height 27 cm, width 26 cm, depth 35 cm.
Power 600 W.
Produced in China or Southeast Asian countries.
Bread recipe for Panasonic bread machine
Many housewives, when they purchase a Panasonic bread machine, are lost. Because they don’t know exactly the recipe by which bread can be made in it. Don't be alarmed. The bread maker is actually quite easy to use. We invite you to try baking ordinary white bread. And to prepare it, take the following products:
- Dry yeast - 1 tsp.
- Wheat flour – 0.4 kg
- Salt – 1 tsp.
- Water (preferably warm) – 300 ml
- Butter – 1 tbsp.
Perform the following manipulations:
- Pour yeast into the bread machine bowl
- Add flour next
- Add salt
- Using a measuring cup, measure out the required amount of water. Pour into the bowl
- Add flour
- Add the butter last. Chop it first with a knife.
- Install program 8, click on the “Start” button
- After some time, you will receive fragrant bread with a crispy crust.
Recipes from Scarlett
The company has created a number of original recipes for bread and desserts. Most of them are suitable for the Scarlett SC 400 model:
- dough for pasta and dumplings;
- nut, dietary, yeast-free, pineapple bread;
- cupcake with candied fruits;
- bread with banana and cinnamon.
There are also dessert recipes:
- rice pudding,
- apricot jam.
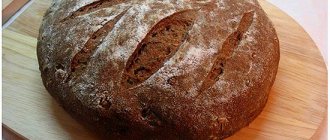
Recipe for Borodino bread for a bread machine
Borodino bread is considered dietary. Because it contains very few calories. Above we described to you the version that our ancestors baked. Try the following recipe as well.
To prepare, take the required amount of ingredients:
- Wheat flour – 250 g
- Rye flour – 150 g
- Rye malt – 3 tbsp.
- Boiling water – 60 ml (for malt)
- Homemade kefir – 250 ml
- Salt – 1 tsp.
- Granulated sugar - 2.5 tbsp.
- Cumin – 1 tsp.
- Vegetable oil – 1.5 tbsp.
- Dry active yeast - 2 tsp.
Perform the following manipulations:
- Pour hot water over the malt, stir quickly, add cumin
- Take the remaining ingredients, place them in the bread machine bowl, add the prepared malt
- Set a special program and wait for your bread to bake
Whole grain bread recipe for bread machine
Whole grain bread, according to many nutritionists, is considered very healthy. It is nutritious and contains a large number of useful elements. Making delicious bread using a bread machine is simple and, at the same time, convenient. You just need to prepare the required amount of ingredients required by the recipe:
- Whole grain wheat flour – 560 g
- Water – 350 ml
- Vegetable oil – 2 tbsp.
- Dry yeast – 1 tsp.
- Honey – 2 tbsp.
- Salt – 1 tsp.
Perform the following manipulations:
- Heat the water a little, dissolve the honey in this water
- Place all ingredients in bread machine bowl
- Turn on the bread maker, select the desired mode: bread size, crust color
- Press the "Start" button
- After the oven signals that the bread is ready, remove the loaf to cool.
Inclusion
- Connect Scarlett SC 400 to the network.
- Choose a cooking recipe and load the ingredients into the bowl.
- Place the bowl in the oven and close the lid.
- The “Menu” button allows you to select the desired baking program. Once you have made your selection, a beep will sound and the LCD display will show the program number and the waiting time for the finished product.
- Press the “START/STOP” button. It turns on the stove and allows you to cancel the program. To do this, you need to hold the button on for 2 s. A long beep will indicate that the operation has been cancelled. But you shouldn’t press this button in order to see what stage of readiness the dish is in. To do this, use a window on the lid.
If the device is turned off accidentally, or the electricity is lost, the stove will work for another 10 minutes according to the same program. But if the pause lasts longer, problems with baking will arise. Most often, the light disappears for a period of time from a few seconds to 8 minutes when the protective barrier is activated. This time should be enough for the stove not to interfere with the program and to operate in a stationary mode.
White bread recipe for bread machine
Preparing bread products at home is a troublesome task. Many grandmothers spend a lot of time every day kneading the adze, waiting for it to fit, and baking bread. But you can significantly reduce this whole process if you try to use electronics.
Bread baked in a bread machine is no different from bread that is prepared by hand. To prepare, take the following set of products:
- Wheat flour – 420 g
- Dry yeast – 1 tsp.
- Vegetable oil – 2 tbsp.
- Granulated sugar - 1.5 tbsp.
- Salt – 1 tsp.
- Water or milk – 260 ml
Perform the following manipulations:
- Sift the flour, pour it into the bowl of the bread machine
- Add granulated sugar and salt
- Pour water with vegetable oil
- Close the lid, set the “Classic bread” mode
Once the bread is baked, it is advisable not to eat it hot. Be patient a little. This is the only way you can enjoy the taste of aromatic, homemade baked goods.
Scarlett SC-400 Bread Maker
Need a manual for your Scarlett SC-400 Bread Maker? Below you can view and download the free PDF manual. It also includes frequently asked questions, product ratings, and user reviews to help you get the best out of your product. If this is not the guide you were looking for, please contact us.
Is your device faulty and the manual doesn't have a solution? Go to Repair Café for free repair services.
French bread recipe for bread machine
Fragrant bread that has just been baked is incredibly delicious! In our article we want to share with you a unique recipe for making French bread. Believe me, the result you will ultimately get will definitely make you happy. After this, it will appear regularly on your dinner table.
Take the required amount of ingredients to prepare:
- Wheat flour – 400 g
- Water – 230 ml
- Vegetable oil – 1.5 tsp.
- Instant dry yeast – 1 tsp.
- Table salt – 1 tsp.
- Granulated sugar - 2 tbsp.
Follow these steps:
- First, add the liquid ingredients – oil and water – to the bread machine bowl.
- Then put the dry ones
- Set the oven to “French bread” mode
- In 3.5 hours you will have a delicious loaf of bread
Recipes for yeast-free bread for a bread machine
Bread baked without yeast is, well, very tasty. It is also considered dietary. Many nutritionists advise its use to those people who adhere to a particular diet. For our recipe take:
- Kefir – 300 ml
- Rye flour – 600 g
- Any bran of your choice – 50 g
- Soda – 0.5 tsp.
- Granulated sugar – 15 g
- Salt – 10 g
- Flax seeds – 20 g
- Sesame seeds – 20 g
Perform the following manipulations:
- Roast the seeds until they turn golden
- Add all ingredients to the bread machine bowl
- Set the required mode
- Wait until the bread maker signals that it is ready - then the bread will be completely ready to eat
Beginning of work
- Before turning on, you need to make sure that the housing, lid, viewing window, chamber walls and removable bowl are intact.
- The Scarlett SC 400 bread maker is installed on a dry and level surface away from stoves and other electrical appliances.
- Do not place anything on top of the lid because the ventilation holes may be blocked.
- For installation and normal operation of the bread machine, the distance from it to the nearest wall or surface should be: at least 20 cm on top, 5 cm on the side and 10 cm on the back.
- Wipe the spatula, removable bowl, and walls with a damp cloth. Remove the film from the control panel.
Wheat bread recipe for bread machine
Fragrant and crispy wheat bread is much tastier than other types of baked goods. You can even serve it on the holiday table for guests and make sandwiches from it. Try baking bread using this recipe at least once and you will use it all the time. To prepare, prepare the following quantities of ingredients:
- Dry yeast - 1.5 tsp.
- Milk – 60 ml
- Granulated sugar - 1.5 tbsp.
- Water – 200-250 ml
- Wheat flour – 0.5 kg
- Butter – 0.050 kg
- Salts – 1.5 tsp.
Execution sequence:
- Place the indicated ingredients into the bread maker mold. First those that are liquid, then dry.
- Be sure to sift the flour.
- Place the mold in the oven, turn on the “Basic” program with a medium crust. Do not open the lid while the dough is kneading, otherwise it will settle.
Breakdowns
Some breakdowns occur with the device:
- The toothed belt jumped off the pulley and broke.
- The bread maker automatically turns off at the most inopportune moment.
- The appliance stops kneading the dough.
- It’s even worse if he starts kneading, but at the wrong time, but when the bread is almost baked.
- There are complaints that the bread maker only works well until the end of the warranty period, and then it works as it wants.
Some problems can be solved by the bread machine manufacturer. There are reviews that he can send small spare parts, such as a spatula for kneading dough.
Delicious bread recipe for a bread machine
There are a very large number of recipes. We offer you bread that has a slightly sweet taste and a dizzying aroma.
So, prepare the following quantities of products:
- Dry yeast – 10 g
- Water (preferably warm) – 310 g
- Wheat flour – 290 g
- Rye flour – 115 g
- Salt - 0.5 tsp.
- Vegetable oil – 35 g
- Cocoa powder – 1 tbsp.
Execution algorithm:
- Stir liquid ingredients
- Pour into mold
- Add dry ingredients
- Add the yeast at the very end
- Set the oven to standard baking mode
- Press the "Start" button
- After about 3 hours, enjoy delicious and aromatic bread
Bread Maker Cornbread Recipe
Do you want to make unusual bread for your family? Then try making them cornbread. You can use it to make not only sandwiches, but also sweet croutons. The main thing in this process is imagination. The technology will do the rest for you.
When preparing corn baked goods, you should know that thanks to corn flour, the product turns out to be very crumbly. Hence, follow our recipe strictly. Take the following amount of products:
- Wheat flour – 450 g
- Corn flour – 100 g
- Milk – 350 ml
- Butter – 35 g
- Salts – 1.5 tsp.
- Granulated sugar - 2 tbsp.
- Turmeric - on the tip of a knife
- Instant yeast - 1.5 tsp.
To prepare, follow these steps:
- Pour slightly warmed milk into the mold
- Melt the butter, pour it into the milk
- Pour the flour into the mold
- Add remaining ingredients
- Select the French bread program
- Close the lid. And do not open it until the end of the baking process.
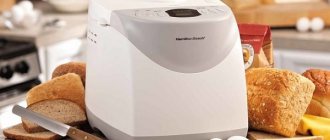
Review of the Redmond RBM-M1920 bread machine: bake bread, knead dough and prepare main courses
The Redmond RBM-M1920 bread maker looks stylish and has all the advantages of devices of this type: automatic programs, delayed start, heating of finished baked goods. Redmond offers to use the bread machine not only for kneading different types of dough and pastries, but also to cook soup in it, prepare main courses, jam and compotes. The book included in the kit contains corresponding recipes.
During testing, we will evaluate the quality of the bread maker, ease of use, adequacy of automatic program settings and how well the device copes with the stated functions.
Characteristics
| Manufacturer | Redmond |
| Model | RBM-M1920 |
| Type | bread maker |
| Country of Origin | China |
| Guarantee | 2 years |
| Estimated service life | 5 years |
| Power | 550 W |
| Case color | metallic |
| Housing material | stainless steel, plastic |
| Baking weight | 500/750 g |
| Choosing crust color | light/medium/dark |
| Bowl coating | non-stick ceramic Whitford “Fusion” |
| Control | electronic |
| Button type | mechanical |
| Display | LCD |
| Non-volatile memory | 10 minutes |
| Temperature maintenance (automatic heating) | up to 1 hour |
| Delayed start | until 15 o'clock |
| Number of automatic programs | 19 |
| Accessories | measuring cup, measuring spoon, additional mixing blade, hook for removing the blade |
| Weight | 4.25 kg |
| Dimensions (W×H×D) | 30×30×25 cm |
| Network cable length | 1.12 m |
| Weight with packaging | 5.2 kg |
| Packaging dimensions (W×H×D) | 36×33×28 cm |
| average price | find out prices |
| Retail offers | find out the price |
Equipment
The packaging in which the bread machine is supplied follows the Redmond corporate style. Information about the product and its photograph are placed on a black background; on the sides of the packaging you can see examples of ready-made dishes and examine individual accessories of the device. A careful study of the packaging will allow you to become familiar with the technical characteristics and advantages of the device, as well as the list and features of automatic programs. The box is equipped with a carrying handle.
Inside the box, two foam inserts on the sides ensure the device remains stationary during transportation and storage. Additionally, the body and all accessories, except for the baking dish, are packed in plastic bags. The inner surface of the baking dish is protected from damage by special packaging material. Having opened the box, inside we found:
- bread machine body
- baking dish
- two mixing blades
- beaker
- measuring spoon
- hook for removing the kneading blade
- recipe book
- instructions and warranty card
At first sight
The shape and design of the bread maker is not surprising. The device is made in the shape of a parallelepiped with rounded corners. The case is made of stainless steel, due to this it looks quite strict and elegant. We think that the device will fit into a kitchen of any design. The metal surface is well processed, smooth to the touch.
On the left side of the case there is a working chamber covered with a lid, on the right there is a control panel with a display and buttons. The lid is equipped with a transparent window through which it is convenient to observe the process without disturbing the temperature in the working chamber. A metal handle protruding beyond the boundaries of the case will protect against burns from hot steam when opening the device.
Ventilation holes can be seen both on the hinged lid and on the right wall of the case.
Apart from the presence of a sticker with the technical characteristics of the device, the back side is unremarkable. The power cable is connected between the rear and bottom panels. Its length is sufficient for domestic use.
Inside the working chamber, at a height of 6.5 cm from the bottom, a heating element is fixed along the walls. In the center there is a place to install the form for kneading and baking. The mold and the motor are connected using a bayonet type connection. The container is installed inside the chamber using a standard movement: placing it at a slight angle and fixing it by turning it to the right. On the inner surface of the wall there are hints in which direction the form should be turned for fixation or, conversely, removal.
At the bottom there are four legs with rubberized pads to prevent slipping. The bottom of the bread machine rises above the table surface by about one centimeter. There are round ventilation holes along the perimeter of the bottom.
The baking dish is made of metal, the inner surface is treated with a ceramic non-stick coating. The kneading blades have the same coating. The coating looks durable, we did not find any scratches, chips or other defects. The walls of the bowl are thick, do not bend or deform when pressed. The handle is thin and metal, so the use of protective equipment when removing finished baked goods is mandatory.
A typical set of accessories includes a measuring cup, a measuring spoon and a hook for removing the blade. Let's be honest, in all the time we have been using various bread makers, we have never used the last accessory. A plastic cup and spoon can be useful if the cook is more comfortable using them rather than scales, or if he has reached the level of skill where he can afford to cook “by eye.” On the wall of the cup there are marks of water (in ml/cups) and flour (in cups). A measuring spoon will allow you to add from ¼ to a full teaspoon or tablespoon of dry product.
The Redmond RBM-M1920 bread maker made a good impression: the device is well made, looks stylish, the design is simple, the bowl is strong, the non-stick coating seems durable, the control panel, at first glance, also does not raise any questions.
Instructions
The operating instructions are made in the form of a thin brochure in a format close to A5. The document is printed on high-quality glossy paper and contains information in three languages, the first of which is Russian. The 13 pages contain all the information a user may need for successful operation: from a description of the design to a table with possible reasons for unsatisfactory baking results. The summary table of automatic programs provides not only recommendations for using the program and its stages, but also additional functions and capabilities.
Additionally, the kit includes a recipe book. The first pages traditionally present advertising materials and a number of general information. The user can get acquainted with the table of calorie content of products, advice from Redmond chefs, recommendations and requirements for the cooking process. All 50 recipes are divided into chapters and will allow you to prepare not only bread or sweet pastries, but also cereals, soups, main courses and desserts. The style of presentation of the recipe is typical for Redmond: a photo of the finished dish on half of the page, a list of ingredients and preparation procedure on the second. For a novice user, a recipe book can become an indispensable assistant.
Control
The control panel with two rows of buttons and an LCD display is located to the right of the hinged cover. All buttons are labeled, so their purpose is intuitive. The display backlight glows bright blue when you press buttons and install programs; after a few seconds of inactivity, it goes out. All set parameters and cycle stage indicators are clearly visible even without the display backlight.
Pressing the buttons is accompanied by a loud, short beep. With the same signals, the bread maker notifies the user about other events occurring in it - the time to add additional ingredients and the end of the cycle, when several loud signals are heard.
The display shows not only the selected settings (program number, loaf weight and degree of browning of the crust), but also the cooking stage (delay start, kneading, rest, rise, baking, auto-heating). So the user can always find out not only the remaining time until the end, but also what exactly is happening in the bread maker at the moment.
The general procedure for baking bread is quite familiar:
- Install the blade and check the reliability of its fastening.
- Fill the mold with ingredients in the volume and sequence specified in the recipe.
- Insert and secure the baking pan into the baking chamber of the bread maker.
- Connect the device to the network. The device will beep and go into standby mode.
- By pressing the “Menu” button, select the desired program. The “Kneading” and “Multi-Baker” programs are available by pressing the corresponding buttons.
- If necessary, adjust the cooking time or delay start time, select the weight and color of the loaf crust.
- Press the “Start/Pause” button.
The delay start function allows you to set the time after which the bread will be ready. Interval - up to 15 hours. The change step depends on the selected cooking program. This feature is not available for all automatic programs. Setting the delay is very simple: after selecting a program or setting the time, you need to press the “+” buttons to increase and “−” to decrease the delay time.
The device is equipped with 19 automatic programs. In addition to actually baking various types of bread, the user can use programs for preparing:
- cupcake
- soup
- yeast dough
- yogurt
- jam
- biscuit
- milk porridge
In addition, process programs are available:
- extinguishing
- mixing with time changes
- proofing and baking
- cooking
The duration of some of the programs may be adjusted. If the user finds that the available automatic programs are not enough, he can always take advantage of the capabilities of the “Multi-Baker”. This program allows you to set the duration of each stage of kneading and proofing, as well as baking and automatic heating. A delayed start function is also available.
The device has non-volatile memory. In the event of a power outage while the program is running, all settings are saved for 10 minutes of inactivity. When the power supply is restored, the device automatically continues the cycle.
Exploitation
Before starting operation, you should wipe the housing outside and inside, as well as wash and dry all parts of the device that come into contact with food. The bread maker should be installed on a flat, horizontal surface away from heat sources. You also need to ensure that there are no decorative surfaces, electronic devices or other objects and surfaces nearby that may be damaged by exposure to elevated temperatures.
Operating the bread maker is quite simple. Let us note a few nuances that we usually pay attention to.
- Tall loaves were obtained with a slightly sagging top. When baking 500g bread, the top was raised and slightly rounded.
- The viewing window in the lid fogs up both during proofing and when baking bread.
- The settings for baking programs for different types of bread can be considered adequate.
- Many programs provide the ability to add additional ingredients during long kneading. This is indicated by long loud beeps.
- A list of automatic programs can usually be found on the lid of the device or in another visible place. The Redmond RBM-M1920 does not have a list of automatic programs on an easily accessible surface of the case. Therefore, the user is forced to check the instructions or write down the numbers of the most popular programs somewhere.
Automatic programs, especially those designed specifically for baking bread, allow you to get the expected result. Program settings differ in the time of kneading and proofing, the number of batches, and the combination of kneading and proofing. It is, of course, possible to leave the bread in the warming mode for an hour at the end of the cycle, but in our opinion, there is a risk of the loaf becoming soggy. Therefore, we removed the bread immediately after baking, placed it on a wire rack, and after 15-20 minutes, wrapped it in a clean towel until completely cooled.
During the entire time of our interaction with it, the Redmond RBM-M1920 bread maker did not present any unpleasant surprises. The device operates reliably, is easy to use, and the baking result was always good and met expectations. The only time we baked a walnut cake according to a recipe from the book, we were disappointed with the result. But the problem was not in the device, but in the recipe itself - more precisely, setting the program time. It was recommended to bake a regular butter cake with baking powder at the appropriate program settings for 4 hours 52 minutes. The proofing time was about three hours, as a result, all the butter melted and peeled off from the dough, and at the end we got a hard product, more like a cookie than a cupcake. Therefore, when using recipes from the book, we advise you to pay attention not only to the list of ingredients, but also to the recommended cycle duration.
Care
Cleaning and maintaining the bread maker is very simple. As with any electrical device, the housing must not be placed in water or under running water. To preserve the appearance and quality of the non-stick coating, it is prohibited to use abrasive or chemically aggressive substances when cleaning.
First, remove the kneading blade from the bowl. If the blade does not come off easily, then fill the bowl with warm water and leave it for a while. The external and internal surfaces of the housing can be wiped with a soft, damp kitchen cloth or sponge. It is acceptable to use a mild detergent. The main condition is to carefully remove its remains after the cleaning process so that it does not affect the taste of the finished dish.
We did not encounter any difficulties when caring for the Redmond RBM-M1920 bread maker.
Our measurements
Energy consumption measurements were made using a wattmeter while the device was operating. In baking mode, the power of the bread maker ranges from 510 to 527 W. In rest mode, the bread maker consumes 0.4 W, in kneading mode - about 30 W. Energy consumption indicators when using automatic programs may be interesting.
- For a cycle of baking bread weighing 750 g with a medium-rare crust in the “French Bread” program, the device consumes from 0.283 kWh.
- When using the “Rye Bread” program and baking a 750 g loaf with a medium-rare crust, the energy consumption was 0.387 kWh.
- The “Quenching” cycle for 1 hour 30 minutes consumes 0.380 kWh.
Most of the time the device operates almost silently. The bread maker only makes noise when kneading dough. The sound signals are quite loud, so you can hear them even from the farthest room, and at night they are quite capable of waking you up even with the kitchen door closed.
Practice tests
During practical experiments, we will use automatic programs, bake several types of bread and try to cook something atypical for a bread machine.
French bread with cheese (recipe No. 14 from the complete book)
Powdered milk - 25 g, premium wheat flour - 440 g, salt - 9 g, sugar - 30 g, vegetable oil - 12 ml, water - 280 ml, yeast - 4.5 g, parmesan - 90 g, dry basil - 2 years
Parmesan was grated on a fine grater and mixed with basil. Place the ingredients in the bread maker bowl in the following order: milk powder, flour, salt, sugar, butter, water, yeast, cheese and basil. Close the lid and set program No. 2 (French bread), loaf weight - 750 g, crust color - medium. The duration of the program was exactly five hours.
After four and a half hours, the smell of fresh bread became completely unbearable. So when the appliance beeped loudly to signal the end of the cycle, we didn't follow the recommendation of keeping the bread in the oven for an hour. We immediately removed the loaf and placed it on a wire rack to cool quickly.
The loaf turned out to be tall. The crust is medium-rare, crispy. The upper part fell inward in the center. The crumb is lush, with a large number of large pores. The cheese and herbs are evenly distributed throughout the bread. The cheese not only added a bright aroma and taste, but also made the bread crumb elastic. When cutting, the crumb does not crumble at all.
The recipe book recommends combining this bread with various milk sausages. However, even without sausage it is quite tasty and self-sufficient.
Result: excellent.
Rye bread with caraway seeds (recipe No. 16 from the complete book)
Premium wheat flour - 350 g, rye flour - 230 g, whole grain flour - 20 g, salt - 6 g, sugar - 12 g, honey - 12 g, vegetable oil - 12 ml, water - 330 ml, yeast - 4 .5 g, malt - 28 g, ground coriander - 2 g, whole cumin - 1 g, nutmeg - 1 g.
Place the ingredients in a baking dish in the following order: water, sugar, salt, honey, yeast, malt, spices, vegetable oil, wheat flour, rye flour and whole grain flour. We installed program No. 10 (rye bread). Loaf weight - 750 g, crust color - medium. After pressing the “Start” button, we learned that the bread would be ready in 4 hours and 32 minutes.
The finished loaf is dense and aromatic. The top part "sank" slightly in the center. The color and degree of roasting of the sides of the bread is uniform. The cut shows that the crumb is of excellent quality. It is soft to the touch, well baked, not sticky or wet, finely porous, without voids. When slicing, the crumb does not crumble.
Result: excellent.
Sour cream
100 g of sour cream of 15% fat content was mixed in 350 g of 10% cream. We poured the milk mixture into the bowl of the bread machine, installed it inside the device and set the “Yoghurt” program. The default cycle length is 8 hours. Since the temperature of our cream and sour cream was significantly lower than room temperature, we increased the program time to 9 hours. After an hour and a half, the contents of the bowl were mixed again.
After the beeps sounded, indicating the end of the work, we took out the bowl and transferred the resulting sour cream into a jar. The sour cream was a bit runny, which we attribute to the low percentage of fat in the original products. They put it in the refrigerator.
The sour cream thickened slightly, but still did not become the kind that “stands for a spoon.” We connect this not with the operation of the device, but with the original ingredients. In general, we conclude that using a bread maker as a yogurt maker is quite possible. And most importantly, you can ferment both large and small quantities of the product.
Result: excellent.
Chakhokhbili with beans (recipe No. 43 from the complete book)
Chicken (thighs) - 300 g, green beans - 200 g, onions - 100 g, tomatoes - 100 g, bell pepper - 80 g, tomato paste - 60 g, butter - 20 g, water - 100 ml, salt , spices.
The prepared and chopped ingredients were placed in a bowl, from which the paddle for kneading the dough had previously been removed. Mix well and cover the bowl with foil. Set program No. 9 (stewing), cooking time 1 hour 30 minutes.
At the end of the program we received a perfectly prepared second course. For our taste, the vegetables were even a little overcooked, so next time we would reduce the cooking time to 1 hour 10 minutes. But nothing burned, nothing ran away. Both the top of the foil and the outside of the bowl remained clean.
The result of this test proves that the parameters of the “Stewing” program are quite adequate and allow you to use the bread maker not only as a device for baking and kneading dough, but also for preparing second courses.
Result: excellent.
conclusions
The Redmond RBM-M1920 bread maker can be considered a device that copes well with basic and additional functions. The device looks elegant, is convenient to use, and is easy to operate. 19 automatic programs allow you to prepare various types of bread, pastries, first and second courses, as well as use individual processes - kneading dough or baking it. For advanced users, there is the “Multi-Baker” program, which allows you to set the duration of each of the stages of kneading and proofing, baking and auto-heating.
The bread turns out evenly fried, the crumb in each of the experiments was exactly what we expected to see. There was only one point that slightly marred the excellent results: large loaves of bread fell through the center of the top. This had no effect on the quality of the bread or its taste, only upsetting our aesthetic feelings. Medium and small loaves are obtained with an evenly raised top.
The disadvantages include the lack of visual representation of programs on the device body. The user needs to either remember the numbers of the programs that are most in demand, or regularly look at the instructions.
pros
- nice neutral design
- automatic programs and the ability to adjust the parameters of some of them
- ease of control and installation of operating parameters
- multifunctionality
- good test results
Minuses
- you need to remember the automatic program number or look at the instructions
- the top of large loaves of bread falls in the center
Sourdough bread recipe for a bread machine
If you decide to bake this homemade bread, you will have to purchase a special bread machine. Because not everyone can cope with such work. It is desirable that it includes the “Home Baker” program. This program allows you to customize the technique yourself, therefore it is ideal for the next recipe. If you don't succeed in baking the bread the first time, try again. For the recipe, take the following ingredients:
- Homemade sourdough – 0.5 kg
- Water – 250 ml
- Salt – 1.5 tbsp.
- Sunflower oil – 2.5 tbsp.
- Wheat flour – 0.5 kg
Perform the following manipulations:
- Grease the mold with oil
- Add homemade starter, water (dissolve salt in it in advance)
- Then add oil
- Add flour
- Set up the “Home Baker” program
Next, the bread maker will do everything for you. All you have to do is enjoy the prepared bread product.
Buckwheat bread recipe for bread machine
By adding buckwheat flour to regular wheat flour, you will get delicious bread: for first courses, for main courses and for savory sandwiches. To prepare, take:
- Buckwheat flour – 50 g
- Wheat flour – 200 g
- Water – 150 ml
- Vegetable oil – 1 tbsp.
- Dry yeast – 1 tsp.
- Granulated sugar – 1 tsp.
- Salt - on the tip of a knife
If you want a larger loaf, increase the quantity proportionally.
Perform the following manipulations:
- First, pour oil into the mold, then water.
- Sift the flour, pour it into the mold
- Add remaining ingredients
- Set the mode to “Basic”
- Wait until the bread is finished baking, remove the loaf
Bran bread recipe for bread machine
Bran is a valuable ally that helps during dieting. They contain a lot of dietary fiber. They make it possible to satisfy hunger, improve the functioning of the intestines and lower the amount of cholesterol in the body.
To prepare, take:
- Milk – 1 tbsp.
- Granulated sugar - 2 tbsp.
- Dry yeast – 2 tsp.
- Bran – 50 g
- Vegetable oil – 2 tbsp.
- Wheat flour – 0.4 kg
- Salt – 1 tsp.
Perform the following manipulations:
- Pour milk and butter into the mold
- Sprinkle flour, granulated sugar, yeast on top
- Then the rest of the ingredients
- Set the program “Basic Bread”
Bread for diabetics in a bread machine - recipe
We offer you bread that contains bran. Thanks to them, carbohydrates are absorbed into the bloodstream more slowly without increasing sugar levels.
To prepare dietary bread, take:
- Serum – 1 tbsp.
- Fructose – 2 tsp.
- Salt – 1 tsp.
- Whole grain flour - 4.5 tbsp.
- Bran – 50 g
- Dry yeast – 2 tsp.
Perform the following manipulations:
- Mix the ingredients, pour this mixture into the bowl
- Install the “Basic Bread” program
That's all. Bread for diabetics is ready. You can enjoy its taste and aroma.
Kefir bread recipe for a bread machine
When you start baking bread, consider what your bread machine manufacturer recommends. Because often such techniques differ from each other. To prepare your next loaf, take:
- Wheat flour – 0.265 kg
- Rye flour – 0.265 kg
- Oatmeal – 0.125 kg
- Kefir – 0.330 l
- Vegetable oil – 0.050 l
- Bran, sesame and flax seeds – 0.075 kg
- Honey – 2 tbsp.
- Salt – 2 tsp.
- Soda – 2 tsp.
- Baking powder - a little
Perform the following manipulations:
- Roast the seeds
- Mix dry ingredients in a bowl
- Add liquid ingredients to them
- Place the dough in the mold
- Set the program "Cupcake"
It is better to try the finished bread when it has cooled.
A bread maker is not just convenient, but also necessary for every modern housewife. After all, in the daily bustle, sometimes you just want to relax and in the evening enjoy homemade bread. And now you don’t need to stand at the stove for half an evening to do this. The bread maker will do everything itself. The main thing is to choose the right recipes. We hope that thanks to the above recipes, you will be able to pamper your family and friends with delicious and fresh bread all the time.
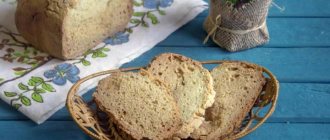
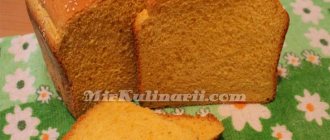
How is homemade Darnitsa bread different from store-bought bread?
Homemade Darnitsky bread, however, like any homemade food, of course, differs from store-bought. Naturally, it contains no preservatives, flavor improvers, dyes, palm oil, etc., because I bake it myself.
It is very soft, elastic, and if you press on it and then release it, it returns to its original shape. This bread can be stored for up to two weeks, although I store it in the refrigerator (but the taste and aroma are preserved).
I pay attention to this because sometimes you buy hot bread in a store and it smells delicious. You bring it home, and if a piece remains, the next day it is no longer the same as it was yesterday. And the taste is not the same, and the aroma most often disappears somewhere.
To be honest, after purchasing a bread machine, I very rarely buy bread in the store; sometimes I don’t have time to bake it or I don’t have time, but everyone is already spoiled with homemade bread, and the store-bought one is most often left over. Of course, the difference is very noticeable.