Recipes without sugar
Sugar-free viburnum preparations for the winter are suitable for diet menus and nutrition for diabetics. The most popular recipes are freezing and dehydration.
Drying methods
Dehydration or drying is the process of removing moisture from fruits. It can be done at home in three ways: using an oven, in an electric dryer or in the fresh air.
In the oven
For this method, the fruits are prepared as follows:
- remove low-quality specimens;
- wash in clean cold water directly on the brush;
- when the water has drained, remove the berries, remove the stalks and place on a baking sheet;
- it is covered with waxed or parchment paper so that the product does not stick;
- the oven is turned on at the lowest power;
- the baking sheet is placed in an oven preheated to 60 - 70 degrees for three hours, the door is left slightly open to allow access to cold air;
- after drying is completed, the product is left to cool on the baking sheet;
- the drying agent is poured into a paper bag or glass jar with a screw-on lid.
In an electric dryer
It is better to dry viburnum in clusters on the grid of an electric dryer. For this:
- the brushes are inspected for the presence of bad fruits and washed;
- then lay it out on a cotton towel to drain off excess moisture;
- the prepared product is placed on the grids of an electric dryer;
- dry for about 7 - 10 hours, swapping trays every 2 - 3 hours.
On open air
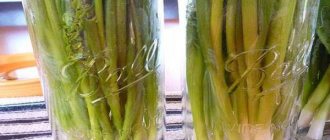
If the autumn weather is still dry and windless, the plant is dried in bunches under a canopy. The place should be well ventilated, and the sun's rays should not directly hit the bunches. The brushes are carefully washed, dipped in cold water, tied in 4-5 pieces and hung on a rope. It may take several days for complete dehydration to occur. The finished product can be transferred to a pantry or cellar for further storage in bundles. If this is not possible, then the fruits are removed and poured into a glass jar.
Freezing methods
They are frozen in briquettes or in crumbly form. Before freezing, the bunches are dipped in water, excess moisture is allowed to drain, and the berries are removed from the branches.
Method of freezing in briquettes
If you have frozen viburnum in portions, how to use it? It is advisable to defrost the whole portion and cook it at once; repeated freezing is undesirable (the fruits will lose their shape, an icy glaze will form on them, and beneficial vitamins will be destroyed).
The freezing process is as follows:
- place a plastic bag in clean plastic containers;
- dry berries are laid out in a dense layer;
- The edges of the bag are placed on top, tightly closed with a lid;
- the container is placed in the freezer for a day;
- Afterwards, the frozen briquette can be removed from the container and left in the freezer in a bag.
Read also: Raw materials for phosphate fertilizers
Freezing separately
Compote, cough syrup with honey and other recipes for red viburnum for the winter can be prepared from individually frozen berries. To freeze, place it on a wire rack in the freezer on a sheet of parchment in one layer. After 3–4 hours, the product is poured into a bag and transferred to another compartment of the chamber for permanent storage.
Drying viburnum
You can prepare these berries for the winter by drying them in the oven. The brushes are laid out on a baking sheet, the regulator is set at 50–60 ⁰С. The oven door should be slightly open to prevent viburnum juice from leaking out of the bursting berries. The stalks can be removed after drying the berries. Dried viburnum should be stored in dry glass jars, closed with lids.
Advice
Drying is considered complete when the berries become wrinkled.
You can dry berries for the winter in a less intensive way, but simply by laying them out in the open air in the shade. The fruits are laid out on clean white paper, covered with gauze or a thin cloth on top. This drying method requires time and patience; the berries need to be carefully stirred from time to time.
Harvesting and storing black elderberry
As already mentioned, all parts of black elderberry are suitable for preparing medicinal elixirs. Ready-made raw materials can be bought at a pharmacy or prepared yourself, but it is worth considering what time of year and what exactly can be collected for medicinal purposes.
Thus, elderberry flowers are collected during the period of their active flowering, usually at the end of May - beginning of June. Whole inflorescences are cut for drying (it is advisable to dry the raw material in an electric dryer at a temperature of no more than 45 degrees), then the dried flowers are separated from the stalks and other impurities, threshed or passed through a sieve. With this drying, much more medicinal components in the flowers are preserved. Always store in cardboard or fabric bags in a dry place, as cheese quickly absorbs moisture and spoils, becoming moldy. Shelf life is from two to three years.
Elderberry fruits ripen in late August - early September. To prepare medicinal raw materials, it is necessary to collect ripe berries, since unripe ones are poisonous. They are cut in whole clusters and dried by hanging the raw material in well-ventilated, shaded places. Dried berries are stored in dry containers for no more than 6 months. To prepare “medicine” from fresh berries, you need to rinse them without separating them from the stalks, so as not to lose the healing juice (by the way, it is better to cook it in a juice cooker in order to preserve the seeds intact, which give the juice an unpleasant bitterness). Fresh fruits can be stored for no more than two days.
Elderberry roots are collected in late autumn, dried and ground into powder, which can be stored for 5 years. But the bark of the plant is harvested in early spring before the sap begins to flow. When the leaves bloom, they are also collected, because the most useful components are in young leaves. It is better to dry both the bark and leaves with artificial heat at a temperature of 60-70 degrees. Finished raw materials are stored for 3 years.
How to freeze viburnum for the winter
The easiest way to preserve the nutritional value of viburnum berries for a long time is to freeze them. You can do this in various ways: put the bunches in containers or wrap them in bags and put them in the freezer; You can pick the berries and spread them in a thin layer, then freeze them and divide them into bags into equal parts.
Experts servicing refrigeration equipment claim that temperatures within the range of -23... -18 °C are suitable for freezing. At this temperature, viburnum, like other fruits, vegetables and berries, will retain its properties in an ice shell for eight months to a year. This way you will have a supply of vitamins until the next season. You can freeze berries at temperatures from -8 to 0 °C, but their shelf life is immediately reduced by three times.
It is better to store berries in the freezer in quantities convenient for you. A small volume freezes better and faster, and therefore lasts longer
Why is this so important? It's all about re-freezing the food, which is strictly prohibited, as the viburnum will lose its suitability. Divide the berries into such portions that you can prepare the entire contents of the container or sealed bag at once.
To preserve the shape of the berries, it is better to use plastic bags and small plastic containers with tight-fitting lids. All this can be found in a regular supermarket in the dishware section. Due to their shape, such containers are conveniently and compactly placed inside freezers. If you need to freeze a really large volume of berries, then a small life hack to save internal space will not hurt. You can use plastic containers as molds for plastic bags.
It's very easy to do. Pour a small amount of berries into a bag and place them in a container, evenly distributing the fruits. Place everything in the freezer. When the viburnum in the bag freezes and turns into a regular rectangular layer, empty the container and continue until the harvesting of berries is completed. Of course, the process will take longer than when using containers for their intended purpose, but the space savings are obvious.
The following method will allow you to freeze the berries so that they do not stick together. In the freezer, select one or more shelves. Cover them with thick plastic. Prepare the berries - sort, wash and dry. Then place them in portions in the freezer, distributing them in a single layer on the shelf. After a few hours, remove the batch and place it in containers or bags and return it to the freezer.
Did you know? Healers believed that viburnum was endowed with magical properties. And the women told the tree about their sufferings and sorrows.
Mastic toppers
Today I’m telling you and showing you how to make beautiful, spectacular, and incredibly time- and labor-saving fondant toppers for a children’s cake! At the same time, we’ll learn how to work with sugar and wafer paper, the topic is interesting, the material has great potential, but we’ve never written anything about it, we need to improve!
We recommend reading: How to Store Spring Garlic in Winter Before Planting
I will demonstrate it using the example of a children's cake with Fixies. I recently had a story with him that is probably familiar to every home pastry chef. Nine in the evening, the doorbell rings - neighbors. Cake for tomorrow. To kid. With the Fixies! “He’s asking very much - he really wants it - it’s a birthday - how would it be without a cake - help me out!” The situation, frankly speaking, is not pleasant, and the most reasonable thing is to refuse, but how? After all, people are not completely strangers. And Fiksikov, meanwhile, wants almost everyone. In general, in such cases, if you can’t refuse, and you don’t know how to draw, the only way out is printing on sugar or wafer paper and mastic toppers. Well, don’t sculpt the whole company, really?
The only condition is the opportunity to make this same sugar or waffle picture somewhere. To print, you need a printer, and not necessarily a special confectionery one (I’m not even sure that such exist), but filled with cartridges with food coloring. The service of printing on edible paper is provided by some confectionery stores, as well as private confectioners at home, those who have purchased a printer and cartridges. So that the paint does not dry out and the printer serves for a long time and properly, you need to print pictures at least once a day, which is why almost everyone who has this printer does not refuse those who want to make sugar pictures. You just need to find a person who lives near you, write to him, agree on a price, send him the file in a jeep and agree on a time when you can pick up the finished picture.
You can print with food dyes on both sugar and wafer paper. Sugar is denser, the image on it is brighter, but it is usually a little more expensive. What to use is up to you.
Here is my sugar picture.
You see, it is packed in a zip bag (in this form, including a large thick envelope, the store where I print gives the pictures to clients is very thoughtful and pleasant). If you are not going to use the picture right away, store it in a ziplock bag: it will not allow air to pass through, and your picture will retain its inherent slight flexibility. From a long stay in the open air, sugar pictures dry out, become brittle and brittle. But this, by the way, does not threaten the waffle, but it is brittle in itself.
Let me show you the sugar picture closer. It is slightly rough, and the print is quite bright. The paper itself is glued to a thick film.
Here you can roughly understand the thickness.
So, let's make a topper for a children's cake!
...along the contour, with a slight indentation, however, as you like.
Take a piece of mastic, which dries quickly. This could be gelatin mastic (but it is not at all tasty, in my opinion, and becomes very hard; I decided that if children decide to chew on the topper, it could simply be dangerous for their teeth)) or purchased mastic like Vizyon or “Top -product”, to which you can add SMS (powder, sold in confectionery stores) to speed up drying. However, if you have time, you can do without SMS, it will just take longer to dry.
I have here white vanilla mastic “Top Product”, probably the most budget-friendly one today, but very good.
I added a pinch of SMS.
Kneaded it. Rolled it into a ball and flattened it slightly.
Rolled it out to a thickness of 5 mm (it can be thinner, depending on how thick your skewers are).
I attached a picture. I drew a stack around the outline.
Cut it out. This must be done very carefully!
I inserted the skewer a few cm deep so that it would hold well. The thickness of the skewer must be completely immersed in the mastic! In other words, when rolling out the mastic, take into account the thickness of the skewer.
Lubricate the mastic with a thin layer of decorgel (can be replaced with honey diluted in water), very lightly and evenly.
We remove the film from the picture.
Carefully glue the image to the mastic.
Our topper is ready!
Let it dry and you can add it to the cake!
Drying time depends on many factors: mastic, topper size, room humidity. This little Nolik made from Top Product mastic with the addition of SMS dried in at most an hour.
And here is the whole bunch. Bright and beautiful! And most importantly - quickly, if there is somewhere to print the picture.
A solution for those who need everything at once for a 1 kg cake)
Here are our fondant toppers on the cake.
Well, the whole cake.
The cake has a minimalist design. The only decorations are toppers made of mastic and screws, also made of mastic. It was an urgent cake, as you understand, so I had to do everything very quickly and a silicone mold from the CakeUp store literally saved me in that situation. I simply sprinkled it with cornstarch, took small pieces of mastic, painted them in the desired colors, filled the recesses with them, ran a knife along the surface of the mold, holding it flat and cutting off the excess mastic, and took out the parts!
We recommend reading: How to Save Your Secrets Until the Morning
If you have time, you can let them dry a little or freeze them in the freezer, they will come out even better. But even so, in a hurry the result is excellent!
The mold with numbers, by the way, is also from the same store. And the stand))) In short, I have a lot of everything from there) But what can you do if the things are really worthwhile!
We work with waffle paper in the same way. Well, or almost: the image on it is not as bright as on sugar paper, so you can often find a recommendation to cover it with decor gel on top. This way it will indeed become much brighter, but it will acquire a gloss, and not everyone likes it. The waffle also comes in waves more often, but I think it's a matter of practice.
The cake has a minimalist design. The only decorations are toppers made of mastic and screws, also made of mastic. It was an urgent cake, as you understand, so I had to do everything very quickly and a silicone mold from the CakeUp store literally saved me in that situation. I simply sprinkled it with cornstarch, took small pieces of mastic, painted them in the desired colors, filled the recesses with them, ran a knife along the surface of the mold, holding it flat and cutting off the excess mastic, and took out the parts!
How to prepare viburnum, ground with sugar?
The product will take up little space, will not require constant revisions, will not require special conditions and will completely retain all vitamins.
How to store figs: 3 options and 5 recipes for storing and preparing
The cooking principle is simple:
- Separate whole, unrotten berries from the bunch. Rinse the product in cold water and leave in a colander to drain excess moisture. Dry. If minimal freezing is done before chopping, the berries will release more juice.
- Using a blender, grind the product, strain the mixture through a sieve or cheesecloth. This will separate the seeds and skin from the pulp and juice.
- Mix the prepared mass with sugar. Sugar and viburnum are combined in a 2:1 ratio, i.e. the amount of sugar should be 2 times more than the berries.
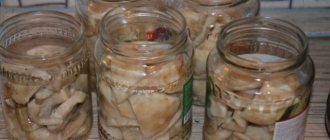
- Transfer the sweet mixture into sterilized jars. A regular plastic cap will do for sealing. You can also preserve the product.
Viburnum, ground with sugar, should be stored in a cool place. Over time, the juice may separate from the sweet pulp, but this is normal for this type of preparation.
If you don't have enough space in your fridge to store jars of jam, there is a way to make as much as you need. In this case, it is not even necessary to cook the product. And here is one of these recipes, where the berries are first frozen whole (we have already told you how to do this today), and then mixed with sugar in the right proportion.
Frozen berries will no longer taste bitter, and this is an undoubted advantage of the preparation. And to enhance the taste and aroma, you can add orange directly with the crust to this live jam.
The finished product is great to eat with tea, and you can make excellent fruit drinks from it. The author of the video says that the children have tasted the taste of such fruit drinks and are enjoying them with pleasure. But still remember that when using this product you should observe moderation, especially for children.
The author also shares a recipe for applying a mask made from berry pulp. Of course, don’t throw away such a treasure. Moreover, the fruits give properties to restore youth!
In general, of course, you can make not only fruit drinks from berries, but also squeeze juices. It is better to use them diluted. Or there are options when several different varieties of berries are mixed: these are usually lingonberries, cranberries and sea buckthorn. Juice in this combination can already be consumed without danger to health.
Freezing viburnum
The berries usually ripen in September. But many are in no hurry to cut them off. Only with the arrival of the first frosts does the collection of viburnum begin. But there is no point in waiting for cold weather if you are going to store viburnum in the freezer. She will lose all her bitterness anyway.
To do this, you need to trim your brushes with scissors. Some sources ask to be careful not to lose the berries. We assure you that they stick to the branches quite firmly, so you don’t have to worry too much about shaking. But the skin of viburnum is thin, so crushing the berry is easy. You need to be more careful with this.
We suggest you familiarize yourself with Installing a refrigerator next to an oven
At home, the brushes are first shaken or sorted to remove insects and small debris. Then they are carefully washed directly with the branches in three waters. Or rinse under clean running water.
Now we need to dry the viburnum. Just don’t put brushes on old wallpaper, as some articles advise. They absorb moisture very slowly. It's better to lay down several layers of paper towels or newspapers. It is even more convenient to use an old thick towel for such purposes. It will work for other berries too.
After drying, take a wide baking sheet or tray, but one that can easily fit into the freezer. Cover it with thick polyethylene, then lay out the berries (torn from the clusters) in a layer of about 0.7-1 cm. Place in the freezer.
After 46-48 minutes, the skin of the viburnum will be sufficiently set by frost. Now you can carefully pour the mixture into a ziplock bag or food container for deeper freezing. A new portion of berries is placed on a baking sheet and the process is repeated.
If you freeze the entire volume at once, then in winter there is a high probability of getting from the bins of the refrigerator not crumbly berries, but a monolithic piece of pulp and juice. Then you will have to use the entire supply at once. Or arm yourself with a chisel and sledgehammer to chop off the required amount.
Advice. Be sure to store frozen viburnum in airtight containers. The smell of long-unwashed socks in the freezer is not a pleasant thing. And this is exactly the kind of amber that viburnum has in all its forms. But useful.
Recipe for making jam
Viburnum jam is an easy preparation, but the taste and beneficial properties of the jam remain at a high level. It is correct to collect viburnum immediately after the first frost, thanks to this it becomes sweet.
Ingredients:
- lemon balm – 25 g;
- viburnum – 420 g;
- sugar – 840 g;
- mint – 25 g;
- ginger - half a teaspoon;
- thyme – 25 g.
Preparation:
- For cooking, you need to select only whole berries. Use damaged fruits for compote or freeze.
- Grind the berries with a blender. Add sugar.
- Chop fresh herbs.
- Sprinkle with ginger and stir.
- Boil the mixture for a minute, place on cheesecloth and squeeze.
- Mix greens with berries.
- The result is raw jam, which must be placed in jars and covered with lids. Keep refrigerated.
How to prepare viburnum without cooking - 4 recipes for the winter
Viburnum prepared raw retains more beneficial properties and vitamins. Let's look at the 4 most successful options.
First of all, in all recipes we free the viburnum milk mushrooms from the branches, wash them and transfer them to a towel. Let the berries dry. We will find out how to cook further below.
Viburnum, pureed with sugar, with seeds
Many people strain the puree, freeing the mass from seeds. However, do not forget that the seeds contain useful substances. Therefore, it is worth leaving them.
We will need:
- red viburnum – 600 g;
- sugar – 500 g.
Preparation steps:
- Place the berries in a blender bowl and chop.
- Add sugar and mix well. Let the mixture sit for a while - this way the sugar will dissolve better in the viburnum puree.
- Fill the jars with pureed viburnum. Leave a couple of centimeters of free space on top.
- Fill the top layer with sugar - this will allow you to preserve the product longer.
- Close the lids and put them in the refrigerator.
Viburnum, mashed with honey, seeds
Honey is a storehouse of vitamins, just like viburnum. The combination of two such products produces a powerful composition that has a positive effect on the body.
We will need:
- honey – 250 g;
- viburnum – 500 g.
Cooking step by step:
- Grind the fruits in a blender. Use other devices that are available (combine, meat grinder, etc.).
- Pour in honey. Dissolve the thick product a little in a water bath.
- Mix the components. Leave the mixture for a few minutes. Place the raw jam into containers and store in the refrigerator.
Frozen viburnum juice
This product is made without sugar. At the same time it is well stored. For longer shelf life, put the juice in the freezer.
We only need viburnum. Use the quantity at your discretion.
Cooking step by step:
- Grind the berries in a blender, then filter through nylon.
- The juice is obtained without seeds.
- Pour the drink into plastic bottles.
- We put it in the freezer.
Frozen viburnum berries
Components:
viburnum - quantity at your discretion.
- We send the milk mushrooms in open bags or containers to the freezer.
- We take out the frozen berries and remove the stems.
- Place into containers again and remove excess air.
- Close tightly and put in the freezer.
If necessary, take a few berries out of the freezer and consume them.
How to store viburnum for the winter without sugar, frozen
There is another option for storing viburnum - do not remove it in the fall, but leave it on the bush for the whole winter. It will tolerate any frost normally and will not lose its taste. But it is possible that the tasty berries will be discovered and eaten by birds.
If the dimensions of the refrigerator allow, you can preserve viburnum without sugar by placing it in the freezer, naturally, in a purified form. When preparing for this type of storage, it is recommended to separate the berries from the clusters along with the stalks.
Their presence will prevent juice from leaking out. Dry fruits are poured into bags or containers. They will retain a crumbly state, this will allow you to easily extract the required amount.
Before placing viburnum in the freezer, do not wash it; do this immediately before use.
Frozen viburnum:
- used when cooking compote or jelly
- used to prepare medicinal tea or infusion
With honey
Viburnum with honey is a very healthy delicacy. If you want to get your daily requirement of vitamin C, it is enough to consume 35 g of this sweet mass every day.
Ingredients:
- honey – 300 g;
- viburnum berries – 600 g.
Preparation:
- Remove the berries from the branches and remove damaged fruits. Rinse, dry, use a paper towel or napkins to speed up the process.
- Crush the berries in any convenient way, rub the mixture through a sieve, remove the flat seeds.
- Measure the amount of the resulting mass, pour in the same amount of honey. Stir until the ingredients are completely dissolved.
- Place the finished mixture in pre-pasteurized jars.
- Store in a cool place.
How to process viburnum: prepare liqueur, make jam
Lovers of strong drinks can prepare viburnum tincture.
For preparation we will stock:
- 200 g of pure viburnum juice
- 200 g sugar
- 200 g water
- 1 liter of vodka
Mix all components thoroughly and keep in a jar at room temperature for 2 days. Next, we taste the drink, if you like its taste, we seal it in bottles. Store throughout the year at room temperature.
To make jam, prepare 1 kg of berries. Make syrup from 300 g of water and 1.4 kg of sugar. Pour the well-boiled syrup over the fruits and let it brew for 12 hours. Next, we begin cooking, making sure to remove the foam that forms on the surface. Place in hot sterilized jars and seal.
To prepare marshmallow, boil 1 kg of ripe fruits in 200 g of water until fully cooked. Then grind the resulting mass through a sieve and boil until it becomes a soft dough. Afterwards, the marshmallow is laid out on wooden cutting boards and dried in the oven.
Recipes for viburnum jam, jelly and marshmallows
Viburnum desserts have a pleasant taste and unusual aroma. Housewives are also attracted by the simplicity of their preparation. Even the least experienced housewife can easily cope with the following recipes:
- Jam. For 1 kg of berries, take a glass of water, 1 kg and a glass of sugar. We make syrup from water and sugar, into which we place the fruits. Let the mixture sit at room temperature for 10-12 hours, covered with gauze. After this, cook the mass until tender, skimming off the foam regularly.
- Jelly. For 1 kg of berries we take 1 kg of sugar and 2 glasses of drinking water. Pour the fruits with water and boil for half an hour over low heat. Add sugar and cook the product after boiling for another 45 minutes. Place the finished jelly in sterile jars and seal it for the winter.
- Paste. For 1 kg of berries, take a glass of water. Combine the ingredients and boil the viburnum until soft. After this, grind the mixture through a sieve and put it back on the stove to cook. This time you need to do this until the workpiece resembles the consistency of soft dough. Spread the resulting mixture in an even layer on a special baking sheet and dry it in the oven.
Heat-treated viburnum products should be stored in a cool place. This will preserve their delicate and pure taste for as long as possible.
Canning
The method of canning basil allows you to obtain a product that can be stored for several months in the refrigerator without loss of quality. For a simple recipe, use salt, sugar, vinegar and basil. The secret is that the greens are kept in boiling water for 1 minute, then ground using a meat grinder and the main ingredients are added to the hot mixture. The jars are sterilized in the standard way and rolled under the lid.
You can preserve greens using the following recipe:
- salt - 50 grams;
- greens - 50 grams;
- olive oil.
This amount of ingredients is designed for a container of 250 grams. Basil and salt are placed in layers in sterilized jars up to the neck level and then filled to the brim with olive oil. The jar is closed and stored in the refrigerator.
Basil is often used in preparing tomato preserves. The idea is that the fruits, pierced with a fork, are placed in sterilized jars, layered with layers of basil. The marinade is prepared as follows:
- water - 2 liters;
- salt - 100 grams;
- granulated sugar - 200 grams;
- Apple cider vinegar - 100 grams.
The marinade is prepared from the listed ingredients until it boils and poured into jars. Next, drain the solution, boil it and pour it back into the jars, after which the containers are rolled up with lids.
Storing viburnum with sugar
Grinding them with sugar will preserve all the beneficial properties of the fruit. Of course, this preparation option is not recommended if there are people in the family who suffer from diabetes.
The preparation recipe is very simple:
- berries are sorted, spoiled or damaged are removed
- wash in cold water and dry on a towel
- then crushed with a meat grinder, blender, passing through a sieve
- mixed with sugar, take twice as much of it as fruit
- put in chilled sterilized jars, close tightly
You can store it in a cold cellar or basement, in the refrigerator. There is no need to be particularly upset if the juice in the jars separates from the berries; this will in no way affect the quality and usefulness of the product. Vitamins, acids and minerals will be perfectly preserved throughout the winter.
Helpful advice: to prevent loss of juice, seeds should not be removed from processed berries.
The second option for preparing fruits with sugar is that the product placed in jars is subjected to sterilization, and the jars filled with the sweet mixture are sterilized:
- liter - 20 minutes
- half liter - 10
The heated jars are closed and placed in a cold cellar.
This method allows you to use less sugar, 1 kg per 1 kg of berries.
You can also sprinkle sugar on whole fruits. For 1 kg you may need up to 800 g of sugar. The berries are washed and dried, poured into jars, alternating layers of viburnum with sugar. It should be on the top, the layer should be thick. The jars are closed with tight lids and placed in the refrigerator.
Drying basil for the winter
Harvesting basil using the drying method is quite simple, and there is no need to use special equipment. The advantage of this method is the maximum preservation of healing properties and taste, while the aroma of dry seasoning is slightly inferior in properties to freshly cut herbs.
In home drying conditions, it is often necessary to process raw materials as quickly as possible, so an oven or electric household appliances are preferred to natural drying.
Regardless of the chosen method, it is important to know about the basic rules of the process
Naturally
Drying naturally allows you to preserve the aroma of the plant and the maximum amount of nutrients. You can do this in two ways:
- drying greens on a flat surface;
- preliminary collection of plants into bunches and hanging.
The first option is more often used in cases where seasoning is made for culinary purposes. Its essence lies in the fact that pre-prepared greens are laid out on a flat surface and dried in the natural conditions of the room.
The second option is used to obtain medicinal raw materials or to obtain an ingredient for cosmetics. It involves forming bundles of twigs by tying them at the base for further hanging in the room. It is recommended to form them from 6-7 pieces. The ideal place for this drying method is the attic.
Excessive humidity will cause the grass to smell like moldy hay; too much light will cause the product to darken. If there is insufficient ventilation, the greens will begin to rot and deteriorate, and it will be impossible to obtain high-quality material. The process should be monitored periodically; to prevent rotting of the raw materials and uniform drying, it is necessary to periodically turn the raw materials over.
In the oven
Drying in the oven must be done carefully, as it can easily dry out the herb. The advantage of this method is its speed, but the usefulness of the final product, compared to natural drying, is less
The process looks like this:
- the sheet is removed from the oven;
- the stove is heated to 40 C;
- Leaves are laid out in a thin layer on a baking sheet;
- the greens are placed on a sheet in the oven, the door is left ajar;
- basil is kept for 1 hour, the product is stirred periodically;
- The oven is turned off, the greens are left in the oven with the door open overnight.
The readiness of dry basil and the degree of drying are checked by touch and visually. Properly prepared basil crumbles easily and can be ground.
In an electric dryer
It is recommended to process the leaves in an electric dryer, since, in the presence of twigs, it is often not possible to achieve uniform drying. After processing, the following manipulations are carried out:
- the leaves are placed on a pallet;
- form an even small layer;
- provide a temperature of 40 C.
During the process, the degree of drying of greens in the electric dryer is monitored. Some people use a microwave to obtain dry seasoning, turning on the equipment at full power for several minutes. The average time to obtain the finished ingredient at 700 W mode will be 3 minutes.
When to collect viburnum?
Harvesting begins after the first frost, as the fruits ripen. The specific time depends on the climatic conditions of the region and soil characteristics. The first collection usually begins after the end of September. A bright red hue is not an indicator of berry ripeness. The first frosts bring sweetness to the viburnum fruits. During this period, the destruction of glycosides occurs.
Many gardeners are afraid that birds may eat the crop, so they try to harvest it quickly. Unpicked berries do not fall off the branches and remain until spring. After the first snow falls, viburnum loses its attractiveness, the fruits become wrinkled, but do not lose their beneficial qualities.
According to the lunar calendar
The moon actively influences the quality of collected plant parts. Therefore, during harvesting, some rules are taken into account
In the First Phase of the Moon, attention is paid to the underground parts of green spaces. In the Second Phase, the plant's terrestrial organs are harvested
Energy coming from below carries all useful substances upward during this period.
The fourth phase of the Moon is similar to the second, and therefore also contributes to harvesting. In the Third Phase of the Moon, they are mainly engaged in drying flowers and fruits. The main harvest of viburnum fruits and bark occurs at the end of September.
Depending on the variety
The most common types of shrubs include: Red bunch, Pomegranate bracelet, May sweet, Lightning. These varieties are among the frost-resistant plants and can withstand temperature changes. During fruiting, they are rarely attacked by pests. Berries can be collected until spring.
Viburnum varieties Zarnitskaya, Sunset, Ryabinushka and Shukshinskaya ripen in early September. Vigorovskaya and Zholobovskaya viburnum ripen by the middle of the first month of autumn. The fruits of Viburnum Maria are ready for harvest at the end of August. By the end of September, the berries of the Souzga variety, which grows in the central region, ripen. In the southern part of the country, the varieties Elixir, Aurora and Red Bunch ripen in mid-September.
Each variety of shrub plant belonging to the Adoxaceae family has its own characteristic features. Mostly, Sadovaya viburnum is grown in private plots. The plant is also harvested in September.
How to store fresh
As soon as the berries are ripe, you can start harvesting. To do this, choose a sunny day. Place the harvest in baskets made from wood shavings. Immediately place the collected raspberries in the shade, otherwise they will spoil after 4 hours. After picking, the berries are stored for 8 hours at a temperature of +20 degrees, so care must be taken in advance to transport them to a cold room.
Preparation
Before placing raspberries in the refrigerator, you need to properly prepare the product. To do this, inspect the berries and remove specimens that show signs of mold and mechanical damage. There is no need to wash the fruits. Next, place the selected raspberries in plastic containers in 2 rows.
Stuff in the refrigerator
Before placing containers with berries in the refrigerator, they should be covered with a napkin. It is not recommended to keep the product near the freezer, since the raspberries will be cold there. The ideal storage location is the middle shelf of the refrigerator. Under such conditions, the product will remain fresh for 10 days.
Important! Raspberries can absorb extraneous odors, so they need to be placed separately from other products
How to keep viburnum fresh for the winter
The easiest way to store viburnum is fresh, in bunches. They will need to be placed in a ventilated container and placed in the refrigerator.
But it will not be possible to preserve a large amount of the product in this way, so viburnum brushes are hung in ventilated cold rooms, for example, on an unheated glazed balcony. For several months, the product will not lose its presentation and retain its beneficial properties.
Storing in a warm room, for example in the kitchen, will slightly shorten the shelf life.
You will learn even more useful information on the topic by watching the video:
Viburnum wine
- For liqueur wine: 400 g sugar and 150 ml water
- For dessert wine: 350 g sugar and 500 ml water
- For table wine: 300 g sugar and 1.7 l water
Viburnum is crushed, water and a quarter of sugar are added and left for 3-4 days to ferment. After this, the wine is filtered and another quarter of the total amount of sugar is added (the next portion will have to be added on the seventh day of fermentation, and the remaining sugar on the tenth). The bottle is closed with a stopper with a water seal. After the fermentation process is completed, the wine is bottled and tightly closed.
Viburnum will fill you with health and delight you with the taste of healthy preparations. The fruiting season of this berry is already close - don't miss it.
Not many people know about the benefits of red viburnum berries, which contain many essential microelements and vitamins to maintain health. The fruits have a strengthening effect, improve heart function, and calm neuroses. There are many recipes for preparing viburnum for the winter: jams, tinctures, preserves, compotes, syrups, jellies. A decoction of the fruit helps with hypertension, gastrointestinal problems, colds, hemorrhoids, bronchial asthma, and restores metabolism.
Important aspects
To store without a refrigerator, you need to create conditions in which the berries will be in a cool, dry place. Since ancient times, fruits have been stored like this:
- tied into bunches of bunches, hung on a thread in a dry basement or attic;
- if you have a cool pantry, you can store the berries there;
- Instead of an attic, you can place them suspended on a glazed balcony;
- Alternatively, put the bunches in a cardboard box, cover it with paper and take it to a dry cellar.
It is also convenient to keep fresh viburnum in bunches in the kitchen, beautifully hanging it from the ceiling. This will not affect the taste and healing properties of the berries, but they will become shriveled as moisture is lost.
Shelf life in this form is up to 6 months in the kitchen and up to 10 months in other specified places.
How to dry viburnum at home
Viburnum is a beautiful and useful plant. Viburnum ripens very late, so harvesting viburnum berries is best done after the first frost. And although viburnum berries turn red long before they ripen, even birds do not eat them until the first frost. Unripe viburnum is hard, bitter and tasteless, but ripe berries are soft and almost transparent.
It is precisely this ripe viburnum that is collected in order to prepare it for the winter. Fruit drinks, juices, tinctures, marmalade, marshmallows, jam and marmalade are prepared from viburnum. One of the good ways to prepare viburnum for the winter is drying. You can dry viburnum in the oven or electric dryer.
Dry viburnum is stored in a dry, dark, cool place, in glass or tin jars. Dry viburnum can be stored for up to 4 years, using it to make tea, soups, or chewing it as a natural vitamin treat.
Other harvesting methods
At home, in addition to drying, other methods of preparing viburnum for the winter are practiced.
Fresh in the refrigerator
Viburnum brushes are washed until the water is clear, dried, packaged in food storage bags and placed in the refrigerator, in the vegetable/fruit compartment.
Freezing
To increase shelf life, viburnum is frozen in whole bunches, but it is also possible to pre-separate the berries. The fruits are not washed first, as this is done immediately after defrosting. To remove excess moisture, the berries are placed on gauze folded in several layers and left for 4-5 hours. Then they are transferred to plastic containers or special bags for freezing. In this form, the raw materials are stored for 12–24 months.
Drying
Clean berries without stems are dipped in hot water and blanched for 3-4 minutes to remove bitterness. After this, it is dried a little, sprinkled with sugar (250 g per 1 kg of raw materials) and left for a day at room temperature. The next day, the resulting juice is drained, the fruits are again covered with 250 g of sugar and kept for a day at room temperature. The juice is removed again, and the viburnum is poured with hot syrup made from sugar and water. After 5 minutes, the syrup is drained.
The fruits are laid out in an even layer on a baking sheet covered with parchment paper and placed in an oven preheated to +85°C for half an hour. When the berries have cooled completely, they are transferred to an airtight glass or plastic container.
Grated viburnum with sugar
The berries are separated from the branches, the stalks and spoiled specimens are removed, washed under running water, and dried on a paper towel. Mix the fruits with sugar in a 1:2 ratio and turn them into a homogeneous mass using a blender, food processor or meat grinder. The puree is stored in sterile glass jars with an airtight lid in a cool place. Shelf life: 12 months.
Juice
Clean and dry berries are processed into juice using a juicer. The resulting liquid is mixed with sugar in a 1:1 ratio. The drink is poured into a sterile plastic container with a tight-fitting lid. Store in the refrigerator.
Tincture
The tincture is used exclusively as a medicine for the treatment and prevention of seizures, respiratory infections, liver diseases, stomach and duodenal ulcers, cholecystitis.
To prepare the tincture, combine 50 g of viburnum berries with 500 ml of vodka (the proportion should be 1:10) and mix. Infuse in a dark glass bottle for 1 month. Store in a clean, dry container with an airtight lid, avoiding direct exposure to sunlight. Shelf life - up to 5 years.
Jam
Boil syrup from 1.5 kg of sugar and 500 ml of purified water. Add 1–1.2 kg of viburnum berries, mix, bring to a boil and remove from heat. Leave indoors at room temperature for 12 hours. Then boil again, cook for 20–30 minutes, stirring constantly and removing foam. Pour the jam into sterilized jars and close with metal lids. Keep in the refrigerator for 1-2 years.
Jam
1 kg of pre-prepared berries is poured with 0.5 liters of water. Cook over low heat, stirring constantly, for 30 minutes. Add 1.5 kg of sugar, mix and cook for another 40 minutes. Hot jam is poured into sterilized glass jars and rolled up.
Bottom line
Despite the good smell and bright, beautiful color, viburnum is not a product that can be consumed haphazardly whenever you want. First of all, it is a herbal medicine that has a therapeutic effect. It should be used in limited doses and in a specific order.
Storage of viburnum berries, which was carried out in violation of the temperature regime and other standards, can lead to the complete destruction of the preparations. Their taste, color and smell will change, and mold will begin to form on the surface of the fruit.
This is a very healthy but delicate berry. Therefore, without knowing how to store viburnum at home, it is better to consume it fresh.
Rules for storing basil in winter
Basil should be stored taking into account the permissible period, which depends on the type of preparation. Frozen products have the longest shelf life. The following rules apply:
- frozen - up to 2 years;
- dried - up to 1 year;
- canned - up to 1 year;
- salted - from 3 to 4 months.
Properly prepared basil can be stored for at least a year. After opening, the jars are stored in the refrigerator. To avoid spoilage, the product is consumed immediately after opening the container, therefore, when preparing preparations, you should not use large-volume containers. Containers from 250 to 500 grams are considered optimal. If defrosted, the product is not re-frozen, since the taste and external qualities are greatly lost.
Dried basil is stored in linen bags in a dark place or in an airtight container. It is recommended not to keep the seasoning together with other herbs to prevent the absorption of foreign odors. Under proper storage conditions, greens can be stored for more than a year, but over time, the aroma and beneficial qualities of the plant decrease.
Do not store greens in places with high humidity levels, as this increases the risk of mold due to water absorption. The quality of the product should be checked periodically to prevent the appearance of rot; if such a problem exists, the seasoning should not be used for culinary purposes.
How to feed viburnum in the fall. Growing and caring for viburnum
Viburnum is a shrub with bright scarlet berries, revered for its healing properties. Viburnum is also valued for its beauty. At any time of the year, it will decorate the garden with its appearance if it is planted and cared for correctly.
viburnum reproduces both vegetatively and by seeds
To do this, the plant requires special attention, and the process will take a lot of time. Viburnum grown from seeds bears fruit and blooms only after 5–6 years
But such a shrub is much hardier and more adapted to natural conditions.
Selection and preparation of planting material
There are two ways to grow a bush from seeds. You can sow freshly harvested seeds directly into the ground in late autumn. They do not require special preparation. This is a long time, because the plant will begin to germinate only after 18 months. By the summer of next year, the sprout will have completely formed only the root system. It will take two years for it to develop shoots on the soil surface.
It is enough to select a well-ripened seed and place it in the soil.
A shorter way is to prepare seedlings through stratification. It consists of two stages and takes 3 months (more about it below).
Selecting a location and disembarking
Whether the plant will germinate next summer depends on where it is sown.
It is important that the seeds are constantly kept in moisture
You need to choose an area of soil that is poorly illuminated by the sun. There the moisture does not evaporate as quickly. The sown area must be clean so as not to disturb future shoots, so you should not pull out weeds in the garden bed or otherwise move the soil around the seeds.
Further care
To speed up the germination process, preparation takes place in two stages:
- Seeds soaked in periodically changed water for two days are placed in a humid environment (sawdust, sand or moss) for two months. The temperature at this time should be +18…+28°C.
- The second stage of preparation consists of moving the seedlings to a cold place with a temperature of +1...+4°C for a month. After this, they can be moved to a greenhouse or seed boxes. The sprouts need to be replanted so that only the brown root goes deep into the soil.
Time frame for transplantation to a permanent place
After the seedlings develop 2–3 healthy leaves, they can be planted in a nursery on the open ground
At this stage, special attention to moisture levels is necessary. Seedlings need to be watered frequently and sprayed with a spray bottle as needed.
After a year they can be transplanted to a permanent place.
Planting viburnum seedlings
Propagating the plant vegetatively is easier and faster. A bush grown from seedlings will be able to bear fruit within 2–3 years after planting. Viburnum can also reproduce by dividing the bush.
In this case, the planting material can be vertical shoots and cuttings.When to plant
The most favorable time for planting seedlings is late autumn. Bushes planted at this time take root better. You should choose the time before the first frost. Planting can also be done in spring. This must be done before the buds open.
How and where to plant
Viburnum is most comfortable in partial shade. She loves high humidity and slightly acidic soil. To plant a bush, you will need a hole 50 cm wide and deep. The top layer of soil must be mixed with a bucket of humus or peat or two glasses of “Nitrophoska”. The resulting mixture must be divided into 2 parts. Part of the soil needs to be poured into the planting hole and a mound should be formed. You need to pour up to 40 liters of water into it.
The seedling can be planted in the hole in two days. A three-year-old seedling needs to be placed on the resulting hill and its roots straightened. After this, the hole is filled with soil. The tree trunk circle should be thoroughly compacted and then watered abundantly. After the water has been completely absorbed, the soil around the trunk is sprinkled with peat or compost.
It is important that the root collar of the bush is buried 50–60 mm into the soil
Viburnum care
The plant needs proper care. Its absence is fraught with various diseases and even the death of the bush.
To maintain the health of viburnum, it is necessary to regularly:
- feed;
- trim;
- carry out disease prevention.
The bush requires proper care depending on the time of year.