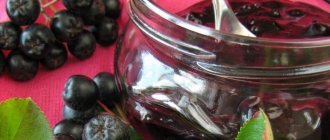
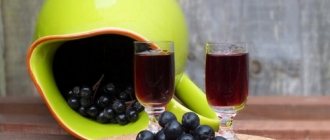
Homemade wines are not only tasty, but also very healthy, and they do not contain any artificial additives. It is always a pleasure to drink such products in any company.
Chokeberry wine, which can be prepared in several different ways, is considered especially valuable and useful.
Recipe for chokeberry wine at home without yeast
All wines are made practically without the addition of yeast. Because the berries already have their own live yeast. But sometimes, in exceptional cases, yeast is added to the wort to activate the fermentation process. This affects the taste, and the result is no longer wine, but mash. Therefore, the best option is not to add yeast. We will consider such a yeast-free recipe.
So, you have a lot of black rowan in your garden, or you know places where there is enough of it to collect it for wine.
The only thing that is recommended is to collect rowan after the first frost, then it will not have such a tart and bitter taste.
We collect rowan berries, then sort them, removing all twigs and leaves, leaving only clean berries. There is no need to wash the rowan, although you can simply rinse it in cold water.
To prepare wine for 5 kg of berries you will need:
- 1 kg sugar
- 1 liter of water
- a little raisins - about 50 g. But add raisins as desired. In principle, it is not required.
At the first stage, you need to mash the berries. Since rowan is somewhat harder than grapes, it will be difficult to press with your hands. It’s better to take a potato masher, for example, and crush all the berries with it.
After mashing the berries, add sugar to it.
Added and stirred. The taste of the future wine depends on the amount of sugar. You can adjust it by adding more or less sugar, the main thing is not to overdo it. Otherwise, the sweetness will remain, and there will be no way to remove it. Place the container with the crushed berries for fermentation. After some time, the process of intensive fermentation will begin.
The juice will last for a week. During this time, it is necessary to periodically approach the container and stir.
After a week, we move on to the next stage - separating the juice from the pulp.
To do this, take gauze and squeeze out all the pulp through it, which we put in a separate bowl. We'll need it later. We also filter the juice itself so that nothing remains in it. Here, in addition to gauze, you can also use a sieve.
At the next stage, we prepare glassware - jars into which you need to pour the strained juice. Wash the jars well with baking soda first. You can also, as for pickles, sterilize them in the microwave.
Pour the juice into the prepared container. Do not pour to the very top, but leave a little space.
Now let's move on to the cake. Pour 0.5 kg of sugar into it and pour a liter of warm water.
It is advisable to add spring or bottled water, but not from the tap. Then we set this mass to ferment for 7 days.
The first batch of squeezed juice and poured into a jar is set for fermentation. We install a water seal on top of the neck of the can or put on a glove. We put the jar in a warm and dark place for fermentation.
Above we talked about raisins. At this stage, you can add 50 g of raisins to the jar of juice if you want to play it safe and start the fermentation process faster. But, I repeat, this is not at all necessary.
While the first jar sits fermenting, after seven days we take out the cake, which we filled with water and filter it in the same way so that only liquid remains. Now we throw away the cake.
Then you will need to mix this juice with what is fermenting in the first jar. To do this, remove the water seal or glove, remove the foam and add the second juice to the first. If you remember. We did not add juice to the very top of the jar, but left a little space. This is just for the second portion.
Now we install the water seal again and set it for final fermentation, which will last from a month to two. The end of the process will be indicated by the falling glove and the cessation of the release of bubbles.
As soon as you saw. Once fermentation has stopped, it is necessary to remove the wine from the sediment or simply strain it. Take a silicone tube and lower it into the wine without touching the sediment. Thus, pour the wine into another clean container. At this stage, we taste the wine and if it tastes sour, add a little sugar.
We’ve strained it, now we’re putting the wine to mature. Fill the prepared bottles to the very top and close the lid tightly. We also place the bottles in a dark, but colder place: a basement or refrigerator. The maturation process lasts from three to six months. If sediment appears, the wine must be filtered every 30-40 days.
That's the whole process. After the ripening period has expired, the wine is stored until it is needed.
It’s not wandering, what should I do?
Poor wine fermentation is a common problem for beginning winemakers.
The reasons are non-compliance with the recipe or inexperience.
| Cause | What to do? |
| No signs of fermentation | Yeast needs time to activate. you need to wait 5 days, perhaps bubbles will appear during this time. |
| The bottle is not sealed tightly | The air seal is not installed correctly or air is getting under the glove. |
| The temperature regime is not maintained | Move the container to another location and monitor the temperature. |
| Excess or lack of sugar | Taste the drink and add sugar or water if necessary. |
| Little yeast | Add some unwashed raisins or wine yeast to the wine. |
| Poor quality raw materials | If bad berries were used for wine, mold will appear on its surface and the product will have to be thrown away. |
Important! Perhaps the fermentation process has ended and the wine is ready!
What can be done if the wine does not ferment is described in the video:
How to make wine from chokeberry with cherry leaves and vodka
This drink can rather be attributed not to wine, but to liqueurs. Liqueurs are sweet fruit and berry alcoholic drinks, the strength of which is 18-20%, and the sugar content is 28-40%.
The result is a very sweet alcoholic drink. True, not everyone likes such wines, but they have their own aroma. And if you saturate it with additional ingredients, you will get a tasty and pleasant drink.
Here is a recipe for preparing one of these tinctures that will be offered to your attention.
To prepare it you will need to take the following components:
- chokeberry - 3 cups
- water – 1 l
- vodka – 500 ml
- sugar - 500 g
- cherry leaves – 50 pcs
- citric acid – 1 tbsp. l
The preparation of tincture, unlike wine, is not so strict according to the recipe. You can vary the ingredients. For example, to get a sweeter liqueur, add more sugar, and to get a stronger drink, you need to add more vodka.
So, we wash the collected rowan under running water, put it in a pan and mash it with a masher.
As soon as the berries release juice, add a little cold water and crush further until all the berries turn into a crushed mass.
To obtain a pleasant aroma, add well-washed cherry leaves to the berries. In principle, leaves from other fruit trees can be used. However, cherries provide a richer, aromatic flavor.
If you are starting to prepare a drink for the first time, it is better to use this most popular option, and then experiment with other components.
Place the pan with grated berries and cherry leaves aside for half an hour. After the specified time has passed, put the pan on the fire and warm it up, but do not bring it to a boil.
At the next stage, take a sieve, put gauze in it, pour the contents of the pan into it, and filter.
Then add citric acid and sugar to the strained liquid. At this stage, add as much sugar as you want the liqueur to taste. If it’s sweet, then add a little more sugar than indicated in the recipe. Then put it back on the fire and bring it to a boil. After this, remove the pan from the heat, cool and pour in vodka.
That's it, the liqueur is ready, all that remains is to pour it into bottles and put it in the refrigerator.
When it’s time for a holiday or friends drop by for a quick visit, you’ll take out your own homemade liqueur and please both yourself and your friends.
Necessary equipment
To prepare the drink you will need:
- Glass bottles with a capacity of 10 to 20 liters - for fermentation, 3 liters - for settling. Bottles with corks are required for storage. Wooden barrels are considered the best container for fermentation, but not everyone has them. Therefore, you can limit yourself to either glass or enamel dishes. Plastic containers can impart an unpleasant taste to the drink.
- A water seal can be made from a rubber glove by making a hole in one of the fingers with a needle. They are also sold ready-made.
- Gauze for filtering and colander.
All equipment is available and homemade wine can be prepared if desired.
A simple recipe for making homemade wine from chokeberries and apples
To slightly enhance the aroma and taste of chokeberry wine, you can add other fruits, such as apples, to the rowan. This wine will have a tart taste, slightly sweet with a slight sourness. It will be ruby in color, and if a glass of wine is illuminated, it will become transparent.
Preparation of rowan-apple wine will take from 3 to 5 months. The entire technology is almost the same as when preparing any other wine.
What do you need to take to make rowan-apple wine?
For 2 kg of chokeberry you will need:
- 1 kg apples
- 3 kg sugar
- 2 liters of water
We start by preparing the collected berries and fruits. We clean the rowan from branches and leaves, select the best berries. We put them in a pan, basin or bucket, where we then crush them using a masher. As a result, the berry will produce juice.
Now let's move on to apples. We will only need good ones, without wormholes or any other damage. Cut the apples into small slices, removing the core.
You can, as when preparing pure apple wine, grind all the apples to a puree.
Mix apples and rowan together, add 1 kilogram of sugar. Then stir it all well.
Now we take a jar in which we will ferment the mixture. Wash the jar well first. It is better to use a three-liter jar. Pour the resulting mixture of rowan berries and apples with sugar into a clean jar, then pour two liters of boiling water. Pour so that there is a little free space left to the edge of the jar.
Add another kilogram of sugar, mix everything and tie the neck of the jar with gauze. We put the jar in a warm and dark place for fermentation. She will stay there for a week. About twice a day you will need to shake the jar or remove the gauze and stir the wort with a spoon.
After a week, strain the wort, removing all the cake. We squeeze it out because it contains a lot of juice. After this, the cake can be thrown away. We pour the wort into jars, install a water seal or put on a glove.
So the cans last for about a week. Then add the remaining sugar and leave to ferment completely. The end of the fermentation process will be indicated by a fallen glove and the cessation of bubbles. Now you need to strain the wine, separating it from the sediment.
Using a silicone tube, carefully pour the liquid into another container without touching the sediment. We close the lid and put it away for maturation in a dark, but cooler room. Here the fermentation process will also continue, but it will no longer be active as at the previous stage. The process will last approximately five months. Then, in the same way, remove the finished wine from the sediment, pouring it using a straw.
We arrange the previously prepared bottles and pour the finished wine into them.
We close the bottles tightly with a lid, put them away for storage in the refrigerator or cellar, whoever has what. Now all that remains is to wait for the right opportunity and try what happens.
But we must not forget that wine prepared at home can be stored for no longer than five years. But I think any home winemaker will not store his wine for such a long time.
How to choose the right berries for making wine
The most important thing when using chokeberry to make wine at home is to collect ripe berries. By the end of August, the chokeberry begins to darken, but this does not mean that it is already ripe. It is necessary to wait for frosts in October, after which chokeberries have a sweetish taste. To check ripeness, you can use another trick: if you crush the berries, the juice should have a rich ruby color.
It is important to pay attention to the appearance of the chokeberry. It should not be wrinkled, damaged or rotten. The berries should be large, shiny, and not too hard. If you lightly press the chokeberry with your fingers, it will be a little soft. Before cooking, the berries need processing - removing the branches. By following these rules when choosing chokeberries for making homemade wine, you will enjoy its sweet taste.
How to make homemade chokeberry wine with yeast
One of the options for making wine involves the use of yeast. It is best to use wine yeast. They provide faster fermentation.
In this recipe we will take all the ingredients in the following proportions:
- Chokeberry - 6 kg.
- Water – 2 liters.
- Yeast – 30 g.
At the first stage of making wine, you need to prepare the berries. We go through them, leaving only the good ones. Then they need to be crushed. We do this using a masher or meat grinder. A blender will also work. After chopping, take gauze and use it to squeeze out the crushed berries. As a result, from 6 kg of berries we get about 4 liters of juice. The juice can be put in the refrigerator for now, but we will need squeezed berries.
We heat two liters of water to 70 degrees and pour it over the berries, or rather the squeezed berry mixture. Then cool and pour the infused water into the prepared container. We will still need this water. We repeat the procedure again and strain the berries again. We pour both infusions, which were obtained during two strainings of the crushed berries, together. Then we add these four liters to the juice that we received earlier. Thus we received 8 liters of wort.
After all the liquid has been drained together, you will need to add sugar. Sugar is added in three steps. The first at this stage, add sugar a second time after five to six days, and a third time after another week.
Preparing Ingredients
When can you start picking berries? As a rule, rowan reaches full ripening in late autumn, and harvesting is best started after the first frost. By this time, the berries reach maximum ripeness and juiciness, and the sugar content is at its highest level. A similar effect can be achieved by placing the berries in the freezer for 3-5 hours, and then defrosting them naturally. But still, natural ripening is preferable. Wine is a drink that you shouldn’t rush into, so to get a wine with unsurpassed taste, you should be patient and wait for the berries to ripen and fill with juice and sugar in natural conditions.
Rowan is characterized by its astringent, bitter taste. To remove astringency from future wine, it is necessary to remove tannins from the berries, with which they are saturated in large quantities. There is nothing complicated about this, just soak the berries in hot water.
The soaking process occurs in two stages. The berries should be placed in a large container and filled with hot water. You should not use steep boiling water, since the goal is not to cook the raw material, but to get rid of the astringency. The water temperature should be between 90–95 degrees, that is, quite hot, but not boiling water. After 4 hours, the first batch of water is drained, since it has already cooled down, and the berry is filled with a new portion of hot water. After the second water has cooled, you can drain it completely.
At this point, the preparation of raw materials is completed. You can move on to analyzing simple recipes for red rowan wine at home.
Homemade chokeberry wine, a simple recipe with vodka
In the recipes above, we looked at options for preparing wine and liqueur. But there is another wonderful and very easy to prepare drink called tincture. There is no need to squeeze or press anything. We simply infuse chokeberry in vodka.
The best option would be, of course, alcohol, but if you don’t have the opportunity to get it, then vodka will do. But again, you need to take good vodka.
To prepare this tincture we will need:
- Chokeberry (berries) – 1 kg.
- Vodka or alcohol – 1 liter.
- Sugar – 300 g.
Sugar may not be added. This is up to your discretion. When I make such tinctures, and for any berry, I don’t add sugar at all. But some people like a little sweet taste, so decide for yourself.
So, we sort out the rowan, rinse it under cold running water. We prepare a container - a jar. We wash it well and dry it. You can use bottles instead of cans. Place the berries in the container. If you make it with sugar, then add sugar too. Now all that's left is to pour the vodka. Pour it so that it is three centimeters above the layer of berries. Close the jar or bottle with a lid (cork) and shake well.
In the future you will have to shake a lot, and therefore it is better to use a bottle as a container - it is more convenient to shake.
Then we place the container in a dark place, where it will infuse for 60 days. Every four days you need to take the container and shake it well. After two months, we take out the finished tincture and filter it through cheesecloth. Then we bottle it and close it with a cork.
That's it, the tincture is ready, put it away for storage. As you can see, the process is very simple. If you don’t want to bother making wine, but want to have a tasty and aromatic drink for your treat, then this tincture is suitable.
I would like to make one more small remark from my own experience. Many, as described above when preparing the tincture, at the end of the process, filter it, throwing out the berries. I don't throw it away, but use it again. It turns out just as well, rich color and pleasant taste. This applies to any berry.
This was a classic tincture recipe. But it can be prepared not only from one berry, but to give it more flavor, you can add another component. Cloves are often added. But I liked the option with honey. Everything is prepared almost the same way.
For half a kilo of rowan you need to take:
- half a liter of vodka
- two tablespoons of honey
Pour the berries into the jar. Then pour in honey. If your honey is very thick or candied, you will first need to melt it in a water bath. After this, pour in vodka and mix everything well.
Now close the jar with a lid and put it in a dark and warm place. Here it will remain for two months or 60 days. Periodically, once a week, the jar will need to be shaken.
At the end of the infusion period, strain the tincture through cheesecloth and bottle it. Close the lid and put it away for storage.
I think you will like this version of the tincture. I didn’t make such a tincture with rowan, but I did use it with blueberries. It didn't even turn out bad at all.
What utensils will you need?
For home winemaking, it is important to choose the right vessels for preparing the wort and fermentation. It is better to give preference to wooden, glass, enamel without damage, and also dishes made of food-grade plastic. For fermentation it is more convenient to use the first two types, and for intermediate overflows the other two. If you want to use a wooden one, then it must be made of oak. Containers made of pure metals - iron, copper, aluminum - are not suitable for winemaking.
Glassware makes it possible to observe fermentation through transparent walls, but it has disadvantages: fragility, impermeability of the walls to air, but to accelerate the maturation of the drink a small amount of air is needed, and flexibility to temperature changes. To eliminate the influence of these disadvantages on making wine at home, glassware is wrapped in felt, thick fabric, and placed inside a wicker basket.
Wooden utensils are considered traditional in winemaking. In it, the temperature fluctuates slightly, the wort is protected from the influence of light, air penetrates through the pores of the material in small quantities, sufficient for the yeast to work. Wine in barrels matures more fully, faster, and the oak imparts tannins and qualities to the drink that are not available when made in glass and other containers. However, in wooden containers it is impossible to monitor the progress of fermentation.
- 7 types of love
- How to find a lost phone by satellite
- Knitting for women fashion models 2021 with description
Chokeberry wine at home, a simple recipe with water
In conclusion, I would like to give a fairly simple recipe for chokeberry wine, which can be prepared even in winter. Yes, don't be surprised. The fact is that here we will use frozen berries. Many collected berries are not all used for various purposes, and some are frozen for the winter. Imagine, in the harsh winter you take a piece of summer out of the refrigerator, wonderful, isn’t it?
We will need to take:
- three liters of clean water
- 2.5 kg sugar
- 200 g raisins
- You need so many berries that the juice squeezed out of it is three liters
Squeeze the berries and get juice. Then it must be heated to room temperature, add sugar and water.
Then pour the entire mixture into a large fermentation container. This could be a jar or bottle. We install a water seal on the throat or wear a glove.
This way the wort will sit in a dark place until the fermentation process is complete. After this, it will be necessary to remove the resulting wine from the sediment. We take the tube and pour it into another container. If you had wine in a jar, you can carefully just pour it over the edge. The Barrier water filter is also suitable. You can use gauze folded in several layers and placed on a sieve with small cells.
The wine was poured. Now it needs to be put to maturation. Pour into bottles, tightly cap and place in a dark, but cooler place for three months.
After this time, we filter the finished wine again and bottle it for storage. That's it, the wine is ready, you can call your friends and show off your creation.
The benefits and harms of the drink
Wine made with your own hands at home is recommended for consumption if you have a number of problems:
- excessive body weight;
- accumulation of toxins and waste in the body;
- rheumatism;
- increased pressure in the arteries;
- nervous excitability;
- radiation sickness.
Wine improves appetite, eliminates stomach cramps, protects the body from infections, and also reduces the risk of developing cancer.
The drink has all the healing properties inherent in chokeberry fruits. As a result of its use, radionuclides, toxic substances and heavy metal salts are removed from the body.
With all the beneficial properties, it is important to keep in mind the possible harm.
The drink contains pollen, yeast and other histamines, so it should not be abused by people who are prone to allergic reactions.
Chokeberry wine can also aggravate migraine symptoms.
It is highly undesirable to drink chokeberry wine under the following conditions:
- pregnancy and lactation;
- tendency to constipation;
- severe hypotension;
- increased blood clotting, varicose veins and thrombophlebitis;
- gastritis with high acidity;
- stomach ulcer, duodenal ulcer.
Tips for beginning winemakers
- Never wash the fruits, as there is a natural yeast on their surface that causes fermentation. This is a common mistake of novice winemakers. You can correct this by adding raisins or yeast to the wort.
- Close the bottle hermetically, be sure to artificially vent gases - wear a glove with a hole in the finger or install a water seal. Lack of sealing can slow down the wort fermentation process. And air, once inside the vessel, contributes to the souring of the product.
- Depending on the room temperature and the amount of sugar, fermentation may begin after a few hours, or only after 3-4 days.
- Temperature conditions. Yeast begins to work actively at a room temperature of 10-30 o C. 18-20 o C are considered optimal. At higher conditions, the yeast dies. Put it in the cold - the yeast will fall asleep. Avoid temperature changes, maintain the temperature at which fermentation began.
- If the wort consistency is too thick, be sure to dilute it with water or juice, but not more than 15% of the original volume.
- Don't be alarmed if you notice mold at first. Remove it and pour the wort into another container.
