You never know what this or that product is made from, because it may contain harmful “Eshki”, emulsifiers, and unnatural dyes. Fortunately, you can cook a lot of things at home, just the way you want. Chocolates are no exception. The cooking process may seem complicated at first, but the quality and unmatched taste are worth it.
Tips for making chocolates at home
You will get the perfect dessert if you follow these simple rules:
- chocolate does not tolerate rooms with temperatures above 20°C;
- We monitor the melting temperature of the chocolate bar so that a white coating does not form on our sweets later. The maximum melting point for bitter is 32°C, for milk – 29-30°C, for white – 28°C. The temperature is checked with a candy thermometer;
- not a single pot of water should fall into the container with melted chocolate, otherwise the delicacy will be spoiled;
- if you cool the candies in the freezer, be sure to use a closed form (you can use cling film), otherwise the finished dessert will have an unpleasant smell;
- In any recipe for preparing homemade delicacies there is a heating process: never allow the chocolate mass or any other liquid or mixture to boil;
- It is better to use powdered sugar instead of sugar; with its help you can easily adjust the consistency of the mass.
Homemade chocolates yourself
DIY sweets at home: recipes and photos
Chocolate... so much in this word! Each of us has a favorite taste, familiar from childhood or discovered in adulthood. And who wouldn’t be “hooked” by an advertisement with pouring liters of sweets, a fountain or a fondue with liquid icing? It’s very easy to prepare all this yourself, causing the surprise of guests at a family celebration, the joy of the birthday boy from such a gift, or simply creating a small holiday for yourself.
Belgian chocolate
Historically, sweets appeared in Belgium in the 19th century - in 1839. Then the confectioner Stolwerk began to make tiles in the shapes of local, Hanseatic gingerbread, which had been accepted by that time. In fact, the word candy implies a shaped small tile. In the same Belgium, in 1912, confectioner Jean Neuhaus, who founded the Neuhaus confectionery brand, saw the opportunity to make a body with candy filling.
The first such sweets were filled with “praline” - a mixture with a base in the form of nuts, as well as cocoa, powdered sugar and milk powder. They were made by hand. In 1915, the process of making treats was mechanized. Also, a few years later, Neuhauz's wife invented the rectangular "ballotin" box, in which most gift delicacies are now sold.
Recipes for chocolates with cocoa - photos
Everyone loves sweets, but everyone prefers different types of treats. Of course, the first things that come to mind are chocolates, cakes, cookies and muffins. Sweets can be healthy and homemade!
To cook deliciously and interestingly, you don’t need to have a lot of equipment, cutting-edge kitchen gadgets or expensive cookware. An unusual duck in apples can be successfully baked on a regular baking sheet in foil, exquisite coffee with syrup can be prepared in an inexpensive but beautiful Turk, and a bouquet of sweets requires only sleight of hand.
Filling
The prepared filling (fondant, gillyage, praline, etc.) is placed in silicone molds. The sweets are then frosted, usually drizzled with hot cocoa frosting. Those that are made by hand, on the contrary, are dipped in glaze.
The hardest filling is grillage. It is made from sugar and roasted chopped nuts. This is one of the expensive varieties; in the Soviet Union they were considered elite, but they are easy to make yourself.
Please note that there should be no large sugar crystals in the grilled meat - if this is the case, it means that the grilled filling was made carelessly, the technology was broken.
Chocolate balls
Homemade sweets compare favorably with factory-made ones due to the complete absence of chemicals. It’s a paradox, but delicacies prepared in a factory are more expensive the more natural their ingredients are. We pay factories less so that sweets can be produced in larger quantities and can wait for their consumers. But we are willing to pay more for naturalness.
However, believe me, all this is easy to do at home!
So, the ingredients for your first masterpieces: Vanilla crackers – 300 g; Milk – 250 g; Butter – 200 g; Sugar – 250 g;
This is the basis not only for this recipe, but for any desserts.
We add cocoa - 100 g, so that the sweets contain cocoa beans (or you can leave it as is - there will be a “white glaze”, or add glucose balls to the sprinkling instead of cocoa); Walnuts – 100 g; Powdered sugar – 50 g – for sprinkling.
This dessert will be similar to the mini-pie “Potato”, familiar and loved by everyone since childhood.
Take the butter out of the refrigerator in advance. Heat milk in a saucepan until hot. Stir cocoa and sugar, then place in a saucepan with milk and cook until sugar dissolves. Crumble the crackers with a mortar or meat grinder. Place the finished crumbs in a container with milk, cocoa and sugar, stir. Cool at room temperature for half an hour. During this time, crush (grind in a food processor) the walnuts. Mix walnuts, powdered sugar and remaining cocoa for sprinkling future candies. Now add butter to the main mass for sweets (you can warm it up a little in the microwave, stir the mass in a container until it becomes homogeneous). Make balls and roll them in a mixture of nuts, powder and cocoa.
The delicacy is almost ready! It remains to keep the balls for about an hour in the refrigerator or half an hour in the freezer.
Chocolates Hedgehogs - joy in the house
This is a super healthy treat! Fruits and dried fruits do not cause much enthusiasm among many, but what do you say if you are offered an unusual and healthy delicacy?
The main composition of "Hedgehogs" is what we know from children's books that hedgehogs love: fruit. Dried apricots - 100 g; Raisins – 100 g; Dried figs – 100 g; Lemon – 2 pcs.
Add some nuts with honey: Walnuts – 100 g; Sweet almonds – 100 g – you can use one type of nut; Honey - the same amount as all previous ingredients by weight.
For sprinkling: Cocoa powder - 100 g or Powdered sugar - 100 g, or glucose colored balls for sprinkling.
You can maintain the proportions by changing the weight of the ingredients. Grind the first 4 ingredients and nuts in a meat grinder. Add to them in a ratio of 1:1 (the same amount) honey - preferably candied, not runny. You want the consistency of a good sticky dough. Now roll it into balls, roll them in powder, cocoa or balls. These goodies need to dry out. They should sit in the room for about 3-4 hours, then in the refrigerator for about an hour.
Chocolate candies with almonds “Surprise” - make at home
The ingredients are similar to our first recipe, the only difference is the absence of crackers.
Butter – 100 g; Powdered sugar - ½ cup; Cocoa powder – 100 g; Almonds – 50 g, (You can use raisins instead of almonds).
Heat and melt butter in a saucepan until hot. Stir cocoa and sugar, then place in a saucepan with butter and cook until sugar dissolves. Cool at room temperature for half an hour.
Almond time! Form balls from the cooled mass, placing a nut or raisin in the core of each.
A real yummy surprise is almost ready! It remains to keep the treat for about an hour in the refrigerator or half an hour in the freezer.
Chocolate covered almonds - a favorite and unforgettable treat
Want to make your own glazed nuts? Tired of looking for your favorite treat in stores? Now you don’t have to pay a lot of money for sweets, make your own and remember the taste you loved from childhood! It's quick and easy, but this recipe requires store-bought tiles. However, you can make your own frosting using the recipe above.
200 g almonds; 100 g of tiles (for melting; choose the taste yourself - milky, bitter, white); Baking paper.
For sprinkling - desirable, but not necessary: cocoa - 4 tablespoons; powdered sugar - 1 tablespoon.
Preheat the oven to 100°C. Dry the almonds, poured onto a baking sheet, in a preheated oven for about half an hour. Melt the tile in a saucepan or “water bath”. It is important not to stir it at this time! Sprinkle cocoa onto baking paper. Now, nut by nut, dip the almonds into the liquid, then roll them into the cocoa. The finished candies should be shaken in a sieve to remove excess cocoa powder. Leave to dry. Sprinkle with powdered sugar and place on the table for guests.
Chocolate covered raisins, DIY sea pebbles
Such a familiar childhood treat - sea pebbles! This is a multi-colored sugar icing. It can also be made with a glaze of liquid cocoa and sugar. 200 g raisins; 100 g tiles (for melting; choose the flavor yourself - milky, bitter, white).
Sea Pebbles just call for sugar (though raisins glazed with melted white tiles and food coloring might earn that name).
Baking paper; For sprinkling - desirable, but not necessary; cocoa - 4 tablespoons; powdered sugar - 1 tablespoon.
Preheat the oven to 100°C. Dry the raisins, poured onto a baking sheet, in a preheated oven for about 15 minutes. Melt the tile in a saucepan or “water bath”. It is important not to stir it at this time! Sprinkle cocoa onto baking paper. Now dip the raisins in the liquid, then roll in the cocoa. The finished candies should be shaken in a sieve to remove excess cocoa powder. Leave to dry. Sprinkle with powdered sugar and place on the table for guests.
For Sea Pebbles, melt sugar or white tiles in a saucepan, add food coloring to it (in the ratio written on the packaging of the product you purchased). Do not roll in cocoa or powder.
DIY sweets with condensed milk
Lunch - condensed milk with chocolate! Let's combine two of the best delicacies in the world! You will need: A can of boiled condensed milk with cocoa; OR A can of boiled condensed milk plus three large (heaped tablespoons) spoons of cocoa; walnuts - 1 cup, crushed in a mortar or meat grinder; 2 tablespoons flour or crumbled breadcrumbs: foil or parchment (thick); Berries from jam to taste - in quantity to taste.
For this recipe, you first need to boil the condensed milk. But since on average 10% of Russians have had a negative experience with condensed milk exploding, we advise you never do this! Why wash wallpaper and curtains when you can just buy boiled condensed milk? So, add crushed nuts (and cocoa if the condensed milk was regular) to a can of boiled condensed milk. Stir. Sprinkle an appropriate size of foil or parchment paper (about a sheet on an oven tray) with flour or breadcrumbs. Scoop out the condensed milk mixture with nuts using a teaspoon or an ice cream scoop in the form of balls. It is better if it is moistened with water. You will have to spread it onto the foil or parchment using a second spoon (otherwise you will have to shake it off, otherwise the shape will change). Place condensed milk balls on a sheet. There should be a distance of about 2 cm between them. Place a jam berry or raisin on each flatbread ball.
It is not enough for these sweets to dry at room temperature - you need to dry them directly on foil or parchment in a preheated oven for about 15 minutes at a temperature of 100. After removing from the oven, let the sweets cool, so remove (pick) from the baking sheet with a knife or spoon.
Coconut and Nut Treat Recipe
This is an unusual dessert recipe in the form of tartlets with icing and coconut crumbs.
You will need tartlet blanks - 30 pcs; 2 tablespoons of hazelnuts and peanuts or any other nuts to taste; 3 tablespoons sour cream; 2 tablespoons cocoa; 2 tablespoons sugar; 40 g butter.
It is important to take the volume of tablespoons without a slide. To diversify the recipe, you can take cashews, walnuts and pistachios: the choice of peanuts and hazelnuts is due to their relative abundance and the fact that they are not expensive, as well as the fact that they are the ones most often taken for confectionery.
Fry the nuts if they have husks (hazelnuts, peanuts) over moderate heat without vegetable oil until the husks come off. Tartlets will taste better with roasted nuts. You can just buy roasted nuts.
DIY chocolate
We continue to make tartlets using the universal method of preparing glaze. Of course, there are recipes with factory-made glaze made from melted tiles, condensed milk or milk. But we will take a standard recipe with what every housewife always has in her kitchen. We will cook in a large cezve or steel ladle.
Place the container on low heat. Pour in the ingredients and stir until smooth. The mass will not boil, but after the “gurgling” starts, you need to immediately remove it from the heat. The glaze is ready. This glaze can be used for glazed almonds, for pouring sponge cakes, and for glazing cookies.
In our case, let the mass cool a little - it is important not to miss the moment of hardening! At this time, place the purchased (or pre-baked) tartlets on a wide plate. Now we put our nuts on the tartlets. Moreover, if the nuts are larger (hazelnuts, cashews, almonds, pistachios), then one nut per tartlet is enough, small ones - 3-4 (pine nuts, peanuts).
Pour the cooled glaze over the tartlets along with the nuts. Try to wait and not let the cooled glaze reach the consistency where it “slides” out of the spout of the ladle or cezve in large drops. Then it will not moisten the tartlet too much, the latter will not soften. Try one of them and, if all is well, work with the rest.
Now you can start making coconut crumbs. Use a pinch or teaspoon to sprinkle it onto the top of the tartlets, on top of the chocolate glaze.
The candies will be ready after the glaze has hardened (becomes shiny and almost hard) on the tartlets. This will happen in 10-15 minutes, it may take a little longer.
We have prepared a photo of tartlets for this recipe - as you can see, your work will not be in vain, and homemade sweets will not be inferior in taste or beauty to sweets from the store.
DIY chocolate covered prunes
Do you want to make your own glazed prunes, are you tired of looking for your favorite delicacy in stores? Now you don’t have to pay a lot of money for sweets, make your own and remember the taste loved by many since childhood! Today it is a very sophisticated delicacy for adults. It is simple and quick, but this recipe requires a store-bought bar. However, you can make it yourself using the recipe given above.
200 g pitted prunes; 100 g of tiles (for melting; choose the taste yourself - milky, bitter, white); Baking paper; For sprinkling - desirable, but not necessary: cocoa - 4 tablespoons; powdered sugar - 1 tablespoon.
Preheat oven to 100°C. Dry the prunes, poured onto a baking sheet, in a preheated oven for about half an hour. Melt the tile in a saucepan or “water bath”. It is important not to stir it at this time! Sprinkle cocoa onto baking paper. Now, berry by berry, dip the prunes into the glaze, then roll them into the cocoa. Ready-made sweets should be shaken in a sieve to remove excess cocoa powder. Leave to dry. Sprinkle with powdered sugar and place on the table for guests.
Glazed prunes at home
As a variation of the previous recipe, melt sugar or white chocolate in a saucepan, add food coloring to it (in the ratio written on the packaging of the product you purchased). Dip prunes into this glaze and do not roll them in cocoa and powder. Leave to dry.
Sweet walnuts at home yourself
Glazed walnuts are quick and easy, but this recipe requires you to purchase a bar. However, you can make it yourself using the recipe given above. In addition, you can use any liquid sweetness for pouring to taste.
200 g walnuts; 100 g of tiles (for melting; choose the taste yourself - milky, bitter, white); Baking paper; For sprinkling - possible, but not necessary: cocoa - 4 tablespoons; powdered sugar - 1 tablespoon.
Preheat the oven to 100°C. Dry the walnuts, poured onto a baking sheet, in a preheated oven for about half an hour. Melt the tile in a saucepan or “water bath”. It is important not to stir it at this time! Sprinkle cocoa onto baking paper. Now dip nut by nut into chocolate, then roll into cocoa. The finished candies should be shaken in a sieve to remove excess cocoa powder. Leave to dry. Sprinkle with powdered sugar and place on the table for guests.
Candies "Grillage in chocolate"
Our grandmothers, who so loved the scarce grilled chocolate in chocolate, had a secret ingredient recipe for its preparation... if you cannot learn this recipe from your grandmother right now, read ours and follow our advice. Ingredients of the treat: 250 g walnuts; 10 g butter; 250 g granulated sugar.
Melt the sugar and butter in an aluminum or steel bowl, add the walnuts and butter crushed in a mortar or mixer. Stir the mixture. Now place the future sweets on a sheet of parchment or baking paper or simply on a baking sheet coated with butter or vegetable oil. Use a rolling pin to make it about half a centimeter thick and cut into pieces.
To make the glaze, you can melt the tiles in a saucepan or water bath, or you can make the glaze yourself.
3 tbsp. sour cream; 2 cocoa; 2 sugars; 40 g butter.
It is important to take the volume of tablespoons without a slide. Of course, there are recipes with factory-made tiles, condensed milk or milk. But we will take a standard recipe with what every housewife always has in her kitchen. We will cook in a large cezve or steel ladle.
Place the container on low heat. Pour in the ingredients and stir until smooth. The mass will not boil, but after the “gurgling” starts, you need to immediately remove it from the heat. The glaze is ready. This glaze can be used for chocolate-covered almonds, for filling sponge cakes, and for glazing cookies.
Pour the glaze over the finished grilled bars and let cool for an hour.
Gift set
Any type of sweets can be given as a gift - especially if you make it yourself. Choose a craft gift box and tie it with a straw ribbon: this way you will emphasize the naturalness and usefulness of the delicacy. You can wrap each sweet in corrugated or golden paper, thin foil, and tie with thin braid. For beauty, put sesal, artificial grass for floristry, etc. inside.
It is customary to serve in a vase or on a wide platter. It can also be decorated by placing candies in rosettes made of crepe or gold paper.
Candy Making Tools
Without which you will not be able to prepare high-quality sweets:
- container for melting chocolate, it is better to use a plastic bowl;
- a confectionery thermometer; an alcohol thermometer can serve as an alternative;
- parchment paper, place the prepared sweets on it so that they harden and the chocolate crystallizes;
- molds: you can use special silicone and plastic molds for sweets, just molds from store-bought sweets in boxes;
- tempering tools: tempering spatulas, marble slab, microwave oven. For beginners, a steam bath is suitable - it’s quick, simple, and inexpensive.
Candies with almonds
Ingredients for almond sweets:
- cocoa powder -0.1 kg;
- butter – 0.1 kg;
- powdered sugar – 0.1 kg;
- almonds – 0.05 kg.
Nuts must be peeled and roasted.
Procedure:
- Melt the butter. Add powder and cocoa. You need to add these ingredients a little at a time, without ceasing to stir.
- Once the mixture has cooled slightly, form the candies.
- Place a nut in the center of each.
- Sprinkle the finished treat with powdered sugar and place in the freezer for 2 hours.
Choosing chocolate for sweets
To make handmade chocolates, any chocolate without additives or fillings is suitable: black, milk, white. But you don't need to use porous tiles. Callets are ideal - tempered chocolate in the form of small disks. An important point is tempering (read more about it in this article). It is a process of gradual heating and cooling that creates stable crystals. They allow the melted chocolate to harden again, give it shine and gloss, and prevent the formation of a gray coating.
Filling
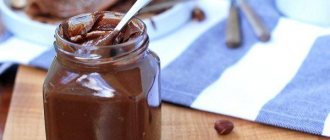
You can fill the dessert with dried fruits and nuts, nougat and ganache, jam and fresh fruits and berries. It’s not that difficult to prepare the final filler at home. For the ganache you will need cream, chocolate, butter, flavoring and a little alcohol. Melt the chocolate and cream in a steam bath, then add the remaining ingredients to the dissolved mixture, mix everything thoroughly and put it in the refrigerator for a couple of hours. The cooled cream can already be used to prepare desserts.
Simple recipe with Nutella
Ingredients: 2 bars of dark chocolate (bitter), 10 pcs. hazelnuts, 10 pcs. any candied fruit to taste, 2 tbsp. l. Nutella.
- Chocolate bars are melted in a water bath. You can also do this in the microwave.
- Grease the candy mold with melted chocolate and put it in the cold for 6-7 minutes.
- The candy base is filled with Nutella. A nut or candied fruit is also pressed into it.
- Be sure to tap the mold on the table to release excess air from the filling.
- The rest of the chocolate is poured on top. The delicacy is put away in the cold.
This chocolate candy recipe can be improved to suit your taste. For example, instead of candied fruits, add pieces of fresh fruit or m&m's inside the treat.
Recipes for chocolates with liquid filling at home
The essence of all methods of making homemade sweets is that we can come up with any filling we want, and then fill it with chocolate. It all depends on your preferences and ability to combine products. Now we will present the most popular, delicious, unusual combinations and recipes for handmade sweets.
Sweets with jam
What we need:
- fruit / berry jam – 150 g;
- dark chocolate – 150 g
How to do it
- Cut the chocolate into small pieces.
- Tempering the chocolate. To do this, heat some of the chocolate chips in a water bath to 45°C. Then we lower the temperature of the mass with the help of the remaining chips to 26-27°C.
- Mix everything thoroughly until all the pieces are completely dissolved; you can place a bowl of hot mixture over cold water, so it will gradually reach 27°C.
- At this stage, we again heat the chocolate in a water bath to 32°C; in no case should the temperature be higher, otherwise all the crystals we need will be destroyed and the process will have to be repeated again.
- The required temperature has been reached – we check the quality of tempering. Drop a little mixture onto the parchment; if it hardens for 5 minutes and shines, then everything is done correctly, we move on.
- Pour the tempered mixture into molds for future candies. Since our filling is liquid, it is important to distribute the chocolate throughout the entire volume of the mold so that it does not leak out in the future. To do this, as soon as you pour the chocolate mixture into the container, turn the mold over onto a glass board or just onto the table so that the chocolate spreads around the edges. The excess must then be removed.
- After 5 minutes, when the mass has hardened, put the jam in our molds with chocolate.
- We temper the remaining chocolate again (the same chocolate can be tempered up to 5 times), then pour it on top of the jam.
- We wait 5-10 minutes (to be safe, you can put it in the refrigerator, although tempered chocolate does not require this) and take it out of the molds - the delicacy is ready.
Stages of making sweets
The principle of preparing all homemade sweets with liquid filling is similar to the one we described above.
For the filling you can use freshly ground berries with sugar and various jams. A great combination is jam and ganache.
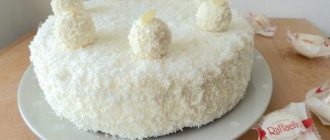
Delicious white and milk chocolate candies
Recipes for homemade milk and white chocolate candies are very diverse. White chocolate has a delicate taste, while milk chocolate has an incredible aroma.
- Catalan sweets are a very tasty delicacy that successfully combines milk and white chocolate.
Ingredients:
- 100 g white dessert;
- 70 g milk chocolate;
- 20 g butter;
- 50 g sugar;
- 100 g hazelnuts.
First you need to lightly toast the hazelnuts. After this, the nuts must be crushed in a blender. Melt the sugar in a thick-bottomed saucepan. You have to be careful and make sure that the sugar doesn't burn. Next, add hazelnuts to the sugar and mix everything well.
The resulting mass should be placed on paper and allowed to cool. When the nut mass has completely cooled, it should be ground in a blender. Next, you need to melt the white chocolate in a water bath and mix it with butter. It is necessary to add ground nuts little by little to the resulting mass. The consistency should be quite thick. From it you need to form circles, each of which should contain a whole nut. The sweets should be placed in the refrigerator for 10 minutes. All that remains is to take the candies out of the refrigerator and dip them in melted milk chocolate.
- Milk candies are everyone's favorite dessert.
These homemade chocolates are very tender and fragrant.
Ingredients:
- 80 g milk sweetness;
- 100 g bitter chocolate dessert;
- 150 g soft cheese.
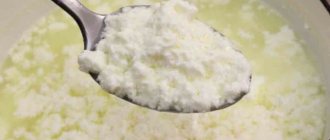
First you need to melt the dark chocolate and grease small paper molds with it. The molds should be placed in the refrigerator for 20 minutes, after which they should be greased again with chocolate mixture and placed again in the refrigerator for 20 minutes. At this time, you need to melt the milk chocolate and beat it with the cheese mixture. After this, you can remove the molds from the refrigerator and carefully separate the chocolate from the paper. All that remains is to fill the chocolate molds with cream. This is very easy to do using a pastry bag.
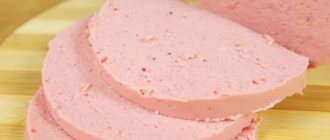
- Homemade Brigadeiro chocolates cook very quickly and disappear from the vase just as quickly.
Ingredients:
- 50 g white chocolate;
- 400 g condensed milk;
- 20 g cocoa powder;
15 g butter.
Heat the butter, cocoa and milk in a saucepan over low heat. You should get a homogeneous and smooth mass. Cook food for no more than 10 minutes. When the mass has cooled, roll it into small balls. The finished chocolate balls should be rolled in finely chopped white chocolate. If the sweets are very soft, you can put them in the refrigerator for 30 minutes.