120 629
Read to the end and you will find a video recipe for a delicious sponge cake!
Biscuit dough is one of the most common and easiest to prepare. It would seem that even a child can do it, all you need to do is mix flour, sugar and eggs, put it in the oven, and here it is, fluffy and fragrant. If you want to assemble a cake, you want to roll rolls. In fact, everything is approximately like this. But incidents often happen to it - it rises poorly, falls off after baking, or crumbles too much. To avoid all this, check out some rules and tricks of sponge dough.
Rules for preparing biscuit
- The biscuit is made from sugar, flour and eggs in a ratio of 1:1:2
- Use large eggs at room temperature. The biscuit does not use soda; the fluffy porous structure is achieved by whipping the whites into a strong foam. Logically, large eggs have more protein.
- Bake the sponge cake only in an oven preheated to 180°.
- The baking dish must be greased with butter, but not all of it. Only the bottom and walls no more than 1 cm in height are greased, otherwise the walls of the biscuit will not be able to rise, but the middle will rise, the biscuit will not be even and may crack. After the mold is greased, you need to make a “French shirt” - dust the mold with a thin layer of flour, turn the mold over and shake out the excess flour.
- Up to 25% of flour can be replaced with potato starch. Starch will retain moisture, the biscuit will not dry out and will crumble less.
- During the first 10-15 minutes of baking, do not open the oven or move the pans. Baking time depends on the thickness of the dough. If you are preparing cake layers with a height of 3-4 cm, the baking time will be 40-50 minutes. If you are preparing a roll (about 1 cm thick) - 10-15 minutes.
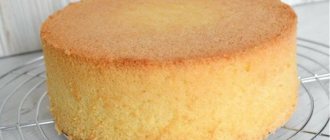
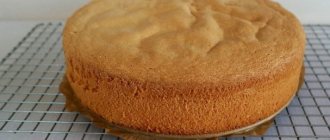
- To prevent the biscuit from falling off, it is cooled in the molds. Then turn it over onto a wire rack so that the biscuit cools evenly on all sides.
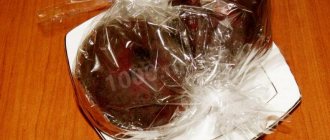
- After the finished biscuit has cooled, it can be wrapped in cling film and placed in the refrigerator overnight. This way the moisture inside the biscuit will be evenly distributed, the biscuit will not crumble, it can be cut into several cake layers, and its taste will become much better.
- There are 2 ways to prepare sponge cake - cold and hot. When it is cold, it is necessary to separate the whites from the yolks; when it is hot, this is not necessary. If you suddenly decide to prepare a sponge cake using a cold method, but when separating the whites from the yolks, a drop of yolk gets into the whites, do not rush to throw it away. Prepare the sponge cake hot.
- When preparing sponge cake, we use a mixer only to beat the whites and yolks. Then the mixer must be removed. You need to stir the flour into the yolk mixture and add the whites with a wooden or silicone spatula, stirring not in a circle, but from top to bottom. This way we will mix all the ingredients and maintain the porous structure of the dough.
Hot way
- There is no need to prepare so many dishes here, because there is no need to separate the whites and yolks. But prepared forms and an oven turned on in advance are sacred. The ingredients are the same.
- Let's prepare a water bath. Since few people have special equipment, we need two pans: a larger one and a smaller one. Or a saucepan and bowl. The smaller pan should hold steady on the walls of the larger one, into which we pour and heat water - not to a boil.
- Break the eggs into a smaller saucepan, put them in the bathhouse and start whisking continuously, also at the highest speed, until the egg mixture warms up to a temperature of 40-50°. Don't have a special thermometer? Let's touch the mixture with our finger - after all, it has a temperature of 36.6°, which means the mixture should feel warm.
- Without interrupting the work of the mixer, put the pan on the table and continue to beat at the same speed, adding sugar, until the mass cools to 20-25° and increases in volume by 2-3 times.
- Now pour in the flour in a stream and using the same technique - from top to bottom, not in a circle - carefully knead the homogeneous dough.
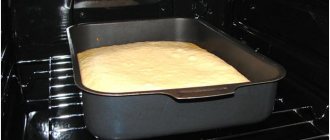
- We prepared a mold or baking tray (lined with baking paper) in advance. Therefore, as soon as the dough prepared by the first or second method is ready, immediately pour it into the mold in one motion so that unnecessary air bubbles do not form. Level it out and put it in the oven, set on medium level.
- The dough should not fill the mold more than ¾ of the way up - it will rise a lot. Of course, a lot depends on our oven. But on average, a thin layer of biscuit is baked for 8-12 minutes, and a thicker layer - 25-40 mm - from half an hour to 45 minutes. After the required time has elapsed, check the readiness of the biscuit with a wooden stick or toothpick: pierce it, pull out a dry one - everything is ready.
- A well-baked sponge cake leaves the sides of the pan without any problems, and when pressed with your fingers, it easily restores its shape.
- DO NOT open the oven, at least for the first 10-15 minutes - the biscuit will settle. He is a gentle creature, does not tolerate sudden or any shaking, knocking, screaming or stomping. Therefore, we expel young restless men and clumsy men from the kitchen while baking.
- So that the sponge cake that was so successful for us does not settle after baking and is easy to remove from the mold, we take the mold out of the oven and place it on a wet towel. Then transfer (turn) onto a wire rack to cool completely.
- If we are going to cut a biscuit, we remember that for this it must stand for at least 4 hours, since cutting it becomes easier the longer it has stood untouched. And if you also plan to soak the biscuit, then cut it no earlier than after 8 hours. So it’s better to bake the sponge cake the day before and let it sit for 12 to 24 hours.
- You can cut the biscuit with a knife, but better - with a fishing line. We make markings and slits on the sides of the cake, insert a strong thread or fishing line into them, cross its ends in front of us - and pull in different directions.
As for sponge rolls, see below for the specifics of baking and rolling them.
Rules, subtleties and tricks for making biscuits
- Its quality is mainly determined by the quality of the whipped egg whites. And we can whip them into a strong, stable foam if:
- We use only fresh eggs;
- choose the largest ones - they have more protein;
- Carefully separate the whites from the yolks. But, if a drop of yolk gets into the whites, only one thing can save the situation: cook the dough hot;
- We use only absolutely clean, dry containers for whipping; a little fat on the walls - and all the work is in vain;
- to guarantee high-quality whipping, we place the container in which we beat the whites in a bowl with cold water, ice or snow;
- We have salt, citric acid or lemon juice on hand to add a little if the eggs, in our opinion, are not being beaten well. We do not use cheap flour for the sponge cake - only the highest grade.
- Don’t be lazy to sift the flour - this simple action will enrich it with oxygen and additionally loosen it, making our dough more fluffy. In addition, it will remove unnecessary impurities that are found in any flour.
- Before adding flour, turn off the mixer and do everything else manually - the mixer at this stage can settle the whipped foam. Use a wooden spoon or silicone spatula.
- Mix the whites, yolks and flour quickly, but very carefully, not in the usual circular motions - but in top-to-bottom movements, which will retain air bubbles inside the dough and prevent it from settling.
- If the recipe calls for adding starch, or baking powder, cocoa, or vanillin to the dough, first mix the additional ingredients with flour.
- It is better to add poppy seeds, zest, etc. when the flour has already been mixed with the eggs.
- Adding starch allows you to get a sponge cake that is more porous and less crumbly.
- Grease the biscuit mold with slightly softened butter: the bottom is completely and the walls are about 1 cm high - or less if the biscuit layer is thin.
- When we need to prepare a sponge cake without a pronounced crust, tender and light - for example, for butter cakes or cakes - then we carefully line the greased form with baking paper, cutting off its “walls” at a height of no more than 5-6 mm. And we also grease this paper along the bottom with oil.
- Biscuit dough can be prepared with baking powder. In this case, grease and sprinkle with flour both the bottom and the walls of the mold up to the top.
- You should not take a smoke break after preparing the dough - it must be immediately poured into the mold and sent to the oven. Otherwise, it will settle, and you can forget about the pomp.
- Place the pan at the middle height of the oven. If the top becomes browned too quickly, you should cover it with paper or foil soaked in water. A strong crust can interfere with the evaporation of moisture; the crust will remain unbaked and wet in the middle.
- The biscuit is not a fan of high temperatures and impatient housewives: it is best baked at 180°, and with the addition of chocolate or cocoa - at 170°. True, there are recipes with different temperature conditions.
- Some housewives advise that after the sponge cake has risen in the oven and slightly crusted, reduce the temperature to 160° and bake at this temperature until done.
- It is better, of course, not to open the oven until the end of baking. In any case, the first 10 minutes are accurate, otherwise the cake may settle. If necessary, open it a little, not for long and very carefully.
- Biscuit does not like shaking, knocking, screaming and stomping.
- It’s best if we want to get a soft, light sponge cake, not soggy, to let it cool on a wire rack for the required number of hours.
- The sponge cake can be sprinkled, for example, with powdered sugar and eaten immediately after baking. But in order to create culinary masterpieces from it, cut it, etc., it must first dry out a little. A little is at least 4 hours, and before impregnation - at least 8 hours. It is more convenient to bake it in the evening, and cut, soak and assemble the cakes after 12-24 hours. Then it will practically not crumble, and after impregnation it will not get wet or lose its shape.
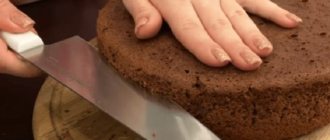
- Cut the sponge cake into layers using a knife or fishing line. Simply - fishing line. We make marks-cuts on the sides of the cake, insert the fishing line, cross it in front of us - and pull it in different directions, keeping the ends parallel.
If we are going to make a roll...
- The dough for sponge rolls is often made thinner than for thicker cakes;
- If the recipe calls for the addition of butter, it must be melted and cooled to room temperature, added to the mixture before adding flour;
- We bake the sponge layer on a baking sheet lined with baking paper. Evenly distribute the dough on it, the thickness of which in different recipes varies from 3 to 10 mm;
- Place the finished hot sponge cake on a towel sprinkled with granulated sugar, remove the paper, roll the sponge cake using a towel and leave to cool. This allows you to maintain the softness of the baked goods and ensure that when the layer needs to be unfolded to apply the filling, it will not crumble;
- Unroll the cooled layer, apply the filling and roll it up;
- You can roll up a hot layer without a towel - with the paper on which it was baked, and remove it when unfolding the cooled layer;
- If the filling for the roll is not butter, but from jam, confiture, fruit, etc. – then you can quickly apply the hot filling, heated in the microwave, directly onto the hot layer of biscuit, before it has cooled down, roll it up, let it cool and soak;
- We make the cream for the roll softer so that when rolling it does not put pressure on the biscuit.
If you have problems with your oven...
- The dough rises in a hump due to uneven heating. Another time we immediately put an additional baking sheet on top. If it burns from below, put a vessel (or a metal bowl) with water down. We do all this before turning on the oven.
- The oven is heated only from below - place an inverted baking sheet on the bottom or - if you have one - a couple of clean bricks. They will warm up in the oven and provide more even heat.
Now a few secrets on how to bake a sponge cake correctly and tastefully
- It is imperative to ensure that the container in which the dough is to be prepared is clean, dry and grease-free. Otherwise, the dough risks losing its fluffiness.
- Beat the ingredients in strict order: first the eggs (if the egg is separated, then whisking should start with the yolks), then add the sugar and, finally, the sifted flour
- To beat eggs, use the maximum power setting of a food processor or mixer until an elastic foam forms, which should increase in volume by 4-5 times. Using a hand mixer or whisk, beat the dough in one direction, otherwise it may sag. The egg mass should take on the consistency and color of whipped cream.
- Sugar should not be poured into the dough in large quantities, as the mass may lose its fluffiness. Add sugar gradually until it is completely dissolved.
- When adding flour, you should reduce the beating speed and add it in small portions. Add and knead flour into the dough quickly and preferably by hand, then the dough will turn out the most fluffy.
- If you want to add zest or dried fruits to the dough, then this should be done after kneading the flour, and very carefully, trying not to let the dough fall off.
- If you are using a silicone mold to bake the biscuit, then simply grease it with oil. When cooking in a tin pan, generously grease it with butter and sprinkle it with a little flour. It would also be a good idea to use parchment paper after greasing it with oil. With its help you will protect the biscuit from sticking to the mold. The cake pan should be cooled in the refrigerator or outside (if baking in winter) before use. This will give the biscuit tenderness.
- The finished dough should be baked immediately and not allowed to infuse. The process of preparing a biscuit is a very meticulous task and does not tolerate fuss around it. Do not make rough movements; one click is enough for the dough to settle completely.
- The oven should be preheated to 200-220°C, depending on the recipe used. Do not open the oven door for 10-15 minutes to prevent the dough from settling. First, the biscuit should be baked at high temperatures, and then lower it to 30-40 ° C.
- If a hump has formed in the middle of the cake or the biscuit has begun to burn, the reason may be uneven temperature distribution in the oven, so you should regulate it using baking sheets with water located one level below or above the baking sheet with the biscuit.
Different baking times are provided for different biscuit dough products:
- for rolls and other thin products, when the dough is poured over the entire area of the baking sheet - 6-8 minutes;
- for products in low, shallow, and silicone forms - 10–12 minutes;
- for cupcakes baked in deep and tall pans - 20-50 minutes.
The readiness of the biscuit should be determined by the browned surface, either by gently pressing the surface of the biscuit with your finger (there will be no dents on it), or by piercing it with a wooden stick (it will be dry when pulled out).
After cooking, the biscuit should be kept in the oven for another 10-15 minutes. Then remove and carefully remove from the mold. It is better to place the mold on a damp towel so that the sponge cake comes away from the edges more easily. If you were preparing a sponge cake for a roll, then it must be separated from the mold while it is hot, otherwise, as it cools down, it may begin to crumble.
For other products, the sponge cake should be cooled at room temperature, and only then removed from the mold. It is better to cut the biscuit no earlier than 4 hours after preparation. Biscuits can be soaked in syrups, juices, tinctures, using special brushes or kitchen watering cans.
If you are planning to make a sponge roll, then when making the dough you should add a little butter to give it elasticity. Use parchment paper to roll. The filling of the roll must be thick, otherwise it will drip.
How to make a sponge cake
Ingredients:
- 6 fresh large eggs;
- 200 g flour;
- 180 grams of sugar.
Cold way
Step 1. Separate the whites from the yolks. Beat the yolks with half the sugar for 5-8 minutes. The mass should increase 3 times, become almost white and hold its shape for 10 seconds.
Step 2. In a clean, dry, fat-free bowl, beat the egg whites with clean, dry whisks until the mass increases 3-5 times. Add the remaining sugar in a thin stream and beat until sharp peaks form.
Step 3. Knead the whipped yolks and a third of the whipped whites with a silicone spatula from bottom to top, no need to stir for long.
Step 4. Add flour in a thin stream and continue stirring from top to bottom until the flour is combined with the mixture. Not longer.
Step 5. Add the remaining whites and gently mix again from bottom to top, just a few seconds.
Step 6. Fill the greased molds 2/3 full and place them in an oven preheated to 180 degrees. We check readiness with a wooden skewer; it should be dry.
Hot way
Step 1. In a water bath, beat the eggs (both whites and yolks) until they warm up to 40-50 degrees.
Step 2. Continuing to beat with a mixer, remove the eggs from the bath, add sugar in a thin stream, beat until the mixture cools to room temperature and increases 2-3 times.
Step 3. Pour flour into the mixture and use a wooden spatula to knead the mixture from bottom to top.
Biscuits. General tips and recommendations.
Biscuits. General tips and recommendations.
1. Biscuits. General tips and recommendations.
a) eggs:
The eggs used to make biscuits must be very fresh and at room temperature.
When baking regular biscuits, I never separate the whites from the yolks, but first beat just the eggs at medium speed for at least 7-8 minutes, and then gradually add sugar and beat for another 7-8 minutes.
If the technology calls for separating the yolks from the whites, then I strongly advise you to do this very carefully; even tiny particles of yolks that get into the whites will not allow them to beat properly and well.
b) flour: Is it necessary to sift flour for sponge cakes? and it’s better to do this 2-3 times along with baking powder and vanilla, if they are added,
By sifting the flour, we enrich it with oxygen and it becomes softer and airier. Flour is introduced into the egg mass in small portions and mixed with a wooden or silicone spatula from bottom to top in a circle - this method is called the folding method. When baking chocolate biscuits with the addition of cocoa powder, the amount of flour is reduced, i.e. if you added 2 tablespoons of cocoa, then you reduce the flour by the same number of tablespoons. c) butter: If butter is added to the biscuit, then you must first melt it, let it cool slightly, preferably strain off the white sediment and add 2-3 tablespoons of the biscuit mass to it, stir well, and then combine with the rest of the dough. If you immediately introduce butter into the dough, it will fall to the bottom and it will be difficult to mix it well, which will take a lot of time, and the biscuit may fall off. d) baking:
Various forms are used for baking biscuits. I mostly use a round springform pan. When baking regular biscuits, the mold is greased with butter and sprinkled with flour, and the bottom is covered with baking paper. In the case of chiffon biscuits, we do the exact opposite - we do not cover or grease our form with anything.
You need to bake biscuits in a perfectly level oven, without fan mode, on the middle shelf. Usually, the recipe indicates in which oven - heated or cold - the biscuit is baked, and although I started baking in a cold oven more than once, I still came to the conclusion that it is better to bake in a heated one. In my recipes, I constantly write - focus on your oven - after all, every housewife knows how her assistant “lives and breathes”. Listen to this recommendation. Do not open the oven while baking the biscuit for at least the first 20 minutes and slam the oven door, it may fall. Check the readiness of the biscuit by inserting a splinter into the center - it should be dry.
The biscuits are cooled in different ways, in some cases in the oven, turning it off and opening the door, in others by turning them over onto cups directly in the mold or placing the biscuits on a wire rack.
In each recipe I will definitely write how to properly cool this biscuit.
Chiffon biscuits.
I first became acquainted with the recipes for these wonderful biscuits thanks to my LiveJournal friend Elena (elaizik). These wonderful, very airy and endlessly delicious biscuits are still my favorites to this day. So, a little history about chiffon biscuits.
These are a typically American type of foam cupcake and they have a specific creator. In 1927, the recipe for chiffon cupcakes, as they were named for their extraordinary tenderness and airiness, was invented by Harry Baker, a Hollywood insurance agent. Twenty years later, in 1947, he sold his patent to General Mills and chiffon cupcakes began to be produced on an industrial scale. Since these muffins contain liquid vegetable oil and not solid fat, it is impossible to beat a lot of air into such oil.
Therefore, in such cakes (muffins) almost double the amount of whites is placed in relation to the yolks, which are thoroughly beaten, absorbing a lot of air. This air and moisture evaporates from the dough and raises the cake. However, due to the decent amount of butter, you also have to add baking powder - baking powder (not soda! - since there is no acid in the dough).
The technique of beating eggs is also different, the yolks and whites are beaten separately, you can see how this is done in the recipe - Classic chiffon sponge cake, the same recipe also contains a method for cutting chiffon sponge cakes. The first and very important point in preparing these biscuits is mixing the yolk mass and proteins. When baking chiffon biscuits, it is very important to follow all the recommendations given in the recipe; this will determine whether the biscuit will turn out or not. The second, and no less important point, is how to properly cool a baked biscuit. The mold with the hot biscuit is turned upside down and left until it cools completely; you can also turn the mold over onto glasses.
And one more, very important point: creams and fillings for such biscuits should not be heavy, otherwise the biscuit will settle.
How to prepare biscuit dough
In order for the biscuit to be tough not only when eating, but also when baking, you must follow the cooking technology. Missing something, replacing something, or forgetting it can ruin everything.
Of course, you shouldn’t pour out the dough or throw away the baked goods: everything can be corrected or turned into something else. But since a biscuit is declared, you will have to show skill. You will definitely be able to bake it not only according to the classic recipe, but also a more modern one, getting a lemon, vanilla or nut sponge cake for the cake.
How to properly cool a sponge cake - How to properly cook a sponge cake so that it does not sink? — 22 answers
In the Food, Cooking section, the question How to properly cook a sponge cake so that it does not sink? asked by the author Prosorushka the best answer is BISCUIT FOR CAKE for cake, for cakes or for tea, simply sprinkled with powdered sugar 0.75 cups of premium flour, 1 cup of sugar, 6 raw eggs, 1 tablespoon of starch. The most convenient way to prepare the dough at home: eggs beat with sugar until volume increases 2.5-3 times. Pour flour mixed with starch into the whipped mass, carefully and quickly knead the dough and immediately pour into prepared forms, filling them to 0.75 volume. Before pouring the dough, the bottom and edges of the mold must be thoroughly greased in advance and covered with paper. Immediately place the filled molds in a preheated oven and bake the sponge cake at a temperature of 180-200 C. At a higher temperature, a crust forms on the surface of the sponge cake, preventing the removal of moisture, in As a result, the biscuit will be fragile. After cooling, this biscuit settles and becomes dense. If the top of the biscuit becomes too brown, cover it with paper. It is not recommended to shake the biscuit pan when baking, as the mass may settle and thicken. During the first 10-15 minutes of baking, do not move the pans in the oven. The baking time for the sponge cake depends on the thickness of the finished cake. With a thickness of 3-4 cm (for cakes, pastries) it is 40-50 minutes, with a thickness of about 1 cm (for rolls) 10-15 minutes. The readiness of thick products can be determined with a wooden stick: the sponge cake is ready if the dough is pierced to it does not stick. The readiness of a thin sponge cake is determined by the color of the crust and elasticity: when pressed with a finger, a dimple remains on the unbaked sponge cake. To prevent the baked sponge cake from falling off, it is cooled in open molds for 20-30 minutes. Fresh sponge cake crumbles when cut, so it is kept for at least 8 hours after baking. It is then soaked in syrup and layered with cream or other fillings. NOTE. Housewives often complain: the biscuit dough does not come out and shrinks. How to avoid such trouble? It’s very simple - the eggs for the biscuit do not need to be separated into whites and yolks, but beaten together for at least half an hour. Then the biscuit will not settle. Be sure to degrease the bowl for whipping first: boil water in it. A WIN-FREE OPTION FOR BISCUIT True, it’s just a cake layer, but you can spread any cream on it and you’ll get a cake. Take 4 eggs, 1 tbsp. sugar and set to beat (be sure to use a mixer at high speed). While you are whipping (10-20 minutes), take the mold, coat it with oil, sprinkle with semolina (you can use crackers or flour, but semolina is just super). Oh, I forgot. Even before breaking the eggs, turn on the oven at full power. When the eggs are beaten (I repeat - at least 10 minutes on max), add a glass of flour. You mix everything, but not for very long, so that no matter what settles, you pour it into the mold and into the oven. The only catch is that if you beat the eggs for too long, the top crust of the sponge cake may separate, and someone will pick it off and eat it. If the eggs with sugar are like If you beat it, the sponge cake will turn out very airy. By the way, if you decide to make a charlotte out of it, then you need 1.5 times more flour, and sugar to taste (I also add 1.5 cups) SPONGE CAKE IN 10 MINUTES Beat the eggs with sugar, add flour, water. Place half of the fluffy dough in the mold, sprinkle with cinnamon, and place the remaining half on top. Pass the almonds through a meat grinder, mix with a small amount of sugar, sprinkle on top of the pie. Bake at full power for 5.5 - 7 minutes. Let cool.
flour - 200 g, sugar - 200 g, eggs - 4 pcs. , warm water - 4 tbsp. l. , ground cinnamon - 1 tsp. almonds - 2 tsp.
Answer from Irina Grishina [guru] Do not open the oven until it is baked! Answer from LANA [guru] I add soda to make it fluffy. But if you often look into the oven and click the door, the sponge cake always goes down. Answer from I-beam [guru] The readiness of the sponge cake can be checked using a wooden stick: if the sponge cake is ready, then the stick removed from it will remain dry. The sponge cake is cut only after it has cooled. Answer from Suck through [ guru] Never open the oven
Sponge cakes with sour cream
Sour cream sponge cake turns out to be more porous and elastic compared to the classic one.
- To prepare it, you need to prepare a mold: line the bottom with parchment paper, without greasing anything. Preheat the oven to 1700C.
- In a deep bowl, beat 2 eggs with a mixer, adding 100 g of sugar in small portions. You should get a lush, thick white foam. Sugar should not be felt, and the volume will triple.
- Add 3-4 drops of vanilla essence, 140 g of thick fat sour cream and 120 g of wheat flour (pre-sifted and mixed with ½ tsp of baking powder) to the dough. Stir the dough with a whisk or spatula.
Transfer the dough to the prepared pan and place in the oven and bake for 40 minutes.
Cool the dough
The finished biscuit is left to cool in the mold for 20-30 minutes (or better yet, 1-2 hours).
It is advisable to place the cake pan on a damp towel so that the cake comes away from the edges more easily. It is recommended to cool the biscuit upside down on a wire rack. Then the cake is removed from the mold and left to infuse for 8-10 hours (at most 2-3 hours) at a temperature of 15-20°C. If you soak it earlier, it will become limp and fall apart. If it is not possible to keep the biscuit for a long time, then you can cool it for 2 hours at room temperature, and then place it in the refrigerator for 2 hours or in the freezer for half an hour. The cakes are cut using a special string. You will find useful tips for cutting biscuits at the link. If it is necessary to preserve the cakes for some time, they are placed in the refrigerator (for several days) or in the freezer, where they can be stored for up to a month. But first, the cakes should be tightly wrapped in cling film or placed in a cake box and covered with parchment. The cakes should be defrosted in the refrigerator. If you follow the above rules, your biscuit will always melt in your mouth and receive well-deserved praise from your guests. Post tags: sponge cake, cooking, cooling, products, fluffy, dough
A few words about the delicacy
Biscuit is deservedly considered among confectioners to be a universal pastry. After all, almost no cake can do without it. In addition, various culinary masterpieces in the form of all kinds of cakes and rolls are often created on the basis of biscuits. It really can become the basis for almost any dessert.
Fluffy, like a cloud, and quite dense, with cream or butter, with apples and raisins - biscuits can be completely different, but they are always united by manufacturing technology. Whatever the dough, you need to thoroughly beat the eggs and add the remaining ingredients as carefully as possible. It is thanks to the air added during the processing process that the biscuit will rise in the oven.
Baking process
The oven should be turned on before you start whisking and stirring. For good baking of the biscuit, 180°C will be quite enough. The oven must be preheated in advance, because biscuit dough is not pie dough and cannot be left standing. Bake the biscuit for about half an hour. No matter how much you would like to look at your sponge cake while baking, opening the oven is strictly prohibited. Otherwise, the flow of cold air will simply cause the delicate sponge cake to fall off, and the result will be a thin, sweet pancake, not a sponge cake. If you want to take a peek, look through the glass with the backlight on. The finished sponge cake springs under your fingers, and there is no sticky unbaked dough left on a toothpick inserted into the sponge cake. Tip: Place the cake on the center shelf. Otherwise, there is a possibility that a biscuit placed high will crack on top, and a biscuit placed too low will burn before it has time to bake.
Cutting the biscuit is very convenient with a strong thick thread. And the cakes should be soaked after the sponge cake has cooled and stood for a while, that is, about 5 hours after the sponge cake has been baked.
Food preparation
Biscuit, more than any other baked product, requires careful selection of ingredients, adherence to the order of their mixing and choice of temperature conditions. That is why it is so important to know the features of making this delicacy and some rules.
In order to prepare a fluffy, soft sponge cake with excellent taste, you need to stock up on exclusively fresh ingredients. In addition, it is very important to choose them wisely. Knowing the secrets of a fluffy sponge cake, you can easily prepare a delicious dessert with your own hands.
- Flour. Biscuits are covered with a golden brown crust due to starch craterization - during heat treatment, its structure changes, becoming more viscous and thick. That is why its presence is very important for this baking, so you can make a shortbread from almost any flour - wheat, buckwheat, rice, corn. If you partially replace it with starch, the biscuit will turn out porous, crumbly and durable. You can do without flour altogether. But there is no starch in nut powder, so biscuits based on it are less durable and sag heavily. But despite this, cooks often add ground nuts to their products, unable to refuse such a delicacy. It is best to give preference to flour with 28-35% gluten. If this indicator is higher, the biscuit will be too dense, and if it is lower, it will be too crumbly.
- Eggs. Without which it is simply impossible to make a biscuit, it is without them. It is the eggs that add fluffiness and strength to baked goods. A thoroughly whipped mixture is deservedly considered the key to success in preparing a delicious, tall sponge cake.
- Sugar. Of course, refined sugar can be the most ordinary, but it is still advisable to choose a product with the smallest crystals. They dissolve much faster and are therefore easier to whisk into the eggs.
