The modern food industry offers consumers a huge variety of cheeses. Most of the inexpensive varieties, unfortunately, are prepared from low-grade raw materials, and the elite ones are available to a few. For this reason, many people interested in a quality food product try to make cheese at home. The curdled milk recipe is the simplest example of this: a natural product without GMOs and synthetic additives can be obtained in just a few hours, without much effort.
What will you need?
In order to make cheese from curdled milk, you must first make cottage cheese from it, from which this product is cooked. What you will need for this:
- A large saucepan with a capacity of at least five liters and a smaller one (1–2 liters) for cooking cheese.
- A slotted spoon with a long handle.
- Colander.
- Gauze folded in two or three layers.
- Cling film.
- A weight to give the cheese the desired shape and density. If you are cooking a small piece of cheese (no more than 1 kg), then a three-liter jar filled with water may well do.
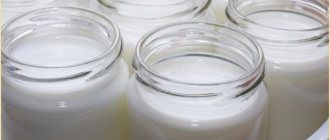
Sour choice
Sour milk is easier to digest than fresh milk, since during fermentation lactose has already been transformed into lactic acid. The product contains milk protein, fat, carbohydrates, organic and fatty acids. The vitamin and mineral composition is dominated by vitamins A, D, E and group B, calcium, potassium, phosphorus, magnesium.
Benefits of sour:
• accelerates metabolic processes and strengthens the immune system thanks to bifidobacteria and lactobacilli;
• prevents the development of osteoporosis and stimulates the production of synovial fluid - a high amount of calcium;
• normalizes the functioning of the cardiovascular system due to potassium and magnesium.
To make cheese from sour milk at home, you need to learn how to choose the right raw materials. The smell should be sour, the separated whey should be transparent, light, with a greenish tint, the curd flakes should be white, not very large. If it smells musty, the taste is bitter, and the whey is opaque and dark, it needs to be thrown out. This product can cause poisoning.
Attention! You should not buy store-bought sour. To maintain taste, stabilizers, preservatives and antibiotics are added to it. Cheese should not be made from expired milk if the consistency is maintained, separation does not occur, and the smell that appears after opening the package is putrid. This indicates damage.
Sometimes homemade milk turns sour only after heating. This is an ideal raw material for cheese makers.
First stage: preparing cottage cheese
Before making cheese from yogurt, you need to make cottage cheese. To do this, take fresh yogurt with a fat content of at least 3.2%. If you have the opportunity to buy real, not skimmed milk at the village market, that’s great! It is important that the product is fresh, without a musty smell, which indicates that the curdled milk is more than three days old.
Pour it into a large saucepan and put it on the fire, stirring occasionally with a slotted spoon so that the settling pieces of cottage cheese do not stick to the bottom. Heat the curdled milk to 50–55 degrees, but do not let it boil, otherwise the grains of the curd mass will become too tight, and the cheese will subsequently turn out to be of poor quality.
Cooking from pure yogurt
This recipe requires only 4 liters of curdled milk - the result is a very delicate product with an interesting taste.
- pour all the curdled milk into a steel pan;
- Mix it well with a whisk;
- place the container on the stove (low heat);
- bring to a boil;
- do not reduce the temperature until the buttermilk is released;
- carefully drain the latter;
- Grind the curd sediment directly in the pan with your hands;
- put the mixture on gauze and tie it tightly;
- Place the resulting knot under a press;
- when the remaining whey comes out, grind the cheese with salt;
- mold them into small heads the size of a large apple and pack them in rags of linen;
- put it under pressure again;
- after 5 hours, cut the balls into quarters and leave them in the kitchen to dry overnight;
- in the morning, wrap the pieces in cotton material soaked in natural kvass (or light beer);
- hide them in the refrigerator.
As the wrapper dries, it must be moistened with the selected drink. The cheese ripening takes about a month.
How to make a cheese paste?
When the curdled milk begins to separate into cottage cheese and whey (it will acquire a slight greenish tint), turn off the stove and let the mixture cool to 30–35 degrees. Line a colander with gauze folded in several layers and carefully pour the contents of the pan into it, stirring with a spoon if necessary. Then carefully gather its edges towards the center, forming a knot with cottage cheese inside.
Press with your hands, helping the excess liquid to come out faster, tie the edges so that the curd does not spill out. Leave the bundle in a colander and place a weight (for example, a bottle of water) on top of it. Leave for three to four hours so that the remaining whey flows out, but do not throw it away, because you can make a lot of delicious baked goods from it.
Recipe option for multicooker
This device is very convenient to use, because its functionality allows you to set the most accurate temperature and time.
Cheese requires the following products:
- curdled milk (from whole milk) – 1.5 l;
- eggs – 2 pcs.;
- juice from half a lemon;
- salt - a level tablespoon.
From this volume you can prepare approximately 400 g of cheese. They do it like this:
- the curdled milk is poured into a bowl, eggs and salt are added to it;
- all this is mixed with citrus juice with a whisk;
- when a homogeneous mass is obtained, the device switches to heating mode;
- the lid is closed and the timer is set for 3 hours;
- after the time has passed, the workpiece is cooled directly in the multicooker (45 minutes);
- the warm mass is transferred to a cloth-covered colander;
- after the whey has flowed out, the compacted product together with gauze is transferred to a small bowl;
- oppression is placed on him;
- after 5 hours, the head of cheese is removed, hidden in a container and sent to the refrigerator.
How to make simple cheese from homemade cottage cheese?
After the cottage cheese for homemade yogurt cheese is ready according to the recipe above, mix it with milk and put it on the stove again (heat below medium), be sure to stir as often as possible. As in the previous recipe, it is important not to allow the product to boil, otherwise the curd will harden even more and become unsuitable for further use. When there is a new separation of the curd mass from the whey, turn off the heat on the stove, fold the mass back onto the cheesecloth and squeeze it out, tying it in a knot and pressing it with a weight. Leave it in this state for half an hour, and then transfer it to a small saucepan and place it in a steam bath to heat. Be sure to stir, as during melting the mass will stick to the bottom.
This is also done so that the curd pieces melt well, which will give the future cheese a uniform consistency. When the cottage cheese has completely melted and turned into a flowing cheese mass, add salt, egg, soda and butter, mix thoroughly and vigorously. The mixture will begin to bubble slightly; you need to continue stirring until the mixture reaches the ideal consistency. Line a bowl with wide edges with cling film, lightly grease with oil and pour the cheese mixture into it, smoothing the top and pressing it lightly to compact the cheese. Cover the top with film and place in a cool place to cool completely. You can place a weight on top to give it a tighter shape.
Recipe for Brunost cheese at home
Brunost is a brown Norwegian product. At first glance, it may seem quite difficult to prepare. However, it really only takes two ingredients and a little time.
youtu.be/F-PegeF0a-4
Cooking time – 30 minutes.
Step 1. Place the pan with whey on the fire. After 75 minutes, the contents will boil down and acquire a caramel color.
Step 2. Pour in the cream. Don't get distracted, it's important to constantly stir the mass to get the desired structure.
Important information! The mixture will boil down during cooking. Dark lumps will also appear. Don't be alarmed, this is how it should be. Just break it up with a spatula and stir.
Step 3. This cooking takes about half an hour. Control readiness by the thickness of the mass. You will also see that the mixture has taken on the color of boiled condensed milk.
Distribute the resulting product into molds. Here I used small silicone ones for cupcakes. Place in the refrigerator until the morning. Once set, you can cut into wedges and serve with hot toast.
You need to know this
Homemade yogurt cheese prepared in this way can be eaten immediately after cooling (4–5 hours), but it becomes much tastier when it sits in a cool place for at least three days. Then its structure becomes denser and its taste more intense.
The only condition: you should store yogurt cheese only in polyethylene, as it quickly weathers and becomes stale. If you have ready access to renewing whey, the finished product can be stored in it by adding a generous pinch of salt to the mixture and renewing it every 4-5 days to avoid souring.
Recommendations
Use the recommendations of experienced chefs to make your homemade cheese even tastier.
- According to your will and individual taste, add pieces of nuts, dill or other herbs, olives, tomatoes, Provençal herbs, etc. to the cheese.
- Remember that if the salting is a little more, the cheese will taste similar to feta cheese. If you add less salt, you will end up with cheese that tastes like Adyghe cheese. To get cheese, you should place the finished product in a container with brine from the salted whey remaining from cooking.
- The cheese ages much better if the final product weight is at least 0.5 kg.
- Store cheese in the refrigerator at a temperature of 8-10 degrees. Homemade cheeses have a short shelf life of 3-5 days, after which they begin to lose their taste and dry out, becoming crusty. It is best to store such cheese in glass or enamel containers.
- Use homemade cheese to make other delicious dishes, such as grilled cheese.
Don’t rush to get rid of the whey left over from the cheese making process, because you can use it to make delicious pancakes or pancakes, use it instead of kvass for okroshka, and you can also make ricotta from this whey.
Fragrant cheese with herbs and garlic
Homemade dairy products are good because their taste is almost always unique, since each manufacturer uses his own special set of herbs and spices in the ratio that is close to his taste. Sometimes simple additions can work wonders, as in this recipe for buttermilk cheese with herbs. The finished product is ideal for making sandwiches, stuffing vegetables, making rolls and casseroles.
- 2 liters of curdled milk;
- 400 grams of sour cream;
- 1 tsp. vinegar;
- 1 bunch of dill plus a few sprigs of basil;
- 1/2 tsp. salt;
- 1 tsp. Provençal herbs;
- 1 tbsp. l. refined oil;
- 2-3 cloves of garlic.
If you don’t like the combination of cheese and garlic, you can replace it with chili pepper (ground) or regular paprika. Some people add fresh bell pepper (1/2 pcs.), grinding it in a blender, then the finished product takes on an unusual appearance: green and red inclusions create a pleasant impression and a desire to try it as soon as possible.
Recipe with fresh herbs
Make cheese according to this recipe and you will get a tasty and healthy product, perfect for sandwiches and salads with vegetables.
You will need:
- fatty homemade yogurt - 0.4 l;
- farm milk – 1.8 l;
- a standard bunch of herbs (dill, cilantro, parsley, basil or a little of each type);
- eggs – 3 pcs.;
- non-iodized salt (preferably medium-ground and sea salt) – a teaspoon.
First, combine homemade yogurt with eggs and knead thoroughly. Place all the milk in a stainless steel pan and place on low heat. At the first signs of boiling, pour in the prepared mixture and, actively using a wooden spatula, wait for the buttermilk to separate.
Next, carefully (and slowly) transfer the curds with a slotted spoon into a colander (or sieve) covered with gauze and wait for the excess whey to release. While the process is not completed, take care of the herbs - wash them thoroughly, cut off the rough stems, finely chop the leaves and leave to dry on a paper towel. Next, mix the greens with the cooled mass in a bowl, return it to the gauze, tie the corners of the material, and place pressure on the head being formed. After approximately 9 hours, pressing will be completed.
If desired, grate the finished cheese with more salt, place in a container with a lid and place in the refrigerator (vegetable compartment) for 3-5 hours.
Step-by-step preparation
Prepare cottage cheese from yogurt and vinegar in the traditional way and wait for the whey to drain. Grind the garlic in a press, mix with salt, spices and very finely chopped dill. Also try to chop the basil leaves as finely as possible and add them to the overall mixture. Send the oil there and grind thoroughly. If you have a mortar available, it is better to use it; if not, use a blender at maximum speed.
Add sour cream to the resulting mass, mix thoroughly and combine it with the finished cottage cheese. Achieve perfect mixing of ingredients. Line a colander with clean gauze, folded in three, place the resulting cheese mass in it and, gathering it into a bundle, hang it over a bowl so that the remaining whey (from which very tasty pancakes are made) drips into it. In this state, leave the cheese for 10–12 hours in a cool place without excess moisture. After this, remove the gauze - the product is ready for use. You can store it in fresh whey for up to two weeks, although everyone who has prepared it says that it is eaten very quickly, as it is very tasty.
Based on all that has been said, we can conclude that curdled milk cheese at home is much better than in mass production. There is no doubt that only high-quality ingredients were used in its preparation. Based on these recipes, you can experiment with additives and create your own versions of homemade yogurt cheese.