Method for frying pistachios in shell
First you need to sort through the purchased nuts. It is better to throw away dried and moldy ones. They are unusable. Many people wonder how to fry pistachios in the shell. To do this you need:
- Choose the right frying pan - it is better that it has a thick bottom.
- Pour the kernels in one layer into the pan and fry, stirring constantly, for about 25-30 minutes.
- The first sign of readiness is that the pistachios will begin to crackle.
- Place the nuts on a plate and let cool.
Now it’s clear how to fry pistachios in the shell in a frying pan. This method is suitable for those who like to feast on pistachios, peeling them from the shell with their own hands.
It is worth considering another popular way to dry pistachios. It involves using an oven. The advantage of this option is the ability to process a large number of pistachios at one time. Necessary:
- Place nuts in an even layer on a baking sheet.
- The oven should be preheated to 200 degrees.
- Place the baking sheet with nuts in the oven.
- In this case, you need to consider how long to fry the pistachios so that they do not burn. 15 minutes will be enough.
- At least 2 times during this time, you should take out the baking sheet and mix the pistachios well for even frying.
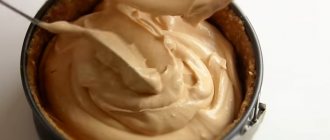
Caramel mirror glaze for cake
Ideal for pastries and cakes. The glaze turns out very aromatic and tasty.
Ingredients:
- lemon juice – 12 ml;
- gelatin – 5 g;
- salt – 2 g;
- starch – 11 g;
- granulated sugar – 100 g;
- water – 30 ml;
- cream – 130 ml (30%);
- water – 70 ml.
Preparation:
- Gelatin should be soaked according to the manufacturer's instructions.
- Dilute starch in less water specified in the recipe.
- Pour lemon juice over sugar. Cook until the mixture is smooth and caramel-colored. Pour in the remaining water. Remove from heat. Pour in the cream and stir.
- Return to heat and add salt. Add starch water. Boil. Cool the mass. You will need a temperature of 50°C.
- Add prepared gelatin. Stir until dissolved. Cool. You will need a temperature of 37°C.
- Cover the cake with this mixture twice.
How to open nuts correctly
Everyone knows how to open a pistachio with a large gap. This is done quite simply by pushing the shells apart, they crack and the nut ends up in your hands. Sometimes you come across pistachios that have not opened completely for some reason.
Moreover, for the shellless roasting method, it wouldn’t hurt to find out how to open closed pistachios without damaging either the nuts or your hands. Even in a closed pistachio there is always a small gap. You need to insert half a shell from a nut that was opened before, edgewise into it. Turn the shell across the crack. A closed nut will open in any case after such manipulation.
For lovers of a richer taste of nuts, it is recommended that before roasting, when the pistachios are still raw, pour them with a strong salt solution for 30 minutes. Be sure to dry them afterwards. You can fry in any convenient way.
Fans of sweet notes can sprinkle with powdered sugar. This type of pistachio would be appropriate if served as an accompaniment to coffee or dessert wine.
Roasted pistachios can be consumed as a separate delicacy. Their use in cooking is also quite common. The nuts are used in desserts, salads and snacks all over the world.
Everyone knows how to open a pistachio with a large gap. This is done quite simply by pushing the shells apart, they crack and the nut ends up in your hands. Sometimes you come across pistachios that have not opened completely for some reason.
How to roast pistachios at home
Pistachios are a tasty product that differs from other nuts in having the lowest calorie content and a high vitamin content. They have a tonic effect and help relieve chronic fatigue and depression. Pistachios have another name - “funny nut” - because of the effect they produce and the shell that bursts, reminiscent of a smile. The most delicious is the Iranian product, which is added to buns, ice cream, and cocktails. You can purchase nuts at any store, buy ready-made ones right away, or fry pistachios yourself.
Preparation
Raw pistachios have a mild, creamy flavor when roasted. Nuts can be cooked in the shell, or after peeling, fry in the oven, microwave or in a frying pan. Additionally, they are seasoned with various spices, salt and even sweet powder.
To fry peeled pistachios, they should be removed from the shell and washed well. Place the nuts in boiling water and boil for 4-6 minutes, then the consistency will be tender, with a certain buttery taste. Then remove them using a colander (sieve), allow the liquid to drain, and place the product in a paper towel folded several times. Make sure the pistachios are completely dry before frying. You will also need to sort through the nuts, remove the moldy ones and remove the dried ones.
We recommend reading: Cream Cheese Cooking Shelf Life
Shelf life of protein glaze
Having prepared a sweet semi-finished product at home, inexperienced housewives often think about how long the icing made from protein and sugar can be stored.
Its shelf life is the shortest in comparison with other types of glaze.
- If it is stored at room temperature, then three days.
- However, to be on the safe side, it is better to store the egg white glaze in the refrigerator. It can be stored in the refrigerator for a little longer – 5 days.
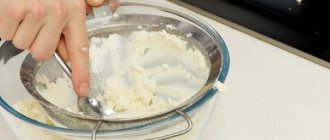
Prepare the protein glaze in a metal container. It has been noticed that it is in such dishes that the maximum pomp of the mass can be achieved. Salt, lemon juice and powdered sugar can help the confectioner achieve the correct consistency of the confectionery product.
You will need: the white of one egg, powdered sugar - 200 g, a teaspoon of lemon juice and salt on the tip of a knife.
- The protein is carefully removed from the shell into a clean container, salted and cooled.
- Then take a mixer or blender and beat the products.
- Powdered sugar is gradually poured into the container. If you don’t have powder at home, use a coffee grinder to crush the sugar to the finest possible powder.
- Then pour lemon juice into the cooking container to stiffen the mass and beat with a mixer until thick. The color of the finished mass is white and opaque.
There is no need to transfer the protein mass to another container. Cooks recommend simply covering the container with a lid or cling film and storing it in the refrigerator. After some time, the glaze will harden a little. When the time comes to apply the semi-finished confectionery product to the Easter cake or gingerbread, take it out and stir thoroughly for a couple of minutes.
How to open nuts correctly
When the nuts ripen, the shells open on their own, but they can also be completely clogged. To open a closed pistachio without cracking, use tongs designed specifically for chopping nuts. If such a device is not available, you can use a garlic press or regular pliers.
Opening a pistachio with a small gap will not be difficult. The shell from the previous peeled nut will help here. It is threaded into the crack and scrolled to the side. The hard shell opens and the pistachio pops out.
Frying methods
First of all, you need to sort out the purchased products and throw away the spoiled nuts. They are not suitable for consumption. Pistachios can be cracked or roasted directly in the shell.
Unshelled nuts are prepared as follows:
- It is better if the frying pan has a thick bottom;
- Place the kernels in a bowl and fry for at least half an hour over low heat, stirring constantly;
- the first sign that the nuts are ready is their crackling;
- Place the roasted pistachios on a plate and wait until they cool.
This is how the nuts are fried in a frying pan. This method is suitable for people who like to clean and enjoy the product at the same time.
Attention! There is no need to add vegetable oil when frying pistachios, since the nuts themselves are fatty. Otherwise, it will be impossible to consume them due to the large amount of fat.
In the oven
You can dry pistachios in the oven. The advantage of this frying method is its ability to quickly process a large number of nuts at once.
For this you will need:
- Place fresh pistachios in an even layer on a clean baking sheet;
- preheat the oven to 180-200°C;
- put the nuts, and, most importantly, do not overcook them here so as not to burn, 15 minutes is enough for this;
- after 5 minutes of frying, you need to remove the pistachios and sprinkle with salt or other seasoning for taste;
- To ensure that the product is evenly fried, during this time you should remove the baking sheet 2-3 times and mix thoroughly.
For those who like nuts too salty, you need to sprinkle more salt and add less spices. Some people generally prefer pistachios without seasoning. However, with them the product acquires an extraordinary taste. Place the prepared delicacy in a cup, cover with a paper napkin and let cool.
In the microwave
Today, more and more people are using the microwave to roast nuts. To prepare them you will need:
- remove the shell;
- Place clean pistachios in boiled water and boil for several minutes;
- place on a paper towel and wait until completely dry;
- then put it in the microwave for about 5 minutes.
Attention! It is recommended to eat pistachios cooled and in small quantities. But you should try them warm for salt, because hot ones absorb spices more intensely. You can’t eat nuts at night, they take a long time to digest and your stomach won’t be able to rest. It is also forbidden to take it on an empty stomach, of course, unless prescribed by a specialist.
How do the shelf life and storage periods differ and what are they for these products?
Consumers often confuse the concepts of expiration date and shelf life and consider them to be equivalent. Actually this is not true. Let's look at the differences between these two terms.
The shelf life is the period during which the product can be used for its intended purpose. If the product has not been sold after the expiration date, the seller is obliged to remove it from the shelf because it is expired. There are two ways to indicate the expiration date:
- Indicating a specific date - day and month.
- Indicating the period - for example, “use within six months from the date of manufacture.”
Decree of the Government of the Russian Federation dated June 16, 1997 No. 720 established goods with a mandatory expiration date. These are products that can cause material damage, a threat to life and health, and the environment. This includes:
Do you use expired food for cooking at home?
Yes, the main thing is to process it if it is meat or expired kefir for pancakes.
27.04%
No, it is very dangerous and not useful.
37.6%
If the products have fungus or mold, then we throw them away; if they are a couple of days past their expiration date, we use them for food, even without heat or other treatment.
35.36%
Voted: 1694
- Food products in and without packaging.
- Medicines.
- Chemicals, household chemicals, fertilizers.
- Industrial goods that change their properties due to the action of external factors include:
- pyrotechnics;
- batteries;
- condoms;
- fire extinguishers and some other products.
- The manufacturer is required to set an expiration date for cakes and pastries.
The shelf life is calculated from the date of manufacture until the day the product is to be consumed. That is, for example, the packaging says that the product was manufactured on May 18, 2021 and the expiration date is 7 days. Accordingly, the last day of consumption is 24.05, not 25.05.
The shelf life is the period during which the product does not lose the qualities reflected in the regulatory and technical documents. Manufacturers may indicate both dates - expiration date and shelf life. In this case, this means that when the storage period expires, the quality of the product will change, but it will be suitable for consumption.
How to choose a quality product
To avoid getting caught by products spoiled by mold, you need to follow certain rules when purchasing:
- A good quality pistachio shell should be smooth, have an even structure and a pale yellow color. If marinades are used during frying, the color turns orange. A dark tone indicates a spoiled product or strong thermal treatment. This suggests that there will be no benefit.
- A high-quality kernel has a green tint. The more saturated it is, the tastier the product.
- The thin film, which is slightly visible through the crack, should have a brown color, in no case red. Some manufacturers coat low-quality products with dyes to give them a marketable appearance. In this case, there is no need to rush to unnatural tones.
- Often, when pistachios ripen, they crack on their own, which makes them easier to get out. However, it is preferable to buy whole samples, because Many merchants treat the kernels with chemicals during the initial stages of ripening, as a result of which a fiction of “ripeness” arises.
- In a high-quality product, the inside protrudes slightly from the burst crack. When it is deep, a “crack of ripeness” is created using a mechanical or chemical method. In both cases, the beneficial and taste properties of pistachios come into question.
- You should not purchase a product located near meat, fish, or sausage counters - the nut instantly absorbs third-party aromas.
- Pistachios should be in a transparent packaging bag so that the quality is clearly visible. The presence of debris or other foreign objects should be stressful.
- When purchasing, you can ask the seller to open the package and smell the product; if there is rot or mold, you should discard the nuts.
- If the package shows many kernels separated from the shell, such samples should also not be purchased. This indicates poor transportation and failure to meet deadlines for harvesting and saving nuts.
When a salt coating of varying thickness is noticeable on the surface of the pistachios, the kernels are clearly no longer fresh; they were harvested more than 1 year ago, even if a fresh date is indicated on the packaging.
Mirror glaze: mistakes
Mirror glaze is a spectacular, glossy, noble coating for cakes and pastries! But as beautiful as she is, she is also capricious! We analyze the most common mistakes when preparing it. Now your sweets will be perfect!
It’s been a while since we updated the “Theory” section, but we need to! And today we will devote our article to mirror glaze, or more precisely, to the most common mistakes that arise when preparing it. The professional training portal for confectioners, The Chef, will help us with this! The guys answered questions that most often torment novice confectioners who have begun to conquer mirror glaze, or, in the language of masters, gloss. We combined this information with the experience of the owner of the Pteat.ru site, and we got an excellent chest of useful tips!)
There are a lot of mirror glaze recipes, and the number is only increasing. Caramel, with gelatin, condensed milk, cream, pectin, berry puree... We also have three on our website - colored, chocolate and caramel mirror glaze. The simplest, working, popular recipes. And everything seems to be verified to the smallest detail, described in detail, but, one way or another, troubles happen: sometimes it flows down from the sides, sometimes it falls in waves or with bald spots, sometimes it loses its shine, then... In general, it turns out that the glaze is a guy with restless!
If anyone has forgotten the rules for working with mirror glaze, let us remind you.
- The glaze is prepared in advance, preferably 12 hours before use, and this time is kept under VKontakte film in the refrigerator.
- Before use, the glaze is heated to operating temperature. For each recipe and composition it can be different - from about 27 to 40 degrees. Experienced confectioners often focus not even on temperature, but on consistency: the glaze should be fluid, but not too fluid. It’s difficult to explain, which is why, in fact, they came up with the concept of “operating temperature” so that there was at least some kind of guideline.
- Only frozen (or at least very well frozen) cakes are filled with glaze! You can cover both mousse and sponge cakes with it, but the latter must be well leveled and - again! - frozen. Leveling cream - any stable one!
- It is necessary to allow the excess glaze to drain, so the blanks are placed on a wire rack or other surface, the area of which is less than the area of the base of the cake.
- The drained glaze can be collected and reused - but under no circumstances on the same cake: the second layer is unlikely to lie evenly. Put the glaze in the refrigerator, and within a week you can cover some other dessert with it)
- You can’t freeze the icing, otherwise it will lose its shine, for which we all love it so much! However, if you used a recipe with dextrose, the gloss will remain after freezing. But home confectioners rarely use such recipes.
So those are the basics.
And now - actually, the mistakes.
Frosting runs down the sides of the cake - completely or almost completely
Well, firstly, perhaps you were in a hurry and did not allow her to “ripe”. The fact is that gelatin needs time to work to its full potential. This is 6-7 hours. That is why the glaze is prepared in advance. And it’s better to leave the glaze for 12 hours, just to be sure) No, seriously, in leading confectionery schools this is exactly the amount of time allotted for “ripening” the glaze. And also - if you are worried, start with dark chocolate icing recipes: they set stronger and faster on the cake.
Secondly, it is quite possible (although you will deny it now)), your cake was not cold enough. For better adhesion, the cake should be downright icy! Therefore, remove the cake from the ring or mold, put it back in the freezer for a while and only then fill it with glaze, because by the time you take the cake out of the ring (which can be very difficult due to lack of practice), it will have time to absorb a little room temperature. temperatures and will no longer be so cold.
Third - condensation. Yes, again, while we are busy taking the cake out of the mold, due to the temperature difference it manages to become covered with tiny droplets of water. And they will also interfere with good grip. Therefore - again! — do not keep the cake at room temperature for a long time before glazing, and just before pouring, wipe it with a clean hand, removing any possible condensation.
The glaze falls in waves
Do you always follow the correct storage of food/medicines and their product proximity?
Yes, of course, this is very important so as not to spend money on your health later.
49.12%
Not really, because there won’t be anything like going to the toilet.
26.32%
I look at it by appearance and if I use anything after heat treatment.
24.56%
Votes: 171
There is only one answer: you did not bring the temperature to the working temperature - the glaze is too cold! If you don't have enough experience yet to recognize the correct consistency of glaze, but want (which is completely normal!) to avoid such problems, freeze some of the mousse in small ramekins and fill them with glaze before glazing the main product. You can try dipping a well-chilled spoon into the glaze, for example, but this test is not always 100% correct.
There are bubbles on the glaze
Not scary, but unpleasant: the aesthetic side of the issue suffers. Of course, bubbles can be covered with decor, but their presence still indicates the insufficient level of professionalism of the confectioner in the field of modern mousse cakes and the not very high quality of the coating. And if you planned a design in a minimalist style, then bubbles will simply ruin the whole concept for you. In short, ideally you need to learn how to coat cakes with glaze without bubbles! They appear at the stage of preparing the glaze, when you actively mix all the ingredients. Before use, according to technology, it is necessary to “break” the glaze with a submersible blender. This procedure, in theory, should rid the mixture of bubbles, but this does not always happen. It happens, on the contrary: the blender only adds bubbles! Therefore, it is extremely important to “punch” strictly according to the rules: in a tall glass, tilting it slightly and fixing the blender attachment in one place, without moving it back and forth. You need to find the optimal position of the nozzle at which the blender will make a quiet, characteristic sound. But a lot depends on the blender itself, on the structure of its attachment. In other words, you need to get a feel for your technique and make friends with it. And this, of course, also comes with practice. And if you want to clearly see right now exactly how to punch the icing to get rid of bubbles, you can do this in the lessons of The Chef online academy, for example, here or here.
How to use
It is known that pistachios exhibit beneficial effects on the body only when eaten raw. Salty ones, so loved by most men, because... They are an excellent snack for beer, but will not bring the desired benefit.
We recommend reading: If You Make Cream With Cremette and Cream, Can You Store It in the Freezer?
Their calorie content does not exceed 600 kcal, compared to other types of nuts, so they are often used in dietary nutrition.
You can prepare various dishes. There is an interesting recipe with the addition of pistachios, for example, sauce. To do this, take a red ripe tomato and cut it into small slices. Then add a finely chopped onion with chopped nuts. Mix well and add red pepper and let it brew.
How to salt pistachios
Nuts are widely used in various national cuisines. They have a soft green tint and go well with vegetables and meat, and are also added to cakes, muffins and other desserts. But most often pistachios are used as a snack for beer, wine and other drinks. It will not be difficult to open pistachios at home and add salt to your taste.
Description of pickling pistachios:
- It is necessary to prepare a saturated saline solution. You will need an enamel bowl, pour water into it and add simple table salt (iodized is allowed). Stir thoroughly until the crystals are completely dissolved. Place pistachios in the prepared saline solution and keep them in the liquid at room temperature for about 2 hours, no less. This time will be enough to soak them.
- Then, after salting in a saucepan, you need to take out the nuts and dry them. Place them on a simple towel or paper and wait until the water drains. The dried product can be fried in a frying pan or in the oven, placing them on a baking sheet. Many people eat raw pistachios and roast them only to increase the flavor.
- The most interesting are the nuts cooked over a fire. For example, when relaxing in nature, you can take pre-salted pistachios with you. They will be a wonderful treat for adults and children. In a special cauldron or grill pan, they will become even tastier and more aromatic, as they will be saturated with smoke. And combining them with cheese or other products, the food is ideal on vacation.
The finished product is used as a snack for intoxicating drinks, wine and even cognac. Also interesting are nuts added to meat products; you can often find them in vegetable salads, for example, in a restaurant. Roasted pistachios are usually served with salt, but there are many recipes for sweet desserts where they are present and delight with their aroma.
You can prepare various dishes. There is an interesting recipe with the addition of pistachios, for example, sauce. To do this, take a red ripe tomato and cut it into small slices. Then add a finely chopped onion with chopped nuts. Mix well and add red pepper and let it brew.
And let's add a couple of secrets at the end
- When cutting a cake with glossy icing, problems often arise. Sometimes the glaze can stick to the knife, what should I do about it? There is a solution and the recipe is very simple - you need to cool the dessert very much and heat the knife well. Then you shouldn't have any problems in the future.
- If you decide to let the cake harden in the mold, then you need to carefully remove it from there. To do this, use ring tape.
- A thick layer of glaze can also be leveled using a spatula.
Experienced chefs can prepare a delicious cake with mirror glaze, but many beginners can do it without any problems if they adhere to the operating temperature and all the nuances of the cooking technology.
Next, you will learn how to make mirror glaze for a cake at home. It is easy to prepare and looks very beautiful.
Preparation
You can buy pistachios in a regular supermarket, or stock up on the product using an online store. It is recommended to first clean the workpiece from shells and husks, rinse thoroughly, and soak for 30 minutes to remove bitterness.
At this time, you can boil water in a saucepan, in which you need to boil the finished kernels so that the consistency becomes tender, with a characteristic oily taste. Place the pistachios on parchment paper folded in several layers, or use a towel to dry the nuts to remove excess liquid.
Preparation
Take a frying pan with a thick bottom, a cast iron variety is suitable, which is heated on the stove and lightly greased with oil. Pistachios are laid out in a thin layer and stirred with a wooden spatula so that the ingredient does not burn. It only takes 5 minutes to prepare a delicious snack. It is recommended to take one nut and break it: if it is golden inside and smells delicious, you can remove it; if it is greenish, you need to hold it a little longer.
Option two does not require preliminary preparation: without peeling the pistachios, place them in a frying pan and stir thoroughly. When they begin to crackle and the apartment is filled with the aroma of roasted nuts, they can be removed.
We recommend reading: How to Make Pastille in a Bosch Stove
It is recommended to leave the product on a napkin or parchment for a few minutes to remove excess fat, otherwise such a snack will be too high in calories and will harm your figure.
Oven-dried pistachios are stored for about a year, when fresh varieties quickly deteriorate and develop a bitter taste.
Mirror chocolate glaze
When making at home, mirror glaze made from chocolate is considered a favorite. This decoration is perfect for such delicacies as “Daniella”, “Bird’s milk”, and looks great with all kinds of mousses. Also, a cake with mirror glaze looks great in the company of a variety of sprinkles, mastic, candied flowers, and also in combination with other shades of confectionery coating. The glossy icing on the cake is very beautiful in appearance, but it will also exceed all your expectations in taste.
Next, you will learn how to make mirror glaze for a cake at home. It is easy to prepare and looks very beautiful.
Ingredients you will need:
- a packet of gelatin;
- sugar – 240 g;
- water – 96;
- molasses (you can also take liquid honey, or prepare it yourself) – 80 g;
- heavy cream (more than 30%) – 160 g;
- cocoa powder – 80 g;
- vanillin – 1 sachet;
- crushed or crushed dark chocolate – 50g.
Step by step recipe
- First, soak the gelatin in water. Follow the instructions on the package. If you threw away a bag with a detailed description, then you will need our help. It is necessary to pour gelatin powder with water at the rate of 1 tablespoon of the product per half glass of liquid. Leave the gelatin to swell in water for 1 hour. Remember that instant gelatin swells in half an hour.
- Now you should prepare a water bath in which you place a container with swollen gelatin. Bring until completely dissolved, stirring continuously. Secret: if you let the gelatin boil, the protein and collagen will be destroyed, after which the dish itself will no longer harden. If you were unable to achieve the desired result, the correct solution would be to throw away the boiled gelatin; it will no longer be suitable for use. The filling on the cake will not work if you add spoiled gelatin to it.
- Add sugar, cocoa and vanillin to a separate container and mix until smooth. Gradually add cream and water. Do this very carefully.
- The mirror glaze mixture will gradually heat up on the stove and boil. Watch carefully and mix it with a whisk. When you prepare a glossy glaze, remember that it will stick to the sides of the dish.
- Then add the previously crushed dark chocolate and let the mixture cool slightly.
- Gelatin makes the treat glossy and mirror-like. This means it’s time to add it to the preparation and mix well.
- Strain the mixture through a strainer, leave it in the refrigerator to stabilize for at least 20 hours and begin decorating the confectionery product.
- We remind you that the working temperature for decorating cakes is 37 degrees.
Now you know how to make mirror glaze from cocoa. It looks very impressive on numerous confectionery masterpieces.
Do not dry pistachios in the microwave for more than 5 minutes. +3 + 10 /- 7, 44 read
If it so happens that you bought pistachios in the supermarket and they turned out to be wet, do not leave them to “dry” in the microwave for ten minutes in a sealed container. Tried. Advice on how to dry them correctly is accepted with pleasure :)))
If it so happens that you bought pistachios in the supermarket and they turned out to be wet, do not leave them to “dry” in the microwave for ten minutes in a sealed container. Tried. Advice on how to dry them correctly is accepted with pleasure :)))
How to store mirror glaze
Glazed or mirror glaze is a real godsend for the pastry chef. With its help, you can make any dessert perfect, the main thing is to prepare it correctly.
Due to its composition, it can be stored in a closed container on a refrigerator shelf for two weeks.
Sugar, gelatin, water, condensed milk, chocolate, food coloring - none of these products are perishable, but such glaze must be stirred before use. Before storing mirror glaze, it must be placed in an airtight container.
Features of storing pistachios in shells
To be beneficial, pistachios must be fresh and fully ripened. You can store nuts in the shell or without it. In ripe fruits it is slightly open, as if cut, and the color of the kernels is emerald. The shell serves to protect nuts from environmental influences and prolong their shelf life.
You can store pistachios:
- In a kitchen cabinet or pantry. They will remain suitable for consumption for six months.
- In the refrigerator, at a temperature of two to six degrees. Pistachios will not lose their beneficial qualities for nine months.
- In the freezer. In such a place, the nuts will be well preserved for at least one year.
In order for pistachios to remain fresh and of high quality for the entire specified time, you should not forget about several rules:
- nuts should be poured into a glass container or a thick plastic bag;
- pistachios must be kept away from sunlight and heat sources (radiators, heaters);
- if in the summer the thermometer in the room rises above 25 degrees, it is better to transfer the fruits from the kitchen cabinets to the refrigerator;
- Moisture affects the preservation of nuts. Due to its excess, mold and mildew appear on pistachios. Therefore, if the kitchen or pantry is too humid, the nuts should also be placed in the refrigerator;
- Periodically, pistachios must be inspected and those fruits that have begun to deteriorate must be removed. Signs of staleness include dots on the shell, the appearance of dark spots and mold;
- It is not advisable to mix newly purchased nuts with those that have been stored in a container for some time. Most likely, these pistachios have different shelf life. Less fresh nuts can spoil a new batch of fruits;
- pistachios do not tolerate the proximity of other types of nuts. Therefore, they cannot be stored together in the same container.
Storing champignons in the freezer
At home, champignons can be stored in the freezer for a longer time. For ease of further use, before storing champignons in the freezer, you can subject them to various degrees of processing.
There are several options:
Freezing fresh champignons
Having chosen this storage option, you need to do the following:
- Clean the mushrooms using the above method;
- If necessary, cut the product into suitable pieces;
- Divide into portions and seal the mushrooms using bags or containers.
Freshly frozen champignons can be stored for no more than 1 month.
Freezing boiled champignons
In order to freeze boiled champignons, you need:
- Clean the mushrooms as above;
- Rinse with running water;
- Cut if necessary;
- Place in boiling salted water and cook for about 10 minutes;
- Place the cooked product in a colander and allow the liquid to drain;
- Place on paper towels and let dry completely;
- Place into portioned bags or containers and place in the freezer.
Frozen boiled champignons can be stored for six months.
Freezing fried champignons
If you need to freeze fried champignons, the procedure should be as follows:
- Carry out preliminary cleaning of mushrooms;
- Wash in running water;
- Grind with a knife;
- Fry with the addition of vegetable oil until the liquid evaporates;
- Place on paper towels and allow excess oil to drain and let the mushrooms cool thoroughly.
Pack into bags and containers and place in the freezer.
Fried champignons can be stored in the freezer for six months.
Once thawed, champignons should be used immediately, as they cannot be re-frozen or stored in the refrigerator for long periods of time.
By using champignons for cooking, the rules and shelf life of which have been violated, you risk getting poisoned and harming your health. The fact is that after the expiration date, toxic substances begin to be produced in mushrooms, and they cease to be suitable for consumption. Therefore, only knowing how to store fresh champignons and frozen semi-finished products of this product can you be completely confident in the harmlessness of the prepared mushroom dishes.
Interesting: How long does Fresh Fish last in the refrigerator?
Champignons are very popular mushrooms and are easy to find in grocery stores. They have a pleasant taste and beneficial properties and are often used to prepare homemade dishes. Champignons are classified as safe mushrooms. They can be consumed even raw, without heat treatment.
In this article we will talk about how to properly store store-bought champignons so that they stay fresh longer.