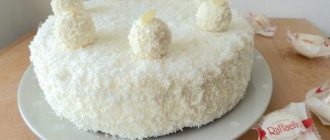
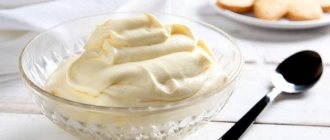
Curd cream for leveling the cake
Cottage cheese-based cake leveling cream retains its texture even at temperatures above 25 degrees. In this case, the mass is obtained with a reduced calorie content and a rich nutritional composition.
What ingredients will you need?
Before creating a cream based on cottage cheese, you need to prepare the following ingredients:
- fine-grained cottage cheese – 350 g;
- butter without additives – 190 g;
- granulated cane sugar (preferably used in the form of powder) – 80-200 g.
It is recommended to vary the amount of sugar according to taste. If the cakes are sickly sweet, then it is recommended to put no more than 80 g of sugar in the cream. When the cream is needed to coat a multi-layer cake, the amount of ingredients will need to be increased in equal proportions.
Step-by-step cooking process
The cream creation scheme contains the following steps:
- Initially, you need to pass the curd mass through a sieve to make the mass more homogeneous.
- It is recommended to keep the oil at room temperature for approximately 3 hours, after which the ingredient should be placed in a large container and beaten with a mixer until foam forms.
- Then you need to pour granulated sugar (powdered sugar) into the container with butter. Continue beating the ingredients with a mixer.
- When the sugar is completely dissolved, add cottage cheese (in parts) to the contents and beat the contents again with a mixer.
If you need to create a dark version of the cream, approximately 30 g of cocoa powder should be included in the composition. You can also add vanilla powder in the amount of 2-3 g.
Rules for applying cream to the cake
The cream for leveling the cake should give the product the correct proportions; for this it is important not only to prepare the cream correctly, but also to apply it.
The main stages of applying the cream:
- Initially, it is necessary to cut off the upper uneven part from the cooled cakes (usually 3 biscuits are used).
- Next, you need to apply a thin layer of the creamy mixture onto the stand, then the finished dessert will not slide off it. If the stand is not used, then this item should be excluded.
- Place the first sponge cake on a stand or on a flat, wide dish. Place a decent amount of cream in the center of the cake. Next, the cream needs to be carefully smoothed over the surface of the cake. It is normal for it to run down the edge of the cake (in the process of spreading it over the surface of the sponge cake).
- Then put a second cake layer on top of the cream and coat it in the same way.
- After this, you need to place the third cake layer cut side down on the second layer of cream. With this arrangement of the sponge cake, when the top cake is coated, fewer crumbs will fall into the creamy mass. There is no need to coat the top sponge cake with the cream mixture yet.
- Next, you need to lightly press down the cakes so that the creamy mass is evenly distributed between the biscuits and use a special spatula to remove any excess cream that appears. It is advisable not to use the creamy mass removed from the cakes further, as it may contain crumbs.
- After this, you should align the sides of the cake. To do this, you will need to spread a sufficient amount of cream on the side and immediately smooth it out with a spatula. The process of applying cream to the side is considered complete when all the depressions are eliminated and the cream lies in an even layer.
- Then you should level the top layer of the cake. It also needs to be thoroughly coated with cream in large quantities and the excess cream mass must be removed using a spatula.
- After applying the cream, it is recommended to place the dessert in the refrigerator for approximately 30 minutes.
- After 30 minutes (when the first layer of cream has hardened), it is recommended to cover the dessert with a second thin layer of cream. As a result, the dessert will acquire perfectly smooth edges without the presence of biscuit crumbs.
- After applying the second layer of cream, it is recommended to put the dessert in the refrigerator for approximately 20 minutes.
- After 20 minutes, it is recommended to carefully wrap the cake with cling film and place it in the refrigerator for 24 hours.
During this period of time, the leveling cream will harden and will not mix (when decorating the cake) with fondant or other type of cream. After a day, you can start decorating the dessert.
Confectioners' tips for choosing the right cream
- The cream under the mastic should be thick;
- The density of the cream is given by oil and custard mixtures;
- If you need more gloss, use more oil in the cream;
- Cream ganache is universal and suitable for leveling cakes with any decor;
- Butter cream with condensed milk is better suited for the glaze;
- The buttercream must be kept at room temperature before use;
- Curd and cream compositions, on the contrary, are best used chilled.
See also: How to replace thickener for sour cream and how to use it correctly
TOP 5 creams for leveling cakes [confectioner’s opinion]
Cream cheese based on Mascarpone
Cream cheese made with soft cheese has a delicate texture and taste.
Cream cheese for leveling Mascaprone cake.
At the same time, it is recommended to level the cake with this creamy mass in 2 layers with intermediate cooling of the cake in the refrigerator.
What ingredients will you need?
Cream cheese in the classic version contains the following ingredients:
- soft butter (it is important to use butter with a fat content of at least 80%) – 100 g;
- Mascarpone (it is important to check the freshness of the product when purchasing) – 300 g;
- granulated sugar in the form of powder – 80 g.
It is important that the cheese must be used cold, and the butter must be used warm.
Step-by-step cooking process
The recipe for creating the cream contains the following sequence of actions:
- The butter should be cut into approximately 4 parts.
- Place the pieces of butter in a deep container and beat with a mixer on medium power. The beating process lasts about 2 minutes. During this period of time, the oil should turn white.
- Then add powdered sugar to the butter and continue the beating process for approximately another 7-9 minutes.
- After 7-9 minutes, you need to start introducing cheese into the contents in small portions. It is recommended to mix the ingredients with a spatula. If you use a mixer, the cream may separate.
- Mix the contents until a homogeneous consistency is obtained.
It is recommended to cool the finished cream in the refrigerator before use. But you don’t need to cool for a long time, as the cream will thicken and will be inconvenient to apply to the cakes.
Protein cream
Cream for leveling a chicken protein cake does not change consistency under the influence of temperatures.
This creamy mass is also ideal for layering sponge cake.
What ingredients will you need?
Protein smoothing cream contains the following ingredients:
- raw chicken protein – 4 pcs.;
- granulated sugar (white only) – 180 g;
- vanillin (in the form of powder) – 2-3 g;
- natural butter without additives, softened – 180 g.
In this recipe, the amount of sugar cannot be changed, otherwise the protein will not acquire the desired consistency. If desired, vanillin can be omitted or replaced with another food flavoring.
Step-by-step cooking process
The cream design algorithm consists of the following stages:
- It is advisable to use whites in a warm state (in this form they take longer to whip, but hold their shape for a long time). They must be placed in a capacious container and ground with granulated sugar.
- Next, the protein mixture must be placed in a water bath and brought to a temperature of 60 degrees.
- Remove the container with the protein from the heat and beat the contents with a mixer until the ingredients have cooled. This process takes approximately 10-15 minutes.
- After this, it is recommended to divide the butter into 6-9 parts.
- Then, without stopping the whipping process, add butter in parts to the protein mass.
- Beat the ingredients until the cream reaches a homogeneous consistency.
The resulting cream should be immediately used to level a dessert or a layer of biscuits.
Chocolate cheese cream
This European cream is easy to prepare in half an hour. It is perfect for leveling cakes, as a layer for biscuits, and decorating cakes. Very tasty, cheaper than ganache at cost.
✍ Ingredients:
- curd cream cheese - 600g;
- cream (from 30% fat) - 1l
- powdered sugar - 200g
- chocolate – 360g
Preparation:
- Cool the cream thoroughly. Beat half of the cream with a mixer for no more than 10 minutes, gradually increasing the speed until it becomes fluffy.
- Add powder, beat for about a minute
- Chop the chocolate into a bowl.
- Heat the remaining cream until it boils and pour into the bowl with the chocolate. Let sit for a while until the chocolate melts and stir until completely smooth.
- Combine both mixtures. Mix with a mixer at medium speed until smooth.
- Place in the refrigerator for an hour
Store cheese properly in the refrigerator. It should not freeze, otherwise there will be grains in the cream. Also be careful not to whip the cream into butter!
Video recipe for making cake leveling cream
See also: Cake 1,2,3.. kg for how many people & How many kg of cake is needed for 10,15,20.. people
Colored cream
You can decorate the creamy mass using food coloring (dry or gel).
At the same time, it is recommended to add dye only at the final stage of using the cream.
What ingredients will you need?
Before preparing the creamy mass, it is recommended to prepare the following ingredients:
- white chocolate without peanuts, coconut and other additives – 500 g;
- cream with a fat content of at least 33% - 170 ml;
- food coloring (color can be chosen as desired, it is recommended to combine several colors) – the number of packages is used at the discretion of the cook.
The more dye is used, the richer the color of the cream will be.
Step-by-step cooking process
The process of creating a cream is recommended to be carried out according to the following scheme:
- Initially, the chocolate needs to be broken into small pieces and placed in a microwave-safe bowl.
- Melt the chocolate in the microwave.
- The cream must be placed in a similar container and heated to approximately 70 degrees, also in the microwave.
- Combine chocolate and cream and mix them using a blender.
- Next, you need to add dye to the finished mass in the desired proportions. If several colors are used, then the bulk must be divided into several parts (depending on the number of “paints” used).
- Mix the ingredients with a spoon until the color is even.
- Cover the container with the creamy mixture with cling film and put it in the refrigerator for about 2 hours.
To ensure that the cream lies smoothly and beautifully, it is recommended to use special culinary strokes.
Cream cheese cream
A cake whose leveling is carried out with a creamy cheese mass is obtained with a delicate taste and holds its shape well, provided that the cream is prepared correctly.
What ingredients will you need?
The composition of the creamy cheese leveling mass includes:
- soft cream cheese (for example, Hochland, Cremette or Almette) - 100 g;
- fresh cream with a fat content of at least 30% - 100 ml;
- ready-made powdered sugar – 60 g.
If desired, you can add 20-30 g of cocoa powder or 2-3 g of vanilla powder to the cream.
Step-by-step cooking process
The sequence for creating the cream consists of the steps described below:
- In a deep container, combine the cream with powdered sugar. Stir the ingredients until the sugar crystals are completely dissolved.
- Then you need to add cheese to the creamy mixture and mix the ingredients with a blender. Until the mass becomes homogeneous, it is recommended to turn on the device at low power. After combining the ingredients, the power of the device should be increased to maximum values and the contents should be beaten until a fluffy mass is formed. On average, the procedure lasts about 5-7 minutes.
To ensure that the cream has the desired texture, it is recommended to keep the cream, cheese and container used in the refrigerator for at least a day before preparing.
White chocolate fairy tale
If you're looking for a thick cake frosting recipe, white chocolate ganache might be just what you're looking for. This is a stable and tasty layer that will not leave anyone indifferent. This ganache turns out to be a delicate creamy shade and holds its shape well.
To prepare use:
- 200 g white chocolate;
- 100 ml cream 33% fat;
- 20 g butter at room temperature.
The chocolate needs to be chopped into small pieces and pour boiling cream over it, wait until it melts and stir until smooth. Add softened butter to the cooled mixture and beat with a blender.
Yogurt recipe
Yogurt cream maintains the desired texture due to the inclusion of gelatin. This cream can also be used for layering cakes, and it is recommended to add crushed pieces of berries or fruits to it.
What ingredients will you need?
Yogurt smoothing cream contains the following ingredients:
- natural yogurt without dyes and preservatives – 400 ml;
- gelatin granules – 30 g;
- water without impurities – 150 ml;
- natural fruit juice – 100 ml.
You also need to include cane sugar in the composition, the amount of which needs to be adjusted according to taste preferences.
Step-by-step cooking process
The algorithm for preparing the leveling cream is as follows:
- Initially, you should heat the fruit juice and dissolve granulated sugar in it. If desired, fruit juice can be replaced with fruit syrup, then sugar can be omitted.
- Next, you need to dissolve the gelatin in warm water. If necessary, it should be dissolved in a water bath. The exact time and method for preparing gelatin are indicated on the package.
- Then you need to combine the ingredients from points 1 and 2. The resulting mixture needs to be cooled to approximately 20-25 degrees.
- After this, you need to add yogurt into the mixture obtained in step 3 and beat the contents with a mixer until the ingredients are evenly distributed.
The finished leveling cream must be placed in the refrigerator for approximately 30 minutes.
Cream Charlotte
The cream for leveling the cake turns out fluffy and holds its shape well, despite the fact that the main ingredient is butter.
Preparation next.
What ingredients will you need?
The classic version of the cream contains the following set of products:
- raw table egg (use a large egg) – 1 pc.;
- butter (must be softened in advance) – 250 g;
- cow's milk with a fat content of 2.5% - 150 ml;
- granulated sugar (preferably cane sugar) – 200 g.
You can also include vanillin (2-3 g) or natural cognac (15-20 ml) in the cream.
Step-by-step cooking process
The scheme for creating Charlotte cream consists of the following points:
- The milk should be poured into a saucepan and placed over moderate heat.
- While the milk is heating, add sugar and stir until the ingredient dissolves. Bring the mixture to a boil, but do not boil.
- Remove the saucepan with the milk mixture from the heat.
- Then in a separate deep container you need to beat the egg.
- Without stopping the beating process, gradually pour the milk mixture into the egg mass. It is important to pour in the sweetened milk in a thin stream, otherwise the egg may curdle.
- When the egg-milk mixture is ready, you need to immediately beat the butter in a separate deep container.
- After the oil begins to lighten, add the egg-milk mixture into it in small portions. It is important not to stop whipping the products while combining them.
If the composition includes vanilla or cognac, it is recommended to introduce them into the cream in the last paragraph.
Buttercream for cake decoration
Although no one likes buttercream, it is actually very simple and great for decorating cakes. I would say that this is the best and easiest to use styling cream. It is recommended to study on it. The roses and other details are the clearest and most beautiful from buttercream.
I recommend the option with condensed milk. You can take regular or boiled. The proportion of butter/condensed milk is 1:1, then it will keep its shape well. If the butter is good and the condensed milk is thick, then you can use 200 grams of butter per can of condensed milk. But, in general, it should work out one to one.
So:
100 grams of butter (good)
100 grams of condensed milk (good, 8.5%)
vanilla
Beat the butter. Continue whisking, gradually adding condensed milk. And a little vanilla.
It is important that the butter and condensed milk are at room temperature, otherwise there is a risk of separation.
Cream based on mastic
The cream based on curd cheese not only holds its shape, but also does not crack during the drying process. This cream is also ideal for decorating a cake.
What ingredients will you need?
Before preparing the cream, you need to check the presence of the following products:
| Ingredient | Quantity |
| fresh cream with a fat content of 30 to 33% | 130 ml |
| natural curd cheese (no preservatives) | 550 g |
| powdered sugar (amount can be adjusted to taste) | not less than 80 g |
If desired, you can include vanilla extract in the amount of 3-5 ml.
Step-by-step cooking process
The cream creation scheme is as follows:
- Initially, you need to pour the cream into a deep container and beat it with a mixer. The ingredient should thicken and increase in volume. On average, the process lasts about 3 minutes.
- Then the cheese needs to be cut into approximately 10-12 pieces.
- Gradually add the cheese into the whipped cream, without stopping the whisking process with the mixer at medium speed.
- Finally, you need to add powdered sugar to the contents without stopping the whipping process.
- Beat the ingredients until the mixture becomes fluffy.
Before use, the cream mass should be cooled in the refrigerator (approximately 30 minutes).
Butter cream
First, a recipe for delicious buttercream for frosting the cake.
Ingredients:
- cream with fat content 33%-35% - 1 cup;
- powdered sugar - 2 or 4 tablespoons.
Preparation:
- Dishes and food must be cold. It is necessary to understand that the mass will double in volume, so the container should be narrow and high.
- It is necessary to pour 1 glass of cream into the bowl in which the cream will be prepared and beat for 1 minute at medium speed until stable.
- Then start adding powdered sugar in equal parts, continuing the same process at the same pace.
- You can add vanilla, chocolate or lemon juice if desired. Beat for just a few more seconds.
Use the cream immediately. If it happens that the whipped mass will be stored for 24 hours, it must be placed in the refrigerator. The container must be closed, as the cream easily absorbs foreign odors. It turns out light, airy, very tasty and easy to make.
Sour cream for leveling the cake
The cream for leveling the cake from sour cream turns out to be delicate (with the taste of ice cream), not cloyingly sweet and holds its shape even at a temperature of 30 degrees.
What ingredients will you need?
Before applying the cream, it is recommended to purchase the following products:
- sour cream with a fat content of at least 20% (if you use low-fat sour cream, the process of whipping the cream will be lengthy) – 350 ml;
- raw chicken egg (elite) – 1 pc.;
- granulated sugar (it is recommended to use white sugar) – 110 g;
- wheat flour (must be sifted first) – 60 g;
- vanilla (preferably using extract) – 5 ml;
- butter without preservatives – 120 g.
It is recommended to remove the butter from the refrigerator approximately 3 hours before starting to create the cream.
Step-by-step cooking process
The algorithm for preparing the creamy mass consists of the following sequence of actions:
- Place sour cream, raw egg and granulated sugar in a large container. Mix the products until a uniform consistency is obtained.
- Then you need to add flour in portions. And pour in vanilla extract. Stir until the ingredients combine into a single mass.
- Place the container with the contents in a steam bath and simmer until the resulting mixture thickens. It is recommended to check the thickness of the cream base with a spoon. If, when stirring, the furrow from the spoon does not quickly close, then the container with the contents can be removed from the heat.
- Next, it is recommended to cover the container with cling film and leave the contents to cool for approximately 40 minutes.
- After the cream has cooled, you need to put the butter in a clean, deep container and beat it until lightened.
- Then add the cooled cream base into the oil in small portions. In this case, the beating process must be continued.
- When all the components are combined, they need to continue beating until a fluffy (almost airy) mass is obtained.
It is recommended to prepare the leveling cream mass when the biscuits are ready.
Cream Sundae
The benefits of this cream are countless. But within the framework of our topic, it is very important that “Plombir” is a stable cream for finishing coating. It will help out even in the summer heat, when many other creams start to run.
What we need:
- Sour cream (from 20%) – 350 g;
- Butter – 200 g;
- Egg – 1 pc.;
- Sugar – 110 g;
- Flour – 3 tbsp. spoons;
- Vanilla extract - 1 tsp.
Butter cream with condensed milk
Condensed milk cream will have a richer taste if you include 15-20 ml of cognac or other fortified drink in the recipe.
What ingredients will you need?
The cream contains only 2 ingredients: softened butter (200 g) and condensed milk made from whole milk (400 g). If you choose condensed milk based on reconstituted milk, the texture of the cream may not correspond to what is stated in the recipe.
Step-by-step cooking process
The cream creation process consists of only 3 stages:
- Place the butter in a deep container and beat it with a mixer. Set the speed of rotation of the beaters to medium.
- When the butter begins to turn white, add condensed milk in small portions. In this case, the beating process cannot be stopped.
- After combining the ingredients, it is recommended to set the speed of the whisk rotation to maximum and beat the contents until a uniform consistency is obtained.
If the consistency of the cream turns out to be liquid, then you need to add more butter to the contents.
Cream ganache
Cream ganache is considered the ideal cream for leveling a cake. It goes well with any decorating cream (to taste), and also holds its shape at any temperature.
What ingredients will you need?
To create the ganache cream you need to prepare:
- dark chocolate (not bitter and without additives) – 180 g;
- thick cream with a fat content of at least 30% - 75 ml;
- soft butter (fat content not less than 80%) – 110 g.
To soften the butter, you need to take it out approximately 3 hours before cooking.
Step-by-step cooking process
The sequence of actions when preparing the cream is as follows:
- Break the chocolate into small pieces.
- Place the chocolate in a dish and pour in the cream.
- Place the dish in a water bath and simmer the contents until the chocolate is completely melted. It is important to stir the ingredients regularly.
- After combining the ingredients and obtaining a single mass, the dish should be removed from the heat and the contents should be allowed to cool to approximately 40 degrees.
- When the creamy chocolate mixture has cooled, you need to add butter in parts. Mix the ingredients until the mixture becomes homogeneous.
Cover the dish with the cream with cling film and put it in the refrigerator for approximately 1.5-2 hours. Cream in desserts is used not only for impregnation and decoration. Thanks to the creamy mass, you can give the cake the correct geometric shape and eliminate cake defects. An important nuance of this type of cream is that it retains its shape at any temperature, otherwise the cake may “float” after leveling.