Winter garlic is planted in the fall for the winter. Its advantages over spring varieties: early ripening and high yield. The main disadvantage is bolting, which can lead to shrinkage of the bulb. Therefore, owners of small home plots prefer to plant winter varieties for their own needs, where timely cutting of shoots is not a big problem. How should winter garlic be stored?
Features of winter garlic
The crop is planted in open ground in the fall. Having formed a root mass in the autumn and safely overwintered, the plant grows vigorously in the spring. The development of winter crops is facilitated by moisture stored after snow melts.
Biological and agrotechnical features of winter garlic:
- high adaptability to different climatic conditions;
- high winter hardiness;
- roots germinate at 0 °C, and at 3-5 °C they grow intensively;
- demands on moisture, especially during leaf growth;
- root length – 10-20 cm;
- increased demands on soil fertility, the best option is light, slightly acidic and well-fertilized soils, sandy loam or loamy;
- the desired soil acidity is neutral or close to it;
- Garlic cannot be grown in one place for years; it cannot be grown again in the same place; it can only be planted after 3-4 years.
Winter garlic is a bulbous plant whose leaves and head repel pests - slugs, caterpillars, borers and even moles.
Planting with teeth and bulbs
The spring vegetable almost never produces an arrow. It is very difficult to obtain aerial bulbs at home, although bulbs of hybrid varieties can be purchased at seed stores. The only variety from which I managed to get an aerial bulb was Guliver . This happened on single plants.
Planting garlic in spring is done in two ways: cloves and bulbs.
Planting with teeth
First, you need to divide the cloves into fractions and plant them “according to their height”, this way we will avoid excessive shading of weaker plants. When planting cloves in open ground, spring garlic is placed at a distance of 10-15 cm with row spacing of 20-25 cm. For planting, grooves are cut with a depth of 5-6 cm. Deeper planting should not be done, since during development the clove deepens and the bulb will be difficult to dig. We place the cloves in the furrows with the bottom down, pressing down slightly in soft soil to maintain the vertical position of the planting material. Sprinkle with a layer of soil and you can mulch the bed with straw or sawdust. To obtain a good harvest, after planting garlic, the area is watered with water with the addition of urea.
Planting with bulbs
Bulbs are aerial bulbs, which we call plant seeds. Propagating garlic in this way makes it possible to obtain a full-fledged bulb in the second or third year. Using this propagation method, you can renew spring garlic and obtain higher quality planting material. In the first year, the one-toothed one grows from the bulb. To get a harvest from small potatoes, they need to be stored in a dry, dark place at room temperature. A month and a half before planting, the bulblets are inspected, dried specimens are removed and sent to the bottom shelf of the refrigerator or in a linen bag in the snow. On the day of planting, soak in a solution of potassium permanganate. The bulbs are planted in prepared beds with depressions made. The planting depth of the bulbs is 3-4 cm with a distance of 10-15 cm between the holes. After finishing the work, the soil is leveled and mulched.
Spring garlic, planting
Growing large garlic: selection of planting material
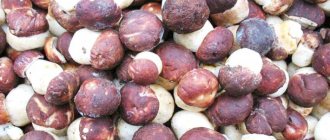
What does it take for garlic to grow large? The correct selection of seed material is half the success, as is the case with onions. Therefore, if you want to grow large garlic, then you should also take large cloves for planting, from large heads. Particular attention should be paid to the number of segments in the onion. It is recommended to use heads with 5-7 large teeth. If there are only 3-4 cloves of garlic, then this may indicate its degeneration. Or maybe vice versa - these are young bulbs grown from the “seeds” of garlic.
You shouldn’t leave very small cloves for planting, especially when it comes to growing large garlic. Because a weak clove will not be able to lay a strong onion. But it can be grown for greens.
For cultivation, it is best to select garlic with purple-striped skin. Such heads are stored better.
The next step is to carefully examine the seed. Garlic cloves should be dry, free of foreign odors and obvious damage from diseases or pests. Garlic for planting must be separated from the bottom of the bulb - the plate with the mother roots. The young plant will not need this part. In this case, under no circumstances should you cut the teeth from the bottom!
And it is important that the garlic is not sprouted. Sprouted garlic, as a rule, does not produce a good harvest. Because it spends some of its energy and stored water on germination, which there is nowhere to get yet - there are no roots yet.
What to do if it goes bad
When storing garlic crops, it is necessary to periodically inspect the crop. If at least one head is infected by a fungus, its spores can destroy the entire batch. It is necessary to immediately remove the spoiled onion and consume the garlic located nearby.
Rotting garlic can be ground. Peel the slices, remove spoiled elements, grind with a blender or meat grinder. Place the mixture in a glass jar, sprinkle with salt and spices, close tightly with a lid, and put in the refrigerator.
The difference between winter and spring garlic
Growing garlic is not too difficult and not at all expensive. It is clear that winter garlic is the one that is planted in the fall, closer to the winter cold. Spring, or summer, is planted in the spring and harvested in the fall. Many people prefer winter, but both types are grown well. The cloves of winter garlic are smaller and are arranged in a circle from the stem in only one row; the cloves of spring garlic are much larger.
The species also reproduce in different ways: spring varieties only with cloves, winter varieties with bulblets or cloves. For winter crops, soil fertility is important: it should be loamy or sandy loam soil with neutral acidity.
It is recommended to plant garlic in every area, because... its leaves and bulbous head are able to perfectly repel harmful insects: caterpillars, slugs, butterflies. And even moles that appear on the site will escape the pungent smell.
You can plant the plant in a separate bed, but if there is no extra space on the plot, then it is a good idea to plant garlic with other crops. A good neighborhood will be with flowers: rose, gladiolus, tulip. You can also place plantings next to strawberries, raspberries, onions, potatoes, and gooseberries. Just don't plant garlic next to beans, cabbage or peas.
It is not advisable to plant winter garlic in one place for more than three years in a row.
Winter garlic is stored for less time, and by February the cloves begin to dry out and additional measures have to be taken to preserve the harvest until spring.
Types of garlic
There are two types of garlic.
- Spring - planted in spring and ripens at the end of summer. It does not shoot, has excellent keeping quality and is stored for a long time. Its dense bulb with several rows of cloves is characterized by a pungent taste. For planting, you need to choose zoned varieties so that they have time to ripen in time.
- Winter - planted in the fall and dug up in July. It does not have enough protective scales for long-term storage. It is better to eat this garlic immediately or use it when canning vegetables. Winter, unlike spring, shoots arrows. After ripening, a core remains in the center of the bulb, and cloves are placed around it. Although their number is less than that of spring, they are larger.
Which variety of winter garlic to choose?
The main disadvantage of winter garlic is its poor keeping quality. Among the abundance of winter varieties, gardeners have long identified several priority ones. The choice of variety mainly depends on the yield, size and taste of the heads. Table 1 shows popular varieties of winter garlic.
Table 1
| Name | Short description |
| Komsomolets | Shoots arrows. The number of teeth in the head is from 6 to 13 pieces. The husk is pinkish in color. High frost resistance. |
| Local Danilovsky | Not a demanding variety. The head has from 6 to 11 cloves. |
| Gribovsky 60 | Shoots arrows. There are up to 11 cloves in an onion. The teeth are large. Early ripening variety. The taste is spicy. |
| Otradnensky | Tolerates low temperatures well. Great taste. The arrows must be cut off in time so as not to lose the harvest. The husk is pink, with a purple tint. There are 4-6 teeth in the head. |
| Anniversary Gribovsky | Mid-late variety. Head weight - up to 80 g. Purple husk. One head consists of 10-12 cloves. Shoots arrows. |
| Yubileiny 07 | Mid-season high-yielding variety. The heads are flat-rounded, white. Weight – 80 g. |
You can read more about these and other varieties of winter garlic in the next article.
What determines the shelf life
The shelf life of garlic and the preservation of its taste, shape, and qualities depend on a combination of factors - variety, storage method. The culture can be safely stored for 6 to 12 months without loss of quality, depending on conditions.
To preserve the garlic harvest, it is important to create favorable conditions:
- temperature regime. For the warm method +15°C, for the cold method +2°C;
- air humidity. It is necessary to maintain balance in the storage location and avoid over-drying or waterlogging. The optimal parameter for storing culture is 50-70%;
- preliminary preparation of heads. Before storing garlic, it is necessary to peel, dry, and trim off the tops and roots to eliminate the risk of rotting;
- light mode. The safety of the culture is ensured by keeping the dried heads in a dark place. In the light, garlic sprouts;
- air access. It is necessary to limit the flow of air flow to the garlic crop so that the heads do not dry out and pathogenic microflora does not develop under the husk. It is optimal to store the culture in small groups with a total weight of up to 0.5 kg each.
Spring varieties of garlic last longer. A culture of this type grows longer, gains juiciness, and its heads are preserved in their original form under favorable conditions.
How to feed garlic planted before winter in the spring to prevent it from turning yellow
In the spring, many people ask themselves the question: why does garlic turn yellow?
This happens for several reasons - lack of nitrogen, pests or temperature changes.
Therefore, let’s start with feeding.
Be sure to feed our plant 3-4 times during the growth period.
Before each feeding, water the garlic with clean water at the rate of 2.5 l/m2. This is the case if there was no rain.
In the spring, as soon as the snow melts and the winter garlic herbs begin to sprout, at this moment it is necessary to feed with nitrogen.
The first feeding is after the snow melts in the spring.
The need to create certain conditions for storage
Like any plant whose fruits are subject to long-term storage, garlic requires certain conditions. Failure to comply with them significantly reduces the shelf life of the product. You risk losing your entire harvest if you don't provide the right temperature, humidity and light. Even collecting garlic needs to follow certain rules so that it does not spoil too quickly.
High requirements for storage conditions are due to the large amount of aromatic oils contained in garlic.
Following storage rules will help you preserve your garlic harvest for as long as possible
If you do not comply with storage conditions, you risk encountering the following problems:
- High humidity will lead to fungal diseases - green mold, black rot.
- At high temperatures and low humidity, the heads will dry out quickly. Such a product becomes unusable: it no longer has a specific taste or aroma, only an unpleasant odor.
- Exposure to direct sunlight activates the process of photosynthesis, causing the garlic cloves to begin to sprout, preparing to give life to a new crop. Not the most suitable option if you planned to save the product at least until spring.
How to plant garlic for the winter: recommendations
To plant garlic correctly in winter, you need to understand what kind of crop it is and what its requirements are. After planting the clove, the plant begins to grow its root system. For successful wintering, the roots must grow 10 cm, and green feathers must not appear from the soil.
The winter planting plan is as follows:
- We take into account the landing dates.
- Choosing a location.
- Soil preparation.
- Preparation of planting material.
- Planting cloves or bulbs.
- Care and feeding.
Now let's look at all the points in more detail.
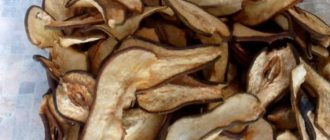
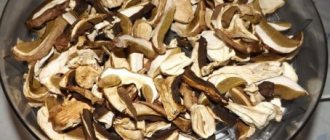
In fabric bags or nylon stockings
Canvas or linen bags are pre-impregnated with a very strong saline solution. After drying, garlic heads are placed in them. Salt impregnation extends the shelf life to 5 months, since salt absorbs moisture and prevents pathogenic bacteria from penetrating inside.
Garlic can be kept in a salted bag made of natural fabric
Many housewives use nylon tights or stockings for storage, which are perfectly breathable and convenient to hang from the ceiling (in the pantry, cellar, etc.).
Nylon allows air to pass through well, so garlic in nylon stockings stays fresh for a long time
Boarding time
Winter garlic is planted in late autumn. This must be done before the slush and cold weather. Planting dates depend on the specific climatic conditions of the region; their range is mid-September to late October. In the southern regions, you can plant garlic even in November, but in the north it is better to complete the planting work earlier - in early autumn.
In order not to make a mistake with planting, be guided by the local climate. Find out when stable frosts occur on the ground. Garlic should be planted 3-4 weeks before this period. During the time remaining before frost, the planting material - cloves or bulbs - takes root, but does not germinate.
The gardener talks in detail about growing winter garlic in his video below:
Selecting a location
Winter garlic is grown in all regions of the Russian Federation, including in the north. The culture is frost-resistant, so it safely survives winter temperatures.
Features of choosing a site for winter garlic:
- Good lighting.
- Waterlogged and swampy soils are not suitable - garlic will rot on them. Preference is given to elevated areas so that the site does not flood with melt or rainwater.
- Favorable predecessors are legumes, pumpkin, greens.
- The best soils are fertile sandy loams and loams.
- The best neighbors are berry crops. Garlic is planted near raspberries, strawberries, gooseberries, and also near flowers - it goes well with roses, tulips, daffodils, and gladioli.
Crop rotation rules
To prevent winter garlic from getting sick and produce high yields, consider the rules of crop rotation:
- The best predecessors are green manure. It is recommended to plant garlic after beans, oats, buckwheat, alfalfa, clover, mustard, and legumes. Among vegetables, cabbage, early potatoes, tomatoes, beets, peppers, and carrots are considered favorable predecessors. Areas where pumpkin crops grew are considered favorable for growth.
- Unfavorable predecessors are considered to be crops from the onion family, which suffer from the same diseases as winter garlic. These, in addition to onions and garlic, also include bulbous flowers.
Storage conditions
There are 2 ways to store garlic:
- Cold: humidity 70–80%, temperature from +2 to +4°C. Under such conditions, it is recommended to store winter garlic. These include the following varieties:
- Hermann;
- Alcor;
- Dubkovsky;
- Lyubasha;
- Doctor;
- Jagged;
- Ext.
- Warm: humidity 50–70%, temperature from +16 to +20°C. Used for spring varieties.
- Abrek;
- Aleysky;
- Gulliver;
- Elenovsky;
- Sochinsky-56.
Do not forget that winter garlic is not suitable for long-term storage. Due to the smaller number of covering scales, its heads begin to dry out faster.
Air - ripened garlic seeds
Aeration is the garlic seeds that form at the top of the arrow after flowering. They are also called bulbs. Storage conditions depend on what type of garlic you grew.
Planting winter garlic
The secrets of large winter garlic lie in choosing the right planting time. Before winter, garlic is planted approximately 2-3 weeks before the expected frost. The optimal daytime temperature is no higher than +8°C. If it gets warmer, the garlic may start to grow. And in its sprouted form it does not tolerate winter well.
It is customary to cover winter garlic with large plant debris from the garden for the winter. For example, corn tops, dried flowers, etc. This is done primarily to retain snow in winter.
The role of the snow retained by this shelter is as follows:
- Snow is like a blanket. Protects garlic from severe frosts.
- Snow is an additional refrigerator. Paradoxically, it not only protects the garlic from the cold, but also protects the garden bed from early warming up in the spring. As a result, the awakening of the vegetable is slightly delayed.
- Snow is a supply of water for plants. Gradually melting, it moistens the ridge.
Harvesting
Proper preparation of garlic is important for its subsequent successful storage. First of all, it consists in timely harvesting. Overripe or underripe vegetables will not be stored for long. For winter varieties, harvesting usually occurs from the middle of July to the beginning of August. Spring varieties, as a rule, need to be harvested in the second half or at the end of August. The ripening of winter garlic and the need to collect it will be indicated by yellowed lower leaves, cracking inflorescence wrappers and dry, thinning scales covering the bulb.
Vegetables should be removed from the garden before:
- the covering upper scales will finally crack and fly off;
- the bulbs will disintegrate into individual cloves;
- New roots will appear at the bottom of the heads.
Harvesting must be done on warm and dry days. At the same time, garlic roots and heads should be protected from impacts and other damage. The soil from the bottom of the bulbs and roots should be carefully removed by hand. Deciduous tops and stems, like roots, should never be removed (trimmed) immediately. After all, through fresh cuts, some of the juice of the onion will be lost, which will increase the likelihood of infection.
Note! 3 weeks before harvesting, it is recommended to stop organized watering of garlic.
Preparing for planting winter garlic
The agrotechnical cycle of growing winter garlic begins with the preparation of beds and planting material.
Beds for garlic
The procedure for preparing beds:
- The beds are prepared a month and a half before planting or in the summer.
- If the soil is heavy and clayey, river sand, sawdust and compost are added to it. Ultra-light sandy soils, on the contrary, require weighting - clay soil, compost and humus are added to them. If the soils are highly acidic, they are alkalized in advance by adding fluff lime, bone meal or dolomite meal.
- It is forbidden to introduce fresh organic matter - it contains a lot of ammonia. Nitrogen, stimulating leaf growth, will doom the garlic to freeze. It is best to fertilize the beds with peat manure compost or rotted mullein. For 1 sq. m bring 1-4 buckets. The soil is dug up along with organic fertilizers to the depth of a spade bayonet.
- Plantings are fertilized with superphosphate (30-40 g per 1 sq. m) and potassium salt (10-25 g per 1 sq. m). Instead of phosphorus-potassium fertilizers, soot or ash will do - 0.5-1 liters per 1 square meter. m beds.
The beds for winter garlic are located on the sunny side; they should be oriented from north to south. Before garlic is planted, the soil in the dug up beds must settle.
Planting material
First of all, the planting material is hardened. To do this, the selected heads are kept for 2-3 weeks in a cool place (3-5 °C). The further process of preparing planting material is determined by its type. There are two options for planting winter garlic:
- With teeth. The garlic is separated into cloves, and each one is carefully inspected. When separating the heads into cloves, it is important not to damage the husk. All small, diseased and damaged teeth are discarded. Teeth that are deformed or have cracks on the bottom are not suitable. The selected material is disinfected: In ash liquor. To prepare a solution, 400 g of ash is poured into 2 liters of water. Boil the solution for half an hour, cool and keep the teeth in it for 2 hours.
- In a solution of potassium permanganate (medium pink color) or copper sulfate 1%. Exposure time – 15 minutes.
For planting, take cloves with a diameter of at least 10 mm.
Experiment with spring garlic and four bags
I'll tell you about my positive experience of growing spring garlic
.
When I just started developing my garden and studied the relevant literature, I came across an opinion that was supported by many professional agronomists: in order to get a good harvest of large garlic, planting material must be stored in a cold place at a minimum positive temperature.
Although small heads will initially grow from such a “product” in the garden bed, they will have time to ripen and reach a normal size. And if you keep garlic in the room all the time, as many summer residents usually do, then it will definitely not have time to grow - the tops will be green and the heads will be small.
RARE PLANT SEEDS FOR YOUR GARDEN - FREE DELIVERY. PRICES ARE VERY LOW. THERE ARE REVIEWS
Okay, how long should you keep garlic in a cool place?
I couldn’t find an exact answer to this anywhere, so I decided to conduct an experiment myself and find out everything.
I sewed four fabric bags, signed “January 15”, “February 15”, “March 15”, “Apartment” and put five heads of the same size in each. I immediately put the last one in a cardboard box, which I put under the closet, and the rest, as the date indicated on them arrived, I put them in the bottom drawer of the refrigerator, it’s always 7° there.
Step-by-step instructions for planting
Hardened and disinfected teeth are planted in the following order:
- The beds are loosened with rakes and furrows are made. The distance between adjacent furrows is 20-25 cm. Depth is 6-8 cm.
- The teeth are placed in the grooves at intervals of 6-8 cm. They are placed vertically - bottom down or on their side. The bulbs are planted more densely - only 15 cm are left between the furrows, and 2-3 cm between the bulbs themselves. They are buried 3-5 cm.
- The planting is watered and sprinkled with a layer of mulch. The thickness of compost, rotted straw, peat, humus or sawdust is 3-4 cm. Mulching enriches the soil with humus, mineral salts, and additionally insulates the planting. Read more about soil mulching here.
- In areas with winter temperatures below minus 25°C, it is advisable to insulate the plantings again - put spruce branches or branches on top. Such a shelter will contribute to the accumulation of snow, which will provide additional insulation.
Preparing garlic for storage
In order for the garlic cloves to last a long time and not spoil, you need to prepare them properly. There are several points that you need to pay attention to:
- harvest time. If you dig up the vegetable at the right time, the heads will not fall apart into cloves. Garlic can be spring or, as experienced gardeners call it, summer and winter (winter). Spring crops are harvested in early August, when the shoots turn yellow and bend to the ground. The winter one needs to be dug up a little earlier - at the end of July;
- digging process. When digging winter and spring garlic, you need to be careful. Young vegetables are easily damaged, which reduces their shelf life. You cannot pull a vegetable out of the ground; you must first dig up the soil with a pitchfork, and then dig up the crop itself. The soil from the fruits is cleaned with your hands; you cannot tap them against each other, as this will cause damage and cracks;
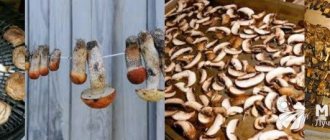
- drying. The dug up crop is left in a dry room to dry for 3-5 days. Hang the vegetables by the tops to the ceiling and leave them there. The nutrients contained in the leaves and stems will be transferred to the heads, which will only make them tastier;
- sorting. After drying, all heads are sorted out, damaged ones (with scratches, cracks, damage), diseased ones (with stains, growths) are rejected and sorted by size.
On a note! If any vegetables are damaged during digging, they are not used for storage. Damaged garlic needs to be processed in the coming days.
Do I need to water garlic?
Like all living things, he loves to eat and drink.
Along with fertilizing, our greens need watering. In dry, hot weather, water 1-2 times a week with up to 10 liters of water per 1 m2.
We water the plant abundantly and mulch it with rotted manure.
Although it can temporarily survive drought. In this case, the harvest will be low. Therefore, along with fertilizing, our greens need watering. In dry, hot weather, water the plant generously 1-2 times a week with up to 10 liters of water per 1 m2 and mulch with rotted manure. And throughout the entire season the soil should be moist. If you are unsure whether your garlic needs watering today. You can dig several holes in the garlic bed to a depth of -7-9 cm. And take a lump of earth for testing. This is how they checked the earth for heating to make sure that the earth had warmed up. But we will check for humidity. This is what my grandfather always did. Lightly squeeze a handful of soil in your fist and then unclench it. The piece did not crumble. This means there is enough moisture in the soil. You can wait 2 days. And vice versa if it crumbles. Let's start watering. Just be sure to fill the holes. After this, after about two hours, we will definitely loosen the beds. And let's mulch. If the summer turns out to be rainy, it is better to remove the mulch from the garden bed. So that there is no rot.
What problems may arise during storage?
Main storage problems:
- Rapid loss of moisture and drying (at incorrect temperature conditions). To avoid this, each onion is dipped in melted paraffin or wrapped in cling film.
- Bulb rotting and fungal infection (with poor ventilation and high humidity). In such a situation, drying and periodically inspecting the bulbs and removing damaged ones will help.
- Germination (when exposed to sunlight). You need to choose a dark place; in addition, you can carefully burn the bottom of the onion with a lighter or over a gas stove. But such bulbs are unsuitable for planting.
Did you know? The name of the American city of Chicago means
«
wild garlic
».
Caring for Garlic
How to grow large garlic in the garden? Yes, just like other cultures - provide good care. What does this require?
- Regular weeding and loosening. In order for the bulbs to gain weight, active nutrition is required. And for this you need loose soil without weeds. But it is important to consider that garlic has very delicate roots, so after it has sent out its arrow, the soil is no longer loosened. Otherwise it will turn yellow very quickly. Only weed removal is acceptable.
- Feeding. To gain weight, the plant needs good nutrition. Therefore, in the spring, in order to develop green mass, you need to fertilize with nitrogen-containing fertilizers. For example, urea. In the summer, when the garlic sprouts, it must be fed with phosphorus-potassium fertilizers. Phosphorus and potassium are necessary for better ripening and storage of garlic. It is thanks to these elements that it acquires its sharpness.
- Watering. During dry summers, garlic needs to be watered regularly. Fertilizing can also be combined with watering.
- One more nuance: arrows. In order for garlic to grow large, they need to be removed. If you do not pick them off, they will take on some of the nutrients, which will negatively affect the size of the bulb. The arrow is torn off when it reaches a size of 15-20 centimeters.
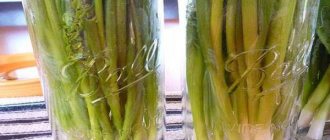
By the way, you don’t have to throw them away, but fry them. Fried garlic arrows are a very interesting dish that tastes like mushrooms.
But you shouldn’t cut off all the arrows. They should be left on several plants. And there are two reasons for this.
First , you can use the arrows to determine whether the garlic is ripe. When the capsule bursts on all the arrows, releasing the micro-bulbs, then it is considered that the garlic is ripe and can be harvested.
box of garlic seeds
The second is updating the seed fund. Next year, garlic without cloves will grow from these micro-bulbs. And after another year, excellent, healthy garlic grows from these monoheads. I’ll tell you how to grow garlic solo below.
Wood ash is good for summer feeding. A glass of ash is diluted in 10 liters of water and the garlic is watered at the rate of one bucket per square meter of ridge.
Ripened garlic is dug out of the ground and sorted. If the heads are very dirty, they can be washed with a stream of water. Next, the garlic is sent for drying. To do this, it is tied in small bunches and hung in a warm, shaded place for two to four weeks. Then this garlic is sorted out again, trimmed, cleaned of dry roots, sorted (for food and for sowing) and stored. Garlic should be stored in a dry and cool place. It is best to pack vegetables in paper bags or boxes.
Caring for young shoots
At first, garlic does not require special care. Make sure that the surface of the bed does not dry out, water it and loosen it on time. If you grow garlic on mulch, update it from time to time.
As soon as the leaves reach a height of 3–4 cm, the bed can be watered with a solution of ammonia (2 tablespoons per 10 liters of water). This will provide young plants with a supply of nitrogen. The foliage will not turn yellow, which means the heads will be larger.
Storing garlic in vegetable oil
The scales are removed from the garlic, the head is divided into cloves, they are poured into a sterilized jar and filled with sunflower or olive oil. Then the jar is closed with a plastic lid with pre-made holes and placed in the refrigerator. This garlic does not spoil for several months.
After using the garlic cloves, you can use the remaining oil to fry meat, fish, or pour it over boiled potatoes and dress salads.
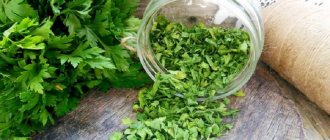
If the garlic starts to spoil, you can store it in ground form. To do this, the cloves are cleaned, passed through a meat grinder, salted, placed in a glass jar, covered with a plastic lid and placed in the refrigerator.
What pests can you encounter?
The most dangerous diseases of winter garlic are rot and rust. Bacterial infections usually infect garlic during storage and then penetrate into the soil with planting material. Table 2 presents common diseases of winter garlic and methods of combating them.
table 2
| Pests/diseases | Harm/symptoms | How to fight? |
| Penicillium rot of the bottom | The leaves turn yellow and then die. | In case of penicillosis, harvesting is carried out when the garlic is completely ready. When trimming, the neck is left longer - about 10 cm. The heads are well dried. Store at a humidity of no more than 75%. Note! Garlic leaves may turn yellow for other reasons, which are discussed here. Then the methods of dealing with this phenomenon will be different. |
| Rust | Rusty spots appear on the leaves. | Spray the planting with fungicides - Oksikhom 0.4%, Ridomil 0.2% or others. Repeat the treatment 2-3 times with an interval of 1-2 weeks. |
| Downy mildew | Gray spots appear on shoots and inflorescences. | The plant should be fed on time. For prevention, calendula is planted near the beds. Treatment with Ridomil. |
| Stem nematode | Thread-like worms 1.5 mm long feed on plant juices. Capable of completely destroying a culture. Lines appear on the leaves, feathers dry out and die, and a rotten smell appears. | Spray with Calypso according to the instructions for the product. |
| Onion fly | Fly larvae damage garlic feathers, slowing down growth and yield. | Spray with a solution of shag (250 g) and hot pepper (1 tbsp.). The ingredients are poured into 2 liters of hot water. They insist for 3 days. After straining, bring to 10 liters, and pour in 30 g of liquid soap. |
How to store garlic in winter at home so as not to dry out
It is better to immediately process the bulk of the harvest and make preparations for the winter. The rest is stored until spring in a room where in winter the temperature is kept quite low but positive with low air humidity. The prepared heads are placed in boxes, baskets or mesh bags, and can be woven into braids.
At a temperature of 1-3 C they will remain juicy and fresh for a long time and will not germinate or dry out until spring.
Experienced vegetable growers know how to properly store garlic at home at room temperature. There are two reliable methods suitable for a city apartment:
- Well-dried heads of garlic are placed in a canvas bag, tied and placed in a plastic bag, leaving it open.
- Another method is to take a jar or pan, pour a 2-3 cm layer of salt on the bottom, then put in the heads of garlic and cover with salt again, etc. The top row must be covered with salt, but it should not be raw.
Features of storing garlic in winter so that it does not dry out and disappear
All vegetables spoil over time. A common question is how to properly store garlic in winter so that it does not dry out and disappear. In fact, there is no single method. It is important to know vulnerabilities, common problems, and create suitable conditions.
There are four in total:
- germination _ Accelerates in warm rooms, with high humidity;
- rot . Reasons: closed containers, lack of ventilation, high humidity. Therefore, you should not store it in polyethylene or plastic;
- drying out High temperature and sunlight accelerate the evaporation of moisture;
- mold, fungal infections . It is often caused by improper preparation, insufficient drying after collection, or insufficient ripening.
When breaking off garlic arrows, always leave one. It determines the degree of maturity. As soon as the seed branch straightens out perpendicular to the ground, it’s time to dig.
Cleaning and storage
To get healthy and fresh garlic, it is important to harvest on time. Once the heads are kept in the ground, they will lose their marketable quality - the outer scales will begin to crack.
Harvesting procedure:
- Start digging up the crop as soon as the lower leaves turn yellow and the tops fall en masse. Garlic is harvested in dry weather. They dig up and pull out of the ground.
- Do not remove the dug up garlic immediately - it must lie in the beds for several days to dry under the sun. The garlic dries along with the stem. If it rains, you will have to move the crop under a canopy, and there it will dry for about 5 days.
- Trim the stems of dried garlic. The length of the stumps is 4-7 cm. Dry the heads in a well-ventilated area or under a canopy.
Read the article about when and how to remove winter garlic from the garden.
If you store garlic in braids, do not trim the stems. If in bunches, leave the stem length 20 cm.
To determine when garlic is ripe, leave a couple of garlic arrows on shoots of varieties. When cracks appear on the shell of the spherical inflorescences, you can safely pull out the garlic.
Garlic, properly harvested and dried, is well stored - it does not spoil or rot. It can be kept under a canopy until the coldest weather, then it is transferred to baskets. The optimal storage temperature is 2-4°C.
How to store garlic in an apartment until spring
The benefits of garlic are due to the content in it of a large set of mineral and organic compounds that affect biological processes in the human body. Many people grow garlic, but not everyone knows how to preserve it for the winter in an apartment or private house.
Spring
It is planted in the garden in early spring. At the end of summer the heads are already ripening. Garlic does not go to waste and is stored for a long time.
How to preserve summer garlic until spring? There are many options for storing spring garlic for planting in the spring. You can choose any one that turns out to be the most convenient under the existing conditions.
- Braiding The ends of the leaves are woven into a piece of twine. But not everyone is able to weave braids, which is why housewives have gotten used to putting garlic bulbs in nylon stockings and hanging them up. The disadvantage of this storage method is the likelihood of the bulbs drying out or their rapid germination due to high temperature or lack of moisture in the room. Therefore, you have to systematically look through the garlic and sort it out.
- You can wrap each onion individually in cling film. Thanks to this, they will remain in good condition until spring.
- Other housewives prefer to use paraffin instead of film. You need to melt it, dip the onions in the mixture and let it harden. They will not dry out as they will be covered with a protective film. Moisture will not evaporate.
- Garlic is stored well in onion skins.
- You can put the bulbs in a wooden box and sprinkle them with sawdust.
Reviews
Alevtina M., Vladimir region.
We have been growing the winter variety Komsomolets for several years. Very productive and stores well. True, we go through it regularly. There are few bad heads. The taste is excellent, good fresh, in dishes, we also use it for preservation. It tolerates frosty winters without problems, and always grows large.
Boris T., Kirov region. I plant Gribovsky before winter. I bury it deeply into the ground - 15 cm, so that it can better survive the frosts. If in the middle zone a depth of 5 cm is enough, then with our frosts this cannot be done. I make sure to leave a few arrows so that I can see when the garlic is ready. The heads grow large, fragrant, and are easy to clean for pickles and preservation.
Hide
Add your review
Growing winter garlic does not require special care or investment, so it can become a profitable business even for beginning farmers. This undemanding and frost-resistant crop can be grown in the northernmost regions.