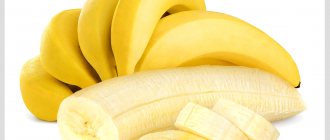
Even 100 years ago, housewives knew how to soak beans before cooking, and most importantly, why. Today this practice is not so popular. As a result, legume dishes turn out bland and are harmful to health. The wrong cooking method can ruin any product. We suggest you learn how to soak beans correctly in order to extract the maximum benefit from them for the body.
Why soak beans before cooking?
Many housewives soak beans to make them cook faster. So, red must be cooked for at least 4 hours. And if you prepare it in advance, the time will be reduced by 3 times. But there are other reasons why soaking legumes is beneficial.
- Improved taste
If the seeds are not pre-soaked, the shell will not cook completely and will be slightly bitter. The density will be uneven: some grains will remain solid, while others will turn into puree. But after cooking, soaked beans become soft, tender and aromatic.
- Prevention of gas formation
Many people didn't like pea or bean soup as children because of the known side effects. The reason is that legumes contain oligosaccharides. The human body is not able to completely break down and absorb them. As a result, undigested oligosaccharides enter the intestines, where they begin to ferment.
Legumes are soaked to break down these substances. Then after eating bean soup you will feel lightness and not rumbling in your stomach.
- Preservation of vitamins
Beans are rich in vitamins B1, B4, B5, B6, PP, and folic acid. However, with prolonged heat treatment, the beneficial substances decompose. Since the soaked seeds are cooked for less than an hour, some of the vitamins can be preserved.
- Neutralization of harmful substances
They are also called antinutrients. Beans contain phytic acid. This substance protects the beans from sprouting. But when it enters the body, phytic acid binds molecules of zinc, iron, copper, silicon and other trace elements. It turns out that when eating unprepared beans, minerals pass through the stomach and intestines in transit. In essence, you are eating an “empty” product.
Beans also contain lectin, which damages the mucous membrane of the gastrointestinal tract and provokes inflammatory processes. The risk of colitis, Crohn's disease, leaky gut syndrome and other digestive problems increases. Soaking partially deactivates the lectin.
- Increased digestibility
Legume seeds contain digestive enzyme inhibitors. They prevent the body from properly digesting proteins, so the pancreas works twice as hard. If you soak the beans before cooking, nothing will interfere with the digestive enzymes, which means the dish will be better digested.
We recommend: How to properly clean flounder before frying, baking or stewing?
Drying and drying fish
Drying and drying fish is one of the ways to prepare it for future use.
Its peculiarity lies in the fact that after a certain period of time, pre-salted fish is dried (dried) in a dry and well-ventilated place.
SOAKING
Rice. 3. Drying fish under a gauze canopy
Rice. 4. Fish dryer (dimensions in mm): / - wooden body; 2 - mesh; 3 - clamps; 4 — handles; 5- door; 6- rods; 7- door hinges
How to hang a fish to dry: if by the tail, the fat will flow out of the peritoneum through the mouth or gills; if by the head, then the ram, for example, will remain all with fat in the peritoneum.
Rice. 5. Box for drying fish
RECIPES FOR DRYING FISH
Ram and roach
Cool, dry, windless days of early spring are most favorable for drying ram and roach. During this period, the fish has not yet spawned, due to which it contains the greatest amount of fat and has the highest weight. Atmospheric and temperature conditions at this time of year are also most suitable for successful drying. Depending on the size of the fish, ram and roach are dried for 13 to 30 days.
Bream and white bream
The fish is placed in a wooden barrel or enamel bucket in a salt solution at the rate of 1 glass of salt per 1 liter of water. A circle is placed on top of the fish, and a heavy object (oppression) is placed on it and kept in this position for 2-3 days. The fish is then washed in cold water and hung in the shade in the breeze. The fish is dried for 10-15 days.
Chekhon
The fish is gutted, the blood near the spine is carefully removed, the gills are removed, and an incision is made from the inside along the ridge without damaging the skin. The scales are not removed. The cut fish is placed in a salt solution (125 g of salt per 1 kg of fish) and pressed down on top with a plate with a small weight. Small fish are salted for 5-10 hours, large fish - from 12 to 20 hours. Keep the fish in brine in a cool place.
Mackerel
Dried mackerel is prepared from fish caught in the spring, after spawning. The fish is gutted by pulling out the entrails through the gill covers without cutting the belly. Then it is washed, hung in pairs, passing thin twine or thick thread through the tail, and immersed in brine for 8 hours (25 g of salt per 1 liter). After this, they are washed with cold water and hung on the rods to dry. Drying lasts about two weeks.
Dried smelt and other small fish
The fish is gutted and wiped with linen cloth. Then they add salt together with spices in an enamel bowl (they put a lot of salt). Leave for 1-2 days, then the brine is drained, the fish is dried, strung on a string or wire threaded through the eye sockets, and dried under a roof in the sun in a well-ventilated place or in a non-hot oven on straw.
Cloudflare Ray ID: 63aa000dcc84cadc • Your IP: 195.64.208.251 • Performance & security by Cloudflare
Cloudflare Ray ID: 63aa000dfc90149c • Your IP: 195.64.208.251 • Performance & security by Cloudflare
First, the fish is salted and then dried. How to pickle taranka at home? There are different recipes for salting ram, but usually they use two methods - wet and dry. The wet method is suitable for small fish, the dry method is suitable for large fish weighing more than 1 kg.
Taranka is a completely dietary and very healthy product, containing protein, valuable fish oil, iodine, chromium and many other useful substances. Dried fish protein ensures proper metabolism, and omega-3 fatty acids protect against cancer, stroke and heart attack. Taranka makes incredibly tasty soups and snacks. If you consider that the calorie content of taranka is only 88 calories, you can afford to eat it every day without fear for your figure!
Did you like the article? Subscribe to the channel to stay up to date with the most interesting materials
Cloudflare Ray ID: 63aa002d5b64169d • Your IP: 195.64.208.251 • Performance & security by Cloudflare
Cloudflare Ray ID: 63aa002dcc71f166 • Your IP: 195.64.208.251 • Performance & security by Cloudflare
Cloudflare Ray ID: 63aa005069340c11 • Your IP: 195.64.208.251 • Performance & security by Cloudflare
The main thing is that in this process it is recommended to ensure that the product is not exposed to direct sunlight. You can hang the carcasses on a wire by piercing their eyes, or on paper clips that cling to the upper lip. The catch is also hung by the tails. It is better not to use this option, because fat and juice will leak out of the product, as a result of which the catch will become dry and fresh.
- 1 What is the difference between stockfish and dried fish?
- 2 Product selection and preparation
- 3 Dry salting recipe
- 4 Method in brine
- 5 How long does it take to dry fish?
Dried product should not be confused with dried product. The first is a semi-finished product, which is later subjected to heat treatment, and the second is ready-to-eat. When drying the catch, they often do not add salt or salt it a little without resorting to soaking. In addition, the drying and drying processes vary in duration. Drying takes place in just a few days, but drying using the cold method can take more than one week.
Drying is used mainly for long shelf life of the catch. This fish is also used in cooking: broths and sauces are prepared, and the crushed product is added to minced meatballs or gravy. The features and storage conditions of dried fish are not very different from those necessary for the preservation of dried fish. A refrigerator, freezer, and cellar are perfect for this.
To salt the product at home, it is advisable to purchase low-fat, small-sized fish. Before the procedure, it is necessary to prepare the raw materials:
- 1. First stage. The fish must be washed thoroughly without removing the scales, the carcass must be gutted and washed well again.
- 2. Second stage. If you have a large catch, it is recommended to sort it by size. Fish of varying sizes require a lot of time.
- 3. Third stage. Salt the fresh product.
It is worth noting that the caught catch may not be gutted. However, in this case, the product will have a bitter taste, which will be imparted by bile. Prepared fish can be preserved using 2 methods: dry - cover the carcasses with dry salt, or wet - in brine.
This is the salting method that is most often used because it is very simple. For salting, choose a large container so that the catch can easily fit in it. Pour a thin layer of coarse salt onto the bottom of a pan or cup and place the fish in a row. Then the carcasses are once again covered with salt so that they are completely covered with it. The next row of fish is placed on top in the same way.
After the last row of catch has been laid, the top of the pan is covered with a lid or plate and weight is added in the form of a jar of water. Dishes containing canned fish must be refrigerated for 4 or 7 days. After the required time, you need to take out the catch, thoroughly wash off the salt from it and soak in water for about 4 or 7 hours. In this case, the water should be changed several times.
Now the fish is ready for the next stage - drying. It needs to be hung in a well-ventilated place. In the summer, it can be dried outside, and in the winter, on the balcony or kitchen.
The main thing is that in this process it is recommended to ensure that the product is not exposed to direct sunlight. You can hang the carcasses on a wire by piercing their eyes, or on paper clips that cling to the upper lip. The catch is also hung by the tails. It is better not to use this option, because fat and juice will leak out of the product, as a result of which the catch will become dry and fresh.
This salting method is also suitable for making it at home. It evenly salts the carcasses in a short period of time. The recipe goes through several stages:
After the water has drained from the fish, it can be dried and hung in the same way as with the dry method.
The drying time of a product directly depends on its size and conditions. On average, this process takes from 4 to 7 days. Fish hung outside dries faster than at home. If the catch is kept indoors, and even in winter, then the period increases even more. After 4 or 5 days, the catch can be tested for readiness. A damp back of the product indicates that drying is not yet ready.
There is another method of drying the catch: an electric oven. The cooking process in it will be quick and simple. Good ventilation and elevated temperatures will lead to rapid dehydration of the product. In a conventional electric oven at a temperature of +55 degrees, the semi-finished product is dried until ready for about 5 or 7 hours.
I myself tried at least a dozen different methods, but in the end I settled on the simplest one. And at the request of his loved ones, he emphasized the safety of the ambassador in accordance with some requirements of SanPiN.
How to properly soak beans?
What water should I soak the seeds in? Clean, boiled, filtered, room temperature.
There are two methods: cold and hot. The first allows you to preserve maximum vitamins in the dish, and the second saves time.
Cold way
To properly soak beans, you need to follow these steps:
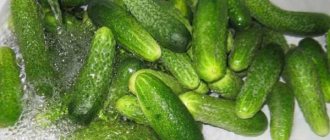
- Sort out the seeds. Throw away dry and wrinkled beans, as even after cooking they will not taste good.
- Rinse under running water.
- Place into a large saucepan. Please note that after soaking, beans increase in volume by 1.5–2 times.
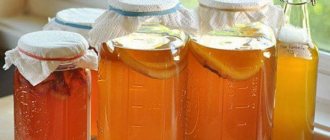
- Pour cold or hot water over the beans (in the second case, the soaking time will be slightly reduced). For 1 cup of seeds, a minimum of 3 cups of liquid is required.
The optimal soaking time is 8-10 hours. You can leave the beans overnight. If you soak them during the day, change the water every 3 hours.
If you add 1 teaspoon of baking soda to the pan, the soaking time will be reduced to 6-7 hours.
Before cooking, the liquid must be drained to get rid of harmful substances. Then rinse the seeds again under running water.
Do not leave the beans to soak for longer than 12 hours. The seeds may ferment and become unfit for consumption. If your apartment is hot, put the soaked beans in the refrigerator.
Hot way
This soaking improves the taste and allows you to cook the beans quickly. The procedure is as follows:
- Pour hot water over the seeds until it completely covers them.
- Place the container on the fire and bring the liquid to a boil.
- Boil for 2-3 minutes.
- Remove from heat, cover and leave for 1 hour.
The beans are now ready for cooking. However, antinutrients and digestive enzyme inhibitors remain in the seeds.
How to soak and how long to cook dried mushrooms
If you dried mushrooms in advance, collecting them in the forest during a successful “hunt” with a basket, or bought a fagot or two from reliable sources, in any case, you have a wonderful opportunity to diversify your home menu with tasty and satisfying dishes. After all, dried mushrooms make not only aromatic and healthy soup.
Fresh wild mushrooms are not always available, but they can successfully replace dried wild mushrooms in any dish all year round. During drying, mushrooms almost completely retain the beneficial and taste qualities of the fresh product. Therefore, it is important to know how to properly soak and how long to cook dried mushrooms in order to avoid taste and nutritional losses.
You can read about all the upcoming exhibitions, festivals, and various master classes that are currently taking place in the capital on the website Mos-Holidays.ru.
Soaking dried mushrooms
Rinse dried mushrooms with cold water to remove dust particles, needles and other small forest debris. A colander is not suitable for this purpose. It’s better to put the mushrooms in a bowl, fill it to the top with water and stir vigorously with your hand from time to time. The debris will float to the top and you can easily remove it.
Pour the washed mushrooms with cold water and leave for 1-2 hours. During this time, the dried mushroom texture will have time to swell and acquire soft properties. Dried porcini mushrooms or any other mushrooms dried naturally (in the open air) are the fastest and easiest to soak.
If mushrooms are dried in an oven or electric dryer, it is easy to overcook them, which will give the delicate product excessive hardness. Dried mushrooms will need another 1-2 hours of soaking.
If you do not intend to cook broth from dried mushrooms, then instead of water they can be soaked in cold milk. Experienced chefs claim that mushroom dishes are especially tasty and aromatic after soaking in milk.
When the mushrooms reach the desired state after soaking, drain the water from them into a separate bowl (after straining), and cut the swollen product into small strips or slices of any shape. Water can be added to soup or sauce to add rich flavor and aroma.
Cooking dried mushrooms without soaking
If you do not have time to soak dried mushrooms, you can do without the “water procedure”. For example, to prepare a “quick” mushroom soup, grind dry mushrooms into powder in any available way and add to the first dish as a seasoning. This method greatly simplifies preparation, but the attractiveness of the dish is lost both externally and in consumer terms. After all, sometimes it is important for the eater to feel the aromatic pieces of mushrooms in the mouth.
Cooking time for dried mushrooms
Dried mushrooms, previously properly soaked, need to be cooked for 30-40 minutes from the moment of boiling so that they are completely suitable for consumption. To cook broth from soaked mushrooms, 20 minutes is enough.
Determining readiness during cooking is very simple - well-cooked mushrooms sink to the bottom of the cooking container. If all the mushrooms are ready, but a few specimens are still floating on the surface, increase the cooking time so that they also sink to the bottom.
The time you spend cooking mushrooms can be used to prepare other ingredients for the dish you are going to cook. In addition, some cooking processes can be combined. For example, adding cereal to a pan with mushrooms will combine the cooking time and prepare the soup much faster.
If for some reason you decide to cook a dish of dried mushrooms without soaking, then remember that you will have to cook them for at least 1.5 hours, and prolonged heat treatment can worsen the taste of the forest delicacy. Therefore, it is advisable to take care of pre-soaking in advance.
Good luck in preparing dried mushrooms and delicious dishes from them!
How long should you soak beans for soup?
To prepare bean soup, the standard soaking time is enough - 8-10 hours. It is better to use the cold method. You can reduce the time to 6 hours, then the beans will be denser after cooking.
First, the beans are cooked separately for 30–40 minutes. Then add to the soup and cook for another 15–20 minutes.
Rules and optimal cooking time for soaked beans
How long to cook soaked beans? It depends on the variety, the size of the seeds and the dish you want to cook.
We recommend: Should you wash dried fruits and nuts from their packaging? Why is this necessary?
If you plan to use medium-sized white beans as a side dish or add them to a vegetable salad, cook them for 45–50 minutes. And the red one needs to be kept on the stove for 60–90 minutes. To prepare the soup, the time can be reduced slightly.
Observe the following rules:
- Immediately before cooking, rinse the beans twice under running water.
- The ratio of seeds and water is 1:3 or 1:4.
- After boiling, drain the liquid, add new liquid and reduce the heat.
- Do not stir the beans while cooking and do not cover the pan with a lid.
- To reduce foaming, add 1 tablespoon of sunflower oil to the water.
- Make sure that the water does not boil away. The liquid should always cover the seeds. Add hot boiled water as needed.
- Salt the dish, add lemon juice and spices only at the end of cooking. Otherwise the beans will turn out tough.
How to check if the seeds still need to be cooked? Remove 3 beans from the pan and taste. If any of them are hard, wait another 5-7 minutes and check again.
How long to cook row mushrooms
Boiling is one of the types of heat treatment of mushrooms. During the cooking process, not only harmful but also aromatic substances pass into the broth, which give the finished dish a characteristic taste and aroma. If you do this for too long, not only the taste, but also the appearance of the mushrooms deteriorates. Therefore, it takes a certain amount of time to cook the rows.
How long to cook row mushrooms before frying
Before you start frying the rows, they must be thoroughly washed and soaked. After this, the mushrooms are placed in a colander, allowing all excess liquid to drain. In the meantime, you need to boil water, adding salt to it at the rate of 1 tsp. per 1 kg of rows. After this, you need to pour the mushrooms into boiling water. Boiling is carried out for 15 minutes. All this time you need to skim the foam from the surface of the boiling water.
After this time, the fruiting bodies are again placed in a colander and washed with running cold water. You need to let the mushrooms dry for a few minutes. Drain the water in the pan and add fresh water, bring it to a boil, add the same amount of salt and put the mushrooms back in. After a quarter of an hour, the finished rows can be removed from the pan, washed and fried.
Important! To prevent the rows from darkening during cooking, you can add 1 tbsp to the water. l. vinegar.
How long to cook rows for salting and pickling
The rows are suitable for canning; they can be salted and pickled. Before marinating, the mushrooms are thoroughly washed to remove debris. Then they are boiled twice for 15 minutes, rinsing in between with cold running water. After the mushrooms are boiled in 2 waters, they are transferred to a colander, washed and allowed to dry. After such heat treatment, the rows can be pickled. Any remaining bitterness in the taste will be removed by a marinade containing spices and garlic.
Some mushroom pickers use the cold pickling method, preferring to soak these mushrooms for several days instead of boiling. However, this is not always justified. Rowers are quite variable mushrooms that easily adapt and adapt to the environment. This also applies to their appearance. Therefore, even an experienced mushroom picker can confuse edible rows with inedible ones.
Attention! To protect yourself from possible unpleasant consequences, it is better to boil these mushrooms.
Before salting, the rows are cleared of debris, washed thoroughly, and then boiled twice in boiling water, slightly acidified with vinegar. Cook the rows until done for at least 20 minutes. After the first boiling, the water must be replaced with fresh water. The boiled mushrooms are placed in a colander, washed with cold water, and allowed to drain and cool. After this, you can start salting.
How long to cook rows for freezing
Unlike many agaric mushrooms, rows can be frozen for storage and later use. Before freezing, boil them 3 times for 10 minutes, changing the water each time. To preserve the natural color and get rid of the mealy taste, add a little vinegar to the water, as well as a couple of bay leaves and one chopped onion.
Important! The fruit bodies cook down quite strongly in boiling water, so boiling them can save quite a bit of freezer space.
After boiling, the mushrooms are allowed to drain and cool, but it is advisable to place them under pressure so that they give up as much liquid as possible. Otherwise, after defrosting, their taste will be watery. Then the rows are laid out in plastic bags and wrapped in such a way as to form a layer. It is important that a minimum amount of air remains inside. After this, the bags are stored in a chest freezer.
Important! Boiled mushrooms can be stored frozen without loss of properties for up to 6 months.
How long to cook the rows before baking
One way to preserve rows for the winter is to bake them in the oven and then put them in jars. The collected mushrooms are washed, removing all dirt and adhering debris, and then soaked for 2 days. Next, the rows are boiled twice in salted water with the addition of citric acid, each time keeping them on low heat for 15 minutes and removing the foam. After cooking, the mushrooms are rinsed each time with running water.
After the rows are boiled a second time, they are finally washed, the water is allowed to drain, and then they are laid out on a baking sheet greased with vegetable oil. The mushrooms are salted, sprinkled with ground black pepper on top, and then baked for half an hour at a temperature of + 180 °C. Then they are taken out of the oven, placed in sterilized jars and covered with plastic lids. After cooling, you need to put the jars with the finished product in a dark, cool place, such as a cellar.
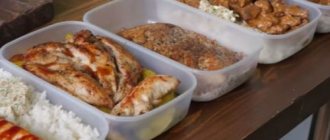
Vegetable soup with beans recipe
One of the healthiest legume dishes is bean soup. To prepare it you will need the following products:
- soaked beans – 500 grams;
- potatoes - 3 pieces;
- rice - 0.25 cups;
- carrot – 1 piece;
- flour – 1 tablespoon;
- vegetable oil - for frying;
- salt and spices;
- greenery.
Soak the rice for 3-4 hours, then rinse. Boil the prepared beans for 40 minutes. Cut the potatoes into cubes and grate the carrots on a coarse grater. Fill all ingredients, except carrots, with one and a half liters of water and place on the stove. Bring to a boil and cook for 20 minutes over medium heat.
Sprinkle the carrots with flour and lightly fry in vegetable oil. Add roast, spices and salt to the soup. Turn the heat to low and wait another 10 minutes. Finely chop the greens, place in the pan and cook the soup for another 3 minutes.
Video below - learn about the two ways to soak beans and how they differ from each other.
Soaking beans is a simple procedure that will require minimal effort from you, but will make the dish as nutritious and easy to digest as possible. Use the cold method whenever possible. Cook the beans following the rules described in the article. Then the finished dish will delight you with its softness and rich taste.