Berry pie always smells deliciously like summer: meadow herbs, fresh morning dew... You break off a piece of pie that melts in your mouth, and it already seems that you have never tasted anything tastier in your life! And if you go out into the garden and pick fresh berries from the bush, mix them with the pie filling - you won’t get a sponge cake, but a real holiday! The recipe that I offer today will be useful not only in the summer: in the cold season you can use frozen berries and fruits. Take care of this in advance: fill the freezer with fresh vitamins, in winter you will thank yourself many times!
Delicious sponge cake recipe
for sponge cake:
- Large eggs - 4 pcs.
- Granulated sugar - 200 g
- Wheat flour - 200 g
- Baking powder - 1 tsp.
for custard:
- Egg yolks - 2 pcs.
- Sugar - 20 g
- Flour -20 g
- Milk – 200 g
- Vanilla extract - 1 tsp. (optional)
Any ripe berries and fruits to taste (250-300 g)
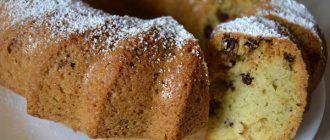
Cherry delight
The recipe for sponge cake with cherries in the oven is simple and accessible to everyone. It is so tasty that it is eaten in an instant. Shall we try?
Ingredients:
- eggs - two pieces;
- soft butter – 125 g;
- flour (pre-sifted) – 250 g;
- baking powder - one teaspoon. spoon;
- granulated sugar - one glass;
- powdered sugar - two tablespoons. spoons;
- cherry fruits – 0.4 kg.
On a note! We need soft butter, so remove it from the refrigerator first.
Preparation:
- Beat the eggs into a container and add soft butter to them.
- Add granulated sugar and beat the mixture until smooth.
- Combine flour with baking powder and sift these components.
- Add dry ingredients to butter-egg mixture. Mix the base to a homogeneous consistency.
- Line a refractory pan with a parchment sheet. We “treat” the walls and bottom with soft butter.
- Place the biscuit mixture into the mold.
- Place cherry berries on top. First, the cherries must be washed, dried and pitted.
- Preheat the oven to two hundred degrees.
- Bake the treat for forty to fifty minutes.
- When the biscuit has cooled, take it out and sprinkle with powder. Ready!
How to cook
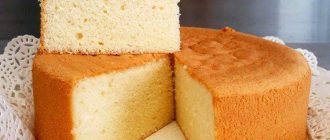
The idea of the pie is this: first we bake a fluffy sponge cake, then cool it, take out the middle of the pie, forming the bottom and sides, mix the sponge cake crumb with berries and cream and fill the base of the pie.
I used the sponge cake from the recipe “Lush sponge cake for a cake”; it is ideal for this pie because it tastes dry, and the addition of juicy berries and cream to the crumb makes it a juicy and amazingly tender delicacy. In addition, the sponge cake holds its shape well, so making a tall pie out of it is not difficult.
So, beat 4 eggs using a mixer. We start at low speed, gradually increasing it (do not add sugar yet).
At the same time as you start beating the eggs, turn on the oven to preheat to 180°C. The biscuit dough must be placed in a well-heated oven, otherwise it will fall off.
When beating, the egg mass is initially yellow, but becomes lighter before our eyes every minute.
No less impressive on your table will be the “Zebra” pie with sour cream, and, by the way, it is prepared very simply and quickly!
In a stand mixer it will take you 3-4 minutes to beat. Beat by hand for at least 10 minutes.
When the eggs become as light as in the photo, add granulated sugar (200 g) in a thin stream.
Our goal is not to let the granulated sugar lie on the bottom; it should immediately begin to combine with the eggs. After adding sugar, it will be even easier to beat, the eggs will lighten, become a little thicker and the structure of the egg mixture will be more like foam.
If at some point it seems to you that there are only whites in the bowl, and you are whipping meringue for meringue in the oven, then everything is going according to plan! The egg biscuit base is perfectly prepared!
Now that the eggs and sugar are well beaten, set the mixer aside and add flour.
But first, the flour must be sifted through a sieve (in order to saturate it with air). Add 1 tsp to it. baking powder.
Stir the dry mixture, trying to evenly distribute the baking powder in the flour.
Now add flour to the egg mixture in parts (it is better to do this again through a sieve, additionally sifting it with baking powder). Another sign that the eggs and sugar are well beaten is that the flour should lie on the surface of an elastic foam until you mix it by hand.
If the flour sinks to the bottom when it gets into the bowl, the eggs are not beaten well. Perhaps this time you won’t get a particularly fluffy result, next time try better when whipping.
Using a silicone spatula or spoon, gently fold the flour into the dough. We do this with light movements from bottom to top, as if lifting the dough. This careful technique of mixing in the flour will ensure that the air accumulated in the whipped egg whites is not lost.
The structure of the dough should resemble thick village sour cream. If you lift a small amount of dough on a spatula, it will flow down in a thick ribbon.
Pour the biscuit dough into a prepared pan (I have a springform pan with a diameter of 18 cm). I prepare the mold like this: first grease the bottom and sides with butter, then sprinkle with flour. It’s even better to cut a circle out of baking paper at the bottom, so there won’t be any problems with removing the biscuit.
Bake the biscuit in a well-heated oven for 30-35 minutes at 180°C. Baking time, of course, depends on the power of your oven. If you are friends with her and know her well, focus on her individual characteristics. Do not open the oven for the first 25 minutes (this is the rule for all ovens), otherwise the biscuit dough will settle.
When you smell the pleasant smell of baking, you can open the oven slightly and check how the sponge cake feels. If it is ruddy, fluffy, the middle springs, and does not fall when touched with your fingertips, then it is ready. Another test for doneness is to pierce the center with a wooden stick. It should come out dry, without sticking lumps of dough.
Remove the baked sponge cake from the oven and let it stand for a while (10 minutes) in the pan. Usually its sides “move away” from the walls of the mold, and a gap appears between the biscuit and the mold. You can also run a knife around the circumference of the pan to loosen the cake in places where it may have stuck a little. The photo clearly shows how the sponge cake moved away from the mold on its own.
Remove from pan and cool on a wire rack. Why use a wire rack when cooling baked goods? Everything is very simple: every centimeter of a freshly baked biscuit must “breathe” well, come into contact with air in order to quickly release the steam/moisture accumulated in it. If a hot sponge cake cools on a hard surface, the bottom may become soggy and the crumb inside will become gummy. For our purposes, absolutely any grid will be suitable: from a microwave oven, a grid shelf from an oven, from a vegetable dehydrator, a multicooker, etc.
If you don’t have a single wire rack in the house, cool it on glasses. That is, place several empty small mugs side by side and cover with a biscuit on top. This way, the baked goods will stay on the edges of the mugs, and the bottom will cool in the open air. I read about this method on the Internet, it seems very simple and reliable to me).
In this photo, I have not yet released the sponge cake from the bottom of the pan. Of course, we also remove the bottom before cooling the baked goods on a wire rack.
To ensure that the surface of the biscuit is even, you can cool it by turning it upside down. The swelling on the surface of the biscuit will smooth out, it will become perfectly smooth. But in this recipe, its top does not matter to us, since we will cut it off and also remove all the insides of the biscuit.
To do this, we retreat approximately 1.5-2 cm from the edge of the cake, use a sharp knife to make a depression, not reaching 1 cm to the bottom. We run a knife around the circumference of the biscuit, then remove the crumb in parts. You can do this with a spoon or with your hands.
We get this “biscuit bowl”, which we will fill with berries and cream mixed with biscuit pulp.
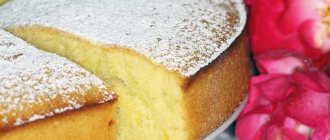
Strawberry sponge cake recipe in the oven
During the strawberry ripening season, bake a sponge cake with these berries. Its magical taste will not leave anyone indifferent! You can also use frozen strawberries for this baking.
Ingredients:
- strawberry berries – 0.2 kg;
- egg;
- soda - half a teaspoon;
- vinegar - one table. spoon;
- flour (pre-sifted) – 1.5 cups;
- granulated sugar – 0.5 cups;
- vanilla.
Preparation:
- We will prepare all the products we need according to the list.
- Separate the whites of the eggs from the yolk part.
- Beat the whites, as they say, to stiff peaks.
- Combine the yolks with granulated sugar, add the protein mass to them.
- Wash the strawberry fruits, dry them, and separate the stems.
- Blend the berries with a blender until they form a puree.
- Add strawberry puree to the egg-sugar mixture. Let's stir.
- Quench the soda with vinegar and add to the rest of the ingredients.
- Let's add vanilla there.
- Sift the flour and pour it into the dough in portions.
- Knead the base into a homogeneous structure.
- Let’s “treat” the refractory mold with oil and place the biscuit mixture into it.
- Bake for forty to fifty minutes at one hundred and eighty degrees.
- When the biscuit has cooled, remove it from the mold.
- You can add icing and berries to your baked goods.
Advice! You can check if the biscuit is ready using a wooden skewer. Pierce the baked goods with it, and if the skewer remains dry, then turn off the oven.
Filling for sponge cake
Use any berries and fruits you like. Both fresh ones, just brought from the market or from the dacha, as well as frozen or canned fruits/berries are suitable.
Today I will have a filling of black currants and lingonberries.
Defrost the berries in advance. Drain off excess liquid and let dry on a paper towel.
Custard
For the cream, put 200 ml of milk on the fire (you need to bring it to a very hot state, but do not let it boil).
In a separate bowl, mix yolks (2 pcs.) and sugar (20 g). This can be done using a whisk or mixer.
Add 20 g of flour.
It is convenient to mix flour with the yolk base of the cream using a mixer. We should get a homogeneous thick cream without a single lump.
Carefully pour the hot milk into the yolk base of the cream, without getting it on the whisk.
At the lowest speed (so as not to splash the hot liquid), beat the milk and yolk-flour mixture. You will see that it will immediately thicken - this is the flour that has brewed. To brew the yolks, return the cream to the heat.
Cook the cream until thick and homogeneous. Then transfer to another bowl and cool to room temperature. If you mix hot cream with biscuit crumbs, they will become soggy.
While cooling, stir the cream so that a film does not form on its surface.
Biscuit cake with blueberries
Try baking a biscuit cake with blueberries. This is a real work of confectionery art.
Ingredients:
- eggs - six pieces;
- granulated sugar – 0.3 kg;
- flour (pre-sifted) - two glasses;
- purified vegetable oil – six tablespoons. spoon;
- blueberries - one glass;
- baking powder - one teaspoon. spoon.
Preparation:
- Combine eggs with granulated sugar. Beat this mass to a homogeneous fluffy consistency.
- Add baking powder, as well as purified vegetable oil, stir.
- Sift the flour and add it to the rest of the ingredients.
- Knead the biscuit base.
- We “treat” the refractory mold with oil.
- Pour the biscuit mixture into it.
- Wash and dry the blueberries.
- Spread them on top of the biscuit base.
- We bake the biscuit treat for forty to fifty minutes at one hundred and ninety degrees.
- Let the baked goods cool and remove from the mold. Ready!