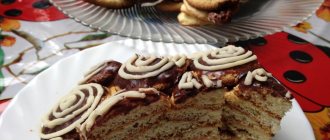
"Red Velvet" by Andy Chef
The original dessert recipe is offered by Andy Chef. It seems to be the same red velvet, but it’s not. Due to the external shape, there is greater interest in trying this sweetness as soon as possible. Small cupcakes look great on a holiday table. Convenient to use. Tasty, aromatic and tender.
Ingredients:
- Flour – 300 g
- Granulated sugar – 1 cup
- Chicken eggs – 2 pcs.
- Milk – 0.5 cups
- Sweet butter – 60 g
- Olive oil – 4 tbsp. spoons
- Cocoa – 40 g
- Vanillin – 1 pack
- Baking powder – 1 pack
- Scarlet food coloring
Preparation:
Build a steam bath. Melt sweet butter on it. Then pour sugar and vanillin into it. Transfer the mixture into a mixing glass. Beat well, adding milk, coloring, eggs and olive oil. You will get a beautiful mass, homogeneous in consistency, with a pinkish tint.
In a separate container, mix flour with cocoa and salt. Pour the resulting dry powder into the whipped mixture. Blend again until smooth.
Prepare cupcake pans. You decide the size yourself. It's not that important. Fill each of them 1/3 full with dough.
Preheat the oven to 170 - 180 degrees. Bake small cakes for about 25 - 30 minutes. Next, after removing them from the oven, cover with a thick napkin or towel. Let stand for about 30 minutes more. Since it still takes time for them to reach the desired state. Only then remove them from the muffin tins.
Decorate the top of the pastry with whipped cream and confectionery shavings. You can use any of your design options.
This is a wonderful option for decorating any holiday table. Dessert can be used as a gift. For example, on Valentine's Day.
Bon appetit, fun and joy to you!
Wine cake
Red velvet cake, the recipe with photos of which was described step by step above, is usually not soaked due to the inherent moisture of the prepared cake layers.
The cakes and cream are prepared according to the classic recipe, but you can add new flavors to the dish using alcohol impregnation.
Impregnation elements:
- granulated sugar – 75 g;
- drinking filtered water – 3 tbsp. l.;
- red semi-sweet (can be dessert) wine – 3 tbsp. l.
Creating an impregnating mixture:
- Bring the water and sugar to a boil, but do not keep it on the fire for long so that the syrup does not have time to thicken.
- Wine is poured into the warm liquid syrup.
- Before coating with cream, the cakes are soaked in the prepared mixture. This gives the dessert a slight wine flavor, moisture and sweetness.
“Red Velvet” from Yulia Vysotskaya
A fairly well-known TV presenter, Yulia Vysotskaya, added her own touch to the recipe for such a wonderful cake. She replaced the buttermilk with cream. The result is excellent. I advise you to try it too to be sure of this.
Ingredients:
- Flour – 350 g
- Eggs – 4 pcs.
- Cocoa – 2 dessert spoons
- Granulated sugar – 0.5 cups
- Baking powder – 2 tsp
- Salt and soda - 1 pinch each
- Vegetable oil – 280 ml
- Cream 33% – 700 ml
- Sour cream – 170 g
- Powdered sugar – 170 g
- Soft cheese – 500 g
- Scarlet food coloring
Preparation:
Sift the flour several times and pour it into a dry bowl. Add salt, soda, baking powder, sugar and cocoa to it. Stir until the ingredients are evenly distributed.
Beat eggs, butter and equal amounts of sour cream and cream into the powdered mixture. For coloring, pour scarlet dye. Beat everything, thereby kneading a beautiful scarlet dough.
In order for the process of extinguishing the soda to take place completely, the dough must be left at rest for 25 - 30 minutes.
While the dough is resting, turn on the oven at 180 degrees.
The resulting mass should make three cake layers. Bake each for 20 minutes in a well-heated oven. When ready, cover each of them with a plastic bag. Leave in the cold for one and a half hours.
In order to prepare a delicious cream, you need to beat the cheese, cream and powdered sugar well.
Brush the resulting mixture onto each cake layer, top and sides.
The dessert must be in the refrigerator for at least five hours. Only then can it be served on the table for consumption.
In addition, be sure to provide aromatic, fresh fruit tea or coffee.
Enjoy your tea, have a great mood!
Original cake
Red velvet cake is often prepared using a dairy product called buttermilk.
The original creamy flavor will delight all lovers of home baking.
The dough is prepared from the following elements:
- flour for creating the base - 300 g;
- buttermilk - a large glass;
- 82% fat butter – 120 g;
- olive oil – 250 ml;
- granulated sugar (or powder) – 300 g;
- soda – 1 tsp;
- cocoa powder – 2 tbsp. l.;
- a pinch of finely ground salt;
- 9% vinegar – 1 tsp;
- eggs (preferably homemade) – 2 pcs.;
- vanilla extract – 2 tsp. without a mound;
- gel dye – 50 g.
The cream is prepared from the following ingredients:
- powdered sugar – 150-160 g;
- full fat cream cheese – 500 g;
- high fat cream – 300 ml;
- vanilla – 5 g.
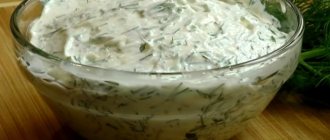
Ingredients for cream
Cake making process:
- To prepare the dough, dry elements are combined.
- Butter at room temperature is processed with sugar in a mixer until the mass is significantly lightened and its volume doubles. After this, eggs, oil and vinegar are driven into the mixture alternately. In this case, whisking should continue. Vanilla extract and buttermilk are added last while beating.
- The dry mixture is combined with an oil base. The dough is tinted with gel dye to the desired brightness.
- The oven dish is lightly coated with oil and sprinkled with flour.
- The dough is transferred into a mold and sent to the oven, heated to 180 degrees for half an hour.
- The baked cake cools for 10-15 minutes and carefully falls out of the mold.
- To create the cream, powder is mixed with cream cheese, vanilla extract is added to the cream, and all components are mixed until smooth.
- Cold cream is carefully transferred to the oily substance and mixed.
- The cold cake is cut into 2 parts with a sharp knife. You can straighten the top of the cake by cutting off the top clumsy layer.
- The cake is assembled in layers with a generous spread of buttercream.
- The assembled dessert is coated with a cream mixture on the top and sides and sprinkled with red sponge cake ground into fine crumbs.
“Red Velvet” by Olga Matvey
For such a masterpiece, you don’t even mind the time spent on preparation. The baked goods turn out very tasty, beautiful, tender, juicy and light. This is a great option for any holiday. You can please your family with them any day.
Ingredients:
For the biscuit:
- Flour - 340 g
- Sugar - 300 g
- Cocoa - 1 tbsp. spoon
- Salt - 1/4 teaspoon
- Baking powder - 2 teaspoons
- Soda - 1 teaspoon
- Eggs - 3 pcs.
- Kefir 3.2% – 200 ml
- Cream 33% – 80 g
- Sunflower oil - 300 g
- Red food coloring (gel) - 2 teaspoons
For cream:
- Butter 82.5% - 100 g
- Powdered sugar - 100 g
- Cream cheese (Philadelphia) - 350 g
Preparation:
Place all dry ingredients for the dough into a sieve. Sift them two to three times. Then the dough will turn out more airy due to the accumulated oxygen.
Please ensure that the expiration date is appropriate. Especially with baking soda and baking powder. Otherwise, the cakes will not receive the required rise.
To further knead the dough, you need to add the remaining products to the dry mixture. Beat them until smooth using a mixer or food processor.
In order to get a bright red color for the biscuit, you need to use a gel dye, not a dry one.
The dough should become medium in consistency and homogeneous. Buy a beautiful bright color. You need to beat it for at least 4 – 5 minutes. Then let it sit for five minutes.
If you do not want to use dye, you can replace it with three tablespoons of cocoa. Then the treat will be chocolate.
Turn on the oven at 170 degrees for even heating.
Meanwhile, divide the resulting red mass into two parts. Since you need to bake two cakes
Line the bottom of the springform pan with parchment paper. Coat the sides thoroughly with butter. Fill the mold with dough, using only one half of the entire mass.
Bake the crust for about 20 minutes in a preheated oven.
Determine the readiness of the cakes using a toothpick. It should be completely dry and free of grains. This is the main confirmation that the biscuit is baked
Cool the finished cakes well by removing them from the baking pan.
It is better not to bake such a cake in a slow cooker. Because it produces too large pores. This significantly spoils the appearance
When you rise the dough, the base on top is not as smooth as you would like. Therefore, it is better to cut off the top part
Place the trimmings in a blender and turn them into crumbs. You can do this with your hands, but it’s easier and faster.
Place the butter in a mixer glass. Beat it for 3 – 4 minutes. Then pour powdered sugar into it. Continue the beating process for about 2 – 3 minutes.
Add cool cream cheese to butter. Beat until smooth
Lubricate the surface of the first cake with cream, stepping back 0.5 cm from the edge. To do this, place the cream mass in a plastic bag, cutting off the edge, the corner in this case.
Place the second cake layer on top and press it down lightly with a wooden cutting board. This will make the cake even
Apply a thin layer of cream to the top and sides. You should end up with a white round shape like this
Cover dessert completely with crumbs. Place in the refrigerator for 5 – 6 hours
Serve such an elegant sweetness on the table, cutting off a portioned segment for each person.
In addition, add juice, coffee or freshly brewed tea.
Bon appetit and have an easy day at work!
Beet juice recipe
Beetroot juice is a natural coloring agent and can beautifully color cakes without adding chemicals.
Recipe:
- premium wheat flour – 350 g;
- granulated sugar – 350 g;
- butter – 270 g;
- kefir with a fat content of 2.5% - 150 ml;
- juice squeezed from beets - 1-1.5 faceted glasses;
- cocoa powder – 30 g;
- baking powder for dough – 1 tsp;
- 9% vinegar – 1 tsp.
Instead of food coloring, you can use beet juice, which is squeezed out of grated vegetables
. Cakes coated with beet juice are made like this:
- The butter, softened at room temperature, is whipped with the addition of sugar.
- The dry ingredients are mixed, first winnowed through a sieve.
- Beet juice, kefir and vinegar are combined together.
- All prepared mixtures are mixed until smooth.
- The tender dough is divided into 2 parts, laid out on a parchment-lined pan measuring 20-22 cm, and baked in an oven preheated to 170 degrees for up to 40-45 minutes.
- Next, the cake is prepared according to the standard procedure.
“Red Velvet” by Alexander Seleznev
Very tasty, incredibly beautiful and appetizing. The cooking process itself is simple, without any special difficulties. But the result will certainly please everyone.
Ingredients:
For the test:
- Premium flour – 340 – 350 g.
- Cocoa - 2 - 3 tbsp.
- Sugar – 200 – 300 g
- Vegetable oil – 280 – 300 ml
- Kefir 2.5% – 280 – 300 ml
- Baking powder – 2 sachets
- Soda - 0.5 teaspoon
- Salt – a few pinches to enhance the taste
- Red food coloring – 2 – 2.5 teaspoons
- Egg – 3 pcs.
For cream:
- Cream or curd cheese – 350 – 400 g
- Butter – 150 – 160 g
- Powdered sugar – 100 g
- Vanillin - to taste
Preparation:
In a dry bowl, combine the flour with the dry ingredients needed for kneading the dough. Then sift them at least 2 times.
In another bowl, mash the butter with a fork. Pour mixed, sifted flour, soda and salt into it. Mix everything thoroughly until completely homogeneous. Add dye and mix again.
For baking, a silicone mold is best suited. Fill it with red mixture.
Bake in an oven preheated to 180 - 190 degrees, no more than 33 - 35 minutes. Readiness to check with a wooden stick. After all, it directly depends on the characteristics of the oven.
When ready, remove them from the mold and cool completely. For greater evenness, cut off the top part of the cake. Scraps can be converted into crumbs for further decoration.
While the cake is cooling, you can prepare the cream.
To prepare the cream, you need to combine all the necessary products. Mix them using a mixer or immersion blender.
Coat the cooled cakes with an even layer of buttercream. Cover completely with crumbs. Or you can leave it in white. Place in the refrigerator for a couple of hours.
Serve to everyone in the form of a portioned piece with a hot drink.
Bon appetit, bake with desire and soul!
How to decorate a cake
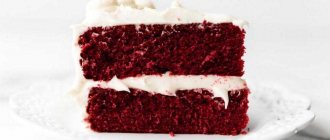
Red velvet cake, the recipe with photos of which was described step by step in detail, is always served impressively.
Creative Decoration Ideas:
- cut crumbs;
- curly stitches with cream;
Decorating options for red velvet cake
- chocolate powder;
- clearing with fruits;
- caramel lace;
- melted chocolate patterns.
Red velvet cake will amaze guests of the most sophisticated celebration. A classic recipe with a photo will clearly demonstrate the end result, and the cooking, described step by step, will greatly facilitate the process. By experimenting with the composition of the base, cream and decorative elements, you can achieve the ideal look and taste of the original dessert.
Article design: Natalie Podolskaya
New version of red velvet cake
The dessert prepared according to this recipe turns out incredibly tasty, crumbly with notes of chocolate. Happy baking!
Ingredients:
For the test:
- Butter 82.5% - 220 g
- Sugar – 395 g
- Eggs – 2 pcs.
- Milk 3.5% - 250 g
- Flour – 365 g
- Baking powder – 10 g
- Cocoa – 10 g
- Red food coloring
For cream:
- Cream cheese – 400 g
- Cream (fat content from 30%) – 70 – 100 g
- Powdered sugar – 50 – 60 g
Preparation:
In a separate container, mix sifted flour with cocoa, baking powder
Using a blender, thoroughly grind the softened butter with sugar. Add the eggs one by one into the resulting homogeneous mass. Beat everything with a blender
Add half the milk to the resulting fluffy mass.
At this stage, milk can be replaced with any dairy product with a similar fat content, for example, fermented baked milk, kefir, etc.
Stir everything until smooth
Place half of the dry mixture of flour, cocoa and baking powder into a bowl. Mix with a blender. Next, pour in the remaining milk product, stirring thoroughly.
Place the dry ingredients back into the bowl and beat until smooth.
Pour the required amount of dye into the dough. Distribute it evenly throughout the dough using a blender
Mix the finished dough, colored red, with a spatula to form an even consistency.
At high temperatures in the oven, the dye burns out. Therefore, more dye needs to be added. To get the right shade
Place a silicone mat on a baking sheet. Put rings on it. Distribute all the airy dough into baking rings. Preheat the oven to 150 degrees. Place in the oven and bake until fully cooked.
The finished cake should spring back slightly when pressed with your fingers. The main thing is not to overdry.
When they are completely ready, remove them from the molds.
While still hot, wrap them completely in cling film. Cool them, then put them in the refrigerator for 3 - 4 hours
After the time has passed, prepare the base for assembly. Cut each one in half according to thickness. To make the finished dessert look impressive when cut, you need to cut off the top layer of each cake by about 2 mm. Set aside the trimmings. They will come in handy later.
Prepare cream cheese cream. To do this, you need to use well-chilled cream cheese and cream.
It is best to place the cream cheese and cream in the refrigerator at a temperature not lower than +2 degrees one day before preparing the cake. 30 minutes before creating the cream, place the whisk and bowl in the freezer.
Place the ingredients for the cream prepared in advance, namely cream cheese, cream and powdered sugar, in a bowl.
Beat with a mixer. First, beat for about 1 minute on low speed to prevent the powdered sugar from scattering.
Then set the mixer to maximum speed, beat the mixture until a fluffy but dense consistency is obtained. Combine the cake layers with the prepared cream cheese cream, spread with a layer of 8 - 10 mm on the side and top parts
Place the trimmings on a silicone mat and dry them a little in the oven at 150 degrees
Then turn it into crumbs using a blender
Sprinkle the cake on all sides with chopped cake trimmings.
For decoration, you can bake marshmallow strips from an extra quarter of the dough. Then you can decorate the cake with them, sprinkling it with powdered sugar.
The American dessert is ready. Absolutely no one can remain indifferent to him. Enjoy your tea!
