Milk bread in a bread machine - step-by-step recipe with photos
Baking bread in a bread machine is the easiest option. It takes literally a few minutes to add the products; the equipment does the rest itself. The main thing is to add products in the order specified in the instructions. In this recipe, the filling begins with liquid ingredients and ends with bulk ingredients.
Important: If a delayed start is used, milk must be purchased from the store or very fresh. If the product suddenly turns sour, the bread will have an unpleasant sour taste and most likely will not rise.
Your rating: ( 3 ratings, average: 4.67 out of 5)
Cooking time: 3 hours 20 minutes
Quantity: 1 serving
How to deliciously fry sweet white bread with milk and egg and sugar in a frying pan: recipe
This breakfast is more delicious because the recipe contains an egg. It makes the taste of the bread more tender and rich.
Ingredients:
- 2 raw eggs
- 150 ml milk
- 50 g granulated sugar
- Half a loaf
- Oil
Recipe:
- Cut stale white bread or loaf into 1.5 cm thick slices
- After this, beat the eggs a little with a fork, you do not need to achieve foam
- It is enough for the yolk and white to become indistinguishable in color
- After this, milk is poured in and the mixture is sweetened
- Heat a frying pan to high temperature and add a little oil
- Now soak each bread slice in the substance for 1-2 minutes on each side.
- After this, place the pieces of bread in oil and fry until golden brown.
How to deliciously fry sweet white bread with milk and egg and sugar in a frying pan: recipe
How to cook bread with milk in the oven
Especially for you, we found a recipe that shows in detail how to bake bread in the oven. It is prepared on dough, so you will have to be patient before trying the taste of homemade bread. It turns out amazing.
Ingredients:
- Wheat flour – 500 g;
- Milk – 250 ml;
- Vegetable oil – 4 tbsp. l.;
- Salt – 1 tsp;
- Granulated sugar – 1 tbsp. l.;
- Wet yeast – 10-15 g.
What we do:
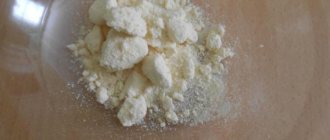
- Place the yeast in a deep container. Add sugar, salt, sunflower oil and mix everything thoroughly with a whisk until the yeast is completely dissolved. Add sifted flour (about 200-250 g) to the same container.
- Mix everything until smooth and cover with a lid. Place in a warm place for 20-30 minutes.
- Then add the remaining flour to the dough portionwise and knead the dough for 10-15 minutes. Return to the bowl, cover with a towel and put in a warm place for 2 hours. As soon as the dough begins to rise, knead it and let it rise again.
- After the time has passed, knead the dough again, give the dough any shape and place it on a baking sheet greased with vegetable oil. We make cuts as in the photo and cover with a towel. Leave it like this for half an hour. Then brush the surface with beaten egg and sprinkle with sesame seeds.
- Send to bake in an oven preheated to 180 degrees for 30-35 minutes. Cover the finished bread with a towel for 20 minutes until the crust becomes soft.
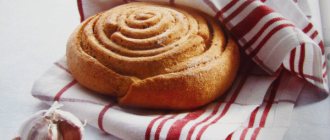
Homemade bread “Milk”
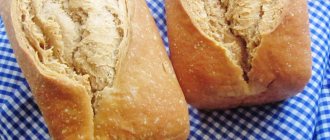
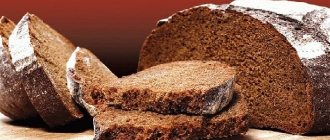
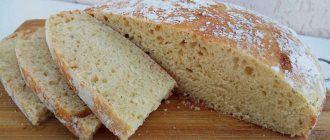
Tomorrow is June 25, 2015. We have already bought tickets to Kazakhstan, we are going to go visit our mother and grandmother... And since we have to travel for 3 days on the train, I decided to bake homemade bread for the trip. One rye bun and one white milk bun. How does regular bread (with water) differ from milk bread? Well, firstly, of course, the color of the crumb. The crumb of milk bread is several shades lighter than its brother (which is made from water). It would be more accurate to say that it is more similar in color to “young” village oil. Secondly, the structure of the crumb. Milk bread, despite its splendor, has a “dense” crumb, like an ordinary sliced loaf (all in numerous holes, but very, very small). Which is very convenient; when slicing, this bread practically does not crumble. The cut when slicing bread turns out incredibly even, and the slice itself is thin. Just what you need for breakfast, spread it with butter or jam, or cover it with ham or cheese. Thirdly... There is a difference in taste. Milk bread, whatever one may say, is still rich bread, not lean. Therefore, it can safely be classified as a breakfast bread. This kind of bread is certainly not suitable for borscht (well, if only for an amateur). Oh, all because it has its own characteristic sweet creamy taste, not to be confused with sweet baked goods. Everything is within normal limits. And, thanks to the baking in the dough, the shelf life of such bread increases 3 times! If stored correctly, you can safely enjoy this homemade milk bread for three days. All this time, the bread with milk will be fresh, aromatic and most importantly tasty. And this despite the fact that it’s summer outside, and outside the window it’s 30 plus... I’ll store the bread in a special fabric bag. You can sew such a bag yourself (without the help of a machine, using an ordinary small stitch); it is not at all difficult and, moreover, does not take long. Material: linen, double layer (so the seams will remain inside, between two layers of fabric). To be clear, this is like tucking one pillowcase into another, right sides facing out. Size 30 by 25 cm, this bag is tightened with a regular cord. And, no plastic bags or plastic bread bins! Taking this opportunity for a more clear example, I’ll bake 2 loaves of milk at once. One, using a bread machine, and the other in the oven. This is so that you can see how beautiful it is, this bread with milk. Easy to prepare and always successful. It is almost impossible to “spoil” it. Try to bake it at least once, I assure you that the first pancake will not be lumpy.
Ingredients for a 700 g loaf:
Flour - 500 - 550 g (this time it took me 530 g) Milk 3.2% - 6% - 330 g Dry yeast - 1 tsp Sugar - 1 tbsp Salt - 1.5 tsp without a slide Butter - 2 tbsp l can be safely replaced with odorless vegetable oil - 3 tbsp
Cooking milk bread in the oven.
Pour slightly warm milk into a deep cup, add yeast, sugar, and mix.
Sift the flour, add salt, mix thoroughly.
Add a little more than half of the flour to the milk, half of the melted butter (you can use regular, odorless vegetable oil) and mix thoroughly (slowly).
You should end up with a fairly sticky, runny dough.
Pour the remaining flour onto the table and level it out.
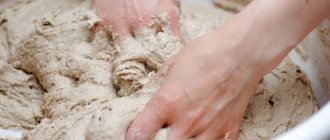
Pour the batter into the center of the flour and continue kneading, collecting flour from the edges. As soon as most of the flour is mixed in and the dough begins to come together into a kind of kolobok, the remaining flour will need to be pushed away from under the dough with your palm and kneading continued again, with both hands, more intensively, on a clean table. And, as the kneading progresses, dust the table with the remaining flour in small portions. I don’t recommend adding more flour than the recommended amount. The dough during kneading, even after all the flour has been used up, will still stick to your hands; this is normal. And, despite this, the batch will need to continue. For more convenient kneading, lightly grease your palms with the remaining oil.
Why do you need to knead the dough? Your main task is how best to knead the dough! Kneading is not just a body movement. And, since the recipe indicates 10-15 minutes for kneading, then please work out 10 minutes in full, and spend the rest on short breaks. Understand that the structure of the crumb and the appearance of the future product depend on the kneading. That’s why two housewives, using the same brands of flour and exact proportions of ingredients, will end up with bread that looks and tastes different. And, for the same housewives, kneaded and baked in a bread maker (while maintaining accuracy in proportions, etc.) the bread will turn out to be the same. With a bread machine it’s clear, everything is done automatically. With a certain speed and force, where intensive kneading of dough takes up more than half of the total time of the entire kneading. And, when kneading by hand (in practice), the bread obtained has a different structure. Like I said, it's all in the mix. So, let’s not be lazy... When kneading, there is a uniform distribution of the bulk ingredients, their combination with the liquid, the beginning of the growth and reproduction of yeast fungi, swelling of the gluten, saturation with oxygen, etc. That is, during the kneading process, the most comfortable environment for the maturation of yeast dough is created. Remember, high quality does not mean fast or long; each type of dough has its own technology for kneading, proofing, kneading and, of course, baking. Now remember how you make the dough? How do you knead, with what intensity and how long does it take you? I’ll say right away that this is not an easy task, especially for fragile people. It’s not for nothing that the best bakers (in France and Italy) are men. Putting bread in the oven is one thing, but making a high-quality batch is something else entirely! In our case, the dough is yeast, unleavened, so try to knead as hard as you can ☺☺☺ for everything about everything - 10 -15 minutes. At the end of kneading you will see how much your dough has changed! It will become homogeneous, soft and tender. It will practically stop sticking to your hands and the table. If you press this dough with your fingers, the pressure marks will instantly disappear and the dough will easily return to its original shape.
Advice: Carefully read and study baking recipes, especially the instructions for kneading dough. How should it turn out, in what time? Yeast dough made using the sponge method is kneaded much easier and faster than regular yeast dough. Opara, a cunning and useful thing! Therefore, if you don’t know how to knead or don’t want to spend a long time fiddling with the dough, start with dough. Yes, the dough will stand for 40 minutes - 1 hour, but there are no tastier, more fluffy products made from sponge dough in the world! How often do I read: let’s make a “dough” and leave it for 10 - 15 minutes! This is not dough! The dough needs time, it must stand well and begin to settle, only after that can something be started on it. There are complex doughs that need additional feeding; such doughs can stand for up to a day or more. There are dough recipes with two and three full proofings. But, this is not fashionable now, to my regret. Serve us pies and whites in 5 minutes, dough in a minute, delicious pasties in a hurry... I don’t argue, it will work out! But the authors and lovers of such recipes will never enjoy the true taste of homemade baking! Unleavened dough for dumplings, dumplings, lasagna, lagman, noodles, pasta is one of the steepest and tightest, and all because of the low liquid content. Only strong men's hands can knead such dough efficiently at home or with the help of special tools. machines in production. Shortbread dough, on the contrary, starts up very quickly and kneads just as quickly, once or twice. And necessarily, subject to low temperature conditions. This is done in order to preserve the structure of fats (butter or margarine) in the dough as much as possible. Fats, during baking (begin to melt between the flour) forming a characteristic layering, due to which the finished products turn out crumbly, tender with a creamy aroma. The dough, with the addition of soda, is made immediately before baking. The kneading is quick, and most importantly, without much effort. The most important thing in such a dough is not to fill it with flour (it’s better not to add flour). Kefir dough is very soft! When kneading, the most important thing is to achieve homogeneity, smoothness and elasticity. You don’t need to expect from such a dough. The soda in the dough must react with the acid (natural kefir, not powder). If you doubt the quality of kefir, then quench the soda with lemon juice or vinegar (the% of vinegar is not important). Add slaked soda to the liquid, not to the flour. But baking powder, on the contrary, is used in bulk. Let the kefir dough (after kneading) rest for 20 - 30 minutes, covered on the table.
Once the dough is well kneaded, roll it into a bun and place it in a spacious cup or saucepan, making sure to cover it. Since there isn’t much dough this time, I put it in a bread maker bowl to let it fit. Covered it with a bag and put it in a slightly preheated oven for 1 hour 20 minutes. The time is approximate, most importantly, your dough should increase in volume by at least 3-4 times.
That's how it fit.
Lubricate your hands with vegetable oil. Separate the dough from the edges of the cup and collect it back into the bun. Then, on a clean table, we knead the dough very carefully for 30 seconds (we release excess carbon dioxide, saturate it with a new portion of oxygen, stretch the gluten in different, new directions: we do not tear the dough, without jerking, we collect the dough with very smooth movements. Work with the dough , after proofing it’s a complete pleasure. It has become incredibly tender and pliable. We don’t use flour when kneading the dough after proofing! Roll the dough into a bun and cover it with a light towel. Grease the baking dish with vegetable oil.
Transfer the dough into the mold. The dough should fill the mold 1/2 of the way, maybe a little more.
If you have a regular baking sheet, then you should first cover it with baking paper, and only then grease it with vegetable oil (in a thin layer and lightly dust it with flour). If you pour a lot of oil, the dough will not hold its shape, it will simply spread across the sheet. Roll the dough into a log and place it in the center of the baking sheet. Cover the dough ball with a large saucepan so that the dough does not dry out. Place the baking sheet on the table for secondary proofing. For about 30 minutes. Why does bread or baked goods fall off when baking? The most important thing is not to overexpose the dough during the secondary proofing. As soon as you see that the dough has increased 2-3 times, at the same time it has become rounded and poured, it means it’s time to bake. If you leave the dough until it increases by 3-4 times, then such a product will definitely fall when placed in the oven or during baking itself. And, all because, due to the long proofing, the upper part of the dough stretched out greatly and became thin, which means the gluten in such a dough has lost all its properties (stretching, holding its shape). Now you understand why such dough falls off when placed in a hot oven. That's right, he simply doesn't have the strength to control himself. By the way, the same thing happens to the dough if it is kept at high temperature. This is above 35C. The higher the temperature at which proofing takes place, the faster the chemical process in the dough will proceed, and in the end it may stop completely (at 50C). Yeast dies at this temperature. This means that at high temperatures the dough will rise instantly, in just 15 minutes. And when planted in the oven or during baking, it will fall off just as quickly as if you overexposed it. Well, all because, with a very fast and strong rise, the dough damaged its elasticity (like an elastic band that was kept stretched for a long time). And, on top of all this, this dough contains a huge content of carbon dioxide (due to the rapid growth of yeast). In simple words, the dough is sour before it’s even born! Conclusion - proofing of products should take place at 30C. Products should increase 2-3 times, no more. During the baking process, such products safely continue to (rise) increase in volume and height.
At about 20 minutes, sprinkle the top of the future bread with flour (in a thin layer, through a strainer). Then, very carefully, we make these shallow cuts with a sharp blade. Of course, if you wish. Leave for another 10 - 15 minutes.
At this time, preheat the oven to 180C. Many people advise baking bread at high temperatures of 200-220C. I personally don't recommend it! Since we have ordinary standard ovens without steam, which means the bread may fall, a thick crust may form, the bread may tear, etc. In our case, I recommend a more gentle baking mode. 180 C is the best, especially for white bread and small-piece baked goods. But, again, everything comes with practice.. Place the bread in the oven, gently close the oven door. Bake for 40 minutes, approximate time. This is such a miracle, in the Light of God!
Remove the bread, transfer it to a wire rack, no need to coat it with anything.
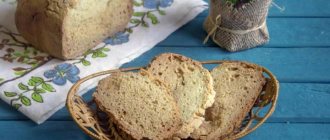
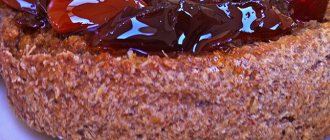
After a minute, wrap in a light cloth and cool on a wire rack until warm. Approximately 2 - 3 hours. Homemade milk bread, baked in the oven already cut.
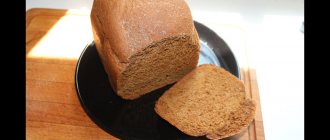
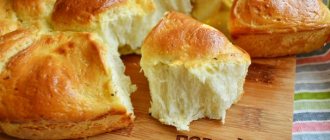
And here is the milk bread from the PANASONIC 2501 bread machine. It is in no way inferior to milk bread from the oven, just as fluffy, beautiful, tasty and aromatic. Bon appetit!
The result is worth the effort
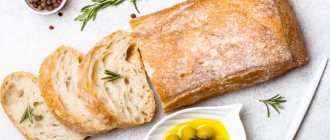
As a result, we get tall and rosy baked goods with a delicious aroma. After cooking, the bread should sit for a few more minutes in the pan, after which we take it out and put it on a wire rack (to cool).
Once completely cooled, Japanese Hokkaido bread can be easily cut with a knife. Of course, such baking takes a lot of time. On the other hand, what prevents you from leaving the dough to “ripen” and go do other things?
Bon appetit to those who decided to prepare this milk cloud with an airy and aromatic crumb in an ensemble with the finest golden brown crust! The results from ordinary products are simply amazing.
Delicious sweet loaf croutons in milk and egg with sugar: recipe
There are also plenty of options for this breakfast. You can cook bread with cheese or vanilla. Croutons in a crispy crust.
Ingredients:
- 140 ml milk
- 2 raw eggs
- 300 g loaf
- Sugar
- 100 g hard cheese
- Oil
Recipe:
- Cut the remains of yesterday's loaf or bread into small cubes of the same size
- After this, in a bowl, turn the eggs with milk and sugar into a homogeneous substance
- Separately, turn the hard cheese into crumbs. To do this, use a grater or blender.
- Heat the oil in a frying pan. Dip cubes in milk-egg mixture and roll in cheese crumbs
- Fry the cubes until golden brown
Delicious sweet loaf croutons in milk and egg with sugar: recipe
As you can see, you can make a very tasty breakfast from bread and milk. Delight your kids with a recipe from your childhood.
How to calculate the required amount of dough for a mold
The amount of this dough for pan bread is calculated for two forms, which are also called L-11 (small) and L-7 (large).
Dimensions L-11 – 146x101x100 mm Dimensions L-7 – 221x110x115 mm. Form L-11 will require 300-350 or 380 grams of dough. I most often take 350-380 g. In the L-7 mold you will need 700-780 g of dough.
Also from this amount of dough you will get 3 small L-11 molds. Add 300-380 grams of dough. If you have two forms of L-7, then you will need to increase the amount of ingredients in the recipe by 1.32 times. That is, each ingredient will need to be multiplied by a factor of 1.32.
If you have one form of L-7, then you need to multiply each ingredient in turn by a factor of 0.62. For example, the flour in the dough is 165 grams, and you multiply 165 * 0.62 and get 102 grams of wheat flour. And so with all the other ingredients. As a result, you will get 710 grams of dough, which you all send into one large L-7 form.
If you need to calculate the amount of dough for forms of other sizes, then write to me about it in the comments.
For a detailed step-by-step video on how to make pan bread, watch my YouTube channel “Delicious Notes on Bread”:
How to deliciously fry sweet white bread with sugar without milk in a frying pan: recipe
There are many recipes for making a sweet breakfast using dairy-free bread. The most popular are breakfasts with condensed milk and wine.
With wine
A very unusual and unusual recipe for our area.
Ingredients:
- 250 g bread
- 20 g powdered sugar
- 110 ml red wine
- Cinnamon, vanilla
- 2 squirrels
- Oil
Recipe:
- Initially, it is necessary to cut off the crusts from the stale loaf
- After this, the crumb is cut into thin slices measuring 2 by 3 cm
- In a small but deep bowl, stir the wine with powdered sugar and cinnamon.
- Now, in another bowl, turn the whites into a fairly homogeneous mass.
- There is no need to whip into foam. Dip the slices in the wine mixture and protein foam
- Place the bread strips in hot oil and fry until golden brown.
How to deliciously fry sweet white bread with sugar without milk in a frying pan: recipe
With condensed milk
Quite an unusual option for a sweet breakfast. It is prepared with condensed milk.
Ingredients:
- 150 ml condensed milk
- 50 ml boiled water
- 300 g bread
- Oil
- 3 eggs
Recipe:
- Cut the remains of yesterday's loaf into thick slices
- In a deep bowl, mix condensed milk with boiled water and eggs
- Now heat the oil, and when it starts to “shoot”, lay out the pieces of bread
- They must first be dipped in the milk-egg mixture and fried until golden brown.
How to deliciously fry sweet white bread with sugar without milk in a frying pan: recipe
Preforming
So my dough was fermented for 2 hours. During this time, it increased in volume almost 3 times and became porous inside.
Now I put it on the table. Handle the dough carefully and gently to preserve as much of its airiness and porosity as possible.
Now you need to divide the dough into two parts. For a small L-11 mold you will need 300-380 g of dough. Today I decided to weigh out 350 grams of dough for this one. The rest of the dough will go into a large L-7 mold, that is, 780 grams.
Then I round both parts of the dough and leave them to rest for 15 minutes.
To prevent the top of the dough from winding, it must be covered with film or a bowl.
origin of name
For those who are interested in the history of this wonderful bread, of course, it is clear what the word “milk” means in the name of the dish (it contains milk, including dry milk). But few people know why the bread is Japanese (many are also confused by the official name in English-language resources - Hokkaido).
As it turned out, preparing a fragrant and delicate-tasting bread requires the addition of milk from cows grazing in the meadows of Furano on Hokkaido (the name of the Japanese island). Of course, ordinary European chefs will not be able to get such a delicacy, but it is quite possible to replace it with milk produced in their homeland.
Ingredients
So, we will need the following ingredients to prepare Japanese bread:
- 650 grams of premium wheat flour;
- 300 ml fat milk;
- 30 grams of milk powder;
- 200 ml heavy cream;
- 1 chicken egg;
- 100 grams of granulated sugar;
- a little table salt;
- 5 grams of instant yeast.
The finished baked goods are designed for twelve servings. Cooking time is about five hours.
Information for those losing weight: the calorie content of the dish is quite high and amounts to 272 kcal per 100 grams.
Proofing bread
After molding, I cover the top of the molds with film and leave to proof for 1 hour 45 minutes at a temperature of +24°C. Proofing time may vary depending on room temperature. Therefore, focus on the appearance of the bread products in the molds. The dough should grow 2.5-3 times in volume and reach almost to the edges of the pan.
Dough fermentation and kneading
After kneading, I transfer the dough into a bowl, cover the top with film and leave to ferment for 2 hours at a temperature of +24°C.
In this case, 1 hour after the start of fermentation, it will be necessary to knead the dough once. To do this, you just need to stretch the dough and fold it on four sides. This folding strengthens the gluten threads and makes the dough more elastic.
After kneading, leave it to ferment for another 1 hour.
Preparing forms
In the meantime, you need to prepare the bread pans. I will use regular aluminum molds. Depending on their size, they are also called L-7 and L-11. L 7 is a large form and its size along the top edge is 11 by 22 cm, and its height is 11.5 cm. L11 is a small form and its size along the top edge is 10x14.5 cm, and its height is 10 cm.
Before baking, the pans must be greased with a thin layer of butter. Vegetable oil is not suitable, as it will be absorbed into the pores of the mold and the dough may stick during baking. Therefore, use butter to grease the molds.
Forming bread products
After 15 minutes, we begin to form the blanks for pan bread. First, I take a smaller part of the dough and lightly dust it with wheat flour on top. Then I turn the workpiece over in front of me. And I start molding. Even for pan bread, I try to give the workpiece a nice and even shape. Then even after baking it will be without external flaws.
After molding, I place the workpiece in a small mold and, if necessary, correct it on all sides.
Then I start molding the blank for the large L-7 mold. I repeat the same thing.
Wheat bread with whey
This recipe is a “bonus” for the most patient. First of all, you read the article to the end, and the bonus should be cool. Secondly, the new step-by-step recipe that I looked at cannot leave you indifferent. This review was written by a person who is truly passionate about baking.
The link to the author's channel is here. There you will find a huge number of video recipes for making bread. We really hope that the prepared material was useful to you. Likes in support are welcome! And that's all for today. We wish everyone a good mood and a productive week! See you on the blog pages Hleby.ru
Best regards, Romanov. V.A.
If you find an error, please select a piece of text and press Ctrl+Enter.