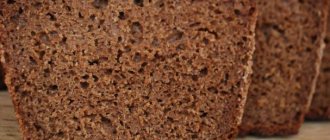
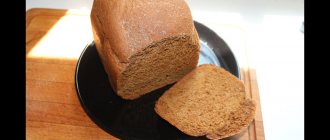
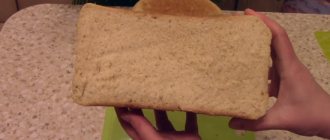
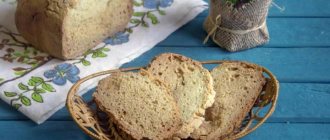
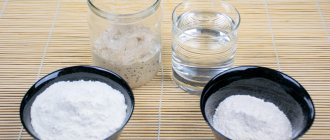
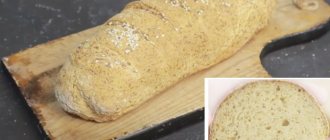
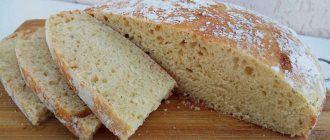
We offer a recipe for sourdough rye bread in a bread machine. By following simple recommendations, you will get a fragrant, golden-brown and undeniably healthy product with a crispy, appetizing crust. The absence of yeast in its composition and the predominance of rye flour gives reason to consider such bread dietary and low-calorie, which will be especially appreciated by supporters of a healthy diet and those who watch their weight.
Rye yeast-free sourdough bread in a bread machine - recipe
- rye flour – 480 g;
- wheat flour – 220 g;
- purified water – 500 ml;
- vegetable oil without aroma – 55 ml;
- granulated sugar – 65 g;
- rock salt – 25 g;
- suitable yeast-free starter – 200 g;
- cumin or coriander (optional) - to taste;
To prepare bread according to this recipe, we will need rye sourdough for bread without yeast. You can find a lot of options for preparing it, you can use absolutely any. As you have already noticed, the ingredients include wheat flour in addition to rye flour. This is necessary so that the bread machine can handle the kneading on its own. After all, if you prepare 100% rye bread, the dough during kneading turns out to be too viscous, and the device will not be able to collect it into a solid lump. You can either help the device during kneading, picking up the mass from the sides using a spatula, or prepare rye-wheat bread in a sourdough bread machine, replacing part of the rye flour with wheat. In the latter case, the device will handle the kneading on its own and your help will not be needed. When making bread only from rye flour, the amount of starter must be increased by about one and a half times, reducing the amount of water accordingly.
We also note that to prepare sourdough bread, you need a bread machine that allows you to customize the mode individually, since standard programs are only suitable for classic yeast baking.
Pour purified water, vegetable oil and suitable sourdough into the bucket of the bread machine. Now sift two types of flour, add salt, granulated sugar and, if desired, cumin or coriander. Add the dry ingredients to the liquid ones and place the container in the device. As we mentioned above, we will choose an individual mode. To do this, set the first kneading time to 15 minutes, the rising time to 4-4.5 hours (without kneading) and the baking time to 1.5 hours. Now we turn on the bread maker and wait for it to prepare us a ruddy, fragrant bread.
Immediately after the signal, remove the product from the device and from the bucket and let it cool.
Sourdough bread in a bread machine
For quite a long time I set myself up to learn how to bake bread without fermented yeast, using sourdough. It seemed to me that I would never master the process of making the sourdough itself. It seemed to me very labor-intensive and complex, I thought that I would be attached to this leaven because I constantly need to do something with it: feed it, warm it, cool it...
In fact, as my mother liked to say, the eyes are afraid, but the hands do. It’s a good saying, I use it very often in everyday life. And most importantly, she helps well.
So, where did I start preparing this very sourdough: by studying the Internet. I watched several videos and read a lot of recommendations on various sites. The process of preparing and maintaining the sourdough starter in “working condition” began to take shape in my head. And then I just started doing it.
The starter is prepared for three days; on the fourth, and in some cases already at the end of the third day, it can be used to make bread. I adopted a recipe for the so-called “eternal” sourdough. So the recipe itself:
Take 100 g of flour (I took 50 g each of premium white and rye flour) and 100 g of water (maybe a little less), stir thoroughly, but do not beat, until the consistency of thick sour cream is obtained. Cover with a towel or gauze and place in a warm place without drafts. Leave for a day until small bubbles appear, stir 2-3 times.
On the second day (i.e. a day has passed since the first mixing of flour and water), we feed the starter: add 100 g of flour and water to obtain the consistency of market sour cream. Cover again and put in a warm place for another day. My starter was in the kitchen cabinet with the door closed.
On the third day, the starter should already be bubbling, bubbling and growing. We feed her one more time and put her in the closet. If we want to bake bread on the third day, then we put it in good heat. For me it was a central heating radiator. Only I didn’t put it on the battery itself, but next to it. And we don’t go too far, we look periodically. When the starter doubles in size, this will be the peak of its activity; at this moment it is at its strongest. We divide it in half. We put one part in the dough, and feed the other again and after an hour, an hour and a half, put it in the refrigerator until next time.
When it’s time to bake bread again, we take the starter out of the refrigerator, feed it and put it in a warm place. As soon as the starter rises and doubles in volume, repeat the procedure.
Recipe for sourdough bread in a Panasonic SD-ZB 2502 bread machine
10 g (2 tsp) salt
1-2 tbsp. spoons of butter
We put everything in a bucket and select menu 08 - “French bread”. In exactly 6 hours, hot, fragrant, ruddy bread without fermented yeast is ready. We take it out of the bucket, let it cool for an hour or an hour and a half and enjoy eating delicious, healthy, crispy sourdough bread, prepared with our own hands.
The picture shows bread made from white flour with the addition of rye flakes, on the 3rd day after baking. When baking it went a little crazy.
Classic recipe
Classic (country) rye bread, usually prepared with sourdough. Previously, bakers kept the composition and method of preparing sourdough in the strictest confidence, but now many housewives willingly share their recipes and secrets of baking this flour product. Below is a simple recipe for classic rye bread for a bread machine, which is not inferior in color or taste to store-bought counterparts, and even surpasses them.
To bake delicious bread, you need to prepare:
- 200 ml of tea (one teaspoon of black loose leaf tea per glass of boiling water);
- 50 g milk powder;
- 50 g white crystalline sugar;
- 10 g salt;
- 5 g cocoa powder;
- 5 g instant coffee;
- 160 g rye flour;
- 185 g wheat flour;
- 60 g sourdough;
- 7 g dry yeast.
To taste homemade rye bread, you will not only need to work hard, but also wait 18 hours for the sourdough to mature and 3.5 hours for baking in a bread machine.
The nutritional value of the final product will be 165.0 kcal per 100 g.
Method for preparing rye bread in a bread machine:
- The first step is to prepare the starter by mixing 160 g of rye flour, 50 g of sugar and 14 g of yeast. Dilute the resulting mixture with warm water to form a thin dough like sour cream. It must be left in a large container in a warm place to ripen for the required time;
- When the starter is ready, you can start baking bread. Pour water into the loaf pan, then add salt, sugar, milk, coffee and cocoa. The last two ingredients may not be added, but they will give the finished baked goods a beautiful dark color;
- Next add rye flour mixed with wheat. Place starter and dry yeast on top of flour mixture;
- Bake using options with a shorter proofing period: “Rye bread”, “French bread”, “Gluten-free baked goods”.
How to bake sourdough bread in a bread machine
Hello at the university, fellow club members.
My information is about sourdough bread in bread baking.
I've been baking it for a year now. For this, I have developed a recipe that I want to share.
Back in the day, I specifically bought Opechka bread to stop eating store-bought bread. It must be said that even with thermophilic yeast, bread from Opechka bread is tastier than store-bought.
And when I correlated the information, I “remembered” that in the time of our grandmothers there was no trace of store-bought yeast, and “it caught fire” to bake sourdough bread. But all the recipes that we managed to find are designed for “manual” execution.
And for this I adapted the baked bread. To be honest, I ruined enough flour for this. Fortunately, my men were not picky about what they ate, they ate everything: the bread turned out delicious, but not very beautiful. Over the course of a year, a recipe was formed, which I gladly share.
Pour half a glass of warm water into a liter jar, plus flour until the consistency of thick sour cream. Close with a breathable lid (I cut several holes in a regular plastic lid). This mixture should stand in a warm place. I have it on my table.
After 2-3 days, bubbles appear, “a cap of foam on me”, there may even be a thin stripe of water. And the smell is sour. You need to mix the zak in aska, by the way, it has become more liquid, add it again warm in the wild in polo in inu less than in the can of zak in aska. And again flour until the consistency of thick sour cream. And again under the lid. Do this 3-4 times with inter in scarlet already in one day, and not after 2-3, as the first time. As usual, after 5 days zak in asuka goto in a. It will taste sour, but the consistency will be like liquid pancakes.
2. I bypass the dough stage. I realized through experience that only sourdough bread turns out slightly sour and flavorful. And if you use zak in aska, then make the dough, and only then the dough, then the bread turns out to be more sour.
So: I take the same amount per order for questions and odes. In my case, for one loaf of bread, 300 grams of zak in aski are used, 300 grams of warm in ode (or raw in atki), 600 grams in flour, salt. (I have kitchen ones in es) I set the program “kneading dough” . It lasts 1.5 hours. Knead for 20 minutes, then let the dough rise for a little over an hour. When the first kneading takes place, you need to make sure that the bun is mixed, not very hard, but also that the dough is not smeared over the bowl. If necessary, lightly add flour. After 1.5 hours the program ended. I love her one more time. And when the second 1.5 hours are over, I look at the dough. As is true, it is slightly smaller in size and suitable. Depending on the size of the kolobok, you can use the program only for baking (1 hour), but also in “time +” during proofing, for another 1.5-2 hours. In the window, displays at the same time show the numbers 2:50 or 3:00. Thus, the baking program is 2 hours 50 minutes. Of these, 1 hour 50 minutes the dough just stands, rises, rests, and 1 hour is baked. And that's it. Ear bread is delicious. The hassle is minimal (in the evening after work you have time to bubble it up, scroll through the “kneading” program every time, and bake it yourself at night).
The remaining zak in aska was divided into ay in wild and fed in ayu with flour so that the next day I would have to pour 300 grams of new bread, and there was still zak in aska in the jar. And so on ad infinitum.
By the way, there is already a mature zak in aska with a hole in the linen lid in the refrigerator, and not on the table. And it makes wonderful bread. Just before use, you need to remove it from the refrigerator and leave the jar on the table for about an hour, and then pour 300 grams into the bowl, add 300 grams of warm water......
And the last thing: I make zak in aska and bake it with grade 2 or at least grade 1 wheat flour. On flour of the highest grade, not sampled in ala. I add a filter to the bathroom.
Features of baking bread from rye flour in a bread machine
Since rye flour is almost completely gluten-free, baking bread from it has a number of features:
- for kneading dough, sourdough is most often used, which works better than yeast, although it increases the time required;
- the dough must be kneaded thoroughly and for a long time;
- even well-kneaded dough always remains sticky;
- To make the bread more porous, the dough should be runny.
Programs for baking such bread in bread machines have a number of features. They increase the dough kneading time, shorten the proofing period and lower the temperature at this stage (so that the dough does not over-acidify). But the baking time, on the contrary, is increased, since the dough made from rye flour takes longer to bake.
If the bread machine model does not have a special mode for baking such bread, then you can still bake it by choosing a more suitable mode that meets the required conditions.
Freshly baked bread should not be cut immediately. Even after it has been removed from the mold, it continues to cook, so you need to wrap it in a towel and let it cool completely.
Potato casserole with mushrooms recipe
is in the material on our website.
Recipes for pork shish kebab in the oven are in this article.
From here you can get recipes for chicken with potatoes cooked in pots.
Whole grain sourdough bread recipe
“Live” microorganisms are stored in the refrigerator indefinitely. The mass must be renewed, maintained, and “fed” with flour and water 1-2 times every 15 days. Knead the sourdough and leave the thick dough for 12 hours. Mix the dough based on the ripened dough. At first, the process seems complicated. You have to wait a long time for the leaven and dough to ripen. In fact, everything turns out to be elementary; preparation does not take much time. The dough kneads easily. Whole grain or wheat sourdough bread will require 3 to 5 days of preparation. Cooking time – 1-2 hours. Gray or gray-yellow whole grain flour is ground together with bran. It contains all the grain shells and germ, rich in useful substances. Premium and first grade wheat contains little fiber and minerals.
Ingredients for the recipe: “Whole grain bread with natural sourdough”
For baking homemade bread, “live” sourdough in an active state, whole grain flour and, if necessary, wheat flour are used. The dough rises quickly and kneads easily. Ingredients for the loaf (shape 30x11x6 cm):
- sourdough made with whole grain flour – 200 g;
- warm water – 433 g;
- whole grain flour 500 g;
- salt – 13 g;
- sugar – 11 g.
The composition can be changed to your taste, use any flour, add honey, molasses or muscovado sugar, dried fruits, herbs, nuts, bran, spices.
To prepare the starter you need:
- whole grain flour – 20 g;
- warm water – 20 g;
- rye starter – 15 g (will speed up the fermentation process up to 6 hours).
Feed the starter 2-5 times, taking into account the peculiarities of the process. The first time - 40 g of whole grain flour and water. Leave to “rest” for 6-8 hours. The second time - 60 g of flour and water. Leave the mixture for 4-5 hours. To knead the dough you will need 200 g of sourdough, 250 g of flour.
Sweet bread, charlotte, cupcake
Recipe for sweet bread in a bread machine
- 100 ml of milk (at least water);
- 3 eggs;
- 6 tablespoons of vegetable oil and the same amount of sugar;
- 450 grams of wheat flour;
- 2.5 teaspoons dry yeast;
- 0.5 teaspoon salt;
- a bag of vanilla sugar;
- apples, dried apricots, raisins.
Set the bread machine to the main mode, “Baking with raisins” program, medium crust level.
Recipe for sweet bread in a bread machine
Charlotte in a bread machine
- 5 eggs;
- 200 grams of granulated sugar and the same amount of flour;
- 5 grams of vanillin;
- 2 large apples.
Beat the eggs, add sugar and vanilla, beat with a mixer again. Add flour, stir. Next is a line of sliced apples. Mix the mixture and grease the bread maker bucket with oil. Set the “baking” mode, cooking time – 1.5-2 hours.
Charlotte in a bread machine
Cupcake in a bread machine simple recipe with photo
- 4 eggs;
- 100 ml milk, the same amount of sugar;
- 150 g butter (softened);
- 250 g flour;
- 1 teaspoon baking powder;
- 200 grams of raisins.
Let us describe the order of loading into bread machines, in which liquids come first. Beat eggs with sugar and pour into the bottom. Then – milk, soft butter, flour, baking powder. Add raisins after the appropriate signal. Set the baking program for yeast-free dough.
Cupcake in a bread machine simple recipe with photo
Whole grain sourdough bread in a bread machine
- Find and set the first stage of baking “heating”, set the timer - 30 minutes.
- Select the “kneading” mode, time – 30 minutes. The stove will alternate periods of intensive kneading with slow processing.
- “Fermentation” mode, set for 120 minutes, program the second rise for 140 minutes.
- Change the maximum “bake” time for the recipe. After pressing the “start” button, the bread maker will begin to perform all modes one by one.
Baking a product from whole grain dough using a bread machine is an excellent way to prepare “lazy” bread even in the absence of an oven.
Recipe for yeast-free sourdough bread
Leaven
The secret to delicious and healthy homemade bread is whole grain sourdough. Without it, baked goods will not “rise” and will not become airy. Bacteria will grow during the fermentation process. Microorganisms will process the flour and help the body absorb it easily. You can make the starter once from whole grain flour and water, keep it in the refrigerator, and update it from time to time.
In a bowl, mix whole grain flour (50-70 g) with warm water (55-75 ml) until the consistency of thin sour cream is uniform. Use boiled water, standing for 24 hours. You can add a tablespoon of honey. Cover the prepared mixture with a towel and place in a dark place for 24 hours.
The starter matures at a temperature of 20-22°C. If it’s hot at home, you need to put the jar in a container with room water. Maintaining an optimal temperature is important so that the mixture “ripens” without souring. The starter needs to be “fed” every day. To do this, prepare the same amount of whole grain flour and water, mix and put in a bowl. After a day, large bubbles and a sour smell will appear.
It is important to thoroughly mix the mixture until smooth after each feeding. The bacteria will mature in 3 to 5 days depending on conditions. Readiness can be easily determined by numerous small bubbles and a sharp vinegar smell. When stirred, small bubbles burst with a bang. The consistency is soft and viscous. On day 5, the whole grain starter will double in size after daily fertilizing. The ripened mixture is stored in a cool place under gauze.
Useful tips or “why bread cracks when baked in a bread machine”
My advice may seem simple, but this is what I personally encountered and how I subsequently managed to cope. In the photo below you can see that the top of the bread is cracked, this sometimes happens to me, although I have been baking for a long time.
The main reason why the crust cracks after baking bread is that our bread sat in the bread maker while it was rising, sometimes I add a tablespoon of sugar for rich bread, and I forget that I need to reduce the time before baking - I may repeat “sugar promotes rapid rise.”
What to do:
- This is your first time baking - check it often, especially after two hours of rising
- if you looked at it, the simplest thing is to increase the baking time and do not close the lid of the bread machine for the first ten minutes, that is, if the main time is 1 hour 10 minutes + 10 minutes for the open lid, a total of 1 hour 20 minutes
Opara
The dough begins to ferment after enrichment with sourdough or yeast. Leavened dough is called dough. You can add the fermented mixture in any volume. As a result, the dough should rise and fall. The process will go faster if there is a lot of mixture with bacteria (ferment), or slower if there is a little. During this time, microorganisms will process whole grain flour, multiply, and help produce fluffy bread when baking.
Dough left overnight usually ripens by morning. It must be prepared step by step.
- Remove the fermented mixture from the refrigerator and place it on the bottom of the bowl. Revive with warm water (up to 40°C), doubling the quantity. One large loaf usually requires 2 cups (500 ml) of mature active starter.
- In a large bowl, whisk together whole wheat flour, salt, and spices to taste, leaving a well. Pour in the liquid starter and stir until the sticky mixture is smooth and free of lumps.
- Leave the thick mixture in a warm place for 12 hours. It will grow 2-2.5 times and fall to its original state. You can open and press the dough with a kitchen tool.
- Set aside 4-5 tbsp from the finished dough. spoon into a jar (this will be a new starter), put it in the refrigerator. Cover with a lid with holes or a cloth to allow the mixture to “breathe.” She will need weekly feeding. Take half of the starter onto a new dough, add whole grain flour and water to the rest.
Dough
Prepare a work surface, place the lump on the flour and knead by hand. The edges of the layer must be pressed towards the middle, and the mass must be turned over from time to time. The longer the whole process takes, the better the bread will be.
Knead a lump of dough until it forms a smooth, non-sticky ball. Grease a container with oil (it is better to take a mold, not a baking sheet), lightly sprinkle with flour. Leave the bun covered with gauze for 2-5 hours. The dough will continue to ferment at 20-22°C.
Food of life
The first sourdough bread in Rus' was considered a symbol of prosperity. Sourdough was a wedding gift to the newlyweds from their parents. If she died without feeding from a bad owner, this was an alarming sign. Modern yeast is much more practical and does not require control or attention. But they bring negligible benefits to our health, and in some cases, harm. This question is very important. Bread made from wallpaper flour may contain shortening, raising agents, stabilizers, hydrogenated oils and other additives. Using butter and margarine increases nutritional value.
Naturally leavened baked goods have excellent taste, an alluring rich aroma, and are stored longer without loss of quality. The result is a baked product with a dense texture that is pleasant to chew. Sourdough is much healthier for health than ready-made yeast.
- Baking retains more vitamins and minerals.
- Whole grain flour with “live” sourdough is easier to digest and improves the functioning of the digestive system.
- Homemade bread is high in calories, filling, strengthens the immune system, and if consumed modestly, is useful for people losing weight.
Whole grain baked goods are often prepared for holidays. You can get creative with the shape, composition, add nuts, sesame seeds, dried fruits, flax and other ingredients.
Video recipe
The process of making bread in a bread machine is intuitively simple and understandable, but if you still have questions and doubts about any matter, try to figure them out with the help of a video recipe. In it, the author will analyze the proportions of ingredients and the very principle of making such bread.
- Author: Maria Sukhorukikh
Rate this article:
- 5
- 4
- 3
- 2
- 1
(0 votes, average: 0 out of 5)
Share with your friends!
Homemade bread with natural sourdough
Natural yeast works great. After 3-5 days, the whole grain sourdough foams and its sour smell intensifies. Homemade bread is easy to prepare and does not require the addition of yeast or fermented milk products. It is advisable for the dough to rise for about 1-3 hours at a temperature of 27-45°C inside the bread machine. An oven is also used for proofing. It does not always have an optimal temperature regime.
Whole grain sourdough bread is kept in the oven with a small amount of warm water. Place a cup of water under the bread pan. The duration of proofing depends on the home temperature. First, the oven is heated to 230°C. Place the mold with the dough when the oven has cooled to the desired temperature.
