Baking is a universal dish that can be prepared from absolutely any dough. It can be open and closed, sweet and savory, thin or thick dough, crispy and tender, cooked in a slow cooker, on a baking sheet or in a special form in the oven. In general, baking is an amazing variety of delicacies that are sometimes even difficult to refuse. It saturates well, is very nutritious and high in calories.
But what exactly can you cook by baking? Today we invite you to study recipes for pies in silicone molds. Let's look at how to prepare them and why we will use silicone.
Before first use
There are a few things you need to do before using silicone baking pans for the first time. First, wash the molds thoroughly. There may be dust and dirt on them that you don't need. Then dry the silicone mold so that there is no moisture left on it after washing. The next step is to oil it. The entire internal surface must be lubricated. This will improve the non-stick properties of the silicone. Rub all corners and edges evenly; excess oil can be drained or wiped off; you don’t need a lot of it. Leave the silicone mold to allow the oil to absorb and dry a little. All! Preparations for first use are complete!
How to use a silicone mold when baking
If you have completed all the preparatory steps before first use, then silicone molds no longer need to be lubricated with oil or grease. They are ready for baking. If you plan to bake a large cake or pie, you can lightly moisten the pan with plain water.
Before pouring the dough, place the pan on a metal baking sheet or wire rack. The silicone mold is flexible, so once the dough is poured it will be difficult to move without a supporting metal tray. Baked goods can be placed in a cold or heated oven, as required by the recipe of your dish. Monitor the temperature. Silicone is afraid of too high temperatures and open fire. The mold may melt, use carefully. Read the packaging of your product for details.
Should know
, that in most cases, baked goods in a silicone mold will cook a little faster than in steel molds. Don't forget to check for doneness!
Warning!
Silicone is easy to cut or puncture. Do not use knives and forks with the pan. It is better to take wooden, plastic or silicone spatulas.
After preparing the mold and baked goods, you need to allow time to cool slightly so that the finished baked goods come out of the mold more easily and do not fall apart. For a small silicone mold, five minutes is enough. If everything is done correctly, the baked goods will hardly stick to the walls and will slide out without any problems. You can try bending the edges of the pan a little to make sure that the baked goods do not stick.
Silicone molds can be used in both electric and gas ovens. View images related to silicone baking molds how to put in the oven. The price difference is small, but with such a stand it is very convenient to pour the dough into the mold, put it in the oven; it has handles and remove the finished baked goods from the oven. The mold can be used for cooking in microwave, oven like
Typically, silicone baking molds can withstand heating up to 230C and cooling up to 40C. After the molds are dry, you can start baking the dessert. How to cook ciabatta Lenten dishes from 1001 FOOD. Will the shape burn or become deformed? How to properly place a silicone mold in the oven? Buy Oleg Ko's book
You shouldn’t do this for every silicone dish; you need a mandatory stand, a similar form made of glass or ceramics, or. Since the shape is not afraid of freezing, please your loved ones with an ice cream cake, layer the ice cream with berries, chocolate chips, and sponge cake. Which oven is better to put a silicone mold with dough in? Now, this problem has become solvable, since silicone molds for Viennese waffles are sold everywhere, which can and even should be cooked in the oven. Unlike metal or glass utensils, silicone molds can be used in the oven, microwave and convection oven
One of the important things to consider when using a silicone mold is to place it carefully in the oven. The main advantage of silicone molds is flexibility and elasticity. The form can be used for cooking in a microwave oven, both gas and electric ovens, but without using the grill mode View full version. What types of ovens can I use silicone baking pans in? You should know that in most cases, baking in a silicone mold will cook a little faster than in steel molds
Place a baking sheet with silicone molds in the oven. As soon as the time comes to bake something, a mountain of molds, molds and jars first falls out of the oven, which piles up on the table while the oven is busy. Baked goods can be placed in a cold or heated oven, as required by the recipe of your dish. At least the one I had ten years ago was steaming like crazy!
Baking is a universal dish that can be prepared from absolutely any dough. It can be open and closed, sweet and savory, thin or thick dough, crispy and tender, cooked in a slow cooker, on a baking sheet or in a special form in the oven. In general, baking is an amazing variety of delicacies that are sometimes even difficult to refuse. It saturates well, is very nutritious and high in calories.
But what exactly can you cook by baking? Today we invite you to study recipes for pies in silicone molds. Let's look at how to prepare them and why we will use silicone.
Advantages of silicone mold
Why silicone and not something else? What is his secret? There are at least 5 reasons to bake using silicone molds:
- Due to their appearance, silicone molds allow housewives to bake not only a regular sponge cake in the shape of a heart, but also make jelly and yogurt cakes in the shape of a rosebud, a kitten’s face or a bear. With this you can surprise children or guests at the holiday.
- The silicone mat also greatly simplifies the housewives’ work. You can use it to bake a wonderful biscuit roll. At the same time, you don’t have to suffer and wonder how to roll the biscuit so that it doesn’t crumble or break at all.
- The convenience of the molds makes it easy and quick to take out baked goods. You won’t have to spend a long time and painfully separating it using a knife, fork and other kitchen utensils. You no longer need to worry whether you will spoil the dessert at the stage when it is already ready, or whether you will be able to remove it from the mold without damage.
- You no longer have to scrape the burnt remains of the cake or rub the bottom with a steel wool to wash the pan. If you lubricate it with oil, you will, without a doubt, be able to successfully both remove the baked goods and wash the mold after work. By the way, you don’t need to lubricate it constantly. You only need to do this when you bake in a new pan for the first time.
- Don't worry about the silicone melting in the oven. It withstands high and low temperatures well, is heat-resistant and strong - nothing will happen to the shape if there is a strong impact. The only thing you should not do is put the mold on an open fire.
So, we found out what is good about a silicone baking dish and why experienced housewives love it so much. We hope that these 5 arguments sounded very convincing.
Now let's move directly to the recipes for pies in silicone form.
Feedback on results after use
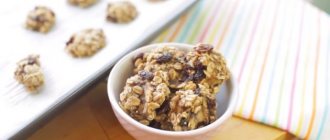
Galina, 32 years old, Saratov: My mother really loves baking. Yesterday she boasted of a new acquisition - various silicone molds. She has already updated one and baked cookies in the shape of a soccer ball, which did not stick anywhere, did not break, and turned out very smooth and beautiful. An excellent purchase that stores very compactly.
Elena, 19 years old, Moscow: Living in a student dormitory, I learned a lot, including how to bake delicious desserts. My friends and I saw interesting silicone molds in the store. We tried to make a biscuit - the process happens very quickly, it takes less time than in other dishes. A neighbor brought new molds in the form of masks, we’ll make cookies for Halloween and surprise everyone.
Svetlana Petrovna, 59 years old, Klin: I am an experienced housewife. The children gave me a set of soft silicone baking molds, I treated them with distrust. The daughter-in-law told how to choose, use, how to clean. Together with her we started baking charlotte according to a recipe from Yulia Vysotskaya. It turned out that the forms are easy to remove, wash well, and take up almost no space in the cabinet.
Open pie with cottage cheese
Let's look at the recipe for a pie in a silicone mold; you can find a photo of this dish a little lower.
What do we need:
- a stick of butter;
- a glass of granulated sugar;
- 2 chicken eggs;
- a glass of flour;
- 2 tsp. baking powder;
- 200 grams of cottage cheese;
- 2 tbsp. l. sour cream;
- cinnamon.
Preparing the pie:
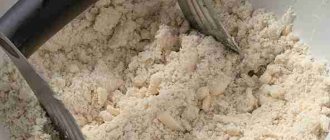
- In a bowl, beat eggs with 2/3 cup sugar with a mixer. Now you need to melt the butter in the microwave (be careful not to boil) and add it to the egg-sugar mixture in a stream, continuing to stir.
- Combine flour with baking powder and gradually pour into the dough. Now mix until it becomes homogeneous.
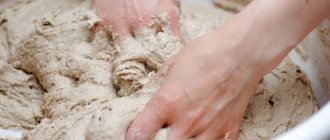
- Forming the dough. If it's still sticky, add a little more flour. It should turn out to be very plastic, like soft plasticine.
- Now we distribute our dough according to the form. We form the sides.
- Prepare the curd filling: beat the cottage cheese with 1/3 cup of sugar and cinnamon. Add sour cream and stir until smooth.
- We pour our filling into the dough. Now you need to level it.
- Place in the oven for half an hour, setting it to 180 degrees.
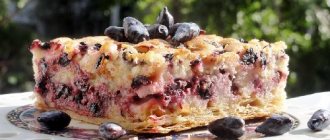
The pie turns out incredibly tasty. A good option for those who do not consume cottage cheese in its pure form. It is especially suitable for children, since not everyone likes fresh cottage cheese, but when baked it turns out surprisingly tender and airy.
Apple pie with cinnamon
Even a novice housewife or child can make this simple cake in a silicone mold. If you're just learning how to work with dough, this dish can help you get closer to perfection.
Ingredients:
- 4 medium apples;
- 30 grams of butter;
- a tablespoon of semolina;
- a glass of flour;
- a glass of granulated sugar;
- 3 egg whites;
- vanillin and cinnamon.
Cooking method:
- Grease the silicone mold with melted butter (you can do this in the microwave). Sprinkle the bottom with semolina.
- Rinse apples under running water, remove seeds and stems, cut into slices. Place on the bottom of the mold.
- Prepare the dough: beat the whites with a whisk or mixer until foam forms. Then add sugar and beat until it dissolves in the whites.
- Add sifted flour to the whites (introduce it into the dough gradually, stirring at the same time), vanillin and cinnamon. Mix the dough.
- Pour the batter onto the layer of apples. Sprinkle with cinnamon again.
- at 180 degrees for about an hour.
Probably every housewife is obliged to prepare this pie during the summer fruit season. Apples are very refreshing and give baked goods a sweet and sour taste. Cinnamon adds a spicy kick to the dish. Brighten up your evening by treating your family, friends and neighbors to an amazingly delicious pie.
and greens
Who said that pies should only be sweet? Many men, for example, do not have a sweet tooth at all. For them we will prepare a savory meat pie in a silicone mold in the oven. The kefir dough will turn out airy and very tender, and the filling will make the baked goods juicy and aromatic. Let's move directly to the recipe:
What will you need?
- half a kilo of ground beef;
- 1 onion;
- 1 tbsp. l. semolina;
- a glass of kefir;
- a glass of wheat flour;
- a bunch of greenery;
- 1/2 tsp. soda;
- 1/2 tsp. salt;
- pepper.
Step-by-step preparation of the pie:
- Pour kefir into a bowl and add soda (quench with vinegar). Leave for five minutes.
- Finely chop the onion and herbs and mix with the ground beef. Now you need to add salt and pepper. To prevent the minced meat from being too thick, you can add a little ice water.
- Gradually introduce the sifted flour into the kefir dough, while stirring with a fork or whisk. The dough will be a little thicker than liquid sour cream.
- We sprinkle the silicone mold with semolina. Pour 1/2 of our batter onto it. Then lay out the minced meat filling and pour in the second half of the kefir dough.
- Bake for about forty minutes in the oven at 180 degrees.
Serve with tea or coffee as a main course. You can also prepare an additional light vegetable salad.
Cooking will not take much of your time and effort. To implement the recipe you will need a minimum amount of ingredients. An ideal option if guests are already on their way and you have nothing to feed them.
Ingredients:
- 400 g very ripe bananas;
- 100 g margarine;
- 130 g sugar;
- 2 eggs;
- 1 tsp. slaked soda;
- 250 g wheat flour;
- 50 g chopped walnuts.
[ads-pc-3]
Muffins with banana and nuts: step-by-step preparation
- 1. In a large bowl, cream margarine and sugar.
- 2. Add eggs and beat.
- 3. Peel the bananas, mash the pulp with a fork until it becomes a paste. Then add them to the bowl and mix well.
- 4. Add slaked soda and flour. Knead a soft dough.
- 5. Place the batter into the muffin tins. Place in an oven preheated to 180 degrees. Bake for 15–20 minutes.
Lifehacks for using silicone molds
A few secrets for housewives who love to bake:
- The pan has thin walls, so the baked goods require much less cooking time. Be sure to make sure the dish doesn't burn.
- Use silicone molds only if you bake in an oven preheated no higher than 250 degrees. If the temperature is higher, you will have to put these forms aside.
- Use silicone molds for more than just baking. They are great for freezing as they can easily withstand temperature changes.
Place the silicone mold in a hot oven. Silicone molds for the oven
Baking is a very important point in using the oven. Cupcakes, jellied pies, a variety of baked sweets - all these are the main attributes of housewives. And, which is typical, in order for the baked goods to turn out beautiful and neat, you need to use special forms. Molds come from different materials - disposable foil, glass, metal, silicone and ceramic.
But using foil molds is not very economical, and they are only suitable for baking when there is nothing else at hand. Glass and metal are durable, but difficult to clean. Taking baked goods out of them is such a hassle. So they were replaced by convenient silicone molds.
Basically, such forms are needed for housewives who are interested in cooking. Various cakes, cookies, muffins, pies, etc. are prepared constantly and they require convenient forms. But in general, if you think about it logically, there is no house in which such forms would be superfluous. They can be used at least once a year, yes. Silicone molds in cooking – even the most basic, household ones, are a very useful and practical thing.
But not only do you need to have such utensils, you also need to be able to use:
- The temperature range in which they can be used is from -40 to 240 °C. If the temperature is higher, you can damage them.
- Before you start using it, you need to wash it.
- Do not place them on an open fire or very close to the fire - it is still silicone, it melts. You shouldn’t push it against the walls either.
- Remember that they are soft, which means moving them from place to place when they are already full will be very difficult. Fill them immediately onto the baking sheet.
- There is no need to grease silicone molds. But it won't hurt.
- The silicone mold also needs to be washed well, preferably with a mild detergent.
- It is better to remove the baked goods after they have been in the pan for 5 minutes or more.
- You can use silicone molds not only for dough, but also for other products, the main thing is not to exceed the temperature.
- Try to choose shapes without “carvings” on the walls or patterns. Otherwise, you will fuss with them twice as much - when you take out all this beauty, and when you wash out the remains from the decorative carving.
Are silicone molds harmful to health?
Some housewives are still afraid to use silicone utensils, but in vain, because they are very convenient and practical to use. In order to confirm or dispel some myths about whether silicone molds are safe, we suggest taking a closer look at the properties of the material from which such products are made.
- Upon careful inspection, make sure that the form, although flexible, is elastic, then it will not “float” when the temperature changes.
- A pungent odor and very bright color of the product indicate low-quality raw materials that should not be used for contact with food.
- Choose silicone utensils that are neutral in color, such as medical grade silicone. It does not oxidize when interacting with foods, does not react with food acids, does not emit toxic substances when heated, and therefore does not harm human health.
- If the molds are made without any violations of technological processes, all rules are followed, and only high-quality materials are used as raw materials, you don’t have to worry about your health.
- Choose products from well-known manufacturers TVS, Ballarini, Tescoma, Vinzer, Moneta, Ikea, Lurch, who guarantee and confirm with quality certificates that their products are safe.
Silicone molds for the oven: advantages and features of use
Silicone molds for baking and freezing foods have appeared relatively recently. Of all the utensils that exist for these purposes, they are the most recent and interesting innovation. Before this, housewives used only glass, ceramic and metal utensils in the kitchen with greater or less success. At the intersection of modern science and past culinary experience, a new silicone cookware has been developed for use in ovens.
Attention! We recommend purchasing silicone molds only from well-known manufacturers. Companies with a good reputation value it and do not produce dishes from toxic materials painted with poisonous dyes.
Types of silicone molds
Silicone baking molds come in different shapes and sizes: round, oval, square, cup, heart, crescent. Some are suitable for baking small muffin cupcakes, then one general form can contain from 4 to 12 cells. Larger pies, hot dog buns, breads, waffles and muffins are baked in individual pans that may have smooth or ridged sides. For baked goods that will be intended for children, shapes in the form of animals and flowers are provided. Among all children's forms, Barney Bear and Baby Dragon are very popular.
What types exist
Large molds are suitable for baking Easter cakes, cakes, muffins and loaves; smaller ones for cookies, cakes and puddings.
Rectangular
In such containers it is convenient to bake pies, make chocolate and candies. The size of the product depends on the purpose. For pies, use a mold with one cell, for sweets - several small ones. Rectangular silicone containers easily roll into a tube, so they take up little space in the kitchen.
Round
A traditional option for baking cakes and muffins. There are solid round or shapes with a ring inside. In such dishes you get lush and beautiful cupcakes. The main thing is to place this form on a baking sheet with high walls before baking. Otherwise, the dough will spill over the boundaries of the container.
With lid
Not only sweet desserts are baked in containers with a lid. Vegetable casseroles, side dishes and meat dishes are prepared in such dishes. The silicone lid fits tightly, protects food from dust, does not absorb odors, and allows you to cook without adding vegetable oil. These silicone containers are convenient for storing baked dishes and desserts in the refrigerator.
How to properly use silicone baking pans
In order for silicone baking dishes to serve you for a long time and be reliable assistants in the kitchen, you need to follow a few simple but mandatory rules for caring for such specific utensils. Step-by-step recommendations on how to clean and store the molds will help you obtain the necessary information that will be useful so that you can use simple and convenient utensils at the right time.
What to do before first use
After purchasing a new silicone mold, be sure to wash it under running water using detergents: it is necessary to wash off any possible dust. Dry completely so that not a drop of moisture remains. Lubricate the entire surface with vegetable oil and leave for a while so that it is absorbed in the right amount.
Do I need to grease the pan before baking?
When the first stage before use has completely passed, then in the future you no longer need to think about how to lubricate the mold; there is no need for this. When you plan to bake a large pie, you can lightly moisten the pan with water.
Do not allow the mold to come into contact with open fire, as this may cause it to melt. Too high temperatures are also contraindicated; the optimal temperature is from 180 to 210 degrees, which often corresponds to the recipe for a culinary product. Sometimes the mold itself indicates the temperature of use - up to 260 degrees.
How to remove baked goods
After the baking process is completed, the pan should be carefully removed from the oven and allowed to cool slightly for 5-7 minutes. The edges come off easily if you peel them off a little by hand. By turning the pan over or tilting it to one side, remove the baked goods without problems or breaks. Do not use cutting or sharp objects that could damage or puncture the mold. The best helpers will be wooden, plastic, and silicone spatulas.
How to clean after baking
After finishing baking, wash the pan immediately or immerse it in water for a while. Residues of dough can be easily removed from the smooth surface of the silicone (with a sponge and detergent).
How to properly store silicone molds
More convenient to store dishes have not yet been invented. Silicone products are easily folded, placed inside each other, when unfolded they immediately take their original shape, and are not afraid of temperature changes.
How to remove baked goods
After cooking, you need to let the baked goods stand for 5-10 minutes to cool. Thanks to this, the dish will come out of the mold easier and will not spread. To remove it, just peel back the walls and transfer the prepared pastries onto a plate, to do this you just need to slightly tilt the pan to one side. If difficulties arise, you can use a wooden or plastic spatula.
It wouldn’t hurt to find out how to get jelly or other desserts. To do this, heat a small amount of water to +40°C and lower the molds there for a few seconds so that the water does not touch the main dish. All you have to do is turn it over - the jelly will slide off into the plate on its own.
What to cook in silicone molds - recipes with photos
Cooking in silicone molds is a real pleasure. Such dishes are useful for both the oven and the microwave with a multicooker. Original forms of dishes (cup and saucer, fruit-shaped) add variety to kitchen life. Prepare delicious baked goods with your own hands in convenient silicone containers according to our recipes, which we have selected especially for you.
In the oven
Recipe No. 1 – Chocolate muffins
Ingredients:
- Flour.
- Cocoa powder.
- Baking powder.
- Butter.
- Sugar.
- Eggs.
- Vanilla sugar.
- Kefir.
Preparation:
- Mix the dry ingredients - 100 grams of cocoa, 250 grams of wheat flour, 1 teaspoon of baking powder, salt and soda, half a teaspoon of vanilla sugar.
- In a separate bowl, melt 100 grams of butter, add 250 grams of sugar, 2 eggs and 200 grams of kefir.
- After mixing all the products, add 200 grams of chocolate and mix again.
- Pour the dough into the prepared silicone molds and bake for 25 minutes in the oven, which is heated to 200 degrees.
Recipe No. 2 – Marble Cake
Ingredients:
- Flour.
- Butter.
- Sugar.
- Milk.
- Eggs.
- Baking powder.
- Cocoa.
Preparation:
- Soften 250 grams of butter and beat well with 1 cup of sugar and vanilla.
- Gradually add 4 eggs and half a glass of warm milk.
- Add one packet of baking powder and 2.5 cups of flour and mix well.
- Divide the dough into two parts, add three tablespoons of cocoa to one.
- Place the liquid white and chocolate dough alternately into the silicone mold, 1 spoon at a time, without mixing.
- Place in the oven when the temperature reaches 200 degrees. Baking lasts 40-45 minutes.
In the microwave
Recipe No. 1 – Cupcake “Curd Tale”
Ingredients:
- Semolina.
- Cottage cheese.
- Sugar.
- Sour cream.
- Eggs.
- Soda.
- Flavored alcohol.
Preparation:
- Mix 200 grams of cottage cheese and semolina and leave for 10-15 minutes for the cereal to swell.
- Add 2 eggs and 2-3 tablespoons of sour cream to the resulting mass. Stir thoroughly, whisking, add 80 grams of sugar.
- Separately mix half a spoon of soda and one tablespoon of alcohol, add everything to the dough. Beat with a mixer at high speed.
- Fill silicone molds a little more than half the volume. Small muffins will be ready in 4-5 minutes, large muffins will take 8-12 minutes.
Recipe No. 2 – Five Minute Cake
Ingredients:
- Flour.
- Starch.
- Egg.
- Vegetable oil.
- Sugar.
- Baking powder.
- Milk.
- Cocoa.
- Sour cream 10%
- Powdered sugar.
Preparation:
- Beat one egg with four tablespoons of sugar, add two tablespoons of cocoa. Add a mixture of flour (4 spoons), baking powder (0.5 teaspoon) and starch (1 spoon), stirring.
- Pour in 5 tablespoons of milk and 3 tablespoons of butter.
- Bake at maximum power of 1000 W for 3-5 minutes.
- Grease with sour cream and powdered sugar.
In a slow cooker
Recipe No. 1 – Cupcake with jam
Ingredients:
- Sugar.
- Sour cream.
- Baking powder.
- Sour cream.
- Eggs.
- Butter.
- Flour.
- Jam or preserves.
Preparation:
- Mix fat sour cream (25-30%, 200 grams) with one chicken egg and two tablespoons of sugar.
- Add 50 grams of softened butter to the mixture. Beating with a mixer will make the cake more tender.
- Mix one teaspoon of baking powder and a glass of flour. Mix with liquid mixture.
- Select the desired silicone mold so that it fits into the multicooker, fill it with half the dough.
- Place jam or marmalade on top, then the remaining dough.
- “Baking” mode, after 1 hour the cake with jam is ready.
Recipe No. 2 – Cottage cheese casserole
Ingredients:
- Cottage cheese.
- Sugar.
- Eggs.
- Vanillin.
- Starch.
- Citrus zest, nuts.
- Milk.
Preparation:
- Beat the whites of two eggs into a thick foam.
- Mix 600 grams of cottage cheese, 100 grams of sugar, 250 ml of milk, two chicken yolks, 50 grams of starch and half a bag of vanilla sugar.
- Add chopped nuts and candied fruits to the mixture.
- Stirring carefully, add the whites.
- Set the “Baking” mode for 50 minutes.
Where to buy and how much does silicone baking utensils cost?
Having received so much useful and necessary information about silicone molds, you will definitely want to purchase them if you have not done so before. You can find approximate prices and commonly used brands in the tables below. Purchasing to order with delivery through the online store will save your time on purchasing useful modern kitchenware.
Silicone baking molds allow you to prepare desserts without using oil. Silicone is highly resistant to temperatures up to +240 degrees.
The dense structure of the material can withstand about 2000 baking sessions.
Many people think that such forms are harmful to health, but this is not so. When used correctly, silicone does not release any harmful substances into food.
Is silicone harmful for baking?
For housewives, it is important not only that the dish turns out tasty and beautiful, but also that it is healthy. It is believed that silicone molds contain a lot of dyes and chemicals, which, when exposed to high temperatures, penetrate into food and cause a negative reaction in the body. This is indeed possible in the following cases:
- when preparing a dish in a container made of cheap material, for example, “technical” silicone;
- in case of non-compliance with temperature conditions.
Only those utensils that are made from “medical” or “food grade” silicone are safe for the body. Even with strong heating, it does not release harmful substances into the environment. Therefore, you can safely prepare dishes for the whole family in it, without fear of harmful effects.
Types of silicone baking molds
The main difference between silicone molds and each other is their purpose.
For cupcakes
When baking cupcakes, it is better to pay attention to small sets of identical containers (usually there are 6 of them in a set); a mold that is a single canvas is also a good option: you can use it to make several lush desserts at once.
The main advantage of molds located on one sheet is that all baked goods will be cooked at the same temperature.
A wide range of volumes allows you to choose the best option for each family member. So, for children it is better to choose small molds, and for adults - larger ones.
For large baked goods
For large cakes, use long rectangular or round pans with a hole in the middle. This will reduce the thickness of the cake for easier cooking, or help it bake through the middle.
Containers in the form of flowers, objects, animals, and fruits are of great interest. Also interesting are detachable silicone molds. They are usually made with a ceramic bottom to make it easier to remove the finished dessert from the mold.
Other silicone accessories
Rug
Such accessories are very convenient at several stages of dessert preparation.
For kneading dough.
Silicone mats help you knead the dough without it sticking to the counter. Here you will only need flour to prevent the dough from sticking to your hands. The main advantage of many mats is the markings applied to their surface for even rolling out layers of dough. There are mats with a voluminous texture that help the housewife create an interesting pattern on the surface of the cake.
For baking.
You can also use silicone mats in the oven. To do this, the accessory should be placed on a baking sheet, and the future dessert should be placed on it. This mat does not require oiling before baking. This use is due to the fact that silicone mats are much easier to clean than baking trays.
How to choose and care.
All you need to care for this item is that you just need to clean it after use with running water, detergent and a soft sponge.
When purchasing a rug, you need to pay attention to several factors:
- It is better not to choose cheap products for purchase, as they can be harmful to human health.
- To make the dessert bake faster and better, you need a mat with a thickness of up to 4 millimeters.
- After purchasing, you need to keep the mat in the oven for 2 hours at a temperature of 240 degrees.
Siliconized paper
Thanks to the use of siliconized paper, baked goods do not burn. Unlike parchment, it does not stick to the dessert. Another advantage of this accessory is its 100% natural composition.
This paper can withstand up to 6 uses in the oven.
The sheets allow you to roll out the dough to a uniform thickness. It is convenient to move the prepared pie into the oven on such paper, since you can bake it directly on the sheet. This will also prevent the pans from getting dirty.
Cooking in silicone
Now let’s look at the cooking process in this newfangled mold step by step. Let's make a reservation right away: the process is very similar to cooking in metal or ceramic dishes. So, if you have basic baking skills, you will fully master this wisdom. And the variety of shapes will allow you to create a real masterpiece, so you don’t even have to rack your brains over the question: how to decorate the finished dessert?
Such dishes can be stored in a kitchen cabinet; they do not require special storage conditions and do not take up much space on the shelf.
- Before cooking, wipe down the pan and dry it with a paper towel. The peculiarity of silicone is that it literally attracts dust.
- Be sure to read the information from the manufacturer of the mold (usually they are indicated on the packaging); it usually indicates under what conditions this item can be used and where exactly.
- The thermal conductivity of silicone is much higher than that of metal or ceramics, which means that the first time, carefully determine the time required for baking, so as not to overcook the dish. Experienced housewives claim that cooking time is reduced to 15-20%.
- Cool before removing. This will take very little time.
Terms of use
There are several tips that will help reveal the functionality of the silicone mold, as well as its safety during cooking.
- The prepared dough must be poured into a mold that is placed on a baking sheet, otherwise the dough may leak out, since silicone is a flexible material.
- Containers made from this material can be used not only in the oven, but also in the freezer. This is due to the fact that silicone can withstand temperatures from -40 to +240 degrees.
- When first used, you need to lubricate the mold with oil, and further processing is optional. Before each use, the mold must be washed with liquid dishwashing detergent. For the first time, the container must be rinsed well and also doused with boiling water.
- The cooking time for desserts using silicone containers is no different from cooking in ceramic, glass or metal containers. But only the top is browned, and the walls and bottom of the baked goods have a fairly moist structure.
- After cooking, the baked goods should be removed from the oven and left in the pan for about 7 minutes. If the dessert sticks, you need to turn the edges of the mold in the opposite direction and use a spatula to separate the prepared cake from it. Do not use metal cutlery, as they may pierce the product.
- Baking dishes can also be used to prepare main courses in the oven. But for this you should give preference to larger containers. The optimal solution for such a dish would be a round mold approximately 25–30 centimeters in diameter.
- With all the abundance of different designs, it is better to choose a minimum of carvings and small details on the form, so that in the future there will be no problems with removing baked goods. It is also worth considering that small parts on the mold are very difficult to wash after cooking.
- To wash dried dough, you need to soak a silicone container for 10 minutes in water at a cool temperature. After this, the water is poured out, and the mold is turned inside out and wiped with a soft sponge.
- For easy storage, all oven accessories can be folded so that they do not take up much space. They quickly take their original shape when straightened, are not subject to deformation and do not wrinkle.
- You can use the molds in the microwave only if it is completely dry. It is also worth considering that the edges of the container should not come into contact with the walls of this household appliance.
Baking pans are mainly used for making cupcakes. There are many recipes for this dessert, which is baked using silicone molds.
Cupcake Recipes
Classic muffins
What you will need:
- 3 chicken eggs;
- 190 grams of granulated sugar;
- half-faceted glass 15% sour cream;
- three quarters of a package of butter;
- a little baking powder;
- faceted glass of flour;
- a couple of handfuls of raisins.
How to cook:
- The flour is sifted.
- Raisins are washed and dried with a towel.
- The oil is heated in a water bath.
- Eggs are beaten with sour cream and granulated sugar, and then butter is poured into this mixture.
- Flour mixed with baking powder is poured into the egg liquid.
- The dough is carefully kneaded, and then raisins are added to it.
- If silicone molds are used for the first time, they need to be greased.
- The containers are filled with dough to two-thirds of the volume.
- The cupcakes are baked in the oven at 180 degrees for about half an hour.
Yeast muffins
What you will need:
- 3 full faceted glasses of flour;
- two-thirds of a package of butter;
- half a glass of milk;
- packaging of dry yeast;
- a little salt;
- half a glass of raisins;
- a couple of handfuls of candied fruits;
- 5 eggs;
- a little vanilla.
How to cook:
- The raisins are washed and steamed with boiling water for several minutes.
- The milk is heated and then yeast is added to it.
- The butter is melted in a water bath.
- Flour is mixed with sugar and baking powder.
- Milk and butter are poured into the flour. The entire mixture is thoroughly mixed until a homogeneous consistency is obtained.
- Pre-beaten eggs are poured into the mixture, vanilla is added.
- Dried fruits are added to the dough.
- Silicone molds are filled two-thirds with prepared dough. The top of future cupcakes is greased with oil.
- They are baked for 45 minutes in the oven.
The surface of the cupcakes can be decorated with chocolate chips.
Cottage cheese muffins
What you will need:
- 250 grams of low-fat cottage cheese;
- packaging of butter;
- 3 chicken eggs;
- an incomplete cut glass of sugar sand;
- a couple of tablespoons of starch;
- 160 grams of flour;
- a small amount of baking powder;
- a handful of raisins.
How to cook:
- The cottage cheese is mixed with sugar using a fork. Eggs and starch are driven into the curd mixture. Everything is thoroughly mixed.
- Softened butter is added to the mixture, flour and baking powder are sifted.
- Raisins are washed and soaked in boiling water.
- Raisins are poured into the curd dough and everything is mixed.
- The dough is poured into molds and baked in the oven at 180 degrees for 40 minutes.
Instead of raisins, you can add another favorite ingredient to muffins, for example, berries, nuts, chocolate. This way the dessert will have a richer taste and will become a favorite treat for every family member.