Pumpkin is rich in vitamins, fiber, microelements and is also low in calories. Many tasty and nutritious dishes are prepared from the juicy orange pulp. It is boiled, fried, baked and stuffed. However, not everyone knows that pumpkin pulp is also dried. Sun-dried slices are a wonderful vitamin supplement to the diet, and children eat them with pleasure.
We'll tell you how to dry a pumpkin in an electric dryer correctly and how to create decorative items from this orange beauty.
Preparing pumpkin for drying
The taste of the finished product largely depends on the correct choice of pumpkins and the preparation of the fruit for drying.
Suitable varieties for drying
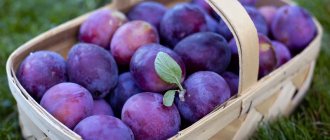
For drying, undamaged pumpkins without signs of rot are selected. It is important that the fruits are fully ripe. First of all, preference is given to table and nutmeg varieties rather than forage varieties of pumpkin.
The best option for drying are considered hard-bark pumpkins , which ripen later than others.
Important! For harvesting, those pumpkins are selected that have the stalk remaining after harvesting. Such fruits are protected from the entry of harmful microorganisms.
Late-ripening varieties include Sweet Table, Winter Sweet, Buttercup, and Blue Hubbard. Among the decorative varieties, Legendaria and Cucurbita are dried. Early ripening varieties are also dried and dried, but their moisture content is higher, and accordingly, they take longer to dry than late ripening ones.
Selection stages
Pumpkin selection is carried out in two stages . First, the appearance of the fruit is examined. Only ripe, whole pumpkins are selected, without dents or damage. There should be no suspicious plaque or stains on the crust.
Then the fruits are cut and the pulp is carefully examined. Pumpkins with uniformly colored, dense flesh produce a tasty and healthy starting product, which is also stored for a long time.
Preliminary processing
Selected specimens are thoroughly washed, peeled and seeds are separated from the pulp .
Advice. When cutting up pumpkins, do not throw away the seeds. They are very helpful.
Pumpkin pulp is cut into pieces 3-4 cm thick .
Do not make the slices too small, because when dried, the pumpkin greatly decreases in size. The blanks are laid out in a container in a thin layer . The slices are sprinkled with sugar at the rate of 200 g per 1 kg of pulp. Place a press on top and put the pumpkin in a cool place for 12-15 hours. Then the juice is drained, the pieces are again sprinkled with sugar and again put in a cool place for 12-15 hours.
The drained juice is mixed with a small amount of sugar and brought to a boil . When the juice has cooled slightly, the prepared pumpkin pieces are immersed in it for 15 minutes. After this, the slices are removed from the liquid and drying begins.
It can be useful:
How to get a good pumpkin harvest
How to store pumpkin at home
How to dry a whole pumpkin
The whole pumpkin is dried to create various crafts. Mainly decorative varieties are used. It is better to remove such fruits from the root just before frost, so it will be stored longer. Before drying the vegetable, it is washed and dried with towels. Each fruit is then placed in nets and hung in a dark, dry and well-ventilated room.
Drying pumpkins continues for 6 - 8 months. Readiness is determined by the sound of the seeds inside. Dried seeds should make a characteristic sound when they hit the dry walls of the fruit.
Drying pumpkin in an electric dryer
It is preferable to dry the pumpkin using an electric dryer or oven . This significantly reduces drying time and reduces the likelihood of product spoilage during the process. In addition, the dryer greatly simplifies the process, since virtually no human intervention is required.
The prepared slices are laid out on racks at a short distance from each other. The temperature is set to at least 55-60 °C. To prevent the slices from sticking to the grates, they are periodically turned over.
The total cooking time for the delicacy depends on the size of the pumpkin pieces and the moisture content of the pulp . On average, the drying process lasts from 12 to 20 hours.
Candied fruit
To prepare candied fruits, small pieces of pulp are used . First, they are boiled several times in sweet syrup, and then laid out on wire racks and sent to the dryer or oven.
You can prepare candied fruits with different flavors. To do this, add lemon or orange juice, cinnamon, ginger, and honey to the sugar syrup.
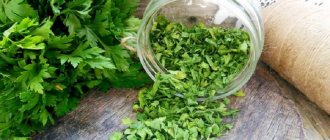
Pumpkin chips
To prepare unusual chips, the pulp is first baked in the oven for 30-40 minutes and pureed . The resulting mass is spread in a thin layer on a baking sheet. Then the puree is dried in an oven or electric dryer until brittle.
Pumpkin chips. Drying the pumpkin. Winter vitamins. Pumpkin in winter.
Pumpkin powder
Another unusual option for preparing dried pumpkin. Pumpkin powder is made from dried puree , grinding it with a coffee grinder to a homogeneous consistency.
The crushed mass is stored in jars or paper bags in a dry, dark place . Pumpkin powder adds a beautiful color to baked goods and complements soups, side dishes and dessert dishes well. If you mix it with warm water, you get healthy pumpkin puree.
Drying pumpkins for decoration and crafts
For crafts or interior decoration, the pumpkin is dried whole .
This is done in two ways: using the oven or in the fresh air. Drying such a large vegetable entirely is not an easy task. To ensure that the pumpkins dry well and do not spoil during drying, choose not too large specimens. The selected fruits are washed and the seeds are removed. The oven is heated to 55-60 °C and the workpiece is placed there. To ensure even drying, the pumpkin is periodically turned over. The drying process takes from two to eight hours, depending on the size of the vegetable and the juiciness of the pulp.
If there is a need to dry a large fruit , this can be done by leaving the prepared pumpkin in a dry, dark place. During natural drying, the workpieces are periodically checked in order to notice signs of spoilage in time. Under natural conditions, pumpkin is dried for two to three months.
Seeds
When cutting pumpkin fruits, the seeds are often thrown away. But in vain - it is a valuable source of zinc, vitamin E and other useful substances. Pumpkin seeds can also be dried .
Before drying, the seeds are thoroughly washed in warm water, freeing them from fibers. Then excess water is removed and the seeds are laid out on clean paper or cloth to dry. Dry naturally at room temperature.
After the seed shell becomes brittle and dry , the seeds are considered ready and removed for storage.
How to make a Halloween pumpkin and how to store it?
You can start preparing pumpkins for this holiday several months before. Choose varieties with not very hard skin, so that you can easily cut out scary faces on the vegetable. You can cook it using the natural drying method. Also, if you don’t have time, you can use a quick drying method by stuffing it with newspapers.
In order to extend the shelf life of Halloween pumpkins abroad, they treat products with special antiseptic solutions. In our regions, you can try spraying the inside of the pumpkin with a bleach solution to prevent the proliferation of microorganisms.
How to dry bottle gourd?
Bottle gourd is quite light, and when dried it becomes almost weightless. This species does not allow moisture to pass through itself well. The preparation of the fruit and the drying process are normal. Some nuances of drying this type of pumpkin:
- A natural drying method is used for this species and it is recommended to do it outside.
- The oven and other appliances are not used to ensure that the fruit retains its shape and dries evenly.
- This pumpkin is dried in a hanging state or on a wire rack.
- For the first few weeks, keep the pumpkin in a bright place, but without direct sunlight, when the pumpkin hardens, it is moved to a dark room and dried until it is ready.
How to determine readiness?
Pumpkin readiness is determined by the following indicators:
- By color. When dried, the vegetable should become dull; Lagenaria usually turns yellowish-brown.
- The vegetable loses its weight.
- If you shake the pumpkin, it makes a dull sound of seeds jumping inside it.
Conditions and shelf life of dried pumpkin for decoration
Finished dried fruits can be stored for a very long time. To do this, you must comply with the following conditions:
- The room temperature should be 12-28 degrees without sudden changes.
- Avoid dampness and contact with moisture.
- Direct sunlight should not fall on the decorative product.
- Immediately after processing the pumpkin (for example, carving), it is recommended to varnish its surface to extend its shelf life.
To make a dried pumpkin preparation for the winter or to dry a pumpkin for decoration, you need to follow special rules. Drying methods differ from each other, as they serve different purposes, and pumpkin varieties differ in their properties depending on their purpose.
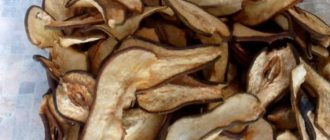
How to determine if a pumpkin is ready
When preparing dried pulp, the main thing is not to overdry it . How can you tell when the treat is ready? Readiness is determined by the appearance of the slices, as well as by taste. Properly dried pieces are soft and flexible, but do not stick to your hands.
If in doubt, try it! Chew the slice for a while. If you feel like the pumpkin is melting in your mouth, it means it's ready . The dried pulp tastes sweet, because now it contains much more natural sugar than fresh pulp.
When dried, pumpkin slices decrease in size by 1.5-2 times. This also signals readiness.
Drying pumpkin in the oven
Before drying the pumpkin in the oven, you need to provide yourself with free time, since the process lasts up to 8 hours. To get a tasty, beautiful and healthy pumpkin preparation, be sure to blanch the vegetable slices first.
- Pumpkin – 1.5 kg
- Water – 2 l
- Salt – 1 tsp.
Dried pumpkin in the oven
The process of preparing a healthy vegetable is as follows:
- Prepared in the manner indicated above, blanch the pumpkin pieces in boiling water with added salt for 2 minutes. Meanwhile, prepare a bowl of ice water. Using a slotted spoon, remove the pumpkin slices from the boiling water and place in cold water with ice cubes for 2 minutes.
- Transfer the pumpkin slices to a colander and dry.
- Heat the oven to a temperature of 55-65 degrees.
- Line a baking sheet with parchment paper or foil.
- Place vegetable pieces on a baking sheet in an even layer at a short distance from each other.
- Place the baking sheet with the preparations in the oven. Do not close the oven door tightly to allow moisture to evaporate. Dry the pumpkin for 5 hours.
- After the time has passed, change the cooking temperature by setting the temperature to 80-85 degrees. Dry the vegetable slices for another 2-3 hours.
Attention! Finished dried pumpkin should not stick to your fingers.
- Cool the fruit preparation by removing the baking sheet from the oven.
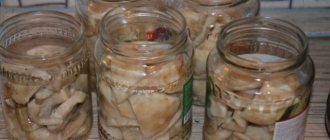
- Pour the drying agent into fabric bags or glass containers. Place the workpiece in a cabinet for later storage.
Storage conditions for the finished product
How to store dried pumpkin slices? For storage, a cool, dry place with a temperature of +9 to +12 °C is best suited. Air humidity should be no more than 60%.
For long-term storage, choose glass or plastic containers with tight-fitting lids. Line the bottom of the container well with dry parchment paper. The layers of slices are also covered with paper.
Advice. If you have prepared a large amount of treats, choose the freezer for long-term storage.
Preparation
Even before you dry the pumpkin you like to make crafts from it, you will have to properly prepare it. This process does not hide any special tricks and boils down to the following procedures:
- To begin with, the peel is washed in soapy water and thoroughly dried.
- After this, the fruit is wiped with alcohol or any liquids with its “participation”.
- All that remains is to move the pumpkin to a place protected from sunlight. Such a room should have good ventilation. The workpiece will remain there until its shell begins to change color (this is about 1–2 weeks).
Uses of dried pumpkin
Dried pumpkin slices are a ready-to-eat product . But they are also used as an ingredient for a wide variety of dishes. Dried pumpkin is used to prepare pureed soups, porridges, sauces, and desserts. We offer several recipes.
Candied pumpkin with honey and spices
Spiced candied pumpkin with honey is a healthy and unusual dessert. To prepare it you will need one and a half kilograms of pumpkin pulp, a cinnamon stick, vanilla sugar, cloves, 4 tbsp. l. fructose, 4 tbsp. l. honey
The pulp is cut into cubes and boiled in water with a cinnamon stick for five minutes. Separately prepare a syrup from two glasses of water, honey, fructose and vanilla sugar. Add pumpkin cubes to the syrup and cook for 15 minutes.
The candied fruits are carefully removed from the cooled mass and dried in the oven at low temperature for at least 4-5 hours. The finished treat is transferred to a container and stored in the refrigerator.
Candied pumpkin with lemon
Candied pumpkin with lemon is very tasty. To prepare this unusual dessert you will need: 2 kg of pulp, 600 g of sugar, half a glass of powdered sugar, two lemons and water.
The pulp is cut into cubes, covered with sugar and left overnight. In the morning, the released juice is drained and mixed with grated lemons. Bring the mixture to a boil and cook, stirring constantly, for five minutes. Then the syrup is filtered, pumpkin pieces are added and boiled until thickened.
Dry the candied fruits in the oven or dryer, spreading them out on paper. The finished dessert is sprinkled with powdered sugar.
Candied pumpkin does not harm your figure - the calorie content of the finished product is about 150 kcal.
Georgian dish pkhali made from dried or sun-dried pumpkin
An unusual dish called pkhali is also prepared from dried pumpkin pulp. To prepare it you will need: 500 g of dried or dried pumpkin, 3 cups of walnuts, 1 tsp.
saffron and utskho-suneli, 2-3 cloves of garlic, cilantro, celery and dill, 2-3 tbsp. l. vinegar, ground pepper and onions (optional). First, prepare the nut mass. Walnut kernels are ground in a meat grinder. The greens are finely chopped. Garlic is crushed into a paste. Greens, onions, garlic, spices, hot peppers, vinegar, and salt are added to the walnuts. Mix thoroughly.
Pieces of dried pumpkin are mixed with nut mass. It is better to prepare pkhali in advance so that the ingredients are soaked. Vinegar is sometimes replaced with pomegranate juice.
Take note:
Preparing pumpkin juice in a juicer for the winter
How to make pumpkin marmalade at home
Cooking tips
Dried or dried pumpkin is good because it can be eaten instead of store-bought dried fruits; it is perfect as a light snack on the road or for a child at school.
You can dry pumpkins regardless of the variety, but it is better to choose autumn vegetables with thick skins. They will turn out tastier and will be ready to eat faster.
Pumpkins for drying should be selected that are ripe, without stains and unspoiled, in their entirety. It should first be washed and cut, remove the entrails and seeds. The peel is cut off and the vegetable is cut as follows:
- small cubes (for example, for candied fruits);
- plates (for chips);
- narrow strips (as an ingredient for salads, soups and other dishes).
The pieces still need to be processed before drying begins. For example, through blanching. Place them in boiling water for two minutes. This will preserve the bright color of the vegetable when dried. And in order to protect them from damage and pests, it is recommended to treat them in a saline solution.
You can dry pumpkin naturally. The following devices are also used for this purpose:
- electric or gas oven;
- air fryer;
- special drying.
The temperature and processing time depend on the type of vegetable, the thickness of the pieces and the type of device. On average, the drying temperature ranges from 50 to 85 degrees. When finished, the pieces should retain their elasticity, but not stick to your hands.
Natural drying
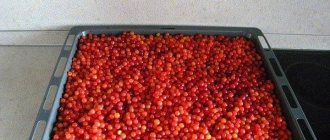
In this case, the pumpkin pieces should be laid out on a wire rack or tray in a single layer and placed in the sun. This can be done on a balcony, veranda or even on the roof of a country house.
In direct sunlight, the pumpkin can dry out within a week or a little longer, but only if the weather is dry and warm. To protect it from insects and dust, you can cover it with gauze.
You can dry the pumpkin pieces by hand and over a gas stove. The cut is threaded with a needle onto a fishing line or nylon thread and suspended over the stove and wait until the liquid has completely evaporated from the product.
Cooking in the oven
Before placing the pumpkin in the oven to dry, it is blanched. Drying time is about 6 hours. For 1.5 - 2 kilograms of product, take two liters of water and a little salt.
You need to prepare drying like this:
- wash the pumpkins and dry them on a paper towel;
- cut off the peel and remove the entrails;
- cut the pumpkin into even, identical strips about a centimeter thick;
- prepare a container with ice water;
- Blanch the slices in salted boiling water for two minutes, then place them in a colander and drain;
- preheat the oven to a temperature of 55−65 degrees;
- Place the slices on a baking sheet in one layer so that they do not touch each other;
- put it in the oven for 5 hours, leave the door slightly open so that the moisture can escape during evaporation;
- After 5 hours, increase the temperature to 80 degrees and dry for another 2-3 hours.
Cool the finished dried pumpkin. Place it in glass jars and store in a dry place.
Using an electric food dryer
There are special devices for drying different products. In this case, it is best to cut the vegetable into small pieces so that they are better processed.
For 2-3 kilograms of pumpkin, take 3 liters of water and a large spoon of salt. The preparation looks like this:
- wash the vegetable, cut it, remove the entrails and peel it;
- First cut the pieces into thin slices, then into small cubes of the same size, but be careful that after drying they do not fall into the holes of the grate;
- then they are blanched as described above. Then cool in cold water and dry;
- Place the pumpkin pieces on the grid so that they do not touch each other;
- Depending on the power of the device, set the temperature to medium and simmer until done. If it is about 90 degrees, then the procedure will take 4-5 hours, if less than 50 degrees, then 12 hours, respectively.
Secrets and tricks of cooking dried pumpkin
So, dried pumpkin is a tasty and healthy dish that is easy to prepare at home . Let's add a few secrets of experienced chefs that will help you stock up on bright slices for the whole winter:
- to preserve the bright orange color, the pumpkin pieces are dipped in boiling water for two minutes before drying (if this is not done, the pumpkin will darken when dried);
- to remove harmful microbes and insects, the pumpkin is soaked in salt water before drying;
- during the drying process, turn the pumpkin slices several times to prevent the pieces from sticking to the grill;
- If, at the end of the process, the pieces remain too wet and sticky, they are left to dry for another one or two hours.
How to store dried pumpkin
There are several options for storing dried pumpkin, but the best are:
- Storage in vacuum plastic containers.
- Self-sealing bags with Velcro at the top.
You can also use bags made from natural fabric or paper bags, but this is not as reliable as the 2 methods described above.
Now you know how to dry pumpkin in an electric dryer. This is very simple and accessible to each of you, if, of course, you have such household appliances. But even if not, you can always find a worthy replacement for it, fortunately, there are plenty of alternative options.
Use any of our methods - each of them can be easily implemented at home. You can do everything, and the result will definitely not disappoint, because the “sunny beauty” (pumpkin) was literally created to bring benefit and joy to people.
How to dry pumpkin for long-term storage
Proper drying is a delicate process, and also requires a fair amount of patience. If a fruit of a normal shape can dry from 3 months to six months, then a thicker-skinned lagenaria will require at least 10 months (or even 1 year).
The main rule is that shrinkage should be natural. Some try to speed up its progress by “running it” in the microwave or oven, but this negates all the decorative value of the fruit: with the slightest mistake, the pumpkin will turn out baked, and it would be wiser to eat it. With such heat treatment, the structure of the fibers is disrupted, and as a result, the peel loses the necessary rigidity.
Therefore, it would be better to let the moisture escape “by chance.” The role of drainage is assigned to the pores covering the surface of the fruit and the stalk. Immediately before drying the whole ripe pumpkin chosen for decoration, you will have to place an oilcloth or a piece of thick film under it - over time it will naturally leak. This is a necessary condition for indoor storage .
This method is the most widespread and simple, but it has its own nuances that it is advisable to keep in mind:
- The fruits are laid out (or better yet, hung) on a loggia or balcony. If you plan to store it lying down, try to place the pumpkin on a table with frequent gaps between the slats - they will ensure proper ventilation.
- Do not forget about constant air circulation (for these reasons, solid countertops and closed cabinets, warm kitchens or musty cellars are not suitable).
- For the first couple of weeks, the workpieces are inspected every day, rejecting overly soft or wrinkled specimens. There is one tricky point here related to mold. It may appear on the peel from exposure to moisture flowing from the fruit. Such “traces” are easily erased, but after a couple of days they appear again. This is not scary - at the end of drying you will see an unusual pattern on the “skin” of the vegetable.
Classic recipe for pumpkin marshmallows in the dryer
Making classic pumpkin marshmallow is very easy because you only need 4 ingredients. This dessert tastes like pumpkin pie, even if you only use cinnamon as a seasoning.
The appearance of the marshmallow will not be as bright and colorful as when using many fruits and berries, but its health benefits are obvious.
What ingredients will you need?
For the classic version of pumpkin marshmallow you will need the following:
- 3 tbsp. pumpkin puree;
- 0.5 tbsp. water;
- 2 tsp. cinnamon;
- 5 tbsp. l. granulated sugar, or more to taste.
Step-by-step cooking process
Step by step steps:
- The dryer must be set to 65°C.
- Next, you need to mix the pumpkin pulp, water, cinnamon and sugar in a blender until smooth, taste and adjust the level of sweetness. The consistency of the mixture should be thick but soft. If it turns out to be too dense, add a little more water and mix in the blender again.
- Then you need to pour the mixture onto a special mat or silicone mat and spread it evenly in a thin layer (3-4 mm thick), and dry for about 6 hours or more until you get an elastic mass that you can pick up and roll.
Pumpkin pastille in the dryer, recipe. - After the marshmallow has cooled, you can cut it into pieces or roll it into rolls.
What can I add?
Instead of cinnamon, you can add an all-purpose pumpkin pie spice blend for even more aroma and flavor.