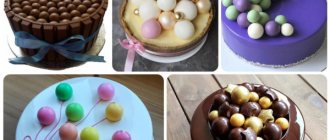
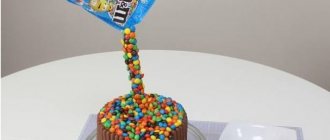
Mastic for sculpting various figures for cakes is very popular today. We invite you to familiarize yourself with one very simple recipe and different figures as ideas for cakes.
Mastic began to be actively used in cooking not very long ago, but it quickly became popular. Today, each cake or pastry has begun to be decorated with different figures. This mass allows you to create real masterpieces, and therefore it is not surprising that confectioners love it so much.
What is mastic and is it difficult to work with?
Mastic
Mastic is a very thick mass, like plasticine. But you can still eat it. It is also important to note that mastic comes in different types.
The most famous at the moment are:
- Honey . This is the softest mass of all and is easy to sculpt from.
- Gelatinous . Characterized by rapid hardening and hardening
- Dairy _ It is used more often than others due to its low cost. Its main component is condensed milk. It can be used as a base coating for cakes and for sculpting small figures.
- Marzipan . It is usually used to cover cakes. Figures cannot be made from it because the mass is very soft
- Universal . This type is sold in candy stores. It is used for both modeling and coating. The taste is not even different from what you can cook yourself
- Floral . This mastic makes excellent jewelry, especially small details.
Each of the presented mastics is good in its own way, but in order to choose the most suitable one for yourself, you should try each of them and learn how to work with it.
Gelatinous
- Gelatin 10 g
- Powder 500 g
- Boiled water 50 ml
- Soak gelatin in water for half an hour.
- Then heat it over low heat until it boils, stirring constantly.
- Cool to room temperature.
- Add half the required amount of powder and knead with a spoon.
- Transfer to the table and knead with your hands, adding the rest of the powder.
- Wrap in film and place in the refrigerator.
This mastic is perfect for sculpting figures - it hardens quickly and does not lose its shape. But this property makes it unsuitable for covering the entire area of the cake.
Sugar mastic for sculpting figures at home: description, step-by-step recipe
Sugar mastic
Homemade mastic is very easy to make and we offer you one of the simplest recipes:
Mastic composition
Cooking method:
- Take a wide bowl and sift powdered sugar into it and add dry milk. Mix the ingredients and add condensed milk.
- Next we mix the future mastic like a regular dough. While you stir, gradually add lemon juice, cognac and coloring. As a result, you will get a pleasant thick mass that will feel pleasant on your hands and you can sculpt good figures from it.
Mastic has a huge advantage because it allows you to create beautiful figures of any size. In particular, it can be useful when you want to decorate a cake or pastries for a holiday.
With condensed milk
Ingredients:
- Powdered milk 150 g
- Powdered sugar 150 g
- Condensed milk 100 g
- Lemon juice 2 tbsp.
Mix milk powder and powdered sugar, add condensed milk and knead until smooth. Add lemon juice. If the mass turns out viscous, add more milk and powder (necessarily in equal proportions). For piquancy, you can add a spoonful of cognac to the dough.
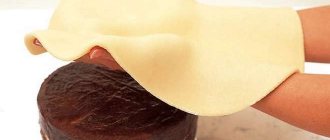
The finished mastic should be placed in the refrigerator for 12 hours, wrapped in cling film. Before rolling out, it should lie at room temperature for at least half an hour. Roll out with a rolling pin to a thickness of 1-2 mm. It is better to do this on cling film.
The amount specified in the recipe is enough to cover a cake with a diameter of 24 cm.
How to mold a toddler with mastic: step-by-step instructions
Mastic toddler
To create a toddler, it is better to make body mastic. This is done by adding the appropriate coloring agent during preparation.
Stage 1 . Roll into an oval shape like an egg. It is required for the body. Take a toothpick and make a hole for the belly button slightly below the center.
Stage 2 . Let's make the head. Roll a small ball. In this case, we take less amount of mastic than for the body. You need to insert a toothpick into the body, on which the head will rest.
- Make holes in the head for the eyes. Make a small nose. It should be flattened in size 4-5 mm. It would be enough
- We also draw the mouth and dimples from a smile with a toothpick.
- For the ears, make two small balls. Roll them up and make a couple of indentations in the center.
Stage 3 . Now secure the head to the body by placing it on a toothpick.
Stage 4 . Let's start sculpting the handles. For your hands, just take a little bit of mastic and roll the sausages first. Use a toothpick to draw fingers on one end.
Stage 5 . Attach your arms to your torso. If the parts do not stick together well, run a brush along the joints. Pre-moisten it with water.
Additionally, you can make some toys, flowers and other decorations for your baby’s hands.
Basics
I am often asked about which mastic is best to sculpt figures from. For some time I worked with both store-bought mastic, made according to various recipes, and with sugar paste, but I always returned to my recipe because I know how to adjust it to my needs.
Remember that all this is not the ultimate truth, but just my own experiences, and you may have a different view on how to make figures from mastic for a cake. So there are no hard and fast rules here other than maybe the placement of parts, so adapt these tips to your needs and preferences.
Required materials and tools
In my work, I try to avoid unnecessary expensive tools and often use what I already have at home. I'll stick with that idea throughout this tutorial and try to keep the amount of what you need to make your sugar gummies to a minimum.
To make a simple figurine from mastic, you will need:
- Mastic of different colors for making the following parts: pants, boots, sweaters, leather, hair;
- A few toothpicks. Note: Do not give fondant products containing toothpicks to young children and be sure to warn everyone else that they contain toothpicks. You can substitute solid pasta if you wish, but let everyone know anyway;
- Salt shaker with powder or corn syrup, whichever you prefer. If you don't have a salt shaker, you can use a spoon instead;
- Cutting board (as smooth as possible);
- A sharp, non-corrugated knife;
- Small or medium ball shaped mastic tool;
- Small pastry brush;
- Water in a small container;
- Black food gel coloring;
- A surface on which you will place the figures, such as a cake or, if you are making them in advance, a piece of foam;
- Printed sketch of a person (see below).
Sketch of a man. To save, right-click on the image and save the image to your computer.
Through trial and error, I realized that as I made figures from mastic, each subsequent piece turned out to be larger than the previous one, and as a result, I ended up with disproportionate mastic crafts. It was also difficult for me to make several figures of the same size if I did it by eye. For this reason, I began to use sketches similar to the one shown above and the figures for the mastic cake began to turn out to be the right size. Just upload this sketch to any graphic editor (I use Irfanview), set the desired height of the future figure and print the sketch. This approach can also be used when decorating a cake to figure out how to arrange the figures and what size they should be.
The height of the figure described in this article is 6.3 cm. Mastic is usually sticky, so to roll it out properly and avoid sticking to the board and fingers, sprinkle the work surface and hands with powdered sugar. Don't worry about getting powdered sugar all over the figure; you can easily clean it afterwards.
To glue pieces of mastic, apply a thin layer of water to one of them using a brush and press them together. You may need to move them around a little to get them to stick, but usually just water is enough to do this. Some people like to use different types of edible glue, either store-bought or homemade, but I usually don't bother with that. Water glues perfectly in almost all cases.
If you are working in a dry area, you may need to soften your mastic to prevent cracking on the surface. To do this, just mix a small amount of water into the dough and warm it in your hands. Try to do everything quickly so that the mastic does not have time to dry out and begin to crack. In high humidity conditions, you may need to stir in additional powdered sugar into the fondant and increase the time between steps to prevent the pieces from mixing.
Next, I will talk about how to sculpt with mastic and get excellent results.
How to make a little mouse from mastic: step-by-step instructions
For a mouse you will need yellow, green, white and pink mass. It is better to make the mouth and eyes from black beads, edible, of course. If you don't have black, then dark blue will do.
Mastic mouse
In addition, you will need tools such as a toothpick, a stack, a base mold and a knife.
Stage 1 . First we make the base. To do this, take the green mass and roll it into a 3 mm pancake. You can make a circle using a glass or glass.
Stage 2 . We make a gift. For this, yellow mastic is used. The most convenient way is to roll the ball and then turn it into a square.
Present
Next, roll out the pink mastic to 1-2 mm. Using a knife, cut into several strips. These will be gift ribbons. You will also need to tie a bow from them.
From what remains, make peas with a mold. They should not exceed 1-1.5 mm in diameter. Use a stack or a toothpick to secure them to the gift.
Stage 3 . Let's make a mouse. For the body we use white mastic. The body is made in the form of a drop. Use a toothpick to mark stripes for the fingers.
Mouse
- Now place toothpicks on both sides. Half pieces are suitable for the paws because they are small in size. We fasten the body and legs so that one is like a base and the other is in the air.
- We roll the ball onto the head and make a small notch a little below the center. Next we also cut out the mouth and eyes. Insert black beads and make a nose out of pink fondant.
- After this, we take two more small pieces and sculpt the ears. First we roll the balls, and then we make indentations in them. Flatten them well and remove the bottom part. Now attach them to your head.
Making the head
- The head is ready and now place it on the body. Again, use a toothpick to join.
- We make the upper legs like the lower ones, but only a little smaller. For the tail we roll a thin sausage, but it should become thinner towards one edge.
Stage 4 . Flower. The stem for the flower will be green. Its size is slightly larger than the height of a mouse.
- We make the bud pink. If you don’t want to bother making your own, you can use beautiful petal molds and then create a flower.
- Make indentations on the petals with a stack, and use a yellow piece for the middle. Now pin everything together and make a small green leaf.
Floral
- Gelatin 10 g
- Water 25 g
- Honey 40 g
- Butter 10 g
- Protein 1 pc.
- Powder 0.5 kg
- SMS (CMC) 4 g
- Pour gelatin with water. After it swells, add honey (artificial or natural), oil and put it in the microwave for a few seconds. Stir, strain.
- Separately mix the sifted powder with 4 grams of SMS. Add the protein and beat with a mixer for 5-7 minutes. Pour in the gelatin mixture and continue beating. Then switch to manual kneading.
- Roll into a ball, place in a sealed bag and leave on the table for 8 hours, after which you can start working.
Flower mastic allows you to make various cake decorations, including very delicate and small elements. It is easy to sculpt from it, the figures become hard and non-fragile.
- Almonds 1 tbsp.
- Sugar 1 tbsp.
- Lemon for zest 2 pcs.
- Protein 2 pcs.
Peel the nuts, wash and grind into powder. First add sugar and zest, and then add the whites. Knead the mixture thoroughly and conscientiously and put it in the refrigerator for 1-2 hours.
Suitable for covering and modeling. If you need to create figures with small details, use slightly less nuts than indicated in the recipe.
- Powdered sugar should be taken as finely ground as possible and always sifted - the smallest grains will tear the dough.
- During cooking, food coloring and flavorings can be added to the mixture. It is best to use special paints for mastic.
Sometimes the finished mastic begins to crumble. In this case, just add a little water or lemon juice and knead again.
- If the dough is too sticky, add a little powder.
- It happens that when tightening the cake, the mastic breaks. There is no need to be nervous, just soak a brush in water and “plaster” the area of the tear.
The very dense mass is difficult to roll out, but it is great for cakes with a lot of cream. Although, in general, wet cakes are not covered with mastic.
- Do not roll out very thinly - it is difficult to avoid tears, and all the unevenness on the cake will catch your eye.
For a glossy effect, coat the finished cake with a solution of vodka and honey.
- When exposed to air, the mastic dries quickly. When making figurines, remove them from the refrigerator in portions, and place the finished products back in the cold, wrapped in a bag.
- To prepare solid figures, use silicone molds.
To make the parts stick together better, lubricate them with protein or water.
- Decorate the cake before serving and do not store it in the refrigerator - the mastic will absorb moisture and settle.
- The remaining pieces can be stored in the refrigerator for 2-4 weeks, and in the freezer they will retain their properties for up to a year.
Video for the material
If you see an error, please select a piece of text and press Ctrl+Enter
.
The art of modeling with mastic has recently burst into the culinary scene. Now almost all pastries and cakes are decorated with figures and various patterns made from mastic. In addition, completely unimaginable shapes can be sculpted from this mass, which together can create an entire cartoon plot or a romantic bouquet.
How to make a lion cub from mastic: step-by-step instructions
Lion cub
For the lion cub you will need yellow, white, brown and black mastic.
Stage 1 . Make a ball for the head, and the body will be teardrop-shaped.
- We also need to make white inserts for the body. They are also made like droplets.
Head and torso
- Make a mouth out of white fondant and spread the fondant in a stack for a better look.
- All that remains is to make the eyes and sculpt round shapes near the mouth.
Stage 2 . The paws will be two-colored - white and yellow. Yellow is the main color and white is used for the fingers. Don't forget to separate your fingers.
- Insert large white parts into the eye recesses, and then slightly smaller ones. At the end we put black eyes. We make the nose brown in the shape of a triangle.
Making a lion
- Finally, mold the ears in the form of flattened circles, and there is also a tail missing. It is made in the shape of a sausage, and there will be a brown brush at the tip.
Stage 3 . The mane will also be brown. You need to make it with petals and then secure them around your head.
- If you haven’t run out of white mastic, use it to make pebbles for the lion. It turns out that he seems to be sitting on them. And from green you can make grass.
Which figurine for a wedding cake is better to choose?
The figurines on the dessert, which is dedicated to the wedding ceremony, can be edible or inedible. Different materials are used for their manufacture. Here is a list of those that are used most often:
- polymer clay;
- porcelain;
- ceramics;
- plastic;
- candy mass;
- chocolate;
- caramel;
- mastic;
- marzipan;
- dough.
If newlyweds want to keep symbolic wedding figurines for a long time, then it is worth buying inedible products. If you want to please your guests by traditionally eating the best piece of cake with figures of the heroes of the occasion, then this ritual is reserved for the end of the wedding celebration. Any figure on a wedding cake must correspond to the thematic focus of the wedding and the entire holiday.
Figurine of the bride and groom
A classic of the genre – figurines of the bride and groom at a wedding dessert. They hold hands, dance, kiss, ride in a car, motorcade or tractor. The figurines in their appearance resemble the lifestyle or character of newlyweds. Often the figures on a wedding cake are visually similar to their prototypes or are comic images of the bride and groom. For example, when a bride catches her future husband with a fishing rod or the groom drags her by force to the registry office. Many couples choose very unusual figurines, which are located along the top edge, hanging their marzipan legs from the cake.
Stylish classic figures
The figures of the newlyweds at the wedding dessert do not necessarily have to look in classic outfits: a white dress, a black suit. If you approach this idea with creativity and imagination, then the long-standing tradition will sparkle with new colors. The figures on the wedding cake can look like Adam and Eve, angels, two doves or a pair of swans. A classic wedding attribute to top off a culinary composition is a pair of items: doves, hearts or wedding rings.
Funny as cartoon characters
Cartoon characters are also frequent “guests” at the newlyweds’ table. Those who are tired of the classics choose bear cubs, elephants, cats, giraffes, firebirds, as well as heroes of famous American cartoons: Melman and Gloria, Beauty and the Beast, Prince and Cinderella or Rapunzel and Eugene. These characters bring enthusiastic smiles to everyone, without exception, creating a fabulous wedding atmosphere.
What are edible figurines made from?
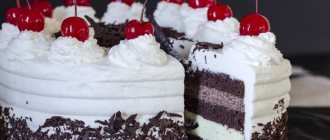
Edible wedding cake figurines are made in different ways. For example, marzipan will help to decorate figurines beautifully, and simple white or black chocolate figures will decorate a stylish wedding dessert. Cream and sugar will also create a delicious wedding highlight. If the newlyweds want to see two white swans on top of the cake, then, as a rule, crispy snow-white meringue is used to make them. The most popular materials for wedding cake figurines among newlyweds are mastic and marzipan.
From mastic
Often, mastic is used to create figurines for wedding cakes. This product not only covers the cake and makes figures from it, but also creates all kinds of inscriptions and more complex compositions. Mastic is a homogeneous edible adhesive mass with an adhesive consistency. It is made both in confectionery factories and at home. Properly prepared mastic has a consistency similar to plasticine. There are several types of such material for making sweet figurines:
- Dairy. Condensed milk is used to make it.
- Honey. It is not difficult to guess that honey is added to it and, unlike simple sugar, this mastic does not crumble or crumble.
- Gelatinous. It is used to create complex compositions.
- Floral. This type of mastic is intended for making flowers and petals.
- Industrial. It is created exclusively in production workshops, and tastes like simple sugar mastic prepared at home.
From marzipan
Marzipan decorations for a family celebration cake are very easy to make at home. Modeling figures is much easier, because marzipan has much higher adhesive properties than mastic or other sweet material. Marzipan is not like peanut butter sprinkled on buns. The composition of this plastic material includes almonds, crushed with sugar and filled with syrup. You either prepare the mixture yourself or buy it ready-made in stores. Marzipan figurines are painted with food coloring.
How to make a panda from mastic: step-by-step instructions
The panda is made from white and black fondant, you don't need any other colors.
Mastic panda
Stage 1 . Make a small ball - this will be the head. We make slits in it for the eyes and immediately roll out black balls for them. If necessary, the recesses can be expanded with a stack. They must be completely closed.
Making the head
- All that remains is to finish the nose - roll it out of black mastic too and make a couple of holes.
Stage 2 . From small pieces we roll out eyes and ears.
- The body has two parts. The first is made from white and a round blank, and the second is elongated and black. Fastening is done with toothpicks.
Eyes and ears
Stage 3 . The paws are made in the form of droplets of black mastic. You can also make pads on them, but in white.
Pastry rose
What you will need:
- Red or pink pastry paste;
- Silicone kitchen mat;
- Roller for rolling;
- Round shape for working with mastic;
- Sticks for modeling mastic products;
- Kitchen sponge;
- Purified water;
- Paint brush;
- Wooden toothpicks;
- Sugar (powdered).
Stage 1
1First of all, you need to prepare the surface by covering the table with a silicone mat (the mat must be absolutely dry).
2 Sprinkle the mat a little with powder, roll the mastic into a ball and begin to turn it into a layer using a silicone roller. We continue to roll out until we obtain a layer about 3 millimeters thick.
Too thin a layer will not allow you to make a beautiful decoration
Stage 2
3Next, take a round mold for working with confectionery paste and cut out many circles from the layer.
4 Separate the circles and place them on a separate baking sheet.
Cutting out the petals
5Pinch off a small piece of mastic and roll it into a ball, then form a cone with a convex circle from the ball. This will be the middle of our rose.
Stage 3
6Place a sponge in front of you, with one circle on top of it. We pick up a modeling stick with a spherical tip. Conventionally, we divide the circle into three horizontal parts, two of which we roll out with a stick to create a slightly wavy surface - these are our petals.
Roll out the sheet using a stick with a round tip.
7 Repeat the procedure with all the remaining petals.
Stage 4
8Prick our cone (the middle of the flower) onto a toothpick, attach the toothpick to the sponge. Take water and a brush and lightly wet the surface of the cone.
9Attach the petals one at a time, wrapping each one around the center, pinned on a toothpick.
Attach the petals by moistening them with water
10 Repeat until the rose has the required splendor and size.
Stage 5
11At the end of the work, the flower must be sprinkled with powder and left for several hours in a dry place to harden.
How to make an airplane out of mastic: step-by-step instructions
Airplane made of mastic
To make an airplane, you need to prepare blue and white mastic. Don't forget about additional tools.
Stage 1 . Make a white body of the airplane; it will look a little like a trapezoid. We sculpt the front glass from blue mastic and attach it to the front.
Stage 2 . Now let's make the wings. To do this, take a couple of balls, roll them out or knead them. Make the wings in the form of triangles. We make the tail a little thinner and also like a trapezoid.
Stage 3 . Now make blue stripes on all parts of the airplane.
Stage 4 . Next we sculpt black and white eyes. The mouth can be drawn with a toothpick or a stack.
How to use mastic for modeling: useful tips
Sometimes it happens that even if you follow the instructions, not everything works out as it should. Each craftswoman has some secrets to make modeling more effective:
- In some situations, it is very difficult to completely cover a cake with fondant in a neat manner. Folds appear on the sides, which can ruin the whole job. You can solve the problem if you roll it out so that you get a small margin.
- After this, the mastic is laid out on the cake and its weight forces it to lie correctly.
- The black dye is considered very rare. To remedy the situation, you can take three colors - blue, yellow and red. They are mixed in a ratio of 2:1:1. You can also try adding blue dye to brown paint.
To obtain a shiny mastic, lubricate the surface with vodka and honey. Both components are added in the same quantity. The resulting liquid lubricates the surface and after drying it becomes shiny.
Honey
- Honey 130 ml
- Powder 950 g
- Water 50 ml
- Gelatin 1 pack
- Pour gelatin with water to swell. Mix with honey and keep in a steam bath until all the crystals melt.
- Sift the powder and knead with honey until elastic.
Don't be alarmed if the dough is very stiff at first; as you knead it, it will acquire a pleasant consistency.
- Further steps are standard - wrap in film and put in the refrigerator.