Cake for girls “Paw Patrol”
To make such a cake for a girl, you need to buy an edible picture on waffle or rice paper in advance.
You will need for the biscuit dough:
- eggs – 4 pcs.;
- refined granulated sugar – 125 g;
- butter – 75 g;
- white wheat flour – 75 g;
- granulated instant coffee – 10 g.
...for the interlayer:
- dark chocolate – 100 g;
- cream 35% fat – 200 g;
- hazelnuts – 100 g;
- powdered sugar – 2 tbsp. l.;
- butter – 50 g.
...for finishing:
- protein – 3 pcs.;
- sugar – 300 g;
- water – 100 ml;
- lemon juice – 1 tsp;
- vanillin.
…For decoration:
- edible picture for the PAW Patrol cake.
Step-by-step instruction:
- Beat the eggs with sugar, first in a water bath, and then without it, until the mixture cools and becomes viscous.
- Pour in the melted butter and after combining it with the mass, add the sifted flour. Mix quickly.
- Introduce instant coffee, diluted in 1 tsp. hot water.
- Place the dough in a mold greased with oil and lined with parchment.
- Bake at 180 °C for 20 minutes, cool, cut into layers.
- Layer each with cream whipped with melted chocolate, powdered sugar, butter and hazelnuts.
- To make a protein custard, beat the egg whites. Boil the syrup for 8 - 10 minutes after boiling. Gradually pour syrup into the egg whites, stopping whisking. Add vanillin and lemon juice.
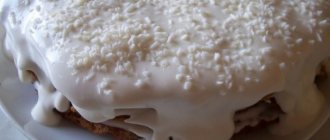
- Spread a layer of protein custard onto the molded cake, put a “Paw Patrol” picture on it, and level it out.
- The side surface is decorated with a “snake” of the same white cream.
- Blue cream stars are placed along the bottom. They also frame the picture. Complement the color palette with yellow cream.
Creative Cakes
But creativity in design doesn’t hurt. Cream figurines, images of favorite characters - there are many such cakes, but your child will still be happy. All children love emotions, so create them. Birthday cakes for girls can be made in the shape of a flower, heart, doll or dress.
What would a modern birthday cake look like for a girl? You can make a cake in the shape of a phone or a handbag - it will look impressive. Decorating such a cake is not at all difficult. You are unlikely to make it yourself, so it is better to leave it in the strongest hands of a pastry chef - he will definitely do everything as needed."Unicorn" for a little princess
The “Unicorn” cake is the dream of little ladies.
You will need for the test:
- flour – 180 g;
- sugar – 200;
- eggs – 4 pcs.;
- butter – 200 g;
- cocoa powder – 70 g;
- baking powder for dough – 1 pc.;
- salt.
...for cream:
- curd cheese – 600 g;
- powdered sugar – 400 g;
- butter – 800 g;
- dyes.
…For decoration:
- ready-made mastic – 350 g;
- canned fruits (peaches are fine).
Step-by-step instruction:
- Kneading the dough begins by beating eggs with sugar. After the mass increases in volume, a mixture of flour with cocoa, salt and baking powder is added to it.
- The semi-finished dough is placed in a round pan covered with parchment. Bake at 170°C for about 25 minutes.
- To make the cream, beat the butter and powder, then add the cheese and continue the process until a homogeneous composition is obtained.
- Part of the cream is painted pink, most is left white.
- The dough base is cut into 2 layers, coated with white cream, coated on the sides and top, and leveled. Decorate with pink stars, dropping them from a pastry bag.
- A unicorn is sculpted from white and pink fondant. Place it on the surface of the cake. Decorate with fruits.
Icing for decorating a children's cake at home
Recently, decorating children's cakes with icing has become very popular. After complete hardening, this food material resembles in appearance the ice pattern that forms on windows in winter. The kids really like it, although without additional decoration with other confectionery products it looks quite boring. You cannot apply icing directly to the surface of the cake. First, the product must be filled with chocolate glaze or covered with mastic. And preparing the base for icing is very simple. For this you only need:
- chicken eggs (whites only) – 3 pcs.;
- powdered sugar – 500-600 g;
- lemon juice – 15 ml;
- glycerin – 1 teaspoon.
Separate the whites from the yolks, pour into a mixing bowl and put in the refrigerator for 15-20 minutes. Then beat them until white, add the rest of the ingredients and beat again. Cover the resulting mass with cling film and place in the refrigerator for an hour. During this time, air bubbles in the mass will burst. After this, the mass can be transferred to a pastry syringe and applied to the prepared surface of the cake.
By the way, there is no need to worry about glycerin. It is completely harmless for children and adults. Moreover, glycerin is used in almost all confectionery products sold in stores and is designated as E 422.
"Masha and the Bear"
Another “fairytale” cake for a girl.
For shortbread dough you will need:
- flour – 1 ½ tbsp.;
- granulated sugar – 1/3 cup;
- butter – 150 g;
- egg – 1 pc.
...for buttercream:
- cream 35% fat – 250 g;
- powdered sugar – 250 g;
- vanilla sugar – 2 g.
...for butter cream:
- butter – 50 g;
- powdered sugar – 2 tbsp. l.;
- dyes.
Step-by-step instruction:
- To make the dough, beat butter, sugar and egg until fluffy and white. Add flour and mix. Form 2 cakes. Bake at 230 °C, cool.
- The cream is prepared by whipping the cream with powdered sugar and vanilla sugar.
- Layers of sand semi-finished product are smeared with butter cream. They also decorate the side surface and cover the top workpiece. It will be the basis for the drawing.
- Prepare buttercream by beating butter and powdered sugar.
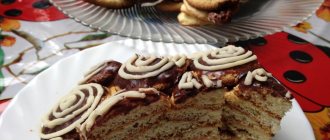
- Print out a picture of fairy-tale characters on a piece of paper according to the size of the cake. Using a toothpick, draw the outline of the figures on the surface. The cream is divided into parts and each is tinted in the desired color, in accordance with the picture.
- Using a paper cornet, they draw cartoon Masha and Misha on the cake along the contour of a toothpick.
for decorating children's cake at home
It was already mentioned in the previous section that in some cases, chocolate icing is an excellent decoration for a children’s cake at home. Now it's time to find out how to make it at home. You will need for this:
- milk – 3 tablespoons;
- cocoa powder – 4 teaspoons;
- sugar – 3 tablespoons;
- butter – 100 g.
Mix dry ingredients in a saucepan or ladle, add butter and milk, put on heat and, stirring, bring to a boil. Cook for 5-7 minutes. When the mixture has cooled sufficiently, to about 40°C, it can be applied to the surface of the cake and smoothed out with a wide knife. Place the cake in the refrigerator to allow the glaze to harden.
You can do it even simpler by using real chocolate for the glaze. To do this, you need to take 125-150 g of dark chocolate, break it into small pieces, put it in a small saucepan, the bottom of which is greased with butter, and melt it in a water bath. Add 50 g of butter into the melted mixture and stir until smooth. Allow the mixture to cool to the above temperature and begin decorating the children's cake.
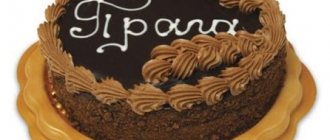
Chocolate can be used to decorate a children's cake without melting it. The simplest option is to sprinkle with grated product or chocolate curls, which can be easily done with a regular vegetable peeler.
However, the most interesting way to decorate a cake with chocolate is to create chocolate patterns. To do this, you should draw or copy the desired patterns and/or inscriptions on a sheet of parchment, place it on a cutting board, melt the sweet product in a water bath, insert it into a syringe and trace pencil outlines with it. Place the board in the refrigerator to harden, and then place the resulting patterns on the surface of the cake coated with cream or covered with mastic.
You can even paint colorful pictures on the cake using chocolate. It's not too difficult either. True, this will also require colored marmalade and confectionery paste. Mastic recipes will be given in the final part of this material. In the meantime, about marmalade pictures.
First, on a sheet of parchment with a pencil, you need to draw or copy the desired picture in a mirror version. It is better to take drawings that contain exclusively the colors of the available marmalade (usually green, yellow and red). The parchment should be placed on the table, and a sheet of mastic should be placed on it and rolled with a rolling pin. As a result, the desired design will be copied on the sweet sheet. This is what needs to be placed on the surface of the cake. By the way, you don’t need to worry about pencil marks on the mastic. Graphite will not harm a child’s body.
Now you need to melt some chocolate in a water bath, draw it into a syringe and draw the contours of the design. Then, also in a water bath, certain colors of marmalade are melted one by one and the desired places are poured inside the contours of the design. The decorated cake should be allowed to sit in the refrigerator for the marmalade to become marmalade again.
Barbie dessert with mastic
It is better to use ready-made mastic. It will require 400 g. The colors for the doll’s outfit are white and pink.
You will need for the biscuit:
- eggs – 4 pcs.;
- refined granulated sugar – 125 g;
- white wheat flour – 125 g.
...for cream:
- butter – 210 g;
- powdered sugar – 112 g;
- milk, condensed with sugar – 84 g;
- vanilla powder – 5 g.
Step-by-step instruction:
- For the sponge cake, beat eggs with sugar until foamy, add flour, mix gently.
- Bake in pans lined with parchment at 180°C for 25 minutes.
- Blanks for Barbie's skirt are cut out of the cooled biscuit. Several layers are glued together with butter cream and given a dome shape. A hole is made in the middle into which the toy should fit. You can soak the layers in syrup.
- The surface of the “skirt” is lubricated with cream. Thin cakes, no more than 1.5 mm thick, are cut from the rolled out layers of mastic. They are formed into a multi-layered skirt, alternating white and pink colors.
- They “put” a mastic top on Barbie. Insert the doll into the middle and secure it with mastic rolled into a rope.