Gingerbread or honey gingerbread have become a fashionable handmade culinary souvenir for any holiday. For example, gingerbread houses are given and made for the New Year and Christmas, gingerbread hearts will be relevant for Valentine's Day, and for March 8 and other holidays gingerbreads are made into no less interesting and beautiful handmade culinary souvenirs.
Painting gingerbread cookies with icing is a very exciting activity! Today you will learn a recipe for gingerbread dough, how to make glaze for gingerbread cookies, and see a small master class on painting gingerbread cookies. There are many holidays ahead, including Valentine's Day, on which it is customary to give valentines and all sorts of pleasant little things in the shape of a heart. Handmade culinary souvenirs, such as a gingerbread heart, beautifully painted and in keeping with the theme, will make a wonderful tasty and fragrant gift for Valentine's Day.
The production of souvenirs with a logo is carried out by the Socium-Plus web resource; in addition, laser cutting, engraving, computer embroidery, etc. are performed. Lowest prices from the manufacturer!
The first question to ask is:
How to make gingerbread at home
So, let's get started, first I'll show you how to make gingerbread dough at home. To do this, I take a saucepan with a thick bottom and pour all the sugar into it. Then I send it over medium heat to melt the sugar. I don’t stir it at first, but let the bottom part melt a little. After it starts to melt, I start stirring it a little with a spatula, thereby helping it melt more evenly.
It is very important that this mass does not burn, otherwise the gingerbread cookies will have a bitter taste.
I stir constantly and do not add heat. You don’t need to cook the caramel for a long time, just let the sugar melt and remove the pan from the heat.
At this time, the water in the kettle should boil, because we need boiling water. Next, I introduce 100 ml into the caramel in a thin stream. boiling water It is very important at this time to actively stir the mixture with a whisk or spatula, otherwise the water will cause the sugar to harden and you will not get the desired consistency. Be careful when pouring in the boiling water as the caramel is at a very high temperature so it will bubble and boil violently when you add the liquid so don't get burned. It is advisable to use potholders in this process.
When all the boiling water has been added and the mixture is dark in color and completely homogeneous, I put the pan back on the fire and add butter to it. Next I melt it. When the butter has melted, add soda, salt and spices.
The spices here are all individual, I take cinnamon, ginger and nutmeg. Additionally, you can add anise, cardamom and allspice, but in very small quantities.
When heated, the soda begins to react, and the mass rises into a foamy cap. Next, I leave the mass to cool, after which the foam cap will settle.
After cooling, the caramel color became even darker. Then I add one egg yolk and mix again.
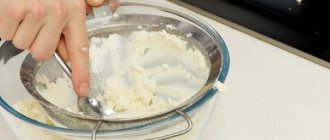
After that, I start adding flour and kneading the dough. You need about 380 - 400 grams of flour, since the exact amount depends on its type.
I do not recommend filling the dough with flour; it should remain soft and slightly sticky. Then I wrap it in a bag or cling film and put it in the refrigerator. It should ripen in the refrigerator for at least a day. By the way, you can store it in it for up to a month, and if you freeze it, the period will increase to three months.
I take it out of the refrigerator and place it on a silicone mat sprinkled with flour, on which I will roll it out. If you don’t want to transfer the cut-out products onto parchment, you can immediately roll them out on it. Now I’ll show you how to make gingerbread cookies with your own hands, without additional stencils and molds.
I also need two planks of the same thickness, but I use children's books, the thickness of which is absolutely the same and is 5 mm. I cut off a piece of dough, put books on the sides and roll it out with a rolling pin. Thanks to the books, the thickness of the rolled out dough will be the same on all sides, and this is important for such baking.
Now I look for any drawing on the Internet and print it out in the desired size, and then cut it out along the contour or leaving a couple of millimeters more. You can also use ready-made molds and stencils for gingerbread, but I didn’t have exactly the ones I planned to make, so I made the blanks myself. I sprinkle the rolled out layer with a little flour so that the paper does not stick. And after that, I lay out the prepared paper blanks and cut them according to their shape with a knife.
Now I very carefully transfer them to a baking sheet so as not to deform them. As I already wrote, if you don’t want to bother with this, then immediately roll it out on parchment. That's the whole recipe for delicious painted gingerbread cookies, but now I heat the oven to 180 degrees and set to bake the gingerbread cookies for 6 - 7 minutes. It is important not to overcook them in the oven, otherwise they will become hard.
As soon as I took them out of the oven, I take long wooden skewers and insert them into the gingerbread cookies, since after they cool down I will no longer be able to do this. I do this so that after painting I can decorate the birthday cake with gingerbread. If after baking they become deformed, then there is not enough flour in the dough, and if they bubble, then there is a lot. Now you know how to bake delicious homemade gingerbread for children so that they will like them.
This gingerbread cookie recipe is perfect for painting. And now I’ll show you how to do it. I hope you take the plunge and try these gingerbread cookies, because they are very tasty and even such a labor-intensive cooking process is worth it.
Honey printed gingerbread cookies with sugar glaze, recipe
Compound:
rye flour 300 g, wheat flour 300 g, 1 egg, honey 400 g, butter 100 g, soda 1 tsp. without top (slaked) or baking powder, spices; for color, you can add about 10 g of cocoa (subtract the weight of cocoa from the weight of flour).
Spices:
The following spices can be used in gingerbread dough: cardamom, coriander, cinnamon, nutmeg, cloves, allspice, ginger - a mixture of all or part. Spices are ground almost into dust. Approximate proportions of different spices (based on the total weight of spices): coriander 30%, cinnamon 30%, cardamom 10%, nutmeg 10%, ginger 10%, cloves 5%, allspice 5%.
It is convenient to make a larger amount of gingerbread spice mixture once and use it as needed. Can be stored in spice containers. Use 1-5 g of spices per serving of dough.
Dough:
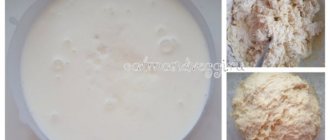
Melt the honey and butter in a saucepan over low heat and set the pan off the heat. Cool the mixture to 60-70C. Separately mix 250 g of each type of flour, soda and spices.
Add egg to flour, stir. Pour in the honey mixture and stir. Leave the mixture alone for 5 minutes, then stir for several minutes until smooth.
Mix in the remaining flour little by little to knead the dough (you may not need all the flour or, on the contrary, more than indicated in the recipe, depending on the humidity and type of flour, honey liquid, and the size of the egg). Knead until the dough comes together into a ball (see photo). The dough should be elastic and non-stick to your hands and surface (see the photo for the degree of elasticity). Wrap the dough in film or a bag or place under a bowl and leave for 20-30 minutes at room temperature. After this, the dough can be cut into gingerbread cookies.
Using gingerbread molds:
Grease a wooden gingerbread mold with vegetable (sunflower) oil with a brush. Set the oven to preheat at 220°C.
Cut/tear a piece from the dough, knead it with your hands into a flat pancake, smaller in size than the pan. Distribute the dough into the mold, carefully compacting it into a pattern. If necessary, remove excess dough. Flatten the surface of the dough with your palm or a small rolling pin.
Carefully remove the gingerbread by picking it up by the edge of the dough; then it will fall out onto your hand or baking parchment. The slightly crushed edges of the gingerbread, by which it was removed, can be straightened with your fingers, returning them to the desired shape. In the photographs, see examples of forming and removing a printed gingerbread from a rectangular shape and a shape with curly edges.
Bake the gingerbread cookies in an oven preheated to 220°C for 5-10 minutes, depending on the thickness of the gingerbread cookies and their quantity (temperature indicated for an electric oven). Readiness is determined by color - the convex relief on the gingerbread should turn brown, and the bottom of the gingerbread should also turn brown. Cool the gingerbreads on a wire rack or wooden board. Gingerbread cookies should be stored in closed, dry food containers.
According to this recipe, the gingerbread cookies are quite soft and crumbly. They increase in height by one and a half to two times. For example: gingerbread cookies with a thickness of 7 mm after baking became 1.5 cm (without taking into account the thickness of the relief).
Gingerbread cookies can be glazed with sugar icing. Glazed gingerbread cookies are softer than without glaze, last longer and do not go stale. See below for the glaze recipe.
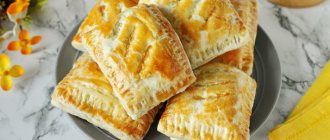
Gingerbread with filling:
To make a gingerbread with filling, you need to roll out 2 layers of dough, one thicker, the second thinner. Calculate the thickness based on the depth of the gingerbread mold. Don't forget that the drawing also has depth and you also need to count on it. Stretch a thicker layer of dough into shape, with small edges around the perimeter. Apply the filling inside the sides in a thin layer. Cover the top with a second layer of dough, carefully glue the layers of dough together around the perimeter of the mold. Take out the gingerbread. Bake as described above.
Icing:
Ingredients: 120 g sugar, 50 g water.
Mix sugar and water, place the pan with the mixture over medium heat, and after boiling, reduce the heat to low. Cook the glaze to 108-110° C. After this, set it aside from the heat, cool to 70-75° C. Apply the glaze to the gingerbread cookies with a brush on both sides.
You can roughly determine the readiness of the glaze as follows: if you take a drop of glaze, cool it and roll it between your fingers, thin threads will appear when it comes off.
You need to apply hot glaze quickly enough, because... frozen glaze will not spread over the gingerbread cookies. The gingerbread cookies can be placed on a wire rack (place a drip tray under the wire rack to catch the icing) or on a baking sheet (parchment paper, etc.). You can dry it at room temperature or in the oven at 50-60° C. Properly cooked glaze will harden on the gingerbread as a solid mass, partially turning white after drying. When dried in the oven, the glaze will be shiny; at normal temperatures, matte, but transparent with sugar stains.
The glaze cools to a dry state in 1-2 hours, the sugar completely crystallizes in 8-9 hours (all white stains appear).
The given amount of glaze is enough for 600-700 g of gingerbread cookies 5-7 mm thick (before baking). Do not reheat the glaze.
In the photos below from left to right: 1. gingerbread sunshine with the correct glaze; 2. gingerbread cookies with liquid (undercooked glaze), the glaze is absorbed, there are no sugar stains; 3. The overcooked glaze formed an opaque thick mass.
Gingerbread cookies treated with glaze do not go stale and remain tasty for 2 months.
Important Notes:
1. There is no need to lubricate the boards in advance, because the oil will have time to be absorbed. Before each formation of a new gingerbread, oil must be applied to the inside of the mold again.
2. The correct dough is removed from the mold without any residue. The form does not need to be washed after use.
3. If the dough sticks to the pan and the pan is well greased, it means there is not enough flour in the dough.
4. If the dough crumbles in your hands and/or when forming the gingerbread, there is excess flour in the dough.
5. Forms must not be washed off from oil after use. Wood loves oil, it protects it and protects it from moisture. The tree does not like water. We recommend washing molds only in the most extreme cases, if contamination cannot be removed mechanically or by wiping with a cloth soaked in oil.
6. After baking, lay out the gingerbread cookies on a flat surface, because... They are very soft when hot and can become deformed.
7. Spices are not added to gingerbread cookies for small children, or cinnamon is added.
************************************************************************************************************************
Old version of the recipe (2014)
Rye-wheat gingerbread dough
************************************************************************************************************************
Compound:
rye flour 370 g, wheat flour 370 g, 1 egg, honey 400 g, butter 100 g, soda 1 tsp. without top, spices.
Dough:
Melt honey and butter in a saucepan over low heat, remove the saucepan from the heat, add spices. Cool the mixture to room temperature. Add egg, stir. Separately mix two flours and soda. Combine 2/3 of the flour and honey mixture in a bowl, stir. Mix in the remaining flour to form a dough. You can knead in several steps, for several minutes. The result should be a dough that does not stick to your hands and surface. Wrap it in film or a bag and place it in the refrigerator for at least 6 hours. The longer the dough rests, the better.
It may take a little more or less flour, it depends on the liquid of the honey, the size of the egg, etc.
Usage:
Cut a piece of dough and knead it with your hands to make it more flexible. Grease a wooden gingerbread mold with vegetable oil (brush). Distribute the dough into the mold, carefully compacting it into a pattern. Trim off excess dough. Carefully remove the gingerbread by picking it up by the edge of the dough; then it will fall out onto your hand or baking parchment. Bake the gingerbread cookies in an oven preheated to 220C for 5-10 minutes, depending on the thickness of the gingerbread cookies and their quantity. Readiness is determined by color - the convex relief on the gingerbread should turn brown, and the bottom of the gingerbread should also turn brown. Cool the gingerbreads on a wire rack. Store in tin boxes or wooden caskets.
According to this recipe, the gingerbread cookies are quite soft and crumbly. They increase in height by one and a half to two times. For example: the roof of the gingerbread house had a basic thickness of 8 mm, after baking it became 1.5 cm (without taking into account the thickness of the relief).
With filling:
To make a gingerbread with filling, you need to roll out 2 layers of dough, one thicker, the second thinner. Calculate the thickness based on the depth of the gingerbread mold. Don't forget that the drawing also has depth and you also need to count on it. Stretch a thicker layer of dough into shape, with small edges around the perimeter. Apply the filling inside the sides in a thin layer. Cover the top with a second layer of dough, carefully glue the layers of dough together around the perimeter of the mold. Take out the gingerbread. Bake as described above.
Spices:
We use the following spices in gingerbread dough: cardamom, coriander, cinnamon, nutmeg, cloves, allspice, ginger. Spices are ground almost into dust. Approximate proportions we use: coriander 30%, cinnamon 30%, cardamom 10%, nutmeg 10%, ginger 10%, cloves 5%, allspice 5%.
Save
Save
Save
Preparing the glaze
First I separate the yolk from the white. And since the protein will be used raw, be sure to wash the eggshells with soap beforehand. Who knows what there is on the surface!
To separate the egg component, I do not use any equipment other than my hands. Having broken the shell on the edge of the plate, I place the white and yolk in my hand and begin to transfer from one to the other. In this case, the white slips through your fingers into the cup, and the yolk remains in your hand. The separation is done in this way in order not to damage the yolk. Otherwise, even if a tiny part of it gets into the glaze, everything will be ruined.
Then I weigh the protein. It turned out to weigh 32 grams. And now I calculate the amount of powdered sugar for the glaze using the formula:
32 * 500 / 90 ~ 177 gr. This means I will need 177 grams. powders.
Anyone who has carefully read what is written above will understand where these numbers come from.
I squeeze lemon juice into a glass.
I start beating the egg whites at low speed.
As soon as a light foam appears, add one drop of lemon.
And I mix it with the protein for a couple of seconds.
Now you should sift the powdered sugar. To separate unground grains of sugar. They will get in the way and clog the nose of the cornet when applying glaze to the gingerbread cookies. If you are confident in the manufacturer and trust him completely, then you can skip this step. And so for the future, know that well, finely ground powdered sugar, literally into dust, is the key to success in making glaze.
Colored glaze for gingerbread
All types of glaze can be painted with food dyes: contour glaze, filling glaze, and the thickest one, intended for the final painting of gingerbread cookies. To get multi-colored icing, you need to put the glaze made in advance for painting gingerbread cookies into different bowls. The recipe for its preparation depends on the type of work being performed (drawing a contour, painting or filling a surface).
Next, water-soluble gel or dry food coloring is added to the prepared glaze. The mass is thoroughly kneaded and applied to the gingerbread cookies. If the icing turns out to be too thick after adding the coloring, you can add a little more powdered sugar. The intensity of the icing color can also be adjusted by adding different amounts of dye.
DIY parchment cornet
A completely simple tool, but extremely convenient and indispensable for painting gingerbread cookies. No culinary syringes or bags have stood nearby and cannot compare with it. The cornet lies very comfortably in the hand. With its help, it is easy to maintain constant pressure, dose and apply glaze. It is made with your own hands from parchment, which is found in every home.
I fold the baking paper over, aligning it along the edge. I cut from the roll from the right angle side.
I unfold the cut part. The result is a square, which in turn is cut diagonally. I got two triangles, I’ll make a little bag out of each.
The tip for applying the glaze will be between the two sharp corners of the triangle.
I visually select the middle and begin to bend and twist the triangle into a bag.
There shouldn't be much of a hole left at the top.
Then I staple it together.
I put the cornet in a glass and fill it with protein glaze.
It became even denser and thicker after the break. Do not apply glaze all the way to the edge.
I push it to the very end and wrap the remaining paper.
I fasten it with a paper clip.
This is a simple but very effective device for applying cream.
Gingerbread painting
Well? Well, I sit down comfortably and start painting gingerbread cookies with sugar-white glaze. But first I’ll cut off the tip of the cornet with scissors. Don't rush to trim too much. Cut little by little, achieving the desired thickness of the line, trying to squeeze out the contents of the envelope.
Basic Rules
- How to apply glaze so that the line is even, voluminous, beautiful and smooth? It’s not at all difficult to answer you. Important! Do not draw a line along the surface of the gingerbread. So even a professional pastry chef will get convulsive ripples. Let's do it as I show you.
- I fix the icing on the gingerbread with the tip of the device and begin to slowly squeeze it out, while it should continue to hang in the air. Take your time and don't be afraid, nothing will happen to her. You can do whatever you want with the frosting.
- Also, do not forget to press the cornet evenly from top to bottom; the glaze itself will not flow out of it.
- Balance your pressure with how quickly you apply the pattern. Otherwise, if there is insufficient pressure and high speed of applying the glaze, it will tear. But if it’s the other way around, then you won’t get a straight line. The painting will not lie flat.
- It's easiest to put points. Squeeze out more glaze in one place - that's the point.
- A zigzag is drawn as follows. A dot is placed, a short straight line is drawn, again the dot is the top of the corner, the line is drawn down, and so on.
- You can correct any marks on the gingerbread using a regular toothpick or skewer. Just carefully remove the glaze or correct any unevenness.
A wonderful gift
You can decorate gingerbread cookies with icing with the most whimsical and fabulous patterns! Draw whatever you want on them.
I’m not your advisor here - fantasize, search, but don’t rush to draw. Drying time for the glaze is approximately 10 minutes. I hope it’s enough for you to admire your painted gingerbread cookies.
You can take a photo of them as a souvenir. And my advice to you is to varnish the most beautiful ones, make a Christmas tree decoration out of them, or give them as a souvenir to someone for the New Year. The fate of the rest is sealed.
Baking comes to life under your hands, gingerbreads bloom in patterns. In anticipation of the feast, the womb, there is harmony, peace, comfort there today. Having looked enough at the creations, he poured a glass full of milk and ate the painted ones until he was stupefied, as long as he had enough strength.
Bon appetit!
Gingerbread painting video:
https://youtube.com/watch?v=bQ5EWEVIA94%3Ffeature%3Doembed
Master class on painting with icing in several stages with your own hands
In this tutorial we will paint gingerbread cookies in the shape of small jam jars. They can be made using the following templates.
1) Use a brown food marker to mark the gingerbread: you need to draw a label with wavy edges, a lid and a napkin under it as shown in the photo.
2) We outline all the outlined lines with white icing so that the filling glaze does not flow beyond them. Leave to dry for 8-12 minutes.
3) Paint the jar with yellow glaze using a thicker nozzle than in step 1.
4) Fill the lid, napkin and label with white icing and leave to dry for at least 8 hours, preferably 12.
5) Using contour white glaze, using a thin nozzle, apply patterns to the lid and napkin (if you feel unsure, you can use a stencil) and trace the label around the perimeter. Then we drip a little icing under the lid and glue a small yellow satin ribbon bow.
6) Using brown contour icing, you can write on the label the name of the person to whom the gingerbread is intended. Ready!
How to make painted gingerbread cookies at home
First of all, I’ll tell you how to make homemade gingerbread cookies. To do this, I take the finished dough out of the refrigerator or knead it. If you just kneaded it, it should take about 12 - 24 hours before baking. Sprinkle the work surface with a little flour and roll out the dough to a thickness of 5 mm
It is important that it is of even thickness on all sides; for this you can use a rolling pin with limiters or special homemade strips made of cardboard and tape. Sometimes for this, I take 2 children's books, the same thickness, 5 mm each
Once again, I repeat that templates for gingerbread cookies can be either purchased or homemade; in the second case, you can make them more varied.
I apply the cut out sketch to the dough and carefully cut along the contour with a knife. If you have plastic or iron cuttings, then you will do everything much faster than me. Now I transfer them to a baking sheet with parchment, at a short distance from each other. Bake gingerbread cookies at 200 degrees, about 6 - 7 minutes or until golden brown. It is important not to overcook them in the oven, otherwise they will become hard later.
Immediately after baking, I let them cool, and then I put a paper blank on top, and with a toothpick I outline the contours, simply poking holes at a short distance from each other.
Making icing sugar is not difficult. Pour the egg white into the mixer bowl, add lemon juice and powdered sugar. Now I carefully mix everything and turn on the mixer at the lowest speed. I mix it like this for about 4 minutes, eventually it will turn white and become more fluffy, but not whipped, which is correct. The consistency should be medium and if I draw a line, then after 6 - 7 seconds it disappears. Now I divide it into 5 parts, since that’s exactly how many colors I need. I add a little food coloring to each part and stir until the color is uniform. Then I transfer each of them into a pastry bag or small ziplock bags. With this glaze, these will be the most delicious gingerbread cookies.
Next, I’ll show you how a convex pattern appears on gingerbread cookies. But one rule applies in this case, this is that you cannot fill two adjacent parts in a row, you first need to wait until the previous one dries. So, first I fill in the green leaf, smoothing the glaze with a toothpick. I fill the second one with the cherry, which should be a little hidden. After pouring each color, I gently shake the gingerbread from side to side several times so that the pattern lies perfectly even.
When they dry out a little, I pour in the second cherry. Now you need to wait again for at least 5 minutes.
I paint thin branches with brown color, from the berries to the leaves.
I add the finishing touches with pink; it has the same consistency as the others.
When the pink color has dried a little, I take white glaze and add light brown snow on the cherry and on the leaf itself. That's it, so I leave them to dry at room temperature for a day. Now you know how gingerbread is made, it’s quite painstaking work, but the process itself is so interesting that it’s addictive. If you have children, involve them in the process, because eating a gingerbread painted with your own hands is much more pleasant than buying one; even eating the drawing turned out not very perfect.
I hope you found answers to all your questions here and learned how to decorate gingerbread cookies with icing. New Year and St. Nicholas Day are coming soon, which means it’s time to give the kids sweet surprises, which could be just such gingerbread cookies. It is enough to find any drawing you like, print it or draw it, and then simply repeat all the processes as in this MK.
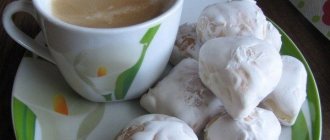
Custard honey gingerbreads
Thanks to this method of preparation, custard honey gingerbreads are soft and remain tender and tasty for a long time, so they can be prepared for future use for several days.
To prepare custard honey gingerbread we will need:
- Flour – 1.5 cups
- Natural honey – ½ cup
- Butter – 1 pack
- Egg – 1 pc.
- Rum – 1 tablespoon
- Sour cream – 30-40 g
- Spices and seasonings – cinnamon (you can add nutmeg, cardamom, cloves)
Heat the oil and honey in a bowl to approximately 75 degrees, gradually add ½ the amount of flour, spices and quickly knead everything. The mass should be dense and need to be cooled. Add the rest of the ingredients to the cooled mass and mix well until smooth.
Roll out the dough, cut out the gingerbread cookies and bake for 10-15 minutes at 200 degrees. If desired, gingerbread cookies can be decorated with icing.
Cooking tips
Before you start making gingerbread cookies, I would like to pay attention to some nuances that will help even inexperienced cooks cope with the task:
- The dough must be chilled before baking. The process of preparing the dough does not take much time (no more than 15 minutes): all prepared components are sequentially combined and kneaded. Next, the finished dough is wrapped in cling film and placed in the refrigerator (at least one hour). When cooled, it rolls out much easier, and the figures will not be deformed when laying them out on a baking sheet.
- The dough must be rolled out between sheets of baking paper. Don't be surprised by this way of working. Usually, to prevent the dough from sticking to the work surface and hands, we sprinkle it with flour. At the same time, there is a risk that it will absorb excess flour. But this will not happen when using baking paper. In addition, it is much easier to work with a layer in paper; you can rotate and twist it to roll it out more evenly. The advantages of this method include the fact that after rolling you will not need to wash the tabletop for a long time.
- The most interesting and painstaking part of the work is painting. You can decorate baked goods with protein-sugar glaze, and you can also make them colored with the help of food coloring. Then painted gingerbread cookies with glaze will be even more beautiful and festive. But if you don’t have enough time for such creativity, then you can simply sprinkle the baked goods with powdered sugar and tie them with colored ribbons. Such fragrant gifts will please all family members.
- To make the painted gingerbread beautiful, we recommend using special cutting molds. If you don’t have one and you’re not going to buy one, you can use an ordinary glass. True, all cookies will have a round shape. In addition, you can also prepare paper stencils.
How to bake honey gingerbread with glaze
The recipe for honey gingerbreads with glaze is not at all difficult to prepare: first, honey gingerbreads are baked from the dough, and then they are covered with specially cooked glaze. Gingerbread cookies prepared in this way are decorative; they can be used to decorate a Christmas tree or a room, thereby creating a festive atmosphere in the house. You can also give them as a gift to your best friends, work colleagues, and relatives.
Ingredients:
for test:
- Butter - 100 g
- Wheat flour - 270 g
- Granulated sugar - 100 g
- Chicken egg - 1 pc.
- Ground cinnamon - 2 tsp.
- Ground ginger - 2 tsp.
- Honey - 1 tbsp. l.
- Soda - 0.5 tsp.
for glaze:
- Starch - 0.5 tsp.
- Egg white - 1 pc.
- Powdered sugar-200-250 gr
- Freshly squeezed lemon juice - 0.5 tsp.
- Prepare the dough. To do this, combine softened butter (previously keep it at room temperature) with sugar and beat with a food processor for several minutes until white.
- Add liquid honey and egg. If your honey is thick, you need to melt it a little to the desired consistency in a water bath. We run everything through the combine again.
- Gradually add sifted flour with ground cinnamon, ginger and soda. And knead the dough by hand.
It will turn out plastic and will slightly stick to your palms, this is normal.
Place the dough in the refrigerator for a couple of hours to make it easier to work with later.
- The dough has already rested well and we will roll it out on a sheet of parchment paper, lightly sprinkling the sheet with flour. The thickness of the dough layer should be from 5 mm to 7 mm.
- We take molds and cut out any shapes - hearts, circles, crescents, etc.
- Place the gingerbread cookies on a baking sheet on baking paper, maintaining a distance between each other, since the products will increase in volume during baking. The oven should be heated to 180 degrees, the average baking time is 10 minutes.
youtube.com/watch?v=6WbQZkd0MPE&t=1s
When the honey gingerbreads have cooled completely and rested (for several hours), you can start decorating them with glaze.
How to make glaze for gingerbread at home?
First, carefully break the egg so that you can separate the white from the yolk. For the glaze we only need egg white.
Add starch with powdered sugar, sifted through a strainer, lemon juice and beat with a mixer to a stretchy mass - about 5 minutes. You can check the readiness of the glaze in the following way: if you lower a spoon into it and pull it towards you, it will follow the spoon.
If you want to decorate gingerbread cookies with white icing, you can do this now. If you want to apply colored icing, you will need food coloring. You need to add them to your taste, a few drops at a time, and see if the tone suits you.
At the same time, remember that after the colored glaze hardens on the products, it will acquire a brighter and more saturated tone. The photo shows colored glaze made by adding Americolor gel dye.
If you are going to apply patterns and inscriptions to gingerbread cookies, the glaze needs to be diluted with a small amount of water - add 1-2 tablespoons.
If you want to fill the entire surface of the gingerbread, make it even more liquid.
Contours and inscriptions with icing can be applied using a pastry syringe. In its absence, you can use a thick plastic bag, the corner of which must be cut off. First, fill the corner of the bag with colored glaze, and then cut off a little from the corner so that the hole is small - no more than 1.5 mm for inscriptions and outlining the outline. And for filling, we cut off more so that the hole is 2-3 mm.
We apply patterns to our honey gingerbread according to our taste and desire. You can, as shown in the photo, outline the gingerbread in the shape of a heart with colored icing - according to its shape. Let the contour dry for 10 minutes.
You can leave the gingerbread as is, but if you want to fill it, then fill it inside the rim with a thinner glaze. The next photo shows how the gingerbread is filled.
To ensure that the glaze spreads evenly on the surface of the gingerbread, shake it slightly.
Delicious, colorful honey gingerbread cookies painted with colored icing are ready! I wish everyone a great mood and bon appetit!
Painted gingerbread: master class
To prepare the dough, mix butter in a bowl, warmed to room temperature, with Beat the mixture with a mixer until smooth. The finer the sugar you use, the smoother the surface will be. It is not necessary to use a brown product; if you do not have one, you can use ordinary white sugar.
Next, break the egg and mix it with honey, add cocoa and spices. And don't forget about soda. It is she who makes the gingerbreads magnificent.
Next, slowly add flour into the mixture in small portions, mixing the ingredients each time. You need to add enough flour so that the dough becomes manageable and does not stick to your hands (but you shouldn’t overdo it either). Next, roll it into a ball, wrap it in film and put it in the refrigerator. Nothing bad will happen to it if it stays in the refrigerator even until the morning.
Gingerbread icing without eggs
For a number of reasons, not all people can eat eggs and products that contain them. In this case, instead of traditional icing, you can use eggless gingerbread icing.
The glaze prepared according to the recipe below turns out to be homogeneous, glossy, shiny, and lies evenly on the surface of the finished products. The step-by-step recipe is as follows:
- A tablespoon of milk and the same amount of corn syrup are poured into powdered sugar (110 g) sifted through a sieve. The last ingredient can be replaced at home with invert syrup or confectionery glaze.
- The icing is kneaded until smooth. If the glaze is too thick, you can add corn syrup.
- The desired dye is added to the finished icing, after which you need to put it in cornets and apply it to the gingerbread.
Another option for gingerbread glaze
you will need:
- 1 protein
- 250gr. powdered sugar
- lemon juice
- food colorings
In a dry bowl, beat the cooled egg white with a whisk and gradually add sifted (!) powdered sugar to it; when the egg white becomes dense, as in the photo, add 0.5 teaspoon of lemon juice or citric acid on the tip of a knife and mix everything again.
When your gingerbread frosting is ready, place it in a piping bag or use a file. To do this, cut off a corner of the file and place gingerbread glaze inside, now you can start painting gingerbread cookies, turning them into a gingerbread souvenir!
The finished culinary souvenir needs to dry for 1 day so that the glaze becomes hard and does not smudge.
Baking a gingerbread and covering it with glaze is only half the battle, the most responsible and important moment is ahead - painting gingerbread cookies, to master gingerbread painting, proceed step by step and go from small to large, you should not immediately take on complex patterns, master the key elements of gingerbread painting, secure them and gradually introduce new ones. Learn how to paint gingerbread below.
Souvenir gingerbread cookies with handmade glaze are presented in gingerbread boxes; we will talk about how to make boxes for gingerbread souvenirs with your own hands in another post.
And now a photo of gingerbread cookies with glaze for inspiration and creative ideas, your handmade culinary souvenir is almost ready!
What you need to know about gingerbread dough
Handmade gingerbread cookies made from ginger dough will be a wonderful gift for any occasion. People of any age, regardless of gender and social status, will want to receive such a gift. It is important that you can prepare such a gift yourself. Another plus of the product is self-painting. If you are preparing gingerbread cookies for your child depicting the characters of his favorite cartoon, it is worth involving the child in the coloring process - this way you will give him unforgettable emotions.
Our recipe is suitable for both gingerbread and regular cookies - you just need to change the thickness of the dough when rolling. You can modify it yourself depending on your taste preferences by adding ginger, cinnamon, cloves, cardamom and other spices. Gingerbread cookies with lemon zest are especially delicious.
The recipe will also discuss the method of preparing sugar glaze. Depending on the required consistency, a certain amount of powder and protein can be added to its composition. Depending on the thickness, the glaze is suitable for applying an outline and for completely filling the finished design. Food coloring is added to give a particular color shade. You can buy them in the store's confectionery department or make them yourself (beetroot juice is great for getting the pink color).
Gingerbread cookies that are baked and glazed remain soft even after several days of storage. If you need to keep gingerbread cookies fresh for a long time, simply store them in a tightly sealed cardboard box.
Preparing the glaze: third option
When the gingerbread cookies are ready, all that remains is to paint them. This is the most interesting and responsible part of cooking, in which the whole family can be involved. As a rule, cookies are decorated with protein glaze. To prepare it you will need one egg white. Unfortunately, you cannot be sure of the quality of store-bought eggs (the whites are used raw), so you can take 2-3 quail egg whites.
To prepare the glaze, grind the whites with powdered sugar (155 grams) using a silicone spatula. The powder is introduced gradually. To make the glaze more flexible, you can add half a teaspoon of starch (corn). Half a teaspoon of lemon juice will help make the glaze shiny. It should be remembered that the finished mass hardens very quickly, so it must be very quickly put into pastry bags or covered with a very damp towel.
We recommend preparing the cornet in advance before preparing the glaze, so as not to waste time on it later.
Holiday Ginger Treat Recipes
Honey gingerbread with cocoa
You will need: baking flour 600g + natural (82.5%) butter 80g + 3 chicken eggs + flower honey 80g + 200g powdered sugar + cocoa powder 15g + 1 tsp. soda To prepare the glaze you will need egg whites with powdered sugar (see below for the glaze recipe).
Heat the honey over medium heat, then the oil, mix and let cool. Beat the eggs and add them to the honey-butter mixture. Add cocoa, a little soda and spices. You should end up with a creme brulee colored mass with air bubbles. Sift the flour and mix with the liquid part. You will have to knead with your hands, otherwise there will be large bubbles.
You might be interested in knowing how to make homemade chocolates.
Break the resulting dough into pieces, wrap in film and place in the freezer for half an hour. Then we roll out and form figures or simply make molded gingerbread cookies. Cook in the oven at 150º for 20 minutes.
With nutmeg
- Wheat flour 450g
- Sugar 125g
- Butter 125g
- Chicken egg 1 pc.
- Honey (preferably buckwheat) 125g
- Ginger with cinnamon 1 teaspoon
- Salt (pinch)
- Baking powder (sachet or 1.5 tsp)
- Soda ½ tsp.
- Nutmeg ½ tsp.
- Cloves (a pinch, to taste)
Mix flour with sugar, spices, baking powder, soda and salt. There is no need to melt the butter; cut it into cubes and grind with the resulting dry mixture. Add a tablespoon of water, honey and egg. Knead the dough, roll it out and cut out the shapes. Cooking mode – at 170º no more than 12 minutes.
As you can see, the dough does not require “ripening”; it can be prepared on the go. This is a traditional recipe for Christmas baking. White chocolate works great as a coating instead of frosting.
Gingerbread Lebkuchen
This is a German pastry with a large range of spices in its composition. The aroma is simply incredible! In Germany, they are traditionally prepared for Christmas, served with mulled wine or hot chocolate.
Spice mixture (in teaspoons): lemon zest – 2, orange zest – 1, cinnamon – 8, coriander – 1, anise – 0.5, nutmeg – 0.5, allspice and ground black pepper 0.5 each, fennel and ginger 1 each.
For the test:
- Wheat flour 0.5 kg
- Natural butter 82.5% fat 80g
- Granulated sugar 80g
- Egg 1 pc.
- Baking powder and soda 0.5 tsp each.
- Honey 300g
- Water 15-20 ml
- Bouquet of spices 3 tablespoons
- Heat honey with butter, add sugar. The latter should dissolve. Cool to normal temperature. Mix the egg and a bouquet of seasonings with the contents. Dissolve baking soda and baking powder in water, pour into remaining ingredients and stir. Add pre-sifted flour to the ingredients in parts and knead the dough until it is no longer sticky. It should stay in the refrigerator for 1.5-2 hours. Bake at 180º for 10 minutes. Enjoy the taste and aroma!
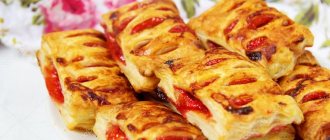
Chocolate and nuts with candied fruits
Ingredients: chocolate (bitter or any other 50g) + nuts (almonds with hazelnuts 90g each) + candied orange 100g + fresh ginger to taste + oatmeal (in the form of finely ground flakes up to 100g) + baking flour 200g + candied fruits (any up to 100g) + 2 chicken eggs + butter “Peasant” 82.5% 120g + cocoa powder (2-3 tablespoons) + powder or sugar 100-150g + packet of baking powder + seasonings to taste.
Chop the nuts into pieces. Grind the orange with candied fruits and ginger. In one container, prepare the following mass: grind the “Peasant Woman” with sugar and add eggs. Whisk and sprinkle with chocolate chips. In a second container, mix oatmeal, flour (don't forget to sift), cocoa, spicy seasonings, baking powder, candied nuts. Combine and stir the contents of the two containers. The dough is ready! According to German tradition, such gingerbread cookies are formed into flat cakes and baked for 10 minutes at 180º. Decorate them with melted chocolate and serve with tea!
Painted gingerbread cookies
Not only adults, but also children love sweet and beautiful gifts for Christmas and New Year. If you want to surprise your family and friends, as well as colleagues, prepare real Christmas painted gingerbread cookies. They can be decorated with sugar icing, making them more appetizing and attractive. Such an unusual gift will be remembered for a long time.
You can also hang a painted gingerbread on a Christmas tree as a New Year’s decoration. The beauty of such a toy is that children can take it off and eat it at any time. The aroma and beauty of gingerbread create a unique festive and magical atmosphere in the house.
Many housewives are afraid to take on making ginger cookies. To an unenlightened cook it may seem that making such a dessert is not an easy task. In fact, it’s not that difficult to bake painted ones; it’s quite simple, but it will require some time. And the most interesting part is that decorating cookies can be turned into real family fun.
There are a lot of cooking recipes, and many of them are very similar. In our article we want to talk about one of them.
Maria Belaya's blog
Hi all. The other day I promised to share with you a recipe for delicious gingerbread cookies. If you've been waiting, catch the article. These gingerbread cookies turn out moderately sweet, with subtle notes of ginger and cinnamon. They are not bitter at all. After baking, they harden a little, but I assure you, you won’t break your teeth on them (I tell you this as a dentist).
I’ll tell you a secret, I’ve been eyeing this kind of gingerbread for a long time, or rather decorating cakes with such toppers. It looks really cute. I put off getting acquainted with this test until the last moment, thinking that it was all extremely difficult. After all, many confectioners do not create this type of decoration themselves, but order them from “gingerbread fairies.”
Of course, in order to color a gingerbread with any cartoon character, it will take a lot of time and artistic talent. But the most frequently ordered gingerbread cookies in the form of hearts, numbers, letters, stars, etc. can be prepared independently. You don't need any special talents for this.
So, how to make gingerbread at home, recipe with photos step by step.
Ingredients:
- 250 g honey
- 250 g butter (82.5% fat)
- 400 g sugar
- 850 g flour
- 4 eggs
- 1 level teaspoon of baking soda
- 1−2 teaspoons cinnamon and ginger
- 1 teaspoon nutmeg, cloves, black pepper (these spices can be replaced with your favorite ones or omitted altogether)
Preparation:
I want to warn you right away that the dough must be made in advance. It should reach the desired consistency in the refrigerator, and this will take at least 6-8 hours, or better yet 12. It seemed to me that the indicated portion was very large and I only made half, which I later really regretted. The finished dough is perfectly stored in the refrigerator for a long time (about 2 months), as are the gingerbread cookies themselves. So my advice is to make a full batch at once, and simply divide the finished dough into several bags and bake as needed.
Let's get started.
Place the honey and spices in a thick-bottomed saucepan and bring it to a boil, stirring occasionally.
As soon as the honey has boiled, remove it from the stove and melt our butter there.
While the honey and butter are cooling, we will prepare the remaining ingredients. We need to beat eggs with sugar. At first glance, it may seem that there is a lot of sugar in the recipe (after all, it also contains honey), but believe me, in the end the gingerbread cookies are not cloying!
The eggs should turn white and noticeably increase in volume.
Add our honey and butter in a thin stream to the egg mixture. Be careful, honey syrup should not be hot! Cool it to a pleasant temperature. While adding honey, the mass should be stirred carefully, trying to maintain all its airiness.
Next, add flour and soda to this mixture. We also carefully stir in.
The finished dough is liquid. As I wrote above, it reaches the desired density in the refrigerator.
We pack our dough into bags and put it in the refrigerator. I clean up for the night.
After the specified time, the dough acquires a dense, velvety structure. But, it's still quite sticky. Therefore, we roll it out on a floured surface.
The thickness of the rolling depends on the size of the figures, about 3-5 mm ideally.
We cut out the figures we need using molds or, if there is no necessary cutting, you can print the desired picture on a printer and cut it out with a knife, tracing the outline.
Another tip is to try to position your pieces as close to each other as possible when cutting out the dough. This will leave very few scraps. The fact is that when you subsequently roll out the same portion, the dough will absorb even more flour each time, which can ultimately cause problems, such as deformation of the lower surface of the finished gingerbread. Of course, it doesn’t make much difference for the family whether the gingerbread cookies turn out with dimples or not, but such masterpieces definitely shouldn’t be given away for sale.
Transfer the cut out figures to a baking sheet lined with parchment. I baked them on a silicone mat, which I don’t recommend doing, because at high temperatures the mat goes in waves and the gingerbreads then turn out not even, and there may be voids underneath. The best option is a Teflon mat, but since I don’t have one in my arsenal, good baking paper is a completely adequate replacement.
As in the case of cottage cheese cookies, it is better to place the gingerbread cookies on a baking sheet of approximately the same size, or you will have to take some out earlier so as not to dry them out. Another very important point is that gingerbread cookies increase in volume during baking, so we leave them a decent amount of space. The larger the gingerbread, the more space it needs.
Place the baking sheet in a preheated oven and bake at 170º for 12-15 minutes. Baking time depends on the size of your gingerbread cookies. Oven mode top-bottom.
How do you know when the gingerbread cookies are ready? This is a matter of practice. It shouldn’t darken much; if it browns around the edges, it’s overbaked. Remember, gingerbread is soft in the oven! But if you pressed it with your finger and it leaves a noticeable dent, then the gingerbread is not ready yet. The baked gingerbread easily comes off the surface on which it was baked. Over time, you will find the time that works best for you. Watch.
Cool the finished gingerbread cookies on a flat surface. Many people also advise pressing the gingerbread on top with a weight so that it does not change its shape. I tried this and that. I didn’t notice much of a difference, so I didn’t use the weight the next time. But, if you notice that the edges of the gingerbread cookies are bent, then do not be too lazy to place a board on top of them until they cool completely.
If you want to decorate a cake with gingerbread on sticks, there are 2 ways. Either we bake the gingerbread with the stick already inserted, or we place the stick in the gingerbread as soon as we take it out of the oven, while it is soft. On my own behalf, I want to say that I tried both options, but it was more convenient for me to string the gingerbread after baking. It's easier and faster for me. However, this requires skill; this must be done quickly before the edges harden. If you bake with sticks, I advise you to soak them in water first so that they do not change color during baking.
As they cool, the gingerbread cookies will harden. It’s better to paint them after they’ve cooled completely, or even better, give them half a day to rest and only then start decorating, if you’re using them for a cake. But, I warn you right away - they are very tasty. And personally, I, not a fan of unnecessary colors in food, prefer to eat them without glaze.
You should decorate the cake with them immediately before serving, as the cream will make the surface soggy.
A special word about the glaze. I can’t share its recipe yet, because it’s not ideal. As soon as I succeed, I will definitely write a separate post. But, I want to immediately note that this is protein with sugar. Raw protein! And if you are afraid of salmonella, then your solution is dry albumin protein. You can buy it in large supermarkets, or in specialized stores for confectioners; there are also departments where they sell all kinds of dietary supplements and nutrition for athletes.
These bright gingerbread cookies decorated my cake. Even after 2 weeks, the gingerbread cookies did not change their taste and consistency. They remained just as crispy and tasty.
Make your children happy, because these cookies can also be cut out together with the kids. And the recipe for meringue on a stick is already on the blog, here is a link to the article - Meringue.
Hidden inside this cake is a Dairy Girl with yoghurt cream and fresh strawberries in the layer; the top of the cake is lined with butter cream cheese. All recipes are on the blog, the links are clickable.
By the way, such gingerbread cookies can be prepared without using honey. This is extremely important for those who are allergic to bee products. If you need a recipe for a replacement syrup, write. I'll try to post it.
Enjoy your meal.
How to store at home
And don’t worry that your honey-gingerbread cookies will go stale before you paint them. Although a whole week has passed, they can be stored in a tightly closed container for up to three months. Without losing any of its taste. The gingerbread cookies will remain soft and fragrant. After all, honey, sugar and spices included in their composition are excellent preservatives. You don't even need a refrigerator to store baked goods.
The only thing that can interfere is that they will simply be eaten without reaching the decoration. And so at any time you can prepare icing for gingerbread cookies and paint them as you please. True, in order to decorate everything beautifully, you need to know some secrets in working with them.
There is no need to immediately panic and get upset, thinking that nothing will work out for you. Did I succeed?! Moreover, I have prepared for you a step-by-step master class with photos on painting gingerbread.
Delicious homemade honey gingerbreads: recipes with photos
The honey treat will provide health benefits if consumed in moderation. Sweets help increase the release of endorphins into the blood, which improve your mood. Honey, which is part of gingerbread, has a rich composition. It slows down the aging process, improves metabolism, and suppresses the development of bacteria.
The traditional recipe uses rye flour, which helps cleanse the intestines and restore the condition of the digestive tract. Homemade delicacy is high in calories. It contains easily digestible carbohydrates, which are quickly absorbed into the blood and deposited in the form of excess fat deposits. Therefore, you should eat no more than 1-2 gingerbread cookies a day, so as not to harm your figure.
Delicious homemade honey gingerbreads: recipes with photos
Color mixture for decoration is bright, catchy and very appetizing
What to do on a cold, boring evening? Well, of course, painting gingerbread cookies with icing. By the way, you can also involve your child in this exciting process. This activity will surely please the restless person.
To prepare a colored mixture for decoration, you should prepare the following ingredients:
- a glass of powdered sugar;
- 1 ml food coloring;
- protein.
Please note: give preference to natural food colors. They cost an order of magnitude more, but they do not contain harmful or toxic components.
Among natural dyes, it is necessary to note carotenoids, anthocyanins, flavonoids, and chlorophylls.
Beat the protein into a dry bowl, add any coloring of your choice, and begin to gradually add granulated sugar. If you want to create several colors from this mass at once, do not rush to add dye. After you prepare the classic version of the mixture for decoration, divide it into several parts, and only then add the dye. You control the color concentration yourself. Pour the mixture into pastry bags and begin painting the confectionery.
Royal icing (recipe): gingerbread icing for painting
For royal icing, which is used to create the outline of a design and painting, you will need fresh egg white, powdered sugar and lemon juice. The recipe for making the glaze is as follows:
- Pour the whites of two or three eggs into a deep bowl, weighing a total of 90 grams.
- Pour finely ground powdered sugar (455-500 grams), previously sifted through a sieve or organza, on top.
- Beat the contents of the bowl with a mixer, first at low speed, and then at medium speed until smooth and stable peaks form.
- Before finishing kneading, add 5 drops of lemon juice to the glaze.
If the icing has a yellowish tint, this means that the protein mass is not completely whipped. If the sequence of actions is carried out correctly, you should get a snow-white and glossy glaze for painting gingerbread cookies. The recipe, about which you can find only positive reviews, allows you to create high-quality, easy-to-use icing.
The finished glaze dries very quickly in the air. To prevent this from happening immediately after kneading, you need to fill the cornets with icing and start painting.
Another gingerbread dough recipe
I have ones on my blog that I really like in taste. I liked this recipe because the gingerbread cookies turn out perfect for painting: smooth, even. I found it on the website.
500 grams of flour plus about 100 grams for mixing 150 grams of powdered sugar 100 grams of butter 225 grams of honey 1 egg + 2 yolks 1.5 level teaspoons of soda (you can also add a little cocoa)
From this quantity I got 25 gingerbread cookies with a diameter of 10 cm and a thickness of 4-5 mm in finished form (rolling out 2-3 mm).
Mix the dry ingredients (flour, powdered sugar, soda, spices) and grate them with grated butter. You can do it in a blender.
Heat honey until hot (do not boil) and pour into dry ingredients. Then add eggs and yolks.
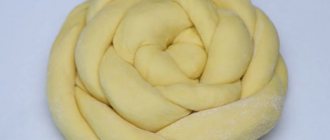
Knead soft but elastic dough. Knead for about 5 minutes. The dough should not float, but it should not be very tight either, since then it will be more difficult to work with it. Wrap the dough in a bag and let it rest for 5-10 minutes.
Roll out the dough to a thickness of 2-3 mm, cut out the desired shapes and bake at 180 degrees. 8-9 minutes in convection mode. Cool the gingerbread cookies completely before applying the icing.
Classic honey gingerbread recipe
The traditional delicacy recipe involves using a minimum of ingredients. An excellent addition to the dessert would be sweet glaze, which you can prepare yourself. In the classic recipe, you can use butter or margarine. But you need to make a choice in favor of oil. In this case, the gingerbread cookies will be more fragrant and healthy. After all, the composition of modern margarines cannot be called correct.
Ingredients:
· Any honey – 1 glass; · Rye flour – 2 cups; · Granulated sugar – 2 heaped tablespoons; · Butter – 1 tablespoon; · Baking soda – ½ teaspoon; · Chicken egg – 1 piece; · Spices (ginger, cinnamon, cloves, vanilla) to taste.
Cooking method:
- Place honey in a thick-bottomed saucepan and heat it over low heat;
- Add spices, butter and sugar to the honey, stir constantly so that the mixture does not burn;
- Sift the flour into a bowl, add the egg and soda, carefully add the warm honey mass;
- Knead the thick dough and leave it to rest in the cold for 2-3 hours;
- Roll out the base to a thickness of 0.5 cm, cut out the gingerbread cookies of the desired shape;
- Place the blanks on a baking sheet lined with parchment paper, greased with oil and lightly sprinkled with flour;
- Bake the products for 8-10 minutes. Depending on the oven, the temperature can be set at 180-200 degrees.
If you want the gingerbread cookies to look more solemn, you can decorate them with icing. To prepare it you need to take half a glass of sugar, 1/3 glass of water and chicken protein. First you need to prepare the sugar syrup. To do this, heat the water and sugar in a saucepan for about 10 minutes at a low boil. Then beat the egg whites to sharp peaks and add syrup to it. As you add the syrup, whisk the mixture constantly.
How to Make a Lemon Garnish Mix
Glaze with the addition of lemon is an excellent find for that category of home confectioners who want to give baked goods an exquisite taste, with notes of sourness, and at the same time give the delicacy an appetizing appearance. Don't mind adding fresh eggs? Then this glaze option is created especially for you. To prepare the lemon mass, you should prepare the following ingredients:
- 100 grams of powdered sugar;
- vanilla extract to taste;
- 4 teaspoons lemon juice.
Sift granulated sugar into a dry bowl until all lumps are removed. Gradually begin to introduce lemon juice and vanilla extract to taste. It is ideal to use freshly prepared juice rather than store-bought juice. Carefully monitor the consistency of the mass - it should turn out thick at the end.
After you prepare the lemon glaze, you should immediately coat the confectionery with it. You can paint the gingerbread cookies or simply pour the liquid over the baked goods, vigorously stirring them in the bowl.
Steamed honey gingerbreads
You can prepare a delicacy not only in the oven. Confectionery in a double boiler or slow cooker turns out very tasty. Despite the fact that the sweetness is not baked, it still turns out rosy and appetizing. It is also worth noting that with gentle temperature treatment, the maximum amount of nutrients is retained in the dessert.
Ingredients:
· Sugar – ½ cup; · Rye flour – 1.5 cups; · Butter – 2 tablespoons; · Honey – 1.5 tablespoons; · Chicken egg – 1 piece; · Baking soda – ½ teaspoon.
Steamed honey gingerbreads
Cooking method:
- Melt butter, honey and sugar in a water bath;
- While the mixture has not yet warmed up, add the egg and baking soda;
- Knead the dough until smooth;
- Remove the dishes from the water bath and sift the flour into the slightly cooled mixture, knead the dough;
- We form round gingerbread cookies with wet hands and place them in a double boiler or multicooker;
- Steam the dessert for about 40 minutes.
Very popular gingerbread cookies. They are prepared with the addition of 2 teaspoons of dry ginger. Ginger-honey gingerbread is considered a European delicacy. They are perfect for the festive New Year's table, as a dessert for tea or coffee. Ginger delicacy is loved not only by children, but also by adults.
Which of the proposed recipes to prepare honey gingerbread is up to you. But it’s better to try several options and choose what you like.
3 dinners for two with free delivery for RUB 1,990.
View menu
Recipe with spices and cocoa
How to make painted gingerbread cookies? There are quite a lot of recipes. They are all similar in some way. The recipe we offer is based on the use of a large number of spices and the addition of cocoa. We will add all the spices one teaspoon at a time, and only ½ teaspoon of ground pepper is enough. As for the thickness of the rolled dough, each housewife chooses the most acceptable option, since some people like thinner cookies, while others like fluffy gingerbread cookies.
There is another trick that allows you to get colored baked goods. After all, very often in pictures we see dark gingerbread cookies. But how can you achieve such a shade? Dark honey will not cope with this task. It turns out that dark syrup is used to obtain the shade. It is not so easy to find, but you can do without it. To get a chocolate shade, just add one or two tablespoons of cocoa to the dough.
A simple recipe for homemade honey gingerbread with nuts
Homemade honey gingerbread with nuts is a simple and quick recipe for making delicious and aromatic gingerbread.
Ingredients:
For the recipe for homemade honey gingerbread we will need the following products:
for test:
- 400 g hazelnuts or any other nuts
- 100 g flour
- 50 g orange and lemon peels
- 1 teaspoon baking soda
- 125 g honey
- 50 g sugar
- 25 g butter
- juice of 1 lemon
- 1 egg
for transparent glaze:
- 0.5 cups powdered sugar
- 1 egg white
- 1 teaspoon lemon juice
- Finely chop the nuts with a knife or roll them with a rolling pin, or grind them in a blender.
- Add chopped nuts, chopped candied fruits, and soda to the flour sifted through a sieve.
- In a saucepan, heat honey, sugar, butter and lemon juice.
- Let's combine both mixtures: nut-flour and heated in a saucepan, add the egg there and knead the dough.
- Roll it out to 1.5 cm thick and leave it on a greased baking sheet overnight at room temperature.
- The next day, preheat the oven to 180 degrees and bake the dough for 30 minutes.
- Let's prepare the glaze: mix all the ingredients in a mixer and immediately apply on top of the hot cake, as the glaze quickly becomes viscous.
- Cut the cake into rectangles and decorate the top with candied fruits or nut kernels.
As soon as the gingerbread cookies have cooled, the dessert can be served at the festive table.
Bon appetit!
Types of painting, tools
You can decorate gingerbread cookies with painted patterns using several techniques. The most difficult ones, requiring a steady hand and some skills, are openwork curls and mesh. It is these patterns that make baked goods elegant and especially festive. Openwork painting of gingerbread cookies will require a lot of time from novice cooks and, possibly, several damaged baked goods. But it's worth it, so you have to try.
A pastry bag is the main tool for painting and decorating baked goods.
For any painting work you need a standard set of tools:
- pastry bag with several nozzles;
- small spoons;
- toothpicks or needles;
- pastry blades.
Professionals complement this set with special tools for performing drawings using complex techniques. If the described tools are not available, you can use an ordinary thick plastic bag, in which, after filling with glaze, the tip of the desired diameter is cut off. The smaller the diameter of the cut tip or nozzle of the pastry bag, the thinner and more graceful the pattern.