No festive feast is complete without a cake. And for no reason, from time to time you want to pamper your household with a delicious dessert. It’s good if it doesn’t take long to prepare, so you can spend the whole day not near the oven, but in the company of your loved ones. Below is an easy recipe for cake with banana and kiwi. Fruits add zest to it, making the dessert tender and soft. The article will also present other recipes for cakes filled with kiwi and bananas. Step-by-step descriptions will allow you to speed up the cooking process and ultimately get an excellent result.
Sponge cake with banana and kiwi
Do you still claim that you don't like fruit in baked goods? This means only one thing - you haven’t tried banana and kiwi cake yet. The recipe for this amazingly delicious dessert is very simple. Even a novice pastry chef can prepare such a cake, let alone an experienced housewife.
The recipe includes several steps:
- Kneading the dough, baking the biscuit and cutting it into cakes. This recipe should make three of them.
- Preparing sugar syrup and soaking cut cakes with it. Cognac is added to the syrup for flavor. If the cake is being prepared for children, this ingredient can be skipped.
- Whipping cream based on sour cream and boiled condensed milk. No sugar is added to it because the milk is quite sweet. If desired, you can make traditional sour cream without condensed milk.
- Assembling and decorating the cake. You can grease it with the remaining cream and decorate it with pieces of fruit or pour it with chocolate glaze. It will also turn out very tasty.
How to decorate a cake with fruits in jelly
Decorate the cake with fruits in jelly.
The optimal solution for decorating a sponge cake is fruits in jelly.
This allows you to create tall multi-layer products. Jelly-coated fruits and berries can be used to decorate not only the surface, but also be used as a layer. In the latter case, a layer of thick cream, fruit confiture, jam or soufflé is placed between the cake and the jelly-fruit mass.
Cake ingredients
To prepare this dessert you will need simple and affordable ingredients. The result is an inexpensive homemade kiwi and banana cake.
The recipe contains the following ingredients needed for kneading the dough and baking the sponge cakes:
- wheat flour - 2 tbsp;
- sugar - 2 tbsp;
- large eggs - 6 pcs.
The cake impregnation is prepared from the following products:
- granulated sugar - 125 g;
- water - 100 ml;
- cognac - 1 tbsp. l.
For the cream you will need the following ingredients:
- boiled condensed milk - 270 g;
- sour cream 25% fat - 400 ml.
To assemble and decorate the cake you need to prepare:
- banana - 2 pcs.;
- kiwi - 5 pcs.;
- coconut flakes - 30 g.
A 200 ml glass is used as a measure of weight.
Compound:
Dough:
- 225 ml curdled milk
- 225 ml milk
- 150 ml vegetable oil
- 250 g sugar
- 500 g flour
- 1/3 teaspoon salt
- 2 teaspoons soda
- 6 tbsp. spoons of coconut flakes
- 2 tbsp. tablespoons zest of one lemon
- 1.5 tbsp. spoons of lemon juice
Cream:
- 350 g butter
- 1 can of condensed milk
And further:
- 9 pcs ripe kiwi + 2 pcs for decoration
- 5 tbsp. spoons of sugar
- 6 tbsp. tablespoons toasted coconut for sprinkling
Important nuances
The cake will be 100% delicious if you take into account the recommendations from experienced chefs when preparing it:
- It is advisable to bake the biscuit in advance, at least 12 hours before assembling the product. Then it will become denser and it will be easier to divide it into cakes.
- Cool the finished biscuit on a wire rack, turning it upside down. This will allow you to level the cake in height and get rid of the “top” that appears in the oven. It is recommended to wrap the completely cooled biscuit in cling film and place it in the refrigerator until the impregnation is ready.
- Sugar syrup can be prepared not on the stove, but in the microwave. Just put sugar in a glass of water and heat it up on high power for 2 minutes. Once the sugar crystals have dissolved, the syrup is ready.
Decorating cakes with carving
Carving is considered a complex way of decorating cakes with fruit. However, this technique is within the capabilities of even novice masters. The main thing is to cut the fruits in a certain sequence with a thin knife.
It is necessary to have special devices - a slicer, a thin carving knife, a vegetable peeler.
It is better to start experiments with familiar fruits.
We offer some carving ideas with apples and pears:
- Apple basket. Cut the fruit in half, scrape out some of the pulp from one half with a spoon to imitate a basket. Cut a flower from the second, string it onto a toothpick and insert it into the lower half (basket). Fill it with other fruits and berries. Such baskets can also be made from other oval-shaped fruits - mango, peach, etc.
- Flower. Cut the apple into halves, remove the seeds and cut into very thin slices. Form them into a flower. Apple slices can be blanched in syrup or coated with a thin layer of jelly.
- Leaves. In the center of the apple quarter, make a longitudinal notch, the edges are jagged, reminiscent of leaves.
- Pear hedgehog. Peel two-thirds of the fruit from the narrow side. Simulate needles by inserting toothpicks with stringed grapes into the pear. In the peeled part, make the nose and eyes using currants or blueberries.
- Strawberry flowers. You can cut the berries into thin slices and arrange flowers from them in the center of the cake. The best solution for a volumetric composition is to place a cake or chocolate vase in the recess. You can cut the berries to the base and slightly open the resulting petals. Then thread it onto a skewer/toothpick and attach it to the crust.
- Asterisks. Using a knife, cut parallel indentations along the peeled banana and then cut into circles. Decorate the cake with the resulting stars in accordance with your idea.
With the help of berries and fruits you can make original decorations without any special equipment. For example, small berries of different colors are suitable for placing congratulations, pictures or other patterns on the cake, which can be covered with jelly.
Cheesecake made with cookies, bananas and kiwi
The absence of an oven is not a reason to refuse the cake. Without baking, you can also prepare a delicious dessert for breakfast or for the holiday table. The step-by-step recipe is to perform the following procedure:
- Soak 4 teaspoons of gelatin in cold boiled water (100 ml).
- Place cookies (200 g) in a blender bowl and grind them into crumbs.
- Pour in melted and slightly cooled butter (70 ml). You should end up with wet crumbs. Place it in a springform pan and spread it across the bottom. Compact well with a silicone spatula.
- Place the pan in the refrigerator to allow the cookie crust to set.
- Kiwi (4 pcs.), peel, cut into cubes and place in a saucepan. Sprinkle sugar on top.
- Place the pan over low heat and simmer for three minutes until the sugar dissolves. Cool.
- Make cream from 150 g of cottage cheese and 300 ml of sour cream using an immersion blender.
- In a saucepan, bring the swollen gelatin to a boil until it melts. You can't boil it. Otherwise, gelatin will lose its properties.
- Cut bananas (2 pcs.) into slices.
- Remove the form from the refrigerator. Place banana slices on top.
- Add the curd mass to the cooled kiwi syrup and pour in the gelatin. Transfer the filling to the crust, then place the pan in the refrigerator.
- After 6-8 hours, decorate the frozen no-bake cake with kiwi and banana with grated white chocolate and pieces of fruit. Can be served for breakfast with tea or coffee.
Cakes decorated with fruits and chocolate
Chocolate is recognized as a universal product for decorating confectionery products; it goes well with most products suitable for decoration.
- Chocolate chips. Cover the sides and top surface of the cake coated with cream mixture. It’s very simple to prepare: grate a chilled chocolate bar on a grater or slice it with a knife.
- Chocolate glaze. Melt the chocolate in a water bath or in the microwave, mix with a small amount of cream/milk. Treat the surface of the product with the prepared glaze or make chocolate streaks. Refrigerate the cake for at least 4 hours before frosting.
- "Lace" made of chocolate. Melted chocolate is a great opportunity to draw any pattern, figure, picture. Draw them on parchment, let them harden, and decorate the cake.
- Glazed fruits and berries are the best decoration for a chocolate cake. Dip the fruit into powdered sugar and then into the hot chocolate glaze. Place on greased foil to set and decorate the cake.
You can decorate fruits and berries with chocolate icing. Fill a confectionery syringe or a parchment bag with melted chocolate, and paint the fruits as much as your imagination allows.
A wonderful addition to the chocolate and fruit decor would be decorating the cake with candies, other sweets and mini chocolates.
No-bake cake recipe with fruits
The next dessert can be offered to children. But despite the fact that this cookie cake with kiwi and banana is very simple, it will turn out tasty and tender, soaked in sour cream and fruit juice. In addition, children will be able to directly participate in its preparation and feel like confectioners.
The dessert recipe consists of the following steps:
- Prepare 400 g of long-lasting cookies, for example, “Zoological” or “Alphabet”.
- Using a mixer, beat sour cream (700 g) with sugar (1 ½ tbsp.) until the crystals are completely dissolved. You should get a homogeneous cream. It is advisable to use sour cream with a fat content of at least 20%.
- Place the cookies in a bowl with sour cream, stir and place in the refrigerator for 1 hour. To make the so-called shortcakes softer.
- Meanwhile, peel the kiwis and bananas (2 pieces each) and chop thinly.
- Place cookies on a flat plate with a spoon in 2 layers, thus forming a crust. Scatter bananas on top.
- Place a second layer of cookies on a plate. This time, distribute kiwi slices on top.
- Place the last layer of fruit cookies, filling with the remaining sour cream. Decorate as desired: cookie crumbs, grated chocolate or fruit.
Step-by-step preparation
Step 1:
The set of products for a sponge cake is very simple: eggs, sugar and flour. For a small cake I reduce the proportions by 2 times
Step 2:
Beat eggs with sugar
Step 3:
Beat until a strong foam or until the mass doubles. It turned out very airy and bubbly.
Step 4:
Carefully add flour. Here opinions differ: everyone claims that you can’t beat with a mixer, because... in this case, the air mass can settle. I say the opposite - the recipe has been tested hundreds of times in our family and this has never happened from beating with a mixer. But of course you can do as you are used to - the main thing is your good mood
Step 5:
Whisk just a little bit, just so that the flour is incorporated into the total mass.
Step 6:
As you can see in the photo, the mass continues to bubble
Step 7:
Cover the pan with baking parchment and grease with vegetable oil.
Step 8:
Pour the dough into the mold. Bake at 180 degrees for 40-50 minutes depending on your oven. It is very important not to open the oven for the first 30 minutes - this can actually cause the biscuit to fall off.
Step 9:
After 45 minutes, my sponge cake is ready - check readiness with a wooden stick or toothpick
Step 10:
These are the remaining ingredients that will be needed for our cake: sour cream and boiled condensed milk, crumbs of any cookies and coconut flakes, water and sugar for syrup, and, of course, bananas and kiwi
Step 11:
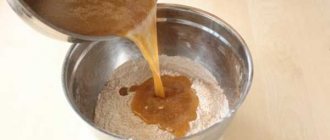
For impregnation, make a syrup - mix water with sugar, heat in the microwave and stir until the sugar dissolves
Step 12:
Cut the completely cooled sponge cake into 3 layers.
Step 13:
Soak in the resulting syrup
Step 14:
Set the soaked cakes aside for a while
Step 15:
For the cream, combine sour cream with boiled condensed milk
Step 16:
Beat a little with a mixer, just to mix the ingredients well, but I think at this stage you can do without it
Step 17:
For the cake layer, cut banana into slices
Step 18:
Step 19:
Cut into thin slices
Step 20:
And now the most interesting thing - we will assemble our cake
Step 21:
Coat the first cake well with cream
Step 22:
Arrange banana and kiwi slices on top
Step 23:
Cover with the second cake layer and also coat with cream and place our fruit on top
Step 24:
Coat the finished cake on all sides with the remaining cream.
Step 25:
Decorate with kiwi slices. I deliberately did not put bananas on top, because... they get dark quickly
Step 26:
Gently sprinkle with a mixture of cookie crumbs and coconut flakes. The cake is ready, it just needs to soak for a couple of hours! Ideally, leave it overnight!
Step 27:
In the morning, cut off a piece and enjoy!
I want to say that the next morning the kiwis released their juice and gave off their sourness. The cake turned out moderately sweet, very tender and rich. We really liked it! I will definitely be making this again and again! Prepare it - I'm sure you'll like it too!
Sour cream jelly cake with kiwi and banana
The next dessert is perfect for a hot summer day. This cake is prepared with kiwi, sour cream and banana. The recipe can be presented step by step as follows:
- First of all, pour gelatin (20 g) with cold water (120 ml) and leave it on the table for 1 hour.
- Bake a sponge cake. To do this, make a dough of 5 eggs, 1 cup of sugar and the same amount of flour. Then pour it into a mold, which is placed in a preheated oven for 35 minutes. Cut the cooled cake into squares.
- In a similar way, chop a banana (1 kg), and cut the kiwi into thin slices.
- Prepare cream from sour cream (1 l) and half a glass of powdered sugar. Pour the pre-dissolved and cooled gelatin into it in a thin stream, then mix again.
- Combine the cream with biscuit pieces and banana, mix.
- Cover the bottom of a wide and deep bowl with film, place kiwi slices on top, and then distribute the filling.
- Place the dessert in the refrigerator. Once completely frozen, turn it over onto a flat plate and remove the cling film.
Soufflé cake with tangerines recipe, photo
Mandarin is a sweet citrus with a rich flavor. People often associate this fruit with the winter season and New Year's holidays. This happens because this particular season turns out to be fruitful for tangerines in warm countries.
But eating citrus fruits as they are can be quite boring. That is why resourceful housewives and chefs have come up with many delicious desserts using tangerines: cakes, jellies, pastries, soufflés, tarts, cheesecakes, pies and much more.
Delicate tangerine soufflé will probably surprise and delight every guest. This is a French dessert with an incredibly soft and rich taste. The article offers you an unusual recipe, where one of the ingredients is champagne (sparkling wine). Every housewife can prepare a soufflé cake with tangerines without having to look for “complicated” ingredients in stores.
You will need:
- Tangerines – 0.5 kg. (it is advisable to choose sweet ones; sour ones can ruin the taste of the finished dessert).
- Butter – 150 g (fat content not less than 73%)
- Flour – 120-140 g (check consistency)
- Sugar – 1 cup (approximately 200-220 g, you can use less).
- Sour cream – 220-250 ml. (fat sour cream, 25-30%)
- Cream – 1 glass (fat, approximately 200-220 ml).
- Eggs - 3 pcs.
- Corn starch – 2 tbsp. with a slide (approximately 20-25 g).
- Champagne – 1 glass (220-250 ml white, sweet or semi-sweet).
- Vanillin – 1 sachet (can be replaced with vanilla sugar).
- Gelatin – 2 tbsp. (10-12 years old)
- Baking powder – 1 tsp. (1 sachet)
- Salt - a pinch
Delicious soufflé cake with tangerines
Preparing the crust for the soufflé cake:
- First you should mix the dry ingredients. To do this, combine flour with a small amount of starch and baking powder in a bowl. You can also add vanillin or vanilla sugar there.
- Melt the butter in the microwave, or leave it at room temperature in advance to soften it.
- Divide the sugar into 3 parts and mix two of them with melted butter. The ingredients are thoroughly mixed until smooth; you can use a mixer.
- After this, eggs should be gradually added to the mixture, 1 piece at a time. and mix the mixture thoroughly each time.
- After all the eggs have been added, add a pinch of salt to the mixture.
- Now it’s time to mix the mixture with the “dry” ingredients and mix everything thoroughly again.
- Preheat your oven to a low temperature of 180-190 degrees.
- Prepare a baking pan for the crust. You will need a special silicone or metal mold. It is lubricated with a small amount of oil.
- The resulting dough should be carefully poured into the mold and baked for 20 minutes. You can check the readiness of the cake with a match or toothpick.
- Be sure to let the crust cool before preparing the soufflé itself, otherwise the dish will be ruined.
Preparing the soufflé for the cake:
- Prepare tangerine syrup. To do this, they should be peeled and divided into small slices. The slices are placed in a saucepan or cooking ladle, covered with sugar (here, focus on your taste and preferred sweetness of the syrup, 100 g of sugar is enough). The mixture should be brought to a boil, boiled for a minute and allowed to cool).
- Pour gelatin into a bowl and fill it with champagne. The cooled tangerine syrup (all the liquid from the tangerine jam without pulp) should be immediately added to the same mass. Let the mixture swell for about half an hour.
- Prepare the base for the soufflé. To do this, mix cream and sugar. It is best to beat them with a mixer. After mixing, add the gelatin mass and mix everything thoroughly again.
- If you have some tangerines left, you can use a few slices not only to decorate the finished cake, but also for filling. Place the soufflé mixture in the refrigerator so that it “sets” a little, but does not harden.
- Pour the thickened mixture directly onto the crust and place the pan with the mixture in the refrigerator to completely harden. After the soufflé has hardened, the cake can be decorated with tangerine slices, other fruits, powdered sugar or the remaining syrup.
A piece of souffle cake with tangerines
Cake made from shortbread, bananas and kiwi
Are you expecting guests to arrive, but you don’t have any time left to bake a biscuit? We suggest preparing a delicious cake with kiwi, banana and condensed milk using ready-made cake layers. Putting together this homemade dessert couldn’t be easier:
- Remove butter (200 g) from the refrigerator a couple of hours before starting work. Once it becomes soft, transfer it to a deep bowl.
- Add condensed milk to the butter: one can of raw and one can of boiled milk.
- Cut banana and kiwi (1 piece each) as desired.
- Place the sponge cake on a suitable sized dish. Cover it with cream and half of the fruit filling.
- Repeat similar steps with the second cake.
- Simply coat the last cake with cream on top and sides.
- If desired, decorate the cake with chopped nuts, almonds or chocolate chips. You can put fresh fruits and berries on top.
Berry decorations
Dark berries look impressive on a lush mass of white cream. Whipped cream, protein cream, custard cream, and condensed milk are used.
To decorate with protein cream with berries you will need:
- 4 eggs (whites);
- 1 cup powdered sugar;
- 1 stick of butter;
- 2 tbsp. l. lemon juice.
Recipe:
- Separate the whites from the yolks, cool and pour into a dry bowl.
- Now beat them with a mixer at medium speed, gradually adding powdered sugar.
- When the mixture reaches the consistency of light foam, place it in a water bath and heat for about 4 minutes until the powder is completely dissolved.
- Combine the heated whites with soft butter and lemon juice, beat again until fluffy.
- Cover the cake layers, top and sides with cream. Using a pastry bag with shaped nozzles, it’s quite easy to form beautiful wave-shaped sides.
- All that remains is to decorate the cake with berries. The most commonly used are raspberries, blueberries, blackberries, lingonberries, and strawberries. Cherries, including cocktail cherries, soaked in sugar syrup are also suitable, but they must first be pitted.
- Place the berries randomly or collect them in a thoughtful composition.
- If the cake is multi-layered, a good idea is to mix the berries with cream and use them as a filling.
A cake decorated with grapes, both green and black, looks elegant. A pattern is formed from the berries or a scattering is laid out. Large grapes are placed both on top and in the layer. If you “drown” them in cream, then when cutting the dessert, guests will experience a pleasant surprise. Grapes are combined with strawberries, kiwi, lemon.
Tip: Fresh frozen berries, such as blackberries, cranberries, raspberries, and black currants, are also suitable for decorating the cake.
Step-by-step recipe with photos
Prepare ingredients for kiwi and banana pie.
Place sugar in a bowl and beat in eggs.
Add all the sour cream to the sweet egg mixture.
Beat all ingredients again with a mixer for 30 seconds for a better connection.
Sift all the flour and baking powder into the resulting mixture. Gently stir in the flour (using gentle movements of a spoon or spatula), kneading the dough to the consistency of medium-fat sour cream.
Peel the kiwi and bananas. Cut these fruits into slices approximately 2-3 mm thick.
Cover the bottom of the springform pan with parchment paper and grease with a thin layer of vegetable oil. First place kiwi slices in a circle on the bottom of the mold.
Place banana slices on top.
Place the previously prepared dough on top of the fruit, smoothing the surface with a spoon.
Place the filled form in an oven already preheated to 180 degrees. Bake the kiwi and banana pie for 40-45 minutes. A sign of readiness will be the rosy surface of the pie.
Let the cake cool in the pan for about 30 minutes. Then carefully remove from the mold onto a horizontal surface, cover with a flat dish and turn over so that the fruit side of the baked goods is on top. Carefully remove the baking parchment from the kiwi circles, being careful not to damage the integrity (this is easy). Serve upside-down fruit pie.
Source